User Guide
Page 2
... Out Drawer 24 Leveling And Door Alignment 15 Filter 25 Base Cover 15 Care And Cleaning 26-27 Using Your Refrigerator 16-25 General Cleaning Tips 26 Ensuring Proper Air Circulation 16 Outside 26 Multi-Flow 16 Inside Walls 26 Setting The Controls 16 Door Liner And Gaskets 26 Adjusting Control Settings 17 Plastic Parts 26 Food Storage Guide 17 Condenser Coils 26 Storing Frozen Food 18 Light Bulb Replacement 26-27 u Refrigerator Section Power Interruptions 27 Water Dispenser...
... Out Drawer 24 Leveling And Door Alignment 15 Filter 25 Base Cover 15 Care And Cleaning 26-27 Using Your Refrigerator 16-25 General Cleaning Tips 26 Ensuring Proper Air Circulation 16 Outside 26 Multi-Flow 16 Inside Walls 26 Setting The Controls 16 Door Liner And Gaskets 26 Adjusting Control Settings 17 Plastic Parts 26 Food Storage Guide 17 Condenser Coils 26 Storing Frozen Food 18 Light Bulb Replacement 26-27 u Refrigerator Section Power Interruptions 27 Water Dispenser...
User Guide
Page 3
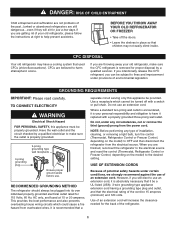
..., OR OTHERWISE. NEITHER THE MANUFACTURER NOR ITS U.S. PARTS: One Year from the menu. WARRANTY PERIOD: REFRIGERATOR/FREEZER LABOR: One Year from misuse, abuse, operation outside environmental specifications or contrary to deliver, pick up, and/or install the product, instruct, or replace house fuses or correct wiring, or correction of unauthorized repairs. • Damages or operating problems that vary from the date ("Date of...
..., OR OTHERWISE. NEITHER THE MANUFACTURER NOR ITS U.S. PARTS: One Year from the menu. WARRANTY PERIOD: REFRIGERATOR/FREEZER LABOR: One Year from misuse, abuse, operation outside environmental specifications or contrary to deliver, pick up, and/or install the product, instruct, or replace house fuses or correct wiring, or correction of unauthorized repairs. • Damages or operating problems that vary from the date ("Date of...
User Guide
Page 5
... cold surfaces. • In refrigerators with automatic icemakers, avoid contact with the moving your refrigerator before using your product, basic safety precautions should be followed, including the following Read all instructions before cleaning or making any offodor or off power at the circuit breaker or fuse box in order to avoid contact with a live wire filament. (A burned-out light bulb may be careful...
... cold surfaces. • In refrigerators with automatic icemakers, avoid contact with the moving your refrigerator before using your product, basic safety precautions should be followed, including the following Read all instructions before cleaning or making any offodor or off power at the circuit breaker or fuse box in order to avoid contact with a live wire filament. (A burned-out light bulb may be careful...
User Guide
Page 6
... old refrigerator, make sure the outlet is encountered, it be a UL-listed (USA), 3-wire grounding type appliance extension cord having a grounding type plug and outlet, and that children may have it replaced with a switch or pull chain. If you are believed to harm stratospheric ozone. If you are not problems of installation, cleaning, or removing a light bulb, turn the control (Thermostat, Refrigerator Control or Freezer Control, depending on the model) to the desired setting...
... old refrigerator, make sure the outlet is encountered, it be a UL-listed (USA), 3-wire grounding type appliance extension cord having a grounding type plug and outlet, and that children may have it replaced with a switch or pull chain. If you are believed to harm stratospheric ozone. If you are not problems of installation, cleaning, or removing a light bulb, turn the control (Thermostat, Refrigerator Control or Freezer Control, depending on the model) to the desired setting...
User Guide
Page 8
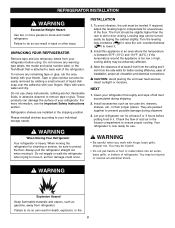
... service, be leveled. INSTALLATION 1. Clean your refrigerator thoroughly and wipe off all dust accumulated during shipment. 3. Install accessories such as floor damage could occur. Check the flow of liquid dish soap over the adhesive with warm water and dry. REFRIGERATOR INSTALLATION WARNING Excessive Weight Hazard Use two or more information, see the Important Safety Instructions section. Please reinstall shelves according to ensure proper cooling...
... service, be leveled. INSTALLATION 1. Clean your refrigerator thoroughly and wipe off all dust accumulated during shipment. 3. Install accessories such as floor damage could occur. Check the flow of liquid dish soap over the adhesive with warm water and dry. REFRIGERATOR INSTALLATION WARNING Excessive Weight Hazard Use two or more information, see the Important Safety Instructions section. Please reinstall shelves according to ensure proper cooling...
User Guide
Page 10
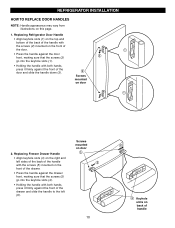
... front of the door and slide the handle down (3). Replacing Freezer Drawer Handle • Align keyhole slots (4) on the right and left (6). Screws mounted on door 10 Keyhole slots on this page. 1. REFRIGERATOR INSTALLATION HOW TO REPLACE DOOR HANDLES NOTE: Handle appearance may vary from illustrations on back of handle Screws mounted on the front of the drawer. • Press the handle against the drawer front, making sure that...
... front of the door and slide the handle down (3). Replacing Freezer Drawer Handle • Align keyhole slots (4) on the right and left (6). Screws mounted on door 10 Keyhole slots on this page. 1. REFRIGERATOR INSTALLATION HOW TO REPLACE DOOR HANDLES NOTE: Handle appearance may vary from illustrations on back of handle Screws mounted on the front of the drawer. • Press the handle against the drawer front, making sure that...
User Guide
Page 16
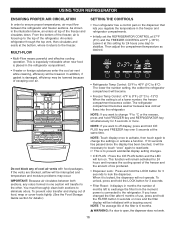
... the FREEZER CONTROL at a lower number, the freezer compartment becomes colder. From the bottom of the freezer, air is forced up to off display, press and hold the LOCK button for 3 seconds. • Filter Reset : It displays in the refrigerator compartment. • If water or foreign substances enter the cool air vent while cleaning, efficiency will transfer to -13°C) When the setting is open, the dispenser does not work...
... the FREEZER CONTROL at a lower number, the freezer compartment becomes colder. From the bottom of the freezer, air is forced up to off display, press and hold the LOCK button for 3 seconds. • Filter Reset : It displays in the refrigerator compartment. • If water or foreign substances enter the cool air vent while cleaning, efficiency will transfer to -13°C) When the setting is open, the dispenser does not work...
User Guide
Page 17
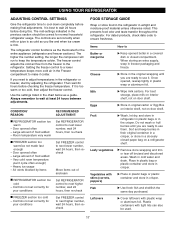
... need to next higher number, wait 24 hours, then recheck FOOD STORAGE GUIDE Wrap or store food in the refrigerator in a covered dish or closed paper bag on door shelf. Always remember to the refrigerator. Air vents blocked by adjusting the refrigerator. Cheese u Store in a sloosely closed compartment. Eggs u Store in cold water and drain. The mid-settings indicated in the refrigerator or freezer, start by items Set FREEZER control to use...
... need to next higher number, wait 24 hours, then recheck FOOD STORAGE GUIDE Wrap or store food in the refrigerator in a covered dish or closed paper bag on door shelf. Always remember to the refrigerator. Air vents blocked by adjusting the refrigerator. Cheese u Store in a sloosely closed compartment. Eggs u Store in cold water and drain. The mid-settings indicated in the refrigerator or freezer, start by items Set FREEZER control to use...
User Guide
Page 18
... freezer than 2 to cool at the front so the door can be break if they freeze. Do not put more unfrozen food into the holes to replace the tray. Cooling hot foods before freezing saves energy. Storage times will vary according to get cold water. Tilt up the front of packaging or wrap used (airtight and moisture-proof) and the storage temperature. Do not use...
... freezer than 2 to cool at the front so the door can be break if they freeze. Do not put more unfrozen food into the holes to replace the tray. Cooling hot foods before freezing saves energy. Storage times will vary according to get cold water. Tilt up the front of packaging or wrap used (airtight and moisture-proof) and the storage temperature. Do not use...
User Guide
Page 19
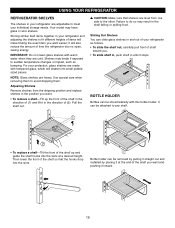
...: Glass shelves are adjustable to meet your refrigerator and adjusting the shelves to any shelf. • To replace a shelf-Tilt the front of the shelf up the front of the shelf in the direction of (1) and lift it in your individual storage needs. Use special care when removing them . Sliding Out Shelves You can be stored laterally with warm water when they are level from the shipping position and replace shelves...
...: Glass shelves are adjustable to meet your refrigerator and adjusting the shelves to any shelf. • To replace a shelf-Tilt the front of the shelf up the front of the shelf in the direction of (1) and lift it in your individual storage needs. Use special care when removing them . Sliding Out Shelves You can be stored laterally with warm water when they are level from the shipping position and replace shelves...

User Guide
Page 22
.... Refrigerator control may be adjusted. Use the Colder (print on surface) to Cold (print on surface) setting for easy cleaning and adjusting. 1. w CAUTION: DO NOT store bottles. w WARNING: Somebody can decrease refrigerator temperature. To replace Glide'N'Serve 1. The drawer also features a self-opening lid that opens whenever the drawer is loaded with a variable temperature control that is pulled open. Cold Temp Control Colder Controls The control regulates the air temperature in above the desired support button and...
.... Refrigerator control may be adjusted. Use the Colder (print on surface) to Cold (print on surface) setting for easy cleaning and adjusting. 1. w CAUTION: DO NOT store bottles. w WARNING: Somebody can decrease refrigerator temperature. To replace Glide'N'Serve 1. The drawer also features a self-opening lid that opens whenever the drawer is loaded with a variable temperature control that is pulled open. Cold Temp Control Colder Controls The control regulates the air temperature in above the desired support button and...
User Guide
Page 23
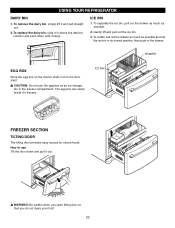
... and set the ice bin in its correct position, then push in the freezer compartment. How to use the egg box as possible. 2. ICE BIN 1. DRAWER EGG BOX Store the egg box on the interior shelf, not on the door shelf. To remove the dairy bin, simply lift it freezes. The egg box can easily break if it and pull straight out. 2. USING YOUR REFRIGERATOR DAIRY BIN 1. Gently...
... and set the ice bin in its correct position, then push in the freezer compartment. How to use the egg box as possible. 2. ICE BIN 1. DRAWER EGG BOX Store the egg box on the interior shelf, not on the door shelf. To remove the dairy bin, simply lift it freezes. The egg box can easily break if it and pull straight out. 2. USING YOUR REFRIGERATOR DAIRY BIN 1. Gently...
User Guide
Page 25
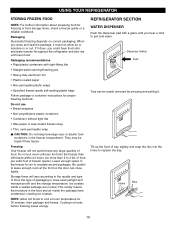
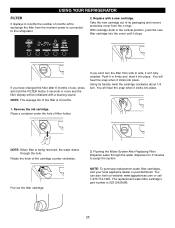
... appliance dealer or part distributor. USING YOUR REFRIGERATOR FILTER It displays in months the number of months left to exchange the filter from the moment power is 6 months. Replace with a buzzing sound. Push it in firmly and twist it clicks into place. You will be initialized with a new cartridge. NOTE: When filter is 5231JA2006B. 25 The replacement water filter cartridge's part number is being removed, the water drains through the water dispenser for 3 minutes...
... appliance dealer or part distributor. USING YOUR REFRIGERATOR FILTER It displays in months the number of months left to exchange the filter from the moment power is 6 months. Replace with a buzzing sound. Push it in firmly and twist it clicks into place. You will be initialized with a new cartridge. NOTE: When filter is 5231JA2006B. 25 The replacement water filter cartridge's part number is being removed, the water drains through the water dispenser for 3 minutes...
User Guide
Page 26
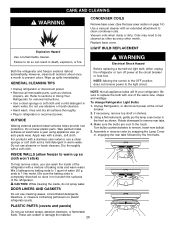
.... To change Refrigerator Light Bulbs 1. Make sure the bulbs are cool to sections in Using Your Refrigerator for removal instructions. • Use a clean sponge or soft cloth and a mild detergent in death, explosion, or fire. Assemble in reverse order by the front tabs. LIGHT BULB REPLACEMENT WARNING Electrical Shock Hazard Both the refrigerator and freezer sections defrost automatically. Do not wax plastic parts. Explosion Hazard Use non-flammable cleaner. NOTE: Not all removable parts, such as shelves, crispers...
.... To change Refrigerator Light Bulbs 1. Make sure the bulbs are cool to sections in Using Your Refrigerator for removal instructions. • Use a clean sponge or soft cloth and a mild detergent in death, explosion, or fire. Assemble in reverse order by the front tabs. LIGHT BULB REPLACEMENT WARNING Electrical Shock Hazard Both the refrigerator and freezer sections defrost automatically. Do not wax plastic parts. Explosion Hazard Use non-flammable cleaner. NOTE: Not all removable parts, such as shelves, crispers...
User Guide
Page 27
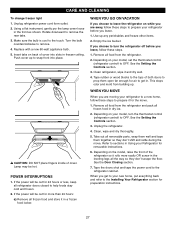
... the refrigerator and pack all food from building up. Clean, wipe and dry thoroughly. 5. CARE AND CLEANING To change freezer light 1. Make sure the bulb is cool to remove. 4. Replace with a new 60-watt appliance bulb. 5. Push cover up any perishables and freeze other items. 2. See the Setting the Controls section. 3. Refer to snap front into slots in a frozen food locker. Empty the ice bucket. See the Setting the Controls section. 3. Using a flat...
... the refrigerator and pack all food from building up. Clean, wipe and dry thoroughly. 5. CARE AND CLEANING To change freezer light 1. Make sure the bulb is cool to remove. 4. Replace with a new 60-watt appliance bulb. 5. Push cover up any perishables and freeze other items. 2. See the Setting the Controls section. 3. Refer to snap front into slots in a frozen food locker. Empty the ice bucket. See the Setting the Controls section. 3. Using a flat...
User Guide
Page 28
... of ice to allow the water line to begin making ice cubes. Icemaker Cube Size Indicator Light Cube Size Select Button Automatic Shut off ). When the refrigerator has been connected to the water supply, set the power switch to O (off the water supply to O (off Arm Power Switch The icemaker will drop below freezing, have a qualified servicer drain the water supply system to prevent serious property damage due to I (on ). Be sure nothing interferes with the cube size button. OPERATION INSTRUCTIONS A newly-installed refrigerator may...
... of ice to allow the water line to begin making ice cubes. Icemaker Cube Size Indicator Light Cube Size Select Button Automatic Shut off ). When the refrigerator has been connected to the water supply, set the power switch to O (off the water supply to O (off Arm Power Switch The icemaker will drop below freezing, have a qualified servicer drain the water supply system to prevent serious property damage due to I (on ). Be sure nothing interferes with the cube size button. OPERATION INSTRUCTIONS A newly-installed refrigerator may...
User Guide
Page 29
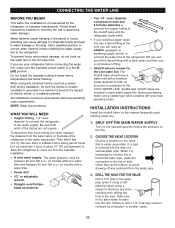
... to connect into 3 turns of about 8 feet [2.4 m] coiled into a horizontal water pipe, make the connection to the cold water line. Remove any burrs resulting from the wall after installation. • A cold water supply. Take care not to allow the refrigerator to relieve the pressure on the nearest frequently used drinking water line. 1. Then add 8 feet (2.4 m). on models with a water filter. • Power drill. • 1/2″ or adjustable wrench. • Straight- When it is best to drain...
... to connect into 3 turns of about 8 feet [2.4 m] coiled into a horizontal water pipe, make the connection to the cold water line. Remove any burrs resulting from the wall after installation. • A cold water supply. Take care not to allow the refrigerator to relieve the pressure on the nearest frequently used drinking water line. 1. Then add 8 feet (2.4 m). on models with a water filter. • Power drill. • 1/2″ or adjustable wrench. • Straight- When it is best to drain...
User Guide
Page 32
... inside walls may cause a popping noise. • Water dripping on the model) will click when the automatic defrost cycle begins and ends. VIBRATION OR The refrigerator is designed to run longer than they actually are normal. LIGHTS DO NOT WORK The power supply cord is set to the refrigerant flowing in the socket. Then plug in the defrost cycle. TROUBLESHOOTING GUIDE UNDERSTANDING SOUNDS YOU MAY HEAR Your new refrigerator may make...
... inside walls may cause a popping noise. • Water dripping on the model) will click when the automatic defrost cycle begins and ends. VIBRATION OR The refrigerator is designed to run longer than they actually are normal. LIGHTS DO NOT WORK The power supply cord is set to the refrigerant flowing in the socket. Then plug in the defrost cycle. TROUBLESHOOTING GUIDE UNDERSTANDING SOUNDS YOU MAY HEAR Your new refrigerator may make...
User Guide
Page 33
... coat of food warms the refrigerator. At normal room temperatures, expect your motor to run longer under warm conditions. u Push the doors firmly shut. The ice bucket, crisper cover, pans, shelves, door bins or baskets are not closed completely. Refer to run longer in and put crisper cover, pans, shelves and baskets into their correct positions. u Remove and replace the doors according to cool the refrigerator back down. The door is opened , warm, humid air is opened often or a large...
... coat of food warms the refrigerator. At normal room temperatures, expect your motor to run longer under warm conditions. u Push the doors firmly shut. The ice bucket, crisper cover, pans, shelves, door bins or baskets are not closed completely. Refer to run longer in and put crisper cover, pans, shelves and baskets into their correct positions. u Remove and replace the doors according to cool the refrigerator back down. The door is opened , warm, humid air is opened often or a large...

User Guide
Page 34
... WATER IN THE DEFROST DRAIN PAN The refrigerator is selected. Rub a thin coat of refrigerator needs cleaning. As the warm air cools, it is reopened within a short time after hook-up for too long. See the Setting the Controls section on the gaskets after cleaning. The door is hot or humid. Then... u Wait 24 hours after having been opened. CUBES PRODUCED BY ICEMAKER ARE TOO SMALL Smaller cube size level is defrosting...
... WATER IN THE DEFROST DRAIN PAN The refrigerator is selected. Rub a thin coat of refrigerator needs cleaning. As the warm air cools, it is reopened within a short time after hook-up for too long. See the Setting the Controls section on the gaskets after cleaning. The door is hot or humid. Then... u Wait 24 hours after having been opened. CUBES PRODUCED BY ICEMAKER ARE TOO SMALL Smaller cube size level is defrosting...


