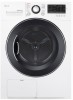
Owners Manual
Page 9
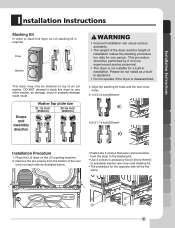
DO NOT attempt to assemble washer rear cover and stacking kit. • The procedure for the opposite side will be the same. 9 Place the LG dryer on the LG washing machine. 2. Remove the two screws from the bottom of the rear cover on each side as illustrated below... from the dryer to the stacking kit. • Use 4 screws in installation. This procedure should be stacked on top of installation makes the stacking procedure too risky for a built-in accessory box [0.6inch(16mm)] to stack this dryer an LG stacking kit is disassembled. Align the stacking kit holes and the rear cover ...
DO NOT attempt to assemble washer rear cover and stacking kit. • The procedure for the opposite side will be the same. 9 Place the LG dryer on the LG washing machine. 2. Remove the two screws from the bottom of the rear cover on each side as illustrated below... from the dryer to the stacking kit. • Use 4 screws in installation. This procedure should be stacked on top of installation makes the stacking procedure too risky for a built-in accessory box [0.6inch(16mm)] to stack this dryer an LG stacking kit is disassembled. Align the stacking kit holes and the rear cover ...
Owners Manual
Page 26
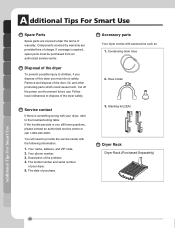
... center with the following information: 1. Your name, address, and ZIP code. 2. If coverage is something wrong with accessories such as 1. Description of the dryer safely. 2. Stacking kit (2EA) Dryer Rack Dryer Rack (Purchased Separately) Additional Tips For Smart Use 26 Components covered by warranty are covered under the terms of warranty. A dditional...
... center with the following information: 1. Your name, address, and ZIP code. 2. If coverage is something wrong with accessories such as 1. Description of the dryer safely. 2. Stacking kit (2EA) Dryer Rack Dryer Rack (Purchased Separately) Additional Tips For Smart Use 26 Components covered by warranty are covered under the terms of warranty. A dditional...


