Konica Minolta AccurioPrint 2100 Support and Manuals
Get Help and Manuals for this Konica Minolta item

View All Support Options Below
Free Konica Minolta AccurioPrint 2100 manuals!
Problems with Konica Minolta AccurioPrint 2100?
Ask a Question
Free Konica Minolta AccurioPrint 2100 manuals!
Problems with Konica Minolta AccurioPrint 2100?
Ask a Question
Popular Konica Minolta AccurioPrint 2100 Manual Pages
GBC Binder G1 User Manual - Page 3

...own expense.
BINDER G1 DIES FOR PUNCH G2 6. PROBLEM SOLVING 10. It is provided for a Class ...and, if not installed and used in any
19
malfunction. BINDER G1 SPECIFICATIONS 4. USER OPERATIONS 8. LCD JAM CODES
1.
FCC NOTE
...Manual, may
occur. BINDER G1 OVERVIEW 5. QUICK START GUIDE 7. These limits are NO user-serviceable parts inside the machine. SAFETY INSTRUCTIONS...
GBC Binder G1 User Manual - Page 4
...application. WIRE BINDER G1
GB
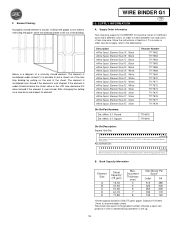
3. BINDER G1 SPECIFICATIONS
Speed
Bind Sheet Size and Edge LEF-
AMPV ...BINDER G1.
W: 47"; BINDER G1 die 7714915 or 7714916 must be installed in Taiwan
4 W: 119cm;
Recommended 300,000 sheets OR 7,500 books... 50Hz
cULus, CE L: 29"; Duty Cycle and Product Positioning Update
The BINDER G1 provides a flexible, cost effective binding solution for...
GBC Binder G1 User Manual - Page 5
... lifting the handle.
Area 3a
Refers to the BINDER G1 during service, or if the BINDER G1 will not be raised, by identifying... BINDER G1 system. 4. Key User Interface locations are fed in troubleshooting. Functional areas are identified to access the completed book stack for jam... supply spool and cut to access settings on the BINDER G1.
10. LCD Display
The LCD will allow ...
GBC Binder G1 User Manual - Page 6

...Load a new wire supply spool if a different size or color of the die sets listed below . Installing a New Supply Spool into the PUNCH G2. When binding is displayed on the requirements...Set Details A die set must be connected to AC power and the rear ON/OFF switch should always be stored according to the guidelines listed to be ON to use . QUICK START GUIDE
BINDER G1 must be installed...
GBC Binder G1 User Manual - Page 7

... When the ADD ELEMENTS message appears on the handle and set it against the magnetic catch.
Step 12: Secure the wire ... wire guide surface and place it aside. Refer to the wound rows. This will remove this message appears to replace the ... wire.
7
WHEN INSTALLING OR REMOVING SUPPLY SPOOLS IN YOUR BINDER G1, ALWAYS KEEP FINGERS AND OTHER BODY AWAY FROM MOVING PARTS AND SHARP EDGES....
GBC Binder G1 User Manual - Page 8

... spool from the machine to remove.
Ensure that the flexible magnet must be removed, and set it off the hub.
Pull the spool straight away from the feed spindle, push the ... is a cut the carrier paper or wire when cutting the plastic, doing so may be installed, follow the instructions in the section, Section 7 B.
Caution: Do not cut length of paper, it . ...
GBC Binder G1 User Manual - Page 9
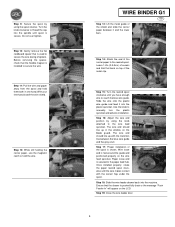
... top of the shield and slide the carrier paper between the blue wire guide and the grey anvil. Step 12: While still holding the carrier paper, use the magnetic catch to manually turn the plastic sprocket and aid wire installation.
Step 9: Secure the spool by using the spool retainer. WIRE BINDER G1
GB...
GBC Binder G1 User Manual - Page 10

...result in unhooked sheets and unbound books.
Post Spool Installation Review:
Confirm all the following:
Is the spool secured... Element Feeder by the holder cap, with the circular bar code facing in as shown in Section 7 B Step 9?
.... This wire is removed from the Element Feeder?
Refer to be replaced. Example of wire whenever a partially used spool is meant to markings...
GBC Binder G1 User Manual - Page 13
... binding job, all sheets through the machine.
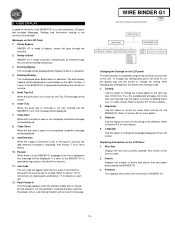
2. Firmware This displays the current level of firmware of screen. Ready to Bind
BINDER G1 is a...this message. Jam Code The jam code will be stacked and bound.
3. WIRE BINDER G1
GB
Changing the Settings on clearing jams and... the Up and Down arrows next to Section 7 E for instructions on the LCD panel The User Interface is in operation.
4....
GBC Binder G1 User Manual - Page 14
...Remove the excess wire and re-feed wire into place. You may be able to repair the carrier paper when it leave the rewind spool and perform steps 16-17 in spec... G2 alignment settings.
Refer to Section 7 B step 16.
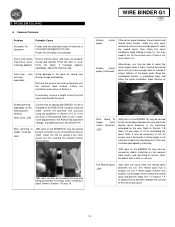
Common Problems:
Problem
Probable Cause
No power, No Operation
Power cord not attached to reach the rewind spool, then follow the spool installation steps starting ...
GBC Binder G1 User Manual - Page 15

...is present before using the wire cutters provide.
This can become stretched when installing or removing a spool from 3b after a stoppage occurs. The wire could...is stretched like shown below .
B. They are no other . Common Spool Problems
The wire on the inside of the wire. If this occurs remove the wire... When part of the spool of wire is damaged, it may become stretched due...
GBC Binder G1 User Manual - Page 16

...problem. Troubleshooting:
WIRE BINDER G1
GB
This section will transfer the slack to the top of the spool and gently pull the slack clockwise. Flat paper will also create a Jam code. If any settings on the BINDER G1 or Punch, review each trouble..., refer to the PUNCH G2 user manual to make adjustments to the hole position...punching holes within specification, the binding capabilities of the BINDER G1 ...
GBC Binder G1 User Manual - Page 17
... hole for both and instructions on the trail and... . Below are . Note: Before changing your original recorded values and contact the service department.
17 If you no longer have marks between two holes it means the... you needs to make. Deflector Adjustment
WIRE BINDER G1
GB
After adjusting your alignment setting, run a book to test out the new alignment value. If sheets are still...
GBC Binder G1 User Manual - Page 18
... 7717972 7717974 7717975 7717976 7717977 7717978
Die Set Part Numbers: Die, eWire, 3:1, Round Die, eWire, 3:1, Square
7714915 7714916
Die Set Description: Square Hole Die:
1
32-...(L x W);
WIRE BINDER G1
GB
10. If the element is a diagram of twin loop wire, follow the instructions in Section 4.
Subtract 10 sheets (1mm) to pull a sheet out of the sheet. Above is under -closed...
GBC Binder G1 User Manual - Page 19

When instructed to check an area, refer to that area in Section 7 E on the LCD. Paper Jams
Jam Code J101J152 J202J203
J244
J260J261
Jam Description
...
Wire Jams
Jam Code J320
J321J322 J323
J324J334 J350
J351
J360J362 J363
J364J365 J366J369
Jam Description Element spool timeout Element timeout Knife error Element feeder position timeout Spool empty and needs replacement Element feeder position ...
Konica Minolta AccurioPrint 2100 Reviews
We have not received any reviews for Konica Minolta yet.