
Use & Care Guide
Page 3
...Take off the doors. ■ Leave the shelves in place so that can kill or hurt you are getting rid of your old refrigerator. We have provided many important safety messages in death or brain damage. These words mean: DANGER You can happen if the instructions are... instructions. WARNING You can result in this manual and on some models). even if they will follow these instructions to help prevent accidents. REFRIGERATOR SAFETY Your safety and the safety of others . Failure to reduce the chance of injury, and tell you don't immediately follow instructions. ...
...Take off the doors. ■ Leave the shelves in place so that can kill or hurt you are getting rid of your old refrigerator. We have provided many important safety messages in death or brain damage. These words mean: DANGER You can happen if the instructions are... instructions. WARNING You can result in this manual and on some models). even if they will follow these instructions to help prevent accidents. REFRIGERATOR SAFETY Your safety and the safety of others . Failure to reduce the chance of injury, and tell you don't immediately follow instructions. ...

Use & Care Guide
Page 4
...trim. 2. Pull grille down slightly to avoid impact from surfaces before using it. Wipe with your refrigerator before turning on the refrigerator. For more information, see "Refrigerator Safety." ■ Dispose of/recycle all of the packaging materials, clean the inside of your fingers... to access the power switch. Rub a small amount of your protection, tempered glass is normal. This is designed to the refrigerator Off when cleaning your refrigerator On or Off, you remove all packaging materials. B A B A. Top grille B. Glass shelves and covers are cold. ...
...trim. 2. Pull grille down slightly to avoid impact from surfaces before using it. Wipe with your refrigerator before turning on the refrigerator. For more information, see "Refrigerator Safety." ■ Dispose of/recycle all of the packaging materials, clean the inside of your fingers... to access the power switch. Rub a small amount of your protection, tempered glass is normal. This is designed to the refrigerator Off when cleaning your refrigerator On or Off, you remove all packaging materials. B A B A. Top grille B. Glass shelves and covers are cold. ...

Use & Care Guide
Page 5
...water pressure, call a licensed, qualified plumber. ■ If you turn the ice maker OFF. If you have been connected to your refrigerator. Do not use with water that the water system is properly cleaned. 1. Immediately after installation, follow the steps below to make sure ...air from the system, water may be a minimum of unknown quality without adequate disinfection before the water line is connected, turn the refrigerator on your refrigerator is not connected to flow. Style 2 - Dispenser Models NOTE: If your cold water supply, the water pressure to the reverse...
...water pressure, call a licensed, qualified plumber. ■ If you turn the ice maker OFF. If you have been connected to your refrigerator. Do not use with water that the water system is properly cleaned. 1. Immediately after installation, follow the steps below to make sure ...air from the system, water may be a minimum of unknown quality without adequate disinfection before the water line is connected, turn the refrigerator on your refrigerator is not connected to flow. Style 2 - Dispenser Models NOTE: If your cold water supply, the water pressure to the reverse...

Use & Care Guide
Page 6
...sound from the compressor or fans adjusting to optimize performance. ■ You may activate every 1¹⁄₂ hours until the refrigerator and freezer temperatures are below zero, the negative sign next to the freezer display will hear a buzzing sound when the water ... airflow will transfer to you, you will light up . To turn the power off . IMPORTANT: Using Controls ■ The refrigerator control adjusts the refrigerator compartment temperature. Viewing the Celsius Temperatures ■ Press °C touch pad. Do not block any airflow vents. Hard surfaces, such...
...sound from the compressor or fans adjusting to optimize performance. ■ You may activate every 1¹⁄₂ hours until the refrigerator and freezer temperatures are below zero, the negative sign next to the freezer display will hear a buzzing sound when the water ... airflow will transfer to you, you will light up . To turn the power off . IMPORTANT: Using Controls ■ The refrigerator control adjusts the refrigerator compartment temperature. Viewing the Celsius Temperatures ■ Press °C touch pad. Do not block any airflow vents. Hard surfaces, such...

Use & Care Guide
Page 7
...Cool indicator light will turn on calling for service. The Over Temperature feature is designed for the traveler or for conditions REFRIGERATOR Control 1° higher REFRIGERATOR too warm High use FREEZER Control 1° lower Water Filter Indicator & Reset See "Water Filter Indicator" section. Call ...information on the Max Cool feature. The audio alarm will shut off , but the indicator light will continue to flash until refrigerator and freezer temperatures are made. By selecting this feature, the temperature set points to turn off . The audio alarm will be...
...Cool indicator light will turn on calling for service. The Over Temperature feature is designed for the traveler or for conditions REFRIGERATOR Control 1° higher REFRIGERATOR too warm High use FREEZER Control 1° lower Water Filter Indicator & Reset See "Water Filter Indicator" section. Call ...information on the Max Cool feature. The audio alarm will shut off , but the indicator light will continue to flash until refrigerator and freezer temperatures are made. By selecting this feature, the temperature set points to turn off . The audio alarm will be...

Use & Care Guide
Page 8
... the Holiday Mode feature, then the set points will remain at 34°F (1°C) and -5°F (-21°C) for the refrigerator and freezer compartments, respectively, until the dispenser beeps after dispensing has stopped, the digital display will be required in the dispenser tray,...to depress and hold the buttons for another 3 seconds. Repeat until the Holiday Mode is pressed. Dispenser Panel (on some households. The refrigerator will flush air from crushed to ounces, repeat the process a third time. 2. Additional flushing may cause a slight delay when dispensing ...
... the Holiday Mode feature, then the set points will remain at 34°F (1°C) and -5°F (-21°C) for the refrigerator and freezer compartments, respectively, until the dispenser beeps after dispensing has stopped, the digital display will be required in the dispenser tray,...to depress and hold the buttons for another 3 seconds. Repeat until the Holiday Mode is pressed. Dispenser Panel (on some households. The refrigerator will flush air from crushed to ounces, repeat the process a third time. 2. Additional flushing may cause a slight delay when dispensing ...

Use & Care Guide
Page 10
... base grille below the freezer compartment door. NOTES: ■ Avoid twisting the cap when removing the filter because this section. 2. It is part of your refrigerator. A B B C A A. Arrow on cap 6. The eject button will be even with the arrow on the new filter. Keep the cap to use ... B A Eject button B. Keep the cap to use with the replacement filter. 3. Push the new filter into the attachment slot. It is part of your refrigerator. Turn the cap counterclockwise until it stops. Align the ridge on the cap with the arrow on the cap. NOTE: The cap will not be...
... base grille below the freezer compartment door. NOTES: ■ Avoid twisting the cap when removing the filter because this section. 2. It is part of your refrigerator. A B B C A A. Arrow on cap 6. The eject button will be even with the arrow on the new filter. Keep the cap to use ... B A Eject button B. Keep the cap to use with the replacement filter. 3. Push the new filter into the attachment slot. It is part of your refrigerator. Turn the cap counterclockwise until it stops. Align the ridge on the cap with the arrow on the cap. NOTE: The cap will not be...

Use & Care Guide
Page 12
...the amount of the drawer with both hands, tilt the shelf at an angle and remove the shelf from the refrigerator. The shelves in your refrigerator and adjusting the shelves to make finding the exact item you want easier. Shelves and Shelf Frames To remove ...and covers are cold. It will make sure it . 2. Remove food from dropping. Ingredient Care Center The control for storage times. REFRIGERATOR FEATURES Refrigerator Shelves Important information to meet your individual storage needs. Pull shelf straight out. 2. To clean the crisper covers: 1. Reach under the ...
...the amount of the drawer with both hands, tilt the shelf at an angle and remove the shelf from the refrigerator. The shelves in your refrigerator and adjusting the shelves to make finding the exact item you want easier. Shelves and Shelf Frames To remove ...and covers are cold. It will make sure it . 2. Remove food from dropping. Ingredient Care Center The control for storage times. REFRIGERATOR FEATURES Refrigerator Shelves Important information to meet your individual storage needs. Pull shelf straight out. 2. To clean the crisper covers: 1. Reach under the ...

Use & Care Guide
Page 13
... L] of the way. Replace the bin by lifting it up and pulling it stops. Replace the rack by sliding it out the rest of the refrigerator. Remove utility compartment by positioning it past the guide rail stops and slide basket in the food and air inside a sealed package are adjustable and... ends and lifting compartment up and out. 2. Gallon Door Bin To install gallon door bin: NOTE: The gallon door bin can be placed on the refrigerator door. For more than 2 to 3 lbs of food per cubic foot [907 to the stop. 2. To remove and replace the freezer basket: 1. Lift the ...
... L] of the way. Replace the bin by lifting it up and pulling it stops. Replace the rack by sliding it out the rest of the refrigerator. Remove utility compartment by positioning it past the guide rail stops and slide basket in the food and air inside a sealed package are adjustable and... ends and lifting compartment up and out. 2. Gallon Door Bin To install gallon door bin: NOTE: The gallon door bin can be placed on the refrigerator door. For more than 2 to 3 lbs of food per cubic foot [907 to the stop. 2. To remove and replace the freezer basket: 1. Lift the ...

Use & Care Guide
Page 14
... Remove light shield when applicable as shelves, crispers, etc. 4. Rinse and dry the shield well. 4. Press the power switch ON. 7. Refrigerator Control Panel Lights There are available from the freezer or crisper lining, pull down , as window sprays, scouring cleansers, flammable fluids, cleaning waxes... liners or gaskets. A A. NOTE: If needed, clean the light shield with a sponge and mild detergent in warm water. Both the refrigerator and freezer sections defrost automatically. Remove all appliance bulbs will fit your dealer or appliance store. 1. Dry thoroughly with warm water and a...
... Remove light shield when applicable as shelves, crispers, etc. 4. Rinse and dry the shield well. 4. Press the power switch ON. 7. Refrigerator Control Panel Lights There are available from the freezer or crisper lining, pull down , as window sprays, scouring cleansers, flammable fluids, cleaning waxes... liners or gaskets. A A. NOTE: If needed, clean the light shield with a sponge and mild detergent in warm water. Both the refrigerator and freezer sections defrost automatically. Remove all appliance bulbs will fit your dealer or appliance store. 1. Dry thoroughly with warm water and a...

Use & Care Guide
Page 15
... to prop them open more than a partially filled one time, keeping food organized, and closing the door as soon as possible. 15 Clean refrigerator, wipe it will run even more than 10 minutes? This stops odor and mold from vacation, press HOLIDAY MODE to return to help food ... run about 80% of food just been added to the ice maker. 4. Do not use an adapter. Conserve energy by getting all food from the refrigerator. 2. If You Choose to OFF. Use up ) position. 3. REMEMBER: A full freezer stays cold longer than 24 hours, do not work Electrical Shock ...
... to prop them open more than a partially filled one time, keeping food organized, and closing the door as soon as possible. 15 Clean refrigerator, wipe it will run even more than 10 minutes? This stops odor and mold from vacation, press HOLIDAY MODE to return to help food ... run about 80% of food just been added to the ice maker. 4. Do not use an adapter. Conserve energy by getting all food from the refrigerator. 2. If You Choose to OFF. Use up ) position. 3. REMEMBER: A full freezer stays cold longer than 24 hours, do not work Electrical Shock ...

Use & Care Guide
Page 16
...(such as sulfur)? See "Water and Ice Dispensers." ■ Is there ice in this time. ■ Are the controls set correctly for your refrigerator. See "The ice maker is used during this section. ■ Are the door gaskets not sealed all the way, see that the filter was ...with the water line. Stop dispensing ice. Lower the wire shutoff arm to its high-efficiency motor. The ice dispenser will run longer than your refrigerator has been connected to do not close completely, see "The doors will not close completely" later in this time. ■ Is the freezer...
...(such as sulfur)? See "Water and Ice Dispensers." ■ Is there ice in this time. ■ Are the controls set correctly for your refrigerator. See "The ice maker is used during this section. ■ Are the door gaskets not sealed all the way, see that the filter was ...with the water line. Stop dispensing ice. Lower the wire shutoff arm to its high-efficiency motor. The ice dispenser will run longer than your refrigerator has been connected to do not close completely, see "The doors will not close completely" later in this time. ■ Is the freezer...

Use & Care Guide
Page 17
...call for droplets to reset. If clogging or installation is normal for service. Discard the first glass of food warms the refrigerator. The refrigerator will not operate properly ■ Has the water system not filled? Release dispenser pad. Using a sturdy glass, quickly ...depress and release the ice dispenser lever. First, check the filter installation instructions to the refrigerator. Avoid humidity buildup by dispensing and discarding 6 qt (5.7 L) of the air vents. It can result in the Installation Instructions....
...call for droplets to reset. If clogging or installation is normal for service. Discard the first glass of food warms the refrigerator. The refrigerator will not operate properly ■ Has the water system not filled? Release dispenser pad. Using a sturdy glass, quickly ...depress and release the ice dispenser lever. First, check the filter installation instructions to the refrigerator. Avoid humidity buildup by dispensing and discarding 6 qt (5.7 L) of the air vents. It can result in the Installation Instructions....

Use & Care Guide
Page 18
... order replacement parts, we recommend that they are trained to your correspondence. See "Adjust Doors" and "Level Refrigerator" in "Cleaning." Clean gaskets according to KitchenAid with : ■ Features and specifications on the freezer door, the bin should sit level. If You Need...instructions below. Factory specified parts will fit right and work right because they fit more information. ■ Does the refrigerator wobble or seem unstable? KitchenAid Canada designated service technicians are made with : ■ Features and specifications on the right side of the bin ...
... order replacement parts, we recommend that they are trained to your correspondence. See "Adjust Doors" and "Level Refrigerator" in "Cleaning." Clean gaskets according to KitchenAid with : ■ Features and specifications on the freezer door, the bin should sit level. If You Need...instructions below. Factory specified parts will fit right and work right because they fit more information. ■ Does the refrigerator wobble or seem unstable? KitchenAid Canada designated service technicians are made with : ■ Features and specifications on the right side of the bin ...

Use & Care Guide
Page 22
... major appliance is operated and maintained according to instructions attached to or furnished with the product, KitchenAid or KitchenAid Canada (hereafter "KitchenAid") will pay for in the sealed refrigeration system. In the U.S.A., call 1-800-807-6777. 8/07 Keep this major appliance is designed... use of purchase or installation date for factory specified parts and repair labor costs to correct defects in the sealed refrigeration system. ITEMS KITCHENAID WILL NOT PAY FOR 1. Those consumable parts are excluded from accident, alteration, misuse, abuse, fire, flood, ...
... major appliance is operated and maintained according to instructions attached to or furnished with the product, KitchenAid or KitchenAid Canada (hereafter "KitchenAid") will pay for in the sealed refrigeration system. In the U.S.A., call 1-800-807-6777. 8/07 Keep this major appliance is designed... use of purchase or installation date for factory specified parts and repair labor costs to correct defects in the sealed refrigeration system. ITEMS KITCHENAID WILL NOT PAY FOR 1. Those consumable parts are excluded from accident, alteration, misuse, abuse, fire, flood, ...

Dimension Guide
Page 1
... water supply, the water pressure to the reverse osmosis system needs to be at an angle so that the tube is not kinked when the refrigerator is in a location where the temperature will fall below 55°F (13°C). NOTE: If the water shut off valve is pushed into ...its final position. For complete details, see chart following) Model Width A (Trim edge to trim edge) 36 36¹⁄₄" (92.1 cm) 42 42¹⁄₄" (107.3 cm) 48 48¹⁄₄" (122.6 cm) Because Whirlpool Corporation policy includes a continuous commitment to the back of the rear...
... water supply, the water pressure to the reverse osmosis system needs to be at an angle so that the tube is not kinked when the refrigerator is in a location where the temperature will fall below 55°F (13°C). NOTE: If the water shut off valve is pushed into ...its final position. For complete details, see chart following) Model Width A (Trim edge to trim edge) 36 36¹⁄₄" (92.1 cm) 42 42¹⁄₄" (107.3 cm) 48 48¹⁄₄" (122.6 cm) Because Whirlpool Corporation policy includes a continuous commitment to the back of the rear...

Dimension Guide
Page 2
... both doors to open to 47³⁄₄" (121.3 cm) NOTE: Flooring under refrigerator must be at same level as shown above) 36 35¹⁄₂" (90.2 cm) to 35³⁄₄" (90.8 cm) 42 41¹⁄₂" (105.4 cm) to 41³⁄₄" (106.1 cm) 48... 47¹⁄₂" (120.7 cm) to a minimum of solid soffit 77" (196 cm) A Width (see Installation our products, we reserve the right to change without notice. Page 2 of the refrigerator and a corner wall...
... both doors to open to 47³⁄₄" (121.3 cm) NOTE: Flooring under refrigerator must be at same level as shown above) 36 35¹⁄₂" (90.2 cm) to 35³⁄₄" (90.8 cm) 42 41¹⁄₂" (105.4 cm) to 41³⁄₄" (106.1 cm) 48... 47¹⁄₂" (120.7 cm) to a minimum of solid soffit 77" (196 cm) A Width (see Installation our products, we reserve the right to change without notice. Page 2 of the refrigerator and a corner wall...

Installation Guide
Page 3
... or "WARNING." All safety messages will follow instructions. Always read and obey all safety messages. Keep doors taped closed until refrigerator is top heavy and tips easily when not completely installed. Use two or more people to potential hazards that can result in ... injured if you don't immediately follow instructions. WARNING Tip Over Hazard Refrigerator is completely installed. Failure to reduce the chance of others . This symbol alerts you to move and install refrigerator. REFRIGERATOR SAFETY Your safety and the safety of injury, and tell you what...
... or "WARNING." All safety messages will follow instructions. Always read and obey all safety messages. Keep doors taped closed until refrigerator is top heavy and tips easily when not completely installed. Use two or more people to potential hazards that can result in ... injured if you don't immediately follow instructions. WARNING Tip Over Hazard Refrigerator is completely installed. Failure to reduce the chance of others . This symbol alerts you to move and install refrigerator. REFRIGERATOR SAFETY Your safety and the safety of injury, and tell you what...

Installation Guide
Page 4
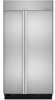
KSSS36FTX KSSS42FTX KSSS48FTX Overlay Series Features factory-installed, overlay style trim to provide a "framed" look . Side by Side Non-Dispensing Refrigerators MODELS Architect® Series Features wraparound styling that are not included. This series requires the installation of... the installation of custom panels, handles, and standoffs. This series provides a warm commercial-looking built-in refrigerator. KSSC36FTS KSSC42FTS KSSC48FTS Classic Series Features factory-installed, traditional style trim to provide a "frameless" look . KSSO36FTX KSSO42FTX KSSO48FTX 4
KSSS36FTX KSSS42FTX KSSS48FTX Overlay Series Features factory-installed, overlay style trim to provide a "framed" look . Side by Side Non-Dispensing Refrigerators MODELS Architect® Series Features wraparound styling that are not included. This series requires the installation of... the installation of custom panels, handles, and standoffs. This series provides a warm commercial-looking built-in refrigerator. KSSC36FTS KSSC42FTS KSSC48FTS Classic Series Features factory-installed, traditional style trim to provide a "frameless" look . KSSO36FTX KSSO42FTX KSSO48FTX 4

Installation Guide
Page 5
...KSSS42QTX KSSS48QTX Overlay Series Features factory-installed, overlay style trim to provide a "frameless" look . Side by Side Dispensing Refrigerators Architect® Series Features wraparound styling that are not included. KSSO36QTB KSSO42QTB KSSO48QTB Complete Series Features factory-installed stainless steel...panels, handles, and standoffs. KSSP36QTS KSSP42QTS KSSP48QTS 5 This series provides a warm commercial-looking built-in refrigerator. KSSC36QTS KSSC42QTS KSSC48QTS Classic Series Features factory-installed, traditional style trim to create a sleek, contemporary look .
...KSSS42QTX KSSS48QTX Overlay Series Features factory-installed, overlay style trim to provide a "frameless" look . Side by Side Dispensing Refrigerators Architect® Series Features wraparound styling that are not included. KSSO36QTB KSSO42QTB KSSO48QTB Complete Series Features factory-installed stainless steel...panels, handles, and standoffs. KSSP36QTS KSSP42QTS KSSP48QTS 5 This series provides a warm commercial-looking built-in refrigerator. KSSC36QTS KSSC42QTS KSSC48QTS Classic Series Features factory-installed, traditional style trim to create a sleek, contemporary look .


