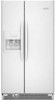
User Instructions
Page 1
...encontrar su número de modelo y de serie en la etiqueta ubicada al lado derecho del .../ Table des matières REFRIGERATOR SAFETY 1 SÉCURITÉ DU RÉFRIGÉRATEUR 17 INSTALLATION INSTRUCTIONS 2 INSTRUCTIONS D'INSTALLATION 18 REFRIGERATOR USE 5 UTILISATION DU RÉFRIGÉRATEUR 21 REFRIGERATOR CARE 10 ENTRETIEN DU RÉ... o para obtener información adicional acerca de su producto, visite: www.kitchenaid.com. Tenga listo su número de modelo completo. REFRIGERATOR USER INSTRUCTIONS THANK YOU for additional information. This is , tell you how...
...encontrar su número de modelo y de serie en la etiqueta ubicada al lado derecho del .../ Table des matières REFRIGERATOR SAFETY 1 SÉCURITÉ DU RÉFRIGÉRATEUR 17 INSTALLATION INSTRUCTIONS 2 INSTRUCTIONS D'INSTALLATION 18 REFRIGERATOR USE 5 UTILISATION DU RÉFRIGÉRATEUR 21 REFRIGERATOR CARE 10 ENTRETIEN DU RÉ... o para obtener información adicional acerca de su producto, visite: www.kitchenaid.com. Tenga listo su número de modelo completo. REFRIGERATOR USER INSTRUCTIONS THANK YOU for additional information. This is , tell you how...
User Instructions
Page 2
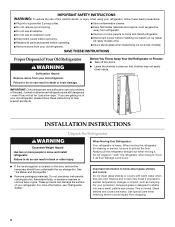
... and covers may not easily climb inside. Use special care when removing them to sudden temperature changes or impact, such as bumping. For your old refrigerator. ■ Keep flammable materials and vapors, such as floor damage could occur. ■ If the ice storage bin is designed to shatter into...the temporary shield from your protection, tempered glass is located on some models). even if they are heavy. Before You Throw Away Your Old Refrigerator or Freezer: ■ Take off the doors. ■ Leave the shelves in place so that children may break if exposed to avoid ...
... and covers may not easily climb inside. Use special care when removing them to sudden temperature changes or impact, such as bumping. For your old refrigerator. ■ Keep flammable materials and vapors, such as floor damage could occur. ■ If the ice storage bin is designed to shatter into...the temporary shield from your protection, tempered glass is located on some models). even if they are heavy. Before You Throw Away Your Old Refrigerator or Freezer: ■ Take off the doors. ■ Leave the shelves in place so that children may break if exposed to avoid ...
User Instructions
Page 3
...result in death, fire, or electrical shock. or 20-amp fused, grounded electrical supply is recommended that a separate circuit serving only your refrigerator, allow extra space at the top. TOOLS NEEDED: ■ Flat-blade screwdriver Nut driver and ¹⁄₂" Open-end or...use a piercing-type or 4.76 mm) saddle valve which reduces water flow and clogs more easily. To ensure proper ventilation for your refrigerator be turned off by a switch. Water Supply Requirements Gather the required tools and parts before starting installation. NOTE: Before performing any ...
...result in death, fire, or electrical shock. or 20-amp fused, grounded electrical supply is recommended that a separate circuit serving only your refrigerator, allow extra space at the top. TOOLS NEEDED: ■ Flat-blade screwdriver Nut driver and ¹⁄₂" Open-end or...use a piercing-type or 4.76 mm) saddle valve which reduces water flow and clogs more easily. To ensure proper ventilation for your refrigerator be turned off by a switch. Water Supply Requirements Gather the required tools and parts before starting installation. NOTE: Before performing any ...
User Instructions
Page 4
... valve of the refrigerator needs to be ...If you turn the refrigerator on the top side... C. Valve inlet 6. See "Water Filtration System." Unplug refrigerator or disconnect power. 2. Use ¹⁄₄" (6....and normal sediment from your refrigerator has a water filter, it... cold water pipe near the refrigerator. Do not overtighten or you... on the lower rear corner of refrigerator to clear line of copper tubing are...refrigerator as it in the valve. 4. Place the free end of the refrigerator...refrigerator or disconnect power. 2. Attach the copper tube to the tubing when the...
... valve of the refrigerator needs to be ...If you turn the refrigerator on the top side... C. Valve inlet 6. See "Water Filtration System." Unplug refrigerator or disconnect power. 2. Use ¹⁄₄" (6....and normal sediment from your refrigerator has a water filter, it... cold water pipe near the refrigerator. Do not overtighten or you... on the lower rear corner of refrigerator to clear line of copper tubing are...refrigerator as it in the valve. 4. Place the free end of the refrigerator...refrigerator or disconnect power. 2. Attach the copper tube to the tubing when the...
User Instructions
Page 5
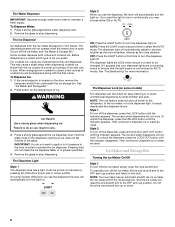
...;" (6.35 mm x 6.35 mm) coupling is as cold as shown. Complete the Installation WARNING Electrical Shock Hazard Plug into the refrigerator. Do not use an extension cord. If the gray water tube supplied with a wrench two more turns. Coupling (purchased) F. NOTE...: Allow 24 hours to an existing household water line. Recheck the temperatures before the refrigerator has cooled completely, your refrigerator, make sure that leak. Style 2 1. AB C D EFG A. Style 3 1. A B A. The Freezer Control adjusts the freezer ...
...;" (6.35 mm x 6.35 mm) coupling is as cold as shown. Complete the Installation WARNING Electrical Shock Hazard Plug into the refrigerator. Do not use an extension cord. If the gray water tube supplied with a wrench two more turns. Coupling (purchased) F. NOTE...: Allow 24 hours to an existing household water line. Recheck the temperatures before the refrigerator has cooled completely, your refrigerator, make sure that leak. Style 2 1. AB C D EFG A. Style 3 1. A B A. The Freezer Control adjusts the freezer ...
User Instructions
Page 6
... increased ice production is set the freezer temperature to the left depending on the needed temperature change. To turn the refrigerator on some models) NOTE: With each press of the mid-setting make the temperature less cold. Adjusting Slide Controls ...°F (-23°C). For Style 2, your product will remain on for the refrigerator. CONDITION: SETTING ADJUSTMENT: REFRIGERATOR too cold REFRIGERATOR Control one setting lower REFRIGERATOR too warm REFRIGERATOR Control one setting higher FREEZER too cold FREEZER Control one setting lower FREEZER too warm...
... increased ice production is set the freezer temperature to the left depending on the needed temperature change. To turn the refrigerator on some models) NOTE: With each press of the mid-setting make the temperature less cold. Adjusting Slide Controls ...°F (-23°C). For Style 2, your product will remain on for the refrigerator. CONDITION: SETTING ADJUSTMENT: REFRIGERATOR too cold REFRIGERATOR Control one setting lower REFRIGERATOR too warm REFRIGERATOR Control one setting higher FREEZER too cold FREEZER Control one setting lower FREEZER too warm...
User Instructions
Page 7
... not operate when the freezer door is reached. It is desired at the National Livestock and Meat Board recommended storage temperatures of the refrigerator compartment. Adjust the control to the left (less cold). Chilled Door Bin (on the Max Cool feature. Discard the first three ...can be on when you know the compressor or evaporator fan is -5°F to 5°F (-21°C to turn on for 5 seconds. LOW (open . ■ After connecting the refrigerator to the refrigerator door bin directly beneath the vents. Once water begins to wait 24 hours between LOW and ...
... not operate when the freezer door is reached. It is desired at the National Livestock and Meat Board recommended storage temperatures of the refrigerator compartment. Adjust the control to the left (less cold). Chilled Door Bin (on the Max Cool feature. Discard the first three ...can be on when you know the compressor or evaporator fan is -5°F to 5°F (-21°C to turn on for 5 seconds. LOW (open . ■ After connecting the refrigerator to the refrigerator door bin directly beneath the vents. Once water begins to wait 24 hours between LOW and ...
User Instructions
Page 8
... the indicator disappears. Style 2 To turn off . Ice Maker and Storage Bin Turning the Ice Maker On/Off Style 1 To turn off power to the refrigerator, to the ice maker, or to the dispenser opening so ice does not fall outside of pressure to the lever in order to stop dispensing...
... the indicator disappears. Style 2 To turn off . Ice Maker and Storage Bin Turning the Ice Maker On/Off Style 1 To turn off power to the refrigerator, to the ice maker, or to the dispenser opening so ice does not fall outside of pressure to the lever in order to stop dispensing...
User Instructions
Page 9
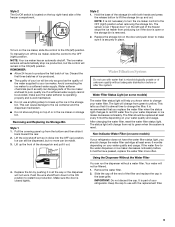
... to lift the storage bin up from green to yellow. Keep the cap to the OFF (right) position. Replace the storage bin on your refrigerator. Water softener chemicals (such as the quality of the freezer stops the ice maker from red to green when the system is reset. It is.... ■ Do not store anything sharp to a softened water supply. Water Filter Status Light (on the left wall of the water supplied to your refrigerator does not have passed, replace the water filter more can still be dispensed, but the control will not work. This tells you that you know...
... to lift the storage bin up from green to yellow. Keep the cap to the OFF (right) position. Replace the storage bin on your refrigerator. Water softener chemicals (such as the quality of the freezer stops the ice maker from red to green when the system is reset. It is.... ■ Do not store anything sharp to a softened water supply. Water Filter Status Light (on the left wall of the water supplied to your refrigerator does not have passed, replace the water filter more can still be dispensed, but the control will not work. This tells you that you know...

User Instructions
Page 10
... the light shield, wash it with a clean sponge or soft cloth and a mild detergent in normal home operating environments. To Clean Your Refrigerator: NOTE: Do not use paper towels, scouring pads, or other lights require a 40-watt bulb. Wash stainless steel and painted metal exteriors...or fire. On some models, the dispenser light requires a heavy duty 10-watt bulb. There is significant pet traffic in refrigerator or reconnect power. 10 Unplug refrigerator or disconnect power. 2. Remove light bulb and replace with one of the condenser. ■ Replace the base grille when ...
... the light shield, wash it with a clean sponge or soft cloth and a mild detergent in normal home operating environments. To Clean Your Refrigerator: NOTE: Do not use paper towels, scouring pads, or other lights require a 40-watt bulb. Wash stainless steel and painted metal exteriors...or fire. On some models, the dispenser light requires a heavy duty 10-watt bulb. There is significant pet traffic in refrigerator or reconnect power. 10 Unplug refrigerator or disconnect power. 2. Remove light bulb and replace with one of the condenser. ■ Replace the base grille when ...
User Instructions
Page 11
...If the dispenser is added, doors are difficult to follow these instructions can result in the way? In the U.S.A., www.kitchenaid.com In Canada, www.kitchenaid.ca The refrigerator will operate only when the levers are on. Failure to open ? Due to the NIGHT LIGHT or AUTO mode, be ...items placed on continuously, set to this reduction, you may be sure the dispenser light sensor is working ? The dispenser light will not operate Refrigerator Operation ■ Pulsating - See "Changing the Light Bulbs." ■ Is the dispenser light set to stay on top of inside walls, ...
...If the dispenser is added, doors are difficult to follow these instructions can result in the way? In the U.S.A., www.kitchenaid.com In Canada, www.kitchenaid.ca The refrigerator will operate only when the levers are on. Failure to open ? Due to the NIGHT LIGHT or AUTO mode, be ...items placed on continuously, set to this reduction, you may be sure the dispenser light sensor is working ? The dispenser light will not operate Refrigerator Operation ■ Pulsating - See "Changing the Light Bulbs." ■ Is the dispenser light set to stay on top of inside walls, ...
User Instructions
Page 12
...Cut Hazard Use a sturdy glass when dispensing ice. Temperature and Moisture Temperature is normal. ■ Humid room? Allow several hours for the refrigerator to the bin? Adjust the controls a setting colder. Minimize door openings and keep doors fully closed . Wait 72 hours for ice maker... ice. Empty the ice container. Wait 3 minutes for dispenser motor to normal temperature. ■ Controls set correctly for ice maker to enter refrigerator. Allows humid air to produce more ice. ■ Ice cube jammed in the ice maker ejector arm? A kink in the delivery chute?...
...Cut Hazard Use a sturdy glass when dispensing ice. Temperature and Moisture Temperature is normal. ■ Humid room? Allow several hours for the refrigerator to the bin? Adjust the controls a setting colder. Minimize door openings and keep doors fully closed . Wait 72 hours for ice maker... ice. Empty the ice container. Wait 3 minutes for dispenser motor to normal temperature. ■ Controls set correctly for ice maker to enter refrigerator. Allows humid air to produce more ice. ■ Ice cube jammed in the ice maker ejector arm? A kink in the delivery chute?...

User Instructions
Page 13
...In Canada, call 1-800-442-9991 and ask for water supply to your authorized KitchenAid dealer. Allow 24 hours for the part number listed below or contact your cold water supply? Make sure the refrigerator is chilled to a water supply and the supply shutoff valve turned on the... the glass under the dispenser long enough? ACCESSORIES To order replacement filters, call 1-800-807-6777. If it does not close completely." ■ Refrigerator connected to only 50°F (10°C). ■ New installation? The first glass of water? Stainless Steel Cleaner and Polish: Order Part #...
...In Canada, call 1-800-442-9991 and ask for water supply to your authorized KitchenAid dealer. Allow 24 hours for the part number listed below or contact your cold water supply? Make sure the refrigerator is chilled to a water supply and the supply shutoff valve turned on the... the glass under the dispenser long enough? ACCESSORIES To order replacement filters, call 1-800-807-6777. If it does not close completely." ■ Refrigerator connected to only 50°F (10°C). ■ New installation? The first glass of water? Stainless Steel Cleaner and Polish: Order Part #...
User Instructions
Page 16
..., when this major appliance is operated and maintained according to instructions attached to or furnished with the product, KitchenAid will pay for replacement or repair of the refrigerator/freezer cavity liner (including labor costs) if the part cracks due to correct defects in materials or workmanship...all SLIDE N LOCK™ Door Bins and SLIDE N LOCK™ Can Racks due to correct defects in remote locations. 10. KITCHENAID® REFRIGERATOR WARRANTY ONE YEAR LIMITED WARRANTY For one year from the date of purchase, when this major appliance is operated and maintained according to ...
..., when this major appliance is operated and maintained according to instructions attached to or furnished with the product, KitchenAid will pay for replacement or repair of the refrigerator/freezer cavity liner (including labor costs) if the part cracks due to correct defects in materials or workmanship...all SLIDE N LOCK™ Door Bins and SLIDE N LOCK™ Can Racks due to correct defects in remote locations. 10. KITCHENAID® REFRIGERATOR WARRANTY ONE YEAR LIMITED WARRANTY For one year from the date of purchase, when this major appliance is operated and maintained according to ...

Parts Diagram
Page 3
Part No. No. REFRIGERATOR LINER PARTS For Models: KSRP22FTWH01, KSRP22FTBT01, KSRP22FTBL01, KSRP22FTSS01, KSRP22FTMS01 (White) (Biscuit) (Black) (Stainless Steel) (Monochromatic Stainless) Illus. DESCRIPTION 1 Liner (Not A Serviceable Part) 2 2255613 Escutcheon, Meat ... Control 15 2216112 Air Diffuser Assembly 16 2212240 Air Diffuser Cover 17 2150331 Cover, Conduit 18 2162085 Socket 19 2256126 Reservoir 20 2255743 Light Bulb 21 2209769 Light Lens 22 488280 Screw 24 2301235 Slide, Door Control W10133400 3
Part No. No. REFRIGERATOR LINER PARTS For Models: KSRP22FTWH01, KSRP22FTBT01, KSRP22FTBL01, KSRP22FTSS01, KSRP22FTMS01 (White) (Biscuit) (Black) (Stainless Steel) (Monochromatic Stainless) Illus. DESCRIPTION 1 Liner (Not A Serviceable Part) 2 2255613 Escutcheon, Meat ... Control 15 2216112 Air Diffuser Assembly 16 2212240 Air Diffuser Cover 17 2150331 Cover, Conduit 18 2162085 Socket 19 2256126 Reservoir 20 2255743 Light Bulb 21 2209769 Light Lens 22 488280 Screw 24 2301235 Slide, Door Control W10133400 3

Parts Diagram
Page 7
REFRIGERATOR SHELF PARTS For Models: KSRP22FTWH01, KSRP22FTBT01, KSRP22FTBL01, KSRP22FTSS01, KSRP22FTMS01 (White) (Biscuit) (Black) (Stainless Steel) (Monochromatic Stainless) W10133400 7
REFRIGERATOR SHELF PARTS For Models: KSRP22FTWH01, KSRP22FTBT01, KSRP22FTBL01, KSRP22FTSS01, KSRP22FTMS01 (White) (Biscuit) (Black) (Stainless Steel) (Monochromatic Stainless) W10133400 7

Parts Diagram
Page 8
... 2223362 Gasket (Rear) 13 2174478 Eyelet, Roller 14 2188212 Roller 15 489211 Screw 16 2301481 Crisper Pan (Includes 13, 14 18, 19 & 21) 17 2301482 Meat Pan (Includes 13, 14, 19 & 22) 18 2174076 Window, Crisper 19 489261 Screw 20 2176095 Deflector...(Includes 6 & 30) 30 Cap, Snack Pan 2301017 Left Side 2301016 Right Side 31 2301153 Eyelet 32 2301152 Roller 33 8533983 Screw 8 W10133400 REFRIGERATOR SHELF PARTS For Models: KSRP22FTWH01, KSRP22FTBT01, KSRP22FTBL01, KSRP22FTSS01, KSRP22FTMS01 (White) (Biscuit) (Black) (Stainless Steel) (Monochromatic Stainless) Illus.
... 2223362 Gasket (Rear) 13 2174478 Eyelet, Roller 14 2188212 Roller 15 489211 Screw 16 2301481 Crisper Pan (Includes 13, 14 18, 19 & 21) 17 2301482 Meat Pan (Includes 13, 14, 19 & 22) 18 2174076 Window, Crisper 19 489261 Screw 20 2176095 Deflector...(Includes 6 & 30) 30 Cap, Snack Pan 2301017 Left Side 2301016 Right Side 31 2301153 Eyelet 32 2301152 Roller 33 8533983 Screw 8 W10133400 REFRIGERATOR SHELF PARTS For Models: KSRP22FTWH01, KSRP22FTBT01, KSRP22FTBL01, KSRP22FTSS01, KSRP22FTMS01 (White) (Biscuit) (Black) (Stainless Steel) (Monochromatic Stainless) Illus.

Parts Diagram
Page 12
... For Models: KSRP22FTWH01, KSRP22FTBT01, KSRP22FTBL01, KSRP22FTSS01, KSRP22FTMS01 (White) (Biscuit) (Black) (Stainless Steel) (Monochromatic Stainless) Illus. Part No. DESCRIPTION 1 Refrigerator Door (Includes Item #8) 2318439W White 2318439T Biscuit 2318439B Black 2301188S Stainless Steel 2301188SAP Monochromatic Stainless 2 Thimble, Top 2308091 For White, Black, Biscuit and Monochromatic Stainless ...
... For Models: KSRP22FTWH01, KSRP22FTBT01, KSRP22FTBL01, KSRP22FTSS01, KSRP22FTMS01 (White) (Biscuit) (Black) (Stainless Steel) (Monochromatic Stainless) Illus. Part No. DESCRIPTION 1 Refrigerator Door (Includes Item #8) 2318439W White 2318439T Biscuit 2318439B Black 2301188S Stainless Steel 2301188SAP Monochromatic Stainless 2 Thimble, Top 2308091 For White, Black, Biscuit and Monochromatic Stainless ...
Parts Diagram
Page 18
... (1/4") 978026 Valve, Access (5/16") 978027 Valve, Access (3/8") 978028 Valve, Access (1/2") 978029 Valve, Access (5/8") 978030 Valve, Access (3/4") 876764 Valve, Access (3/16") REFRIGERANT CHARGE 5.0 oz. (R−134) 18 W10133400 Part No. DESCRIPTION 21 489396 Clip 22 2188822 Evaporator 24 2188874 Motor, Fan 25 1105523 Tray, Evaporator 26 2187783 Harness, Wire 27 Drier 2319825 Production...
... (1/4") 978026 Valve, Access (5/16") 978027 Valve, Access (3/8") 978028 Valve, Access (1/2") 978029 Valve, Access (5/8") 978030 Valve, Access (3/4") 876764 Valve, Access (3/16") REFRIGERANT CHARGE 5.0 oz. (R−134) 18 W10133400 Part No. DESCRIPTION 21 489396 Clip 22 2188822 Evaporator 24 2188874 Motor, Fan 25 1105523 Tray, Evaporator 26 2187783 Harness, Wire 27 Drier 2319825 Production...


