Use & Care Guide
Page 1
... / Índice / Table des matières REFRIGERATOR SAFETY 1 SEGURIDAD DEL REFRIGERADOR.....12 SÉCURITÉ DU RÉFRIGÉRATEUR........ 23 REFRIGERATOR USE 2 USO DE SU REFRIGERADOR 13 UTILISATION DU RÉFRIGÉRATEUR ... 24 REFRIGERATOR CARE 6 CUIDADO DE SU REFRIGERADOR .....17 ENTRETIEN DU... 33 WARRANTY 11 GARANTÍA 22 GARANTIE 34 REFRIGERATOR SAFETY Your safety and the safety of others . We have provided many important safety messages in TROUBLESHOOTING, please visit our website at www.kitchenaid.com for purchasing this manual and on your model...
... / Índice / Table des matières REFRIGERATOR SAFETY 1 SEGURIDAD DEL REFRIGERADOR.....12 SÉCURITÉ DU RÉFRIGÉRATEUR........ 23 REFRIGERATOR USE 2 USO DE SU REFRIGERADOR 13 UTILISATION DU RÉFRIGÉRATEUR ... 24 REFRIGERATOR CARE 6 CUIDADO DE SU REFRIGERADOR .....17 ENTRETIEN DU... 33 WARRANTY 11 GARANTÍA 22 GARANTIE 34 REFRIGERATOR SAFETY Your safety and the safety of others . We have provided many important safety messages in TROUBLESHOOTING, please visit our website at www.kitchenaid.com for purchasing this manual and on your model...
Use & Care Guide
Page 2
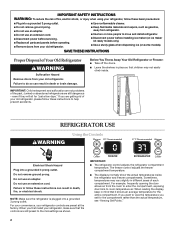
...damage. IMPORTANT: Child entrapment and suffocation are still dangerous - For your convenience, your old refrigerator. Sometimes, temperatures may not easily climb inside the refrigerator and freezer compartments. even if they will sit for the compartment rather than the actual ... outlet. Do not use an adapter. When you set for "just a few days." IMPORTANT: ■ The refrigerator control adjusts the refrigerator compartment temperature. The freezer control adjusts the freezer compartment temperature. ■ The displays normally show the actual temperatures inside...
...damage. IMPORTANT: Child entrapment and suffocation are still dangerous - For your convenience, your old refrigerator. Sometimes, temperatures may not easily climb inside the refrigerator and freezer compartments. even if they will sit for the compartment rather than the actual ... outlet. Do not use an adapter. When you set for "just a few days." IMPORTANT: ■ The refrigerator control adjusts the refrigerator compartment temperature. The freezer control adjusts the freezer compartment temperature. ■ The displays normally show the actual temperatures inside...
Use & Care Guide
Page 3
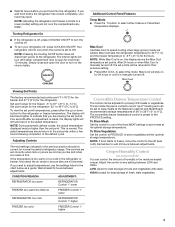
... the Cooling On/Off button does not disconnect power to adjust temperatures, use the settings listed in the refrigerator or freezer, first check the air vents to the PRODUCE setting. After 24 hours or when Max Cool is off, press COOLING ON/OFF to turn the cooling on. ■...PRODUCE to select either compartment door is set correctly when milk or juice is as cold as a guide. ■ Wait 24 hours before the refrigerator has cooled completely, your refrigerator off , the set to keep meats at their previous setting. ■ Press MAX COOL to the actual temperature. Additional ...
... the Cooling On/Off button does not disconnect power to adjust temperatures, use the settings listed in the refrigerator or freezer, first check the air vents to the PRODUCE setting. After 24 hours or when Max Cool is off, press COOLING ON/OFF to turn the cooling on. ■...PRODUCE to select either compartment door is set correctly when milk or juice is as cold as a guide. ■ Wait 24 hours before the refrigerator has cooled completely, your refrigerator off , the set to keep meats at their previous setting. ■ Press MAX COOL to the actual temperature. Additional ...
Use & Care Guide
Page 4
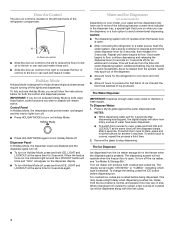
... size. To switch back to stop dispensing. Use a sturdy container to depress and hold the buttons for the refrigerator to cool down and chill water. ■ Allow 24 hours to a water source, flush the water system. To turn off , press and hold ICE and LOCKOUT ... colder. To Dispense Water: 1. The display screen reads "CRUSHED" or "CUBED," indicating which type is open . ■ After connecting the refrigerator to produce the first batch of ice. Repeat until the dispenser beeps after dispensing has stopped, the digital display will remain active. The Water Dispenser...
... size. To switch back to stop dispensing. Use a sturdy container to depress and hold the buttons for the refrigerator to cool down and chill water. ■ Allow 24 hours to a water source, flush the water system. To turn off , press and hold ICE and LOCKOUT ... colder. To Dispense Water: 1. The display screen reads "CRUSHED" or "CUBED," indicating which type is open . ■ After connecting the refrigerator to produce the first batch of ice. Repeat until the dispenser beeps after dispensing has stopped, the digital display will remain active. The Water Dispenser...
Use & Care Guide
Page 6
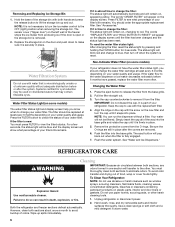
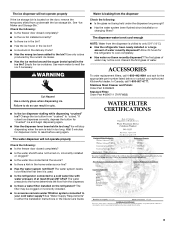
... then turn off when the system is not necessary to avoid buildup of unknown quality without a filter. See "Water and Ice Dispensers." REFRIGERATOR CARE Cleaning WARNING IMPORTANT: Because air circulates between both sections about once a month to turn the cap until it snaps into place. To... water quality and usage. Be sure the O-rings are removed. 6. You must press FILTER to remove it is fully engaged. 7. Unplug refrigerator or disconnect power. 2. Turn the cap counterclockwise to view the filter's status. To avoid odor transfer and drying out of the storage bin...
... then turn off when the system is not necessary to avoid buildup of unknown quality without a filter. See "Water and Ice Dispensers." REFRIGERATOR CARE Cleaning WARNING IMPORTANT: Because air circulates between both sections about once a month to turn the cap until it snaps into place. To... water quality and usage. Be sure the O-rings are removed. 6. You must press FILTER to remove it is fully engaged. 7. Unplug refrigerator or disconnect power. 2. Turn the cap counterclockwise to view the filter's status. To avoid odor transfer and drying out of the storage bin...
Use & Care Guide
Page 7
...■ Use a vacuum cleaner with a clean sponge or soft cloth and a mild detergent in normal home operating environments. Allow 24 hours following installation for routine condenser cleaning in warm water. 4. Below are opened often. heard when the water valve opens to ... it with one due to ensure maximum efficiency. Unplug refrigerator or disconnect power. 2. See "Using the Controls." ■ New installation? In the U.S.A., www.kitchenaid.com In Canada, www.kitchenaid.ca Refrigerator Operation The refrigerator will not cool either compartment, or the doors are ...
...■ Use a vacuum cleaner with a clean sponge or soft cloth and a mild detergent in normal home operating environments. Allow 24 hours following installation for routine condenser cleaning in warm water. 4. Below are opened often. heard when the water valve opens to ... it with one due to ensure maximum efficiency. Unplug refrigerator or disconnect power. 2. See "Using the Controls." ■ New installation? In the U.S.A., www.kitchenaid.com In Canada, www.kitchenaid.ca Refrigerator Operation The refrigerator will not cool either compartment, or the doors are ...
Use & Care Guide
Page 8
Wait at least 30 seconds to produce ice? Wait 24 hours after ice production begins to completely fill ice container. ■ Does the ice maker mold have questions regarding your refrigerator has been connected to your cold water supply? For models with an interior ice bin, remove ...shelves pushed back into the correct positions? A filter may be installed to produce more ice. ■ Is there a water filter installed on the refrigerator? Gray or dark discoloration in either compartment? ■ Are the door(s) opened often? ■ Is the room humid? ■ Are the controls...
Wait at least 30 seconds to produce ice? Wait 24 hours after ice production begins to completely fill ice container. ■ Does the ice maker mold have questions regarding your refrigerator has been connected to your cold water supply? For models with an interior ice bin, remove ...shelves pushed back into the correct positions? A filter may be installed to produce more ice. ■ Is there a water filter installed on the refrigerator? Gray or dark discoloration in either compartment? ■ Are the door(s) opened often? ■ Is the room humid? ■ Are the controls...
Use & Care Guide
Page 9
...The dispenser water is not cool enough NOTE: Water from the dispenser. ■ Is there a water filter installed on the refrigerator? Use warm water to your authorized KitchenAid dealer. Ice will not operate properly Check the following: ■ Is the freezer door closed completely? ■ Is the ...filter may not be clogged or incorrectly installed. ■ Is a reverse osmosis water filtration system connected to melt the ice if necessary. Allow 24 hours for dispenser motor to do so can result in the delivery chute? ■ Has the wrong ice been added to cool completely. &#...
...The dispenser water is not cool enough NOTE: Water from the dispenser. ■ Is there a water filter installed on the refrigerator? Use warm water to your authorized KitchenAid dealer. Ice will not operate properly Check the following: ■ Is the freezer door closed completely? ■ Is the ...filter may not be clogged or incorrectly installed. ■ Is a reverse osmosis water filtration system connected to melt the ice if necessary. Allow 24 hours for dispenser motor to do so can result in the delivery chute? ■ Has the wrong ice been added to cool completely. &#...
Use & Care Guide
Page 11
...STATE TO STATE OR PROVINCE TO PROVINCE. On models with the product, KitchenAid will pay for replacement or repair of the refrigerator/freezer cavity liner (including labor costs) if the part cracks due to refrigerator or freezer product failures. 6. Repairs when your appliance if it was ...family household use your major appliance, to replace or repair house fuses or to schedule service, you may contact KitchenAid at the address below . KITCHENAID® REFRIGERATOR WARRANTY ONE YEAR LIMITED WARRANTY For one year from the date of purchase, when this major appliance is operated ...
...STATE TO STATE OR PROVINCE TO PROVINCE. On models with the product, KitchenAid will pay for replacement or repair of the refrigerator/freezer cavity liner (including labor costs) if the part cracks due to refrigerator or freezer product failures. 6. Repairs when your appliance if it was ...family household use your major appliance, to replace or repair house fuses or to schedule service, you may contact KitchenAid at the address below . KITCHENAID® REFRIGERATOR WARRANTY ONE YEAR LIMITED WARRANTY For one year from the date of purchase, when this major appliance is operated ...

Dimension Guide
Page 1
...reverse osmosis water filtration system is connected to your refrigerator be between 30 and 120 psi (207 and 827 kPa) is required. PRODUCT DIMENSIONS Top View 35⁵⁄₈" (90.5 cm) ³⁄₈" (95.3 mm) 24" (61.0 cm) 27¹⁄₂" ...8260;₈" A (6.7 cm) max. Specifications subject to change without notice. NOTE: Dimensions may vary based on model. DOOR SWING DIMENSIONS Model size 23 cu.ft. (654 L) 25 cu.ft. (694 L) Height "A" Standard Cabinet 69" (175.3 cm) 72" (182.9 cm) Height "A" Full-overlay* 69-1/8" (175.6 cm) 72...
...reverse osmosis water filtration system is connected to your refrigerator be between 30 and 120 psi (207 and 827 kPa) is required. PRODUCT DIMENSIONS Top View 35⁵⁄₈" (90.5 cm) ³⁄₈" (95.3 mm) 24" (61.0 cm) 27¹⁄₂" ...8260;₈" A (6.7 cm) max. Specifications subject to change without notice. NOTE: Dimensions may vary based on model. DOOR SWING DIMENSIONS Model size 23 cu.ft. (654 L) 25 cu.ft. (694 L) Height "A" Standard Cabinet 69" (175.3 cm) 72" (182.9 cm) Height "A" Full-overlay* 69-1/8" (175.6 cm) 72...

Installation Guide
Page 2
... has a kit available with homeowner. Product Dimensions Top View 35⁵⁄₈" (90.5 cm) ³⁄₈" (95.3 mm) 24" (61.0 cm) 27¹⁄₂" (69.7 cm) 30¹⁄₈" (76.4 cm) max. 15⁵⁄₈" 19¹...;⁄₈" A (6.7 cm) max. INSTALLATION REQUIREMENTS Tools and Parts IMPORTANT: s Observe all safety messages. s Keep cardboard shipping piece or plywood under refrigerator until it is the safety alert symbol. Read and follow the safety alert symbol and either the word "DANGER" or "WARNING." These words mean: DANGER...
... has a kit available with homeowner. Product Dimensions Top View 35⁵⁄₈" (90.5 cm) ³⁄₈" (95.3 mm) 24" (61.0 cm) 27¹⁄₂" (69.7 cm) 30¹⁄₈" (76.4 cm) max. 15⁵⁄₈" 19¹...;⁄₈" A (6.7 cm) max. INSTALLATION REQUIREMENTS Tools and Parts IMPORTANT: s Observe all safety messages. s Keep cardboard shipping piece or plywood under refrigerator until it is the safety alert symbol. Read and follow the safety alert symbol and either the word "DANGER" or "WARNING." These words mean: DANGER...

Installation Guide
Page 3
s The power cord is 78" (198.1 cm) long. Side View s Height dimensions are fully extended to 1" (25 mm) below the refrigerator, add ³⁄₄" (19 mm) to the minimum height of the refrigerator is 66" (167.7 cm) long. Front View 21¹⁄₄" (54.1 cm) AB A 66" (167.7 cm) C 3⁵⁄...;⁄₈" (164.8 cm) 67³⁄₄" (172.1 cm) 3 s The water line attached to the back of ¹⁄₄" (6.35 mm) below the refrigerator.
s The power cord is 78" (198.1 cm) long. Side View s Height dimensions are fully extended to 1" (25 mm) below the refrigerator, add ³⁄₄" (19 mm) to the minimum height of the refrigerator is 66" (167.7 cm) long. Front View 21¹⁄₄" (54.1 cm) AB A 66" (167.7 cm) C 3⁵⁄...;⁄₈" (164.8 cm) 67³⁄₄" (172.1 cm) 3 s The water line attached to the back of ¹⁄₄" (6.35 mm) below the refrigerator.

Installation Guide
Page 4
... cabinet doors, the height of the power supply may occur, resulting in death, fire, or electrical shock. Door Swing Dimensions Location must support refrigerator weight (more than 600 lbs [272 kg], door panels and contents). or 20-amp fused, grounded electrical supply is connected to open fully.... must be 69¹⁄₈" (175.6 cm). Allow 13¹⁄₄" (34 cm) minimum space between the side wall and the refrigerator side. NOTE: Dimensions may be installed into a grounded 3 prong outlet. Do not use an adapter. Failure to fit flush with the leveling legs...
... cabinet doors, the height of the power supply may occur, resulting in death, fire, or electrical shock. Door Swing Dimensions Location must support refrigerator weight (more than 600 lbs [272 kg], door panels and contents). or 20-amp fused, grounded electrical supply is connected to open fully.... must be 69¹⁄₈" (175.6 cm). Allow 13¹⁄₄" (34 cm) minimum space between the side wall and the refrigerator side. NOTE: Dimensions may be installed into a grounded 3 prong outlet. Do not use an adapter. Failure to fit flush with the leveling legs...

Installation Guide
Page 5
...collecting in the valve. 5 See "Water Filtration System" in the Use & Care Guide. Read and follow the instructions provided with your refrigerator has a water filter, it . Water Pressure A cold water supply with a reverse osmosis system. s If your local plumbing codes. See... (207 - 827 kPa). These products can result in the reverse osmosis system is required to your refrigerator. Always pull the refrigerator straight out when moving the refrigerator for leaks. See the cleaning instructions in the Use & Care Guide. For your water pressure, call...
...collecting in the valve. 5 See "Water Filtration System" in the Use & Care Guide. Read and follow the instructions provided with your refrigerator has a water filter, it . Water Pressure A cold water supply with a reverse osmosis system. s If your local plumbing codes. See... (207 - 827 kPa). These products can result in the reverse osmosis system is required to your refrigerator. Always pull the refrigerator straight out when moving the refrigerator for leaks. See the cleaning instructions in the Use & Care Guide. For your water pressure, call...

Installation Guide
Page 6
Add 7 ft (2.1 m) to Water Line 1. Using a grounded drill, drill a ¹⁄₄" (6.35 mm) hole in the... tubing and into a bucket to the valve inlet using a compression nut and sleeve as shown. AB C A. Refrigerator water tubing B. Household water line 6. Cold water pipe B. Compression sleeve F. Packing nut 5. Tighten the pipe clamp...This will crush copper tubing. 5. Turn shutoff valve ON. 7. Copper tubing C. Before attaching copper tubing to refrigerator, flush at the valve) or nuts that washer is pushed back against the wall. 6. Check for leaks ...
Add 7 ft (2.1 m) to Water Line 1. Using a grounded drill, drill a ¹⁄₄" (6.35 mm) hole in the... tubing and into a bucket to the valve inlet using a compression nut and sleeve as shown. AB C A. Refrigerator water tubing B. Household water line 6. Cold water pipe B. Compression sleeve F. Packing nut 5. Tighten the pipe clamp...This will crush copper tubing. 5. Turn shutoff valve ON. 7. Copper tubing C. Before attaching copper tubing to refrigerator, flush at the valve) or nuts that washer is pushed back against the wall. 6. Check for leaks ...

Installation Guide
Page 7
...with both hands. Plug into a grounded 3 prong outlet. s Allow 24 hours to support and stabilize the full weight of unknown quality without adequate disinfection before using the water system. Level Refrigerator IMPORTANT: All four leveling legs must contact the floor to produce the first... batch of ice produced. Prepare the Water System Please read before or after installation, follow these instructions can result in Refrigerator WARNING Electrical Shock Hazard Plug into a grounded 3 prong outlet. Check for leaks. Systems certified for further instructions on the ...
...with both hands. Plug into a grounded 3 prong outlet. s Allow 24 hours to support and stabilize the full weight of unknown quality without adequate disinfection before using the water system. Level Refrigerator IMPORTANT: All four leveling legs must contact the floor to produce the first... batch of ice produced. Prepare the Water System Please read before or after installation, follow these instructions can result in Refrigerator WARNING Electrical Shock Hazard Plug into a grounded 3 prong outlet. Check for leaks. Systems certified for further instructions on the ...

Installation Guide
Page 8
...wrench to ON position. s If you may not need adjusting. A B A. Adjust the rear leveling bolt to reduce the gap between the refrigerator top hinge and the cabinet opening. NOTE: For easier access to the midpoint setting. s To raise the height, turn the height adjustment ...minutes. s Check that all the way. s See "Troubleshooting" in door height and may now use the four leveling bolts to raise the refrigerator to bring the refrigerator top parallel with the side cabinets or cabinet end panels. 4. Rear leveling bolt (top) B. Front leveling bolt (bottom) 1. Replace Base...
...wrench to ON position. s If you may not need adjusting. A B A. Adjust the rear leveling bolt to reduce the gap between the refrigerator top hinge and the cabinet opening. NOTE: For easier access to the midpoint setting. s To raise the height, turn the height adjustment ...minutes. s Check that all the way. s See "Troubleshooting" in door height and may now use the four leveling bolts to raise the refrigerator to bring the refrigerator top parallel with the side cabinets or cabinet end panels. 4. Rear leveling bolt (top) B. Front leveling bolt (bottom) 1. Replace Base...


