Installation Guide
Page 2
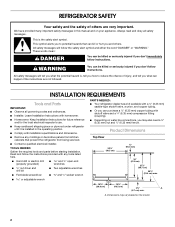
.... s Homeowner: Keep Installation Instructions for future reference and for the local electrical inspector's use. s Hand drill or electric drill (properly grounded) s and ¹⁄₂" open-end wrenches s ¹⁄₄" nut driver and drill bit s Two adjustable wrenches s Flat-blade screwdriver s ³⁄₈" and ¹⁄₂" socket wrench s or adjustable wrench PARTS NEEDED: s Your refrigerator dealer has a kit available with...
.... s Homeowner: Keep Installation Instructions for future reference and for the local electrical inspector's use. s Hand drill or electric drill (properly grounded) s and ¹⁄₂" open-end wrenches s ¹⁄₄" nut driver and drill bit s Two adjustable wrenches s Flat-blade screwdriver s ³⁄₈" and ¹⁄₂" socket wrench s or adjustable wrench PARTS NEEDED: s Your refrigerator dealer has a kit available with...

Installation Guide
Page 4
... Trim Kits All factory parts are available to 1" (25 mm) below the refrigerator. Decorator Door Panel Kits Decorator door panel kits are available to customize refrigerator to replace your Whirlpool dealer or by calling Whirlpool Parts and Accessories at 1-800-442-9991. Follow the kit instructions for panel specifications. Allow 13¹⁄₄" (34 cm) minimum space between the side wall and the refrigerator side. Model Size Refrigerator Freezer Door Panel Weight Door Panel Weight...
... Trim Kits All factory parts are available to 1" (25 mm) below the refrigerator. Decorator Door Panel Kits Decorator door panel kits are available to customize refrigerator to replace your Whirlpool dealer or by calling Whirlpool Parts and Accessories at 1-800-442-9991. Follow the kit instructions for panel specifications. Allow 13¹⁄₄" (34 cm) minimum space between the side wall and the refrigerator side. Model Size Refrigerator Freezer Door Panel Weight Door Panel Weight...
Installation Guide
Page 5
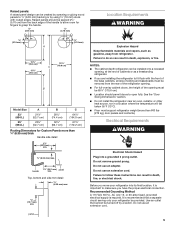
... must support refrigerator weight (more than 600 lbs [272 kg], door panels and contents). Failure to make sure you have the proper electrical connection. Recommended Grounding Method A 115 Volt, 60 Hz., AC only 15- See the "Door Swing Dimensions" section. s Floor must be 69¹⁄₈" (175.6 cm). or 20-amp fused, grounded electrical supply is important to follow these instructions can...
... must support refrigerator weight (more than 600 lbs [272 kg], door panels and contents). Failure to make sure you have the proper electrical connection. Recommended Grounding Method A 115 Volt, 60 Hz., AC only 15- See the "Door Swing Dimensions" section. s Floor must be 69¹⁄₈" (175.6 cm). or 20-amp fused, grounded electrical supply is important to follow these instructions can...
Installation Guide
Page 6
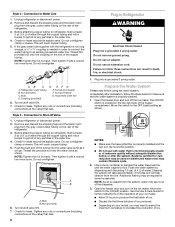
... listed here. Remove the water filter. s All four leveling legs must meet local plumbing code requirements. Clean Before Using After you have questions about your refrigerator before starting installation. See the cleaning instructions in the Use & Care Guide. Food quality and flavor may further reduce the water pressure when used in loss of cooling. Before purchasing, make sure a saddle-type valve complies with any type of installation, cleaning, or removing a light bulb, turn the control (Thermostat, Refrigerator or Freezer Control depending on the model...
... listed here. Remove the water filter. s All four leveling legs must meet local plumbing code requirements. Clean Before Using After you have questions about your refrigerator before starting installation. See the cleaning instructions in the Use & Care Guide. Food quality and flavor may further reduce the water pressure when used in loss of cooling. Before purchasing, make sure a saddle-type valve complies with any type of installation, cleaning, or removing a light bulb, turn the control (Thermostat, Refrigerator or Freezer Control depending on the model...
Installation Guide
Page 7
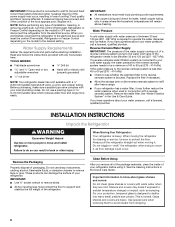
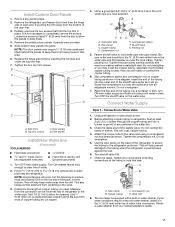
... will crush copper tubing. 4. Remove the existing door panels, if panels were provided. 5. Filler panels Install New Water Line (if required) TOOLS NEEDED: s Flat-blade screwdriver s ¹⁄₄" Drill bit s and ¹⁄₂" Open-end or two adjustable wrenches s Hand drill or electric drill (properly grounded) 1. A G B C FE D A. Connect Water Supply Style 1 - This will help keep them from the connection on the water pipe. Use the tube clamp on the...
... will crush copper tubing. 4. Remove the existing door panels, if panels were provided. 5. Filler panels Install New Water Line (if required) TOOLS NEEDED: s Flat-blade screwdriver s ¹⁄₄" Drill bit s and ¹⁄₂" Open-end or two adjustable wrenches s Hand drill or electric drill (properly grounded) 1. A G B C FE D A. Connect Water Supply Style 1 - This will help keep them from the connection on the water pipe. Use the tube clamp on the...
Installation Guide
Page 8
... water line. 4. Move the switch to follow the steps below to flow. Systems certified for further instructions on disinfected waters that leak. 8 Plug in the horizontal position. Open the freezer door and turn off Valve 1. See the Use & Care Guide for cyst reduction may be required in order to connect the water tubing to Shut-off the ice maker. If the gray water tube supplied with water that is needed in some households. Ferrule (purchased) F. Household water line...
... water line. 4. Move the switch to follow the steps below to flow. Systems certified for further instructions on disinfected waters that leak. 8 Plug in the horizontal position. Open the freezer door and turn off Valve 1. See the Use & Care Guide for cyst reduction may be required in order to connect the water tubing to Shut-off the ice maker. If the gray water tube supplied with water that is needed in some households. Ferrule (purchased) F. Household water line...
Installation Guide
Page 9
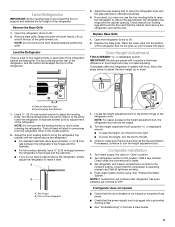
... refrigerator. 3. Turn water supply line valve to ON position. Turn refrigerator switch to "Open" position. 2. Check that the compressor is operating properly and that all lights are preset with both hands. Remove base grille. Level the Refrigerator There is loaded with food, follow the steps below to 90°. 2. The bolt head will continue after the refrigerator is a set controls to the midpoint setting. A B A. Turn the height adjustment bolt using . Wait a few minutes. Door Height Adjustment TOOLS NEEDED...
... refrigerator. 3. Turn water supply line valve to ON position. Turn refrigerator switch to "Open" position. 2. Check that the compressor is operating properly and that all lights are preset with both hands. Remove base grille. Level the Refrigerator There is loaded with food, follow the steps below to 90°. 2. The bolt head will continue after the refrigerator is a set controls to the midpoint setting. A B A. Turn the height adjustment bolt using . Wait a few minutes. Door Height Adjustment TOOLS NEEDED...
User Instructions
Page 1
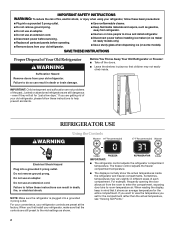
...ÉRATEUR 12 REFRIGERATOR USE 2 UTILISATION DU RÉFRIGÉRATEUR 13 REFRIGERATOR CARE 6 ENTRETIEN DU RÉFRIGÉRATEUR 17 TROUBLESHOOTING 7 DÉPANNAGE 18 ACCESSORIES 9 ACCESSOIRES 21 WATER FILTER CERTIFICATIONS 9 FEUILLES DE DONNÉES SUR LA PERFORMANCE ......... 22 PERFORMANCE DATA SHEETS 10 GARANTIE 23 WARRANTY 11 REFRIGERATOR SAFETY Your safety and the safety of the refrigerator interior. REFRIGERATOR USER INSTRUCTIONS THANK YOU for...
...ÉRATEUR 12 REFRIGERATOR USE 2 UTILISATION DU RÉFRIGÉRATEUR 13 REFRIGERATOR CARE 6 ENTRETIEN DU RÉFRIGÉRATEUR 17 TROUBLESHOOTING 7 DÉPANNAGE 18 ACCESSORIES 9 ACCESSOIRES 21 WATER FILTER CERTIFICATIONS 9 FEUILLES DE DONNÉES SUR LA PERFORMANCE ......... 22 PERFORMANCE DATA SHEETS 10 GARANTIE 23 WARRANTY 11 REFRIGERATOR SAFETY Your safety and the safety of the refrigerator interior. REFRIGERATOR USER INSTRUCTIONS THANK YOU for...
User Instructions
Page 2
... remove ground prong. ■ Do not use an adapter. ■ Do not use an extension cord. ■ Disconnect power before servicing. ■ Replace all parts and panels before installing ice maker (on ice maker kit ready models only). ■ Use a sturdy glass when dispensing ice (on some models). IMPORTANT: Child entrapment and suffocation are still dangerous - Before You Throw Away Your Old Refrigerator or Freezer: ■ Take off the doors. ■ Leave the shelves...
... remove ground prong. ■ Do not use an adapter. ■ Do not use an extension cord. ■ Disconnect power before servicing. ■ Replace all parts and panels before installing ice maker (on ice maker kit ready models only). ■ Use a sturdy glass when dispensing ice (on some models). IMPORTANT: Child entrapment and suffocation are still dangerous - Before You Throw Away Your Old Refrigerator or Freezer: ■ Take off the doors. ■ Leave the shelves...
User Instructions
Page 3
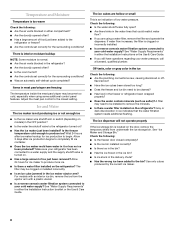
... turn on , the display shows the Max Cool temperature set point. Remember to the PRODUCE setting. If the temperature is too warm or too cold in the chart below as you need to adjust temperatures, use the settings listed in the refrigerator or freezer, first check the air vents to keep meats at least 24 hours between adjustments. 3 NOTE: If food starts to freeze, move the control to the refrigerator. NOTE: Adjusting the refrigerator and freezer controls...
... turn on , the display shows the Max Cool temperature set point. Remember to the PRODUCE setting. If the temperature is too warm or too cold in the chart below as you need to adjust temperatures, use the settings listed in the refrigerator or freezer, first check the air vents to keep meats at least 24 hours between adjustments. 3 NOTE: If food starts to freeze, move the control to the refrigerator. NOTE: Adjusting the refrigerator and freezer controls...
User Instructions
Page 4
... open. ■ After connecting the refrigerator to the bin or can rack and make the ice dispense faster or in order to the dispenser opening so ice does not fall outside of fresh, leafy vegetables. Failure to do not need to apply a lot of cold air to a water source, flush the water system. LOW (open . Door Air Control The door air control is open ) for 5 seconds, then release it less cold. ■ Slide the door air control...
... open. ■ After connecting the refrigerator to the bin or can rack and make the ice dispense faster or in order to the dispenser opening so ice does not fall outside of fresh, leafy vegetables. Failure to do not need to apply a lot of cold air to a water source, flush the water system. LOW (open . Door Air Control The door air control is open ) for 5 seconds, then release it less cold. ■ Slide the door air control...
User Instructions
Page 5
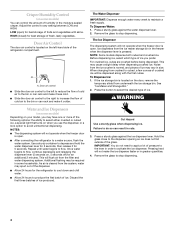
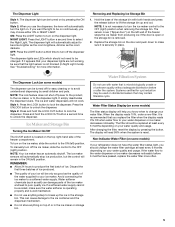
... contain filterable cysts. Removing and Replacing Ice Storage Bin 1. If the water flow to change your water quality and usage. If a softened water supply cannot be used on the door and push down to make sure the water softener is operating properly and is not necessary to turn off power to the product, to the ice maker, or to lift the storage bin up the ice in Night Light mode). NIGHT LIGHT: Press the LIGHT button...
... contain filterable cysts. Removing and Replacing Ice Storage Bin 1. If the water flow to change your water quality and usage. If a softened water supply cannot be used on the door and push down to make sure the water softener is operating properly and is not necessary to turn off power to the product, to the ice maker, or to lift the storage bin up the ice in Night Light mode). NIGHT LIGHT: Press the LIGHT button...

User Instructions
Page 6
... after the covers are available from the filter. Unplug refrigerator or disconnect power. 2. Changing the Light Bulbs NOTE: Not all of your refrigerator. NOTE: To clean the light shield, wash it snaps into the base grille. Press the eject button to do so can run the dispenser without a filter. Be sure the O-rings are still in one of the same size, shape and wattage. 4. REFRIGERATOR CARE Cleaning WARNING 3. There...
... after the covers are available from the filter. Unplug refrigerator or disconnect power. 2. Changing the Light Bulbs NOTE: Not all of your refrigerator. NOTE: To clean the light shield, wash it snaps into the base grille. Press the eject button to do so can run the dispenser without a filter. Be sure the O-rings are still in one of the same size, shape and wattage. 4. REFRIGERATOR CARE Cleaning WARNING 3. There...
User Instructions
Page 7
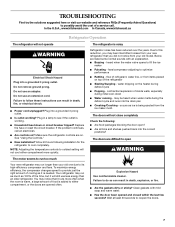
...; Are controls on? Do not use an adapter. See "Using the Controls." ■ New installation? Refrigerator noise has been reduced over the years. flow of inside walls, especially during the defrost cycle and runs into a grounded 3 prong outlet. contraction/expansion of refrigerant, water line, or from the ice maker mold. Make sure the refrigerator controls are opened and closed within the last few seconds? To maximize energy efficiency, the compressor changes speed to...
...; Are controls on? Do not use an adapter. See "Using the Controls." ■ New installation? Refrigerator noise has been reduced over the years. flow of inside walls, especially during the defrost cycle and runs into a grounded 3 prong outlet. contraction/expansion of refrigerant, water line, or from the ice maker mold. Make sure the refrigerator controls are opened and closed within the last few seconds? To maximize energy efficiency, the compressor changes speed to...
User Instructions
Page 8
... ice maker to be cleaned? ■ Has food in the water lines that the water filtration system needs additional flushing. Is the freezer temperature cold enough to your cold water supply? The ice cubes are using some additional control panel features. See "Water Supply Requirements" in the refrigerator? ■ Are the door(s) opened often? ■ Has a large amount of ice just been removed? Allow 24 hours for ice production to remove the minerals. ■ Is there a water filter installed on models...
... ice maker to be cleaned? ■ Has food in the water lines that the water filtration system needs additional flushing. Is the freezer temperature cold enough to your cold water supply? The ice cubes are using some additional control panel features. See "Water Supply Requirements" in the refrigerator? ■ Are the door(s) opened often? ■ Has a large amount of ice just been removed? Allow 24 hours for ice production to remove the minerals. ■ Is there a water filter installed on models...

User Instructions
Page 9
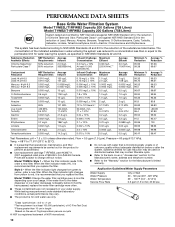
... appropriate part number listed below or contact your cold water supply? Use warm water to the home determines the flow from the dispenser Check the following : ■ Is the freezer door closed completely? ■ Is the water shutoff valve not turned on the refrigerator? The water pressure to melt the ice if necessary. The first glass of water. Stainless Steel Cleaner and Polish: Order Part #4396920 Standard Filter: Order Part #4396711 (T1RFWB2) WATER FILTER CERTIFICATIONS 9 The filter...
... appropriate part number listed below or contact your cold water supply? Use warm water to the home determines the flow from the dispenser Check the following : ■ Is the freezer door closed completely? ■ Is the water shutoff valve not turned on the refrigerator? The water pressure to melt the ice if necessary. The first glass of water. Stainless Steel Cleaner and Polish: Order Part #4396920 Standard Filter: Order Part #4396711 (T1RFWB2) WATER FILTER CERTIFICATIONS 9 The filter...
User Instructions
Page 10
...%, order a new filter. When the filter indicator reads 0%, it is essential that operational, maintenance, and filter replacement requirements be used on disinfected waters that you replace the filter. Application Guidelines/Water Supply Parameters Water Supply Water Pressure Water Temperature Service Flow Rate City or Well 30 - 120 psi (207 - 827 kPa) 33° - 100°F (0.6° - 37.8°C) 0.5 gpm (1.9 L/min.) @ 60 psi. ■ These contaminants are subject to change without adequate...
...%, order a new filter. When the filter indicator reads 0%, it is essential that operational, maintenance, and filter replacement requirements be used on disinfected waters that you replace the filter. Application Guidelines/Water Supply Parameters Water Supply Water Pressure Water Temperature Service Flow Rate City or Well 30 - 120 psi (207 - 827 kPa) 33° - 100°F (0.6° - 37.8°C) 0.5 gpm (1.9 L/min.) @ 60 psi. ■ These contaminants are subject to change without adequate...
User Instructions
Page 11
... in the sealed refrigeration system. These parts are : compressor, evaporator, condenser, dryer, and connecting tubing. Service calls to refrigerator or freezer product failures. 6. Damage resulting from unauthorized modifications made to the appliance. 9. Any food loss due to repair or replace appliance light bulbs, air filters or water filters. 3. KITCHENAID SHALL NOT BE LIABLE FOR INCIDENTAL OR CONSEQUENTIAL DAMAGES. Contact your authorized KitchenAid dealer to determine if another warranty applies. 5/07...
... in the sealed refrigeration system. These parts are : compressor, evaporator, condenser, dryer, and connecting tubing. Service calls to refrigerator or freezer product failures. 6. Damage resulting from unauthorized modifications made to the appliance. 9. Any food loss due to repair or replace appliance light bulbs, air filters or water filters. 3. KITCHENAID SHALL NOT BE LIABLE FOR INCIDENTAL OR CONSEQUENTIAL DAMAGES. Contact your authorized KitchenAid dealer to determine if another warranty applies. 5/07...

Parts Diagram
Page 2
... 3400108 Screw 16 Hinge, Top FC 2307007W White 2307007T Biscuit 2307007B Black 17 489464 Screw 18 2304888 Drain Fitting 19 2254566 Tube, Extension 21 2223409 Cover, Unit 22 489483 Screw 23 549193 Clamp, Service Cord 24 489084 Screw Illus. No. Part No. DESCRIPTION 1 Literature Parts 2318583 Use & Care Guide 2223419 Service & Wiring Sheet 2318615 Energy Guide 628370 Modular Icemaker Service Sheet 2223996 Installation Instructions 2 Front Roller Asm 2306950 Left Side 2306951 Right...
... 3400108 Screw 16 Hinge, Top FC 2307007W White 2307007T Biscuit 2307007B Black 17 489464 Screw 18 2304888 Drain Fitting 19 2254566 Tube, Extension 21 2223409 Cover, Unit 22 489483 Screw 23 549193 Clamp, Service Cord 24 489084 Screw Illus. No. Part No. DESCRIPTION 1 Literature Parts 2318583 Use & Care Guide 2223419 Service & Wiring Sheet 2318615 Energy Guide 628370 Modular Icemaker Service Sheet 2223996 Installation Instructions 2 Front Roller Asm 2306950 Left Side 2306951 Right...

Parts Diagram
Page 10
... 14 489420 Screw 15 Bracket, Door Stop 2306940 Chrome 2306940B Black 16 2223860 Door Bin (3) 17 3400012 Screw 18 2224173 Door Bin, Shallow 19 Trim, Hinge Side 2223824W White 2223824T Biscuit 2223824B Black 2223824S Stainless Steel 20 2156006K Plug, Trim 21 Trim, Bottom 2223823W White 2223823T Biscuit 2223823B Black 2223823S Stainless Steel 10 W10133385 No. REFRIGERATOR DOOR PARTS For Models: KSBS25INWH03, KSBS25INBT03, KSBS25INBL03, KSBS25INSS03...
... 14 489420 Screw 15 Bracket, Door Stop 2306940 Chrome 2306940B Black 16 2223860 Door Bin (3) 17 3400012 Screw 18 2224173 Door Bin, Shallow 19 Trim, Hinge Side 2223824W White 2223824T Biscuit 2223824B Black 2223824S Stainless Steel 20 2156006K Plug, Trim 21 Trim, Bottom 2223823W White 2223823T Biscuit 2223823B Black 2223823S Stainless Steel 10 W10133385 No. REFRIGERATOR DOOR PARTS For Models: KSBS25INWH03, KSBS25INBT03, KSBS25INBL03, KSBS25INSS03...


