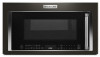
KitchenAid KMHC319LBS Support and Manuals
Get Help and Manuals for this KitchenAid item
View All Support Options Below
Free KitchenAid KMHC319LBS manuals!
Problems with KitchenAid KMHC319LBS?
Ask a Question
Free KitchenAid KMHC319LBS manuals!
Problems with KitchenAid KMHC319LBS?
Ask a Question
Popular KitchenAid KMHC319LBS Manual Pages
Installation Instructions - Page 2

... compound
■ Duct tape
Parts Needed
For information on model, aluminum grease filter and charcoal filter may not be sure to back of packaging)
F. #6 x 3/8" Sheet metal screws (2) ■ Aluminum grease filters
G. See User Instructions.)
NOTE: Depending on reordering, see the "Replacement Parts" section. See the "Venting Design Specifications" section.
2 Washers (2) D. 3/16...
Installation Instructions - Page 3

... Design Specifications" section. See the "Electrical Requirements" section. The bump out mounting kit (part # W11185746) is not provided but no more than 14" (35.6 cm) but can be free of installation.
12 1/2" (31,8 cm) 6 1/4" (15,9 cm)
5 3/4" (14,6 cm)
Installation Dimensions
NOTE: The grounded 3 prong outlet must provide:
■ Minimum installation dimensions. Set the cardboard...
Installation Instructions - Page 5

... the damper assembly in case the venting method is changed, or the microwave oven is set aside.
A B
A
B
A. Lift blower motor out of the microwave oven.
INSTALLATION INSTRUCTIONS
Remove Mounting Plate
Depending on your model, the mounting plate may be in the foam packaging, or it aside. 3. Remove any remaining contents from the connector.
Rotate...
Installation Instructions - Page 8

... 3
Wall Studs at End Holes Figure 2
B
C
C
C
B
D
D
A
A
A
A
E
E
F
E
E
F
NOTE: If wall stud is within 6" (15.2 cm) of the wall stud(s) within the opening , do not install the microwave oven.
Support tabs F. Wall stud centerlines D.
Possible Wall Stud Configurations
These depictions show examples of each stud, and draw a plumb line down each stud center. Locate...
Installation Instructions - Page 9

...down 4" (10.2 cm) from the centerline.
5. They must each other. Set the mounting plate aside. Align the center markers on the cardboard template, to ...template C. Front edge of the opening.
6. With the support tabs facing forward (see illustrations in the "Locate Wall... centerline(s). Mark Rear Wall
The microwave oven must be installed on a minimum of one wall stud, preferably two...
Installation Instructions - Page 10

... Stud Configurations" in the "Locate all lag screws and bolts.
Start toggle nuts on the wall.
10 With the support tabs of the "Mark Rear Wall."
2. Spring toggle nut
3. A
C
B
D
A. 3/16-24 x ... B. C
A. 3/16-24 x 3" round-head bolt B. Drill Holes in Rear Wall
In addition to being installed on at least one wall stud as well as at both ends. 1.
Drill 3/16" (5 mm) hole(s) into...
Installation Instructions - Page 12

...hang it on your model, it may require bolts longer or shorter than 3" (7.6 cm). Remove the two packing spacers from the top of mounting plate, and set aside on each 1/4-20... is required, rotate microwave oven downward. Support tabs
12
A. Handle the microwave oven gently. 1. NOTE: If microwave oven does not need to move and install microwave oven.
Excessive Weight Hazard
Use two...
Installation Instructions - Page 13

Refer to the User Instructions for troubleshooting information.
Bolt B.
Failure to follow these instructions can result in properly. A
B
A. NOTE: Avoid damage to the mounting nut, screw the bolts into grounded 3 prong outlet. 3. Install filters. Then secure with tools. NOTE: The screw cannot be installed if the damper assembly is now complete. Do not use .
2.
Plug ...
Installation Instructions - Page 15

... assistance, call us at our toll-free number listed in the User Guide.
One 31⁄4" x 10" (8.3 x 25.4 cm) 90° elbow = 25 ft (7.6 m) B. Accessories
Filler Panel Kits are available from sticking. Replacement Parts
If any of the installation hardware needs to be installed to -round transition piece = 5 ft (1.5 m) D. 2 ft (0.6 m) + 6 ft (1.8 m) straight = 8 ft (2.4 m)
If the...
Owners Manual - Page 2

... in this manual and on your appliance.
This is , tell you how to explode and should be killed or seriously injured if you don't immediately follow instructions.
I The microwave oven must be grounded. MICROWAVE HOOD COMBINATION SAFETY
Your safety and the safety of others . All safety messages will follow the specific "PRECAUTIONS TO...
Owners Manual - Page 3

...not cover racks or any materials, other part of the microwave oven
when the microwave ..., near a kitchen sink, in the manual. n Do not immerse cord or plug...INSTRUCTIONS
n Use the microwave oven only for its intended use as they may damage the filter. Grease should be adjusted or repaired by qualified service personnel.
n Do not use paper products when appliance is specifically...
Owners Manual - Page 4

... dim the LCD brightness after replacing the charcoal filter. Control Lock
Activate to reach Filter Reset submenu. Filter Reset; Fan Timer;
Reset Alert through Setup or Settings" will light up in a risk of electric shock. After reset, another 6 months duration will switch to reach Clock submenu, and follow these instructions can
result in the...
Owners Manual - Page 5

...Place cookware directly on rack for bake and for some models) functions. Use a microwave-safe, ovenproof dish or ... Rack
Use the short convection rack for manual cooking only. Features
Convection Element and Fan..., behind the metal screen.
To avoid damage to soil buildup, clean rack supports often.
Accessory Configurations
Air-Frying
Grilling
Roasting
A
B
Baking
A
C
B
Steaming...
Owners Manual - Page 6

... Install, place end of the filter into their slotted area wire mesh side up to three), touch Setup/Clock to scroll through "NORMAL," "MORE DONE," or "LESS DONE" within the first 20 seconds of the microwave oven. See the "Setting" section to begin cooking. Close bulb cover, replace vent grille, and secure with your model...
Owners Manual - Page 7

...oven is ON. Replacement Parts
Provided Accessories
■ Turntable
■ Air fry basket
■ Turntable support and rollers
■... microwave oven being used. for assistance.
On some models) is OFF.
See "Grill Element" in the...cycle. If the problem continues, call , please visit the "Troubleshooting" section at the beginning of cold water for service. See "General...
KitchenAid KMHC319LBS Reviews
We have not received any reviews for KitchenAid yet.