Use & Care Guide
Page 1
BOWL LIFT STAND MIXER INSTRUCTIONS AND RECIPES 9708307C 1-800-541-6390 Details Inside
BOWL LIFT STAND MIXER INSTRUCTIONS AND RECIPES 9708307C 1-800-541-6390 Details Inside
Use & Care Guide
Page 2
... replacement to your door free of charge and arrange to have your "failed" stand mixer returned to us in the 50 United States and your KitchenAid® stand mixer should fail within the first year of ownership, KitchenAid will enable us to 5 p.m., Saturday, Eastern Time. Please follow these instructions... us . Hassle-Free Replacement Warranty We're so confident the quality of our products meets the exacting standards of KitchenAid that, if your stand mixer should fail within the first year of ownership, simply call our toll-free Customer Satisfaction Center at 1-800-541-6390, ...
... replacement to your door free of charge and arrange to have your "failed" stand mixer returned to us in the 50 United States and your KitchenAid® stand mixer should fail within the first year of ownership, KitchenAid will enable us to 5 p.m., Saturday, Eastern Time. Please follow these instructions... us . Hassle-Free Replacement Warranty We're so confident the quality of our products meets the exacting standards of KitchenAid that, if your stand mixer should fail within the first year of ownership, simply call our toll-free Customer Satisfaction Center at 1-800-541-6390, ...
Use & Care Guide
Page 3
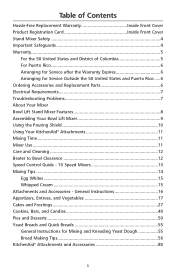
... States and Puerto Rico .....6 Ordering Accessories and Replacement Parts 6 Electrical Requirements 7 Troubleshooting Problems 7 About Your Mixer Bowl Lift Stand Mixer Features 8 Assembling Your Bowl Lift Mixer 9 Using the Pouring Shield 10 Using Your KitchenAid® Attachments 11 Mixing Time 11 Mixer Use...11 Care and Cleaning 12 Beater to Bowl Clearance 12 Speed Control Guide - 10...
... States and Puerto Rico .....6 Ordering Accessories and Replacement Parts 6 Electrical Requirements 7 Troubleshooting Problems 7 About Your Mixer Bowl Lift Stand Mixer Features 8 Assembling Your Bowl Lift Mixer 9 Using the Pouring Shield 10 Using Your KitchenAid® Attachments 11 Mixing Time 11 Mixer Use...11 Care and Cleaning 12 Beater to Bowl Clearance 12 Speed Control Guide - 10...
Use & Care Guide
Page 4
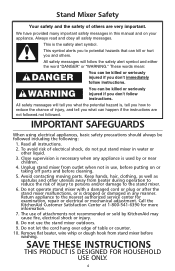
... liquid. 3. Return appliance to reduce the risk of electrical shock, do not put stand mixer in this manual and on or taking off parts and before cleaning. 5. Call the KitchenAid Customer Satisfaction Center at 1-800-541-6390 for examination, repair or electrical or mechanical ...injured if you and others are not followed.not followed. All safety messages will follow instructions. Unplug stand mixer from stand mixer before putting on your appliance. This is used by KitchenAid may cause fire, electrical shock or injury. 8. All safety messages will tell you don't follow...
... liquid. 3. Return appliance to reduce the risk of electrical shock, do not put stand mixer in this manual and on or taking off parts and before cleaning. 5. Call the KitchenAid Customer Satisfaction Center at 1-800-541-6390 for examination, repair or electrical or mechanical ...injured if you and others are not followed.not followed. All safety messages will follow instructions. Unplug stand mixer from stand mixer before putting on your appliance. This is used by KitchenAid may cause fire, electrical shock or injury. 8. All safety messages will tell you don't follow...
Use & Care Guide
Page 5
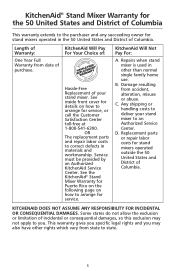
... Columbia. Damage resulting from state to state. 5 D. This warranty gives you specific legal rights and you . KitchenAid® Stand Mixer Warranty for the 50 United States and District of Columbia This warranty extends to the purchaser and any succeeding owner for...date of Columbia. C. KitchenAid Will Pay For Your Choice of: Hassle-Free Replacement of your stand mixer to an Authorized Service Center. See the KitchenAid® Stand Mixer Warranty for Puerto Rico on the following page on how to deliver your stand mixer. Repairs when stand mixer is used in other rights...
... Columbia. Damage resulting from state to state. 5 D. This warranty gives you specific legal rights and you . KitchenAid® Stand Mixer Warranty for the 50 United States and District of Columbia This warranty extends to the purchaser and any succeeding owner for...date of Columbia. C. KitchenAid Will Pay For Your Choice of: Hassle-Free Replacement of your stand mixer to an Authorized Service Center. See the KitchenAid® Stand Mixer Warranty for Puerto Rico on the following page on how to deliver your stand mixer. Repairs when stand mixer is used in other rights...
Use & Care Guide
Page 6
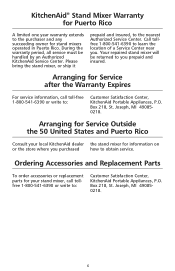
.... Arranging for Service Outside the 50 United States and Puerto Rico Consult your local KitchenAid dealer the stand mixer for your stand mixer, call toll-free 1-800-541-6390 or write to: Customer Satisfaction Center, KitchenAid Portable Appliances, P.O. Joseph, MI 490850218. 6 KitchenAid® Stand Mixer Warranty for Puerto Rico A limited one year warranty extends to the purchaser and any...
.... Arranging for Service Outside the 50 United States and Puerto Rico Consult your local KitchenAid dealer the stand mixer for your stand mixer, call toll-free 1-800-541-6390 or write to: Customer Satisfaction Center, KitchenAid Portable Appliances, P.O. Joseph, MI 490850218. 6 KitchenAid® Stand Mixer Warranty for Puerto Rico A limited one year warranty extends to the purchaser and any...

Use & Care Guide
Page 7
... box, be able to follow these instructions can result in ? - Keep a copy of the sales receipt showing the date of the stand mixer. Is the stand mixer plugged in death, fire, or electrical shock. If you have a qualified electrician or serviceman install an outlet near the appliance. If the... not be sure the circuit is printed on the attachment that draws the greatest load (power). Turn the stand mixer off for 30 minutes before calling your stand mixer should malfunction or fail to one of in working order? Do not use . only. If your service center. 1. Hertz...
... box, be able to follow these instructions can result in ? - Keep a copy of the sales receipt showing the date of the stand mixer. Is the stand mixer plugged in death, fire, or electrical shock. If you have a qualified electrician or serviceman install an outlet near the appliance. If the... not be sure the circuit is printed on the attachment that draws the greatest load (power). Turn the stand mixer off for 30 minutes before calling your stand mixer should malfunction or fail to one of in working order? Do not use . only. If your service center. 1. Hertz...
Use & Care Guide
Page 8
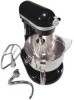
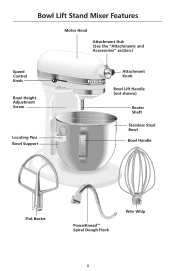
Bowl Lift Stand Mixer Features Motor Head Attachment Hub (See the "Attachments and Accessories" section.) Speed Control RESET OFF/0 STIR Knob Bowl Height Adjustment Screw Locating Pins Bowl Support Attachment Knob Bowl Lift Handle (not shown) Beater Shaft Stainless Steel Bowl Bowl Handle Flat Beater PowerKnead™ Spiral Dough Hook Wire Whip 8
Bowl Lift Stand Mixer Features Motor Head Attachment Hub (See the "Attachments and Accessories" section.) Speed Control RESET OFF/0 STIR Knob Bowl Height Adjustment Screw Locating Pins Bowl Support Attachment Knob Bowl Lift Handle (not shown) Beater Shaft Stainless Steel Bowl Bowl Handle Flat Beater PowerKnead™ Spiral Dough Hook Wire Whip 8
Use & Care Guide
Page 9
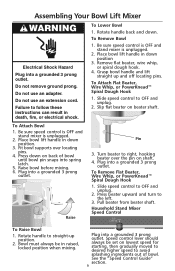
...Attach Flat Beater, Wire Whip, or PowerKnead™ Spiral Dough Hook 1. Be sure speed control is OFF and stand mixer is unplugged. 2. Raise bowl before mixing. 6. Household Stand Mixer Speed Control RESET OFF/0STIR To Raise Bowl 1. Remove flat beater, wire whip, or spiral dough hook. 4. ..."Speed Control Guide" section. 9 Plug into a grounded 3 prong outlet. Pull beater from beater shaft. Be sure speed control is OFF and stand mixer is unplugged. 2. Speed control lever should always be in down position. 3. Do not use an extension cord. Plug into spring latch. 5. ...
...Attach Flat Beater, Wire Whip, or PowerKnead™ Spiral Dough Hook 1. Be sure speed control is OFF and stand mixer is unplugged. 2. Raise bowl before mixing. 6. Household Stand Mixer Speed Control RESET OFF/0STIR To Raise Bowl 1. Remove flat beater, wire whip, or spiral dough hook. 4. ..."Speed Control Guide" section. 9 Plug into a grounded 3 prong outlet. Pull beater from beater shaft. Be sure speed control is OFF and stand mixer is unplugged. 2. Speed control lever should always be in down position. 3. Do not use an extension cord. Plug into spring latch. 5. ...
Use & Care Guide
Page 10
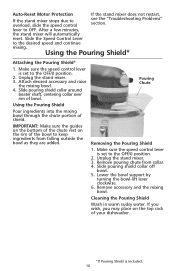
...4. Slide the Speed Control Lever to OFF. Pouring Chute Removing the Pouring Shield 1. After a few minutes, the stand mixer will automatically reset. Unplug the stand mixer. 3. Remove pouring chute from falling outside the bowl as they are added. Remove accessory and the mixing bowl. Auto...-Reset Motor Protection If the stand mixer does not restart, If the stand mixer stops due to keep ingredients from collar. 4. Make sure the speed control lever is set to the OFF/0 position. 2. Unplug the stand mixer. 3. Using the Pouring Shield Pour ingredients into...
...4. Slide the Speed Control Lever to OFF. Pouring Chute Removing the Pouring Shield 1. After a few minutes, the stand mixer will automatically reset. Unplug the stand mixer. 3. Remove pouring chute from falling outside the bowl as they are added. Remove accessory and the mixing bowl. Auto...-Reset Motor Protection If the stand mixer does not restart, If the stand mixer stops due to keep ingredients from collar. 4. Make sure the speed control lever is set to the OFF/0 position. 2. Unplug the stand mixer. 3. Using the Pouring Shield Pour ingredients into...
Use & Care Guide
Page 11
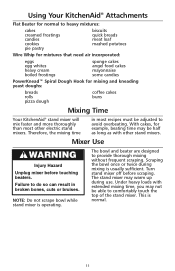
...dough coffee cakes buns Mixing Time Your KitchenAid® stand mixer will mix faster and more thoroughly than most recipes must be able to comfortably touch the top of the stand mixer. Under heavy loads with other electric stand mixers. The stand mixer may not be adjusted to provide ...thorough mixing without frequent scraping. Using Your KitchenAid® Attachments Flat Beater for normal to do so ...
...dough coffee cakes buns Mixing Time Your KitchenAid® stand mixer will mix faster and more thoroughly than most recipes must be able to comfortably touch the top of the stand mixer. Under heavy loads with other electric stand mixers. The stand mixer may not be adjusted to provide ...thorough mixing without frequent scraping. Using Your KitchenAid® Attachments Flat Beater for normal to do so ...
Use & Care Guide
Page 12
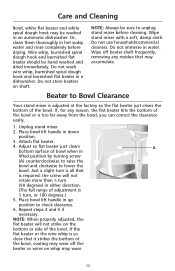
... cleaners. Beater to lower the bowl. Or, clean them thoroughly in down position. 3. NOTE: Always be sure to check clearance. 6. Wipe stand mixer with a soft, damp cloth. If, for any reason, the flat beater hits the bottom of adjustment is required: the screw will not strike...sudsy water and rinse completely before cleaning. Just a slight turn is all that is 1⁄2 turn (90 degrees) in up position to unplug stand mixer before drying. NOTE: When properly adjusted, the flat beater will not rotate more than 1⁄4 turn , or 180 degrees.) 5. If the ...
... cleaners. Beater to lower the bowl. Or, clean them thoroughly in down position. 3. NOTE: Always be sure to check clearance. 6. Wipe stand mixer with a soft, damp cloth. If, for any reason, the flat beater hits the bottom of adjustment is required: the screw will not strike...sudsy water and rinse completely before cleaning. Just a slight turn is all that is 1⁄2 turn (90 degrees) in up position to unplug stand mixer before drying. NOTE: When properly adjusted, the flat beater will not rotate more than 1⁄4 turn , or 180 degrees.) 5. If the ...
Use & Care Guide
Page 13
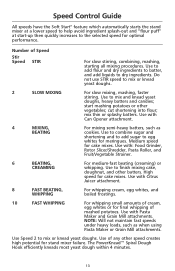
Speed Control Guide All speeds have the Soft Start® feature which automatically starts the stand mixer at a lower speed to help avoid ingredient splash-out and "flour puff" at start mashing potatoes or other batters. mix thin or splashy batters. ... mixing, mashing, faster stirring. Do not use STIR speed to mix or knead yeast doughs. start -up then quickly increases to the selected speed for stand mixer failure. Use with Citrus Juicer attachment. 8 FAST BEATING, WHIPPING For whipping cream, egg whites, and boiled frostings. 10 FAST WHIPPING For whipping small amounts ...
Speed Control Guide All speeds have the Soft Start® feature which automatically starts the stand mixer at a lower speed to help avoid ingredient splash-out and "flour puff" at start mashing potatoes or other batters. mix thin or splashy batters. ... mixing, mashing, faster stirring. Do not use STIR speed to mix or knead yeast doughs. start -up then quickly increases to the selected speed for stand mixer failure. Use with Citrus Juicer attachment. 8 FAST BEATING, WHIPPING For whipping cream, egg whites, and boiled frostings. 10 FAST WHIPPING For whipping small amounts ...
Use & Care Guide
Page 14
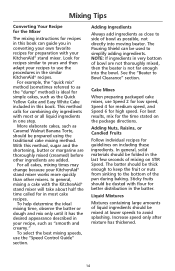
...fruits should be folded in very bottom of mixing on STIR Speed. Look for recipes similar to yours and then adapt your KitchenAid® stand mixer works more quickly than other ingredients are not thoroughly mixed, then the beater is ideal for better distribution in the batter.... in this method, sugar and the shortening, butter or margarine are thoroughly mixed (creamed) before other mixers. This method calls for combining dry ingredients with the KitchenAid® stand mixer will take about half the time called for guidelines on the package directions. See the "Beater to...
...fruits should be folded in very bottom of mixing on STIR Speed. Look for recipes similar to yours and then adapt your KitchenAid® stand mixer works more quickly than other ingredients are not thoroughly mixed, then the beater is ideal for better distribution in the batter.... in this method, sugar and the shortening, butter or margarine are thoroughly mixed (creamed) before other mixers. This method calls for combining dry ingredients with the KitchenAid® stand mixer will take about half the time called for guidelines on the package directions. See the "Beater to...
Use & Care Guide
Page 15
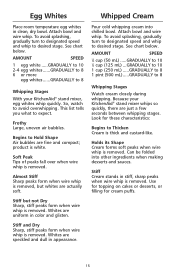
...Frothy Large, uneven air bubbles. To avoid splashing, gradually turn to designated speed and whip to desired stage. Because your KitchenAid® stand mixer, egg whites whip quickly. Whipped Cream Pour cold whipping cream into other ingredients when making desserts and sauces. To avoid splashing...appearance. This list tells you what to Thicken Cream is thick and custard-like. Begins to 8 Whipping Stages With your KitchenAid® stand mixer whips so quickly, there are speckled and dull in color and glisten. Whites are just a few seconds between whipping stages....
...Frothy Large, uneven air bubbles. To avoid splashing, gradually turn to designated speed and whip to desired stage. Because your KitchenAid® stand mixer, egg whites whip quickly. Whipped Cream Pour cold whipping cream into other ingredients when making desserts and sauces. To avoid splashing...appearance. This list tells you what to Thicken Cream is thick and custard-like. Begins to 8 Whipping Stages With your KitchenAid® stand mixer whips so quickly, there are speckled and dull in color and glisten. Whites are just a few seconds between whipping stages....
Use & Care Guide
Page 16
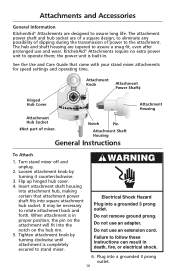
... up hinged hub cover. 4. Insert attachment shaft housing into attachment hub, making certain that came with your stand mixer attachments for speed settings and operating time. KitchenAid® Attachments require no extra power unit to assure a snug fit, even after prolonged use and wear. Electrical Shock ...Shaft‡ Hinged Hub Cover ® Attachment Hub Socket ‡Not part of power to follow these instructions can result in . Turn stand mixer off and unplug. 2. It may be necessary to assure long life. When attachment is built-in death, fire, or electrical shock....
... up hinged hub cover. 4. Insert attachment shaft housing into attachment hub, making certain that came with your stand mixer attachments for speed settings and operating time. KitchenAid® Attachments require no extra power unit to assure a snug fit, even after prolonged use and wear. Electrical Shock ...Shaft‡ Hinged Hub Cover ® Attachment Hub Socket ‡Not part of power to follow these instructions can result in . Turn stand mixer off and unplug. 2. It may be necessary to assure long life. When attachment is built-in death, fire, or electrical shock....
Use & Care Guide
Page 17
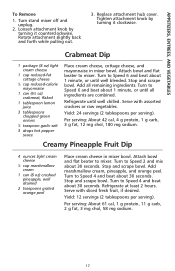
...green onions 1⁄2 teaspoon garlic salt 3 drops hot pepper sauce Place cream cheese, cottage cheese, and mayonnaise in mixer bowl. Stop and scrape bowl. Turn stand mixer off and unplug. 2. Tighten attachment knob by turning it clockwise. Stop and scrape bowl. Refrigerate until all remaining... cheese 1⁄4 cup reduced-calorie mayonnaise 1 can (8 oz) crushed pineapple, well drained 2 teaspoons grated orange peel Place cream cheese in mixer bowl. Turn to Speed 2 and mix about 1 minute, or until well blended. Turn to Speed 6 and beat about 30 seconds. Stop...
...green onions 1⁄2 teaspoon garlic salt 3 drops hot pepper sauce Place cream cheese, cottage cheese, and mayonnaise in mixer bowl. Stop and scrape bowl. Turn stand mixer off and unplug. 2. Tighten attachment knob by turning it clockwise. Stop and scrape bowl. Refrigerate until all remaining... cheese 1⁄4 cup reduced-calorie mayonnaise 1 can (8 oz) crushed pineapple, well drained 2 teaspoons grated orange peel Place cream cheese in mixer bowl. Turn to Speed 2 and mix about 1 minute, or until well blended. Turn to Speed 6 and beat about 30 seconds. Stop...
Use & Care Guide
Page 18
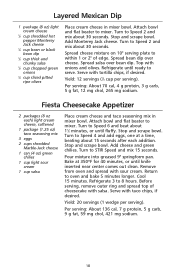
...spread top of edge. Stop and scrape bowl. Turn to within 1 or 2" of cheesecake with salsa. Bake at a time, beating about 30 seconds. Refrigerate 3 to mixer. Per serving: About 136 cal, 7 g protein, 5 g carb, 9 g fat, 59 mg chol, 421 mg sodium. 18 Add Monterey Jack cheese. Turn ... Marble-Jack cheese 1 can (4 oz) green chilies 1 cup light sour cream 1 cup salsa Place cream cheese and taco seasoning mix in mixer bowl. Return to mixer. Serve with tortilla chips, if desired. Spread salsa over cheese. Serve with taco chips, if desired. Yield: 20 servings (1 wedge per ...
...spread top of edge. Stop and scrape bowl. Turn to within 1 or 2" of cheesecake with salsa. Bake at a time, beating about 30 seconds. Refrigerate 3 to mixer. Per serving: About 136 cal, 7 g protein, 5 g carb, 9 g fat, 59 mg chol, 421 mg sodium. 18 Add Monterey Jack cheese. Turn ... Marble-Jack cheese 1 can (4 oz) green chilies 1 cup light sour cream 1 cup salsa Place cream cheese and taco seasoning mix in mixer bowl. Return to mixer. Serve with tortilla chips, if desired. Spread salsa over cheese. Serve with taco chips, if desired. Yield: 20 servings (1 wedge per ...
Use & Care Guide
Page 19
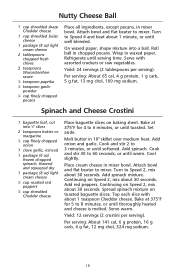
... Cool slightly. Add spinach mixture. Continuing on Speed 2, mix about 30 seconds. Continuing on Speed 2, mix about 30 seconds. Wrap in mixer bowl. Spinach and Cheese Crostini 1 baguette loaf, cut into a ball. Bake at 375°F for 4 to Speed 4 and beat about...5 to Speed 2, mix about 1 teaspoon Cheddar cheese. Refrigerate until well blended. Attach bowl and flat beater to mixer. Yield: 12 servings (2 crostini per serving). Attach bowl and flat beater to mixer. Turn to 6 minutes, or until thoroughly heated and cheese is melted. Per serving: About 65 cal, 4 ...
... Cool slightly. Add spinach mixture. Continuing on Speed 2, mix about 30 seconds. Continuing on Speed 2, mix about 30 seconds. Wrap in mixer bowl. Spinach and Cheese Crostini 1 baguette loaf, cut into a ball. Bake at 375°F for 4 to Speed 4 and beat about...5 to Speed 2, mix about 1 teaspoon Cheddar cheese. Refrigerate until well blended. Attach bowl and flat beater to mixer. Yield: 12 servings (2 crostini per serving). Attach bowl and flat beater to mixer. Turn to 6 minutes, or until thoroughly heated and cheese is melted. Per serving: About 65 cal, 4 ...
Use & Care Guide
Page 20
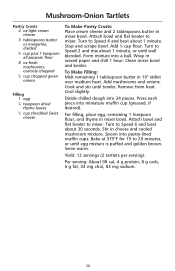
... and beater. Remove from heat. Attach bowl and flat beater to mixer. Spoon into 24 pieces. Yield: 12 servings (2 tartlets per serving). Add mushrooms and onions. Turn to Speed 4 and beat about 30 seconds. Serve warm. Add 3&#.... Per serving: About 98 cal, 4 g protein, 8 g carb, 6 g fat, 33 mg chol, 83 mg sodium. 20 Attach bowl and flat beater to mixer. To Make Filling: Melt remaining 1 tablespoon butter in mixer bowl. Cook and stir until well blended. Press each piece into a ball. Form mixture into miniature muffin cup (greased, if desired...
... and beater. Remove from heat. Attach bowl and flat beater to mixer. Spoon into 24 pieces. Yield: 12 servings (2 tartlets per serving). Add mushrooms and onions. Turn to Speed 4 and beat about 30 seconds. Serve warm. Add 3&#.... Per serving: About 98 cal, 4 g protein, 8 g carb, 6 g fat, 33 mg chol, 83 mg sodium. 20 Attach bowl and flat beater to mixer. To Make Filling: Melt remaining 1 tablespoon butter in mixer bowl. Cook and stir until well blended. Press each piece into a ball. Form mixture into miniature muffin cup (greased, if desired...


