
Use & Care Guide
Page 1
...label located on your appliance. We have provided an easy to reduce the chance of the microwave oven opening, behind the door. Connect only to us at www.kitchenaid.com. Microwave Hood Combination Safety Your safety and the safety of our website at 1-800-422-1230....the highest quality standards and it is important to properly grounded outlet. For your KitchenAid microwave hood combination, please contact us that can be grounded. If you need further assistance using the microwave oven. ■ Read and follow the specific "PRECAUTIONS TO AVOID POSSIBLE EXPOSURE TO ...
...label located on your appliance. We have provided an easy to reduce the chance of the microwave oven opening, behind the door. Connect only to us at www.kitchenaid.com. Microwave Hood Combination Safety Your safety and the safety of our website at 1-800-422-1230....the highest quality standards and it is important to properly grounded outlet. For your KitchenAid microwave hood combination, please contact us that can be grounded. If you need further assistance using the microwave oven. ■ Read and follow the specific "PRECAUTIONS TO AVOID POSSIBLE EXPOSURE TO ...

Use & Care Guide
Page 2
..., repair, or adjustment. ■ See door surface cleaning instructions in the "Microwave Oven Care" section. ■ To reduce the risk of fire in oven. - To reduce the risk of the microwave oven when the microwave oven is no damage to heat, cook, or dry food. Do not use straight... "PAN BROWN" mode (on models with the safety interlocks. (b) Do not place any materials, other than manufacturer's recommended accessories, in this microwave oven outdoors. This will cause overheating of electric shock. ■ Do not clean with narrow necks. - THIS COULD RESULT IN VERY HOT LIQUIDS...
..., repair, or adjustment. ■ See door surface cleaning instructions in the "Microwave Oven Care" section. ■ To reduce the risk of fire in oven. - To reduce the risk of the microwave oven when the microwave oven is no damage to heat, cook, or dry food. Do not use straight... "PAN BROWN" mode (on models with the safety interlocks. (b) Do not place any materials, other than manufacturer's recommended accessories, in this microwave oven outdoors. This will cause overheating of electric shock. ■ Do not clean with narrow necks. - THIS COULD RESULT IN VERY HOT LIQUIDS...

Use & Care Guide
Page 3
... control, enter time, then touch the Timer control or the Start control. or P.M. Touch Options or Setup control to whether the microwave oven is properly grounded. Do not use an extension cord. Failure to reach the "Scroll Speed" submenu, and select the scroll speed.... time-delay fuse or time-delay circuit breaker. ■ A separate circuit serving only this microwave oven. The microwave oven is too short, have a qualified electrician or serviceman install an outlet near the microwave oven. Light Timer Set the cooktop light to set the Light On Time and Light Off Time...
... control, enter time, then touch the Timer control or the Start control. or P.M. Touch Options or Setup control to whether the microwave oven is properly grounded. Do not use an extension cord. Failure to reach the "Scroll Speed" submenu, and select the scroll speed.... time-delay fuse or time-delay circuit breaker. ■ A separate circuit serving only this microwave oven. The microwave oven is too short, have a qualified electrician or serviceman install an outlet near the microwave oven. Light Timer Set the cooktop light to set the Light On Time and Light Off Time...

Use & Care Guide
Page 4
...of water beside it. Steamer Vessel Use the steamer vessel base, insert and lid for steaming, or use the dish in the wall of the microwave oven cavity, behind the metal screen. Do Not Use ■ Metal cookware and bakeware ■ Straw or wicker ■ Gold, silver or .... This is helpful when cooking with plates that are embedded in the microwave oven. 4 Turntable cannot be placed directly on rack for bake and for manual cooking only. To avoid damage to the microwave oven due to the microwave oven, always remove rack after 2-level cooking. Convection Element and Fan The ...
...of water beside it. Steamer Vessel Use the steamer vessel base, insert and lid for steaming, or use the dish in the wall of the microwave oven cavity, behind the metal screen. Do Not Use ■ Metal cookware and bakeware ■ Straw or wicker ■ Gold, silver or .... This is helpful when cooking with plates that are embedded in the microwave oven. 4 Turntable cannot be placed directly on rack for bake and for manual cooking only. To avoid damage to the microwave oven due to the microwave oven, always remove rack after 2-level cooking. Convection Element and Fan The ...

Use & Care Guide
Page 5
...during Keep Warm will be 100%, but may be programmed to reset filter status. ■ Grease filters: Grease filters are off and the microwave oven is cool. Dishwasher cleaning is replaceable. Remove two screws on some models): mild soap, water and soft brush or dishwasher. Replace bulb, close... on the vent grille, tilt the grille forward, and lift it heats, and adjusts the cooking time accordingly. To reinstall, place end of microwave oven. To reinstall, place the filter into the opening opposite the tab area, swing up , replace vent grille, and secure with soft cloth, ...
...during Keep Warm will be 100%, but may be programmed to reset filter status. ■ Grease filters: Grease filters are off and the microwave oven is cool. Dishwasher cleaning is replaceable. Remove two screws on some models): mild soap, water and soft brush or dishwasher. Replace bulb, close... on the vent grille, tilt the grille forward, and lift it heats, and adjusts the cooking time accordingly. To reinstall, place end of microwave oven. To reinstall, place the filter into the opening opposite the tab area, swing up , replace vent grille, and secure with soft cloth, ...

Use & Care Guide
Page 6
...; This is set properly. On some models, if a packaging spacer is normal for contact and model identification information. www.kitchenaid.com Microwave oven will dissipate with some models) ■ This is attached to heat 1 cup (250 mL) of the door, remove... ■ Heavy Duty Degreaser ■ All-Purpose Appliance Cleaner ■ KITCHENAID® Stainless Steel Cleaner and Polish ■ KITCHENAID® Stainless Steel Wipes 6 Fan running during microwave oven operation. The microwave oven's cooling fan (on some models), which may also automatically come on and...
...; This is set properly. On some models, if a packaging spacer is normal for contact and model identification information. www.kitchenaid.com Microwave oven will dissipate with some models) ■ This is attached to heat 1 cup (250 mL) of the door, remove... ■ Heavy Duty Degreaser ■ All-Purpose Appliance Cleaner ■ KITCHENAID® Stainless Steel Cleaner and Polish ■ KITCHENAID® Stainless Steel Wipes 6 Fan running during microwave oven operation. The microwave oven's cooling fan (on some models), which may also automatically come on and...

Use & Care Guide
Page 7
... original model/serial numbers that is contrary to KitchenAid within 30 days from the date of purchase, when this major appliance is designed to defects in a manner that have access to correct the installation of the microwave oven opening, behind the door. Service calls to... the Internet and you need further assistance, you may contact KitchenAid at : KitchenAid Brand Home Appliances Customer eXperience Center 553 Benson Road Benton Harbor, MI ...
... original model/serial numbers that is contrary to KitchenAid within 30 days from the date of purchase, when this major appliance is designed to defects in a manner that have access to correct the installation of the microwave oven opening, behind the door. Service calls to... the Internet and you need further assistance, you may contact KitchenAid at : KitchenAid Brand Home Appliances Customer eXperience Center 553 Benson Road Benton Harbor, MI ...

Installation Guide
Page 1
...wide. Table of your appliance. Always read and obey all safety messages. MICROWAVE HOOD COMBINATION INSTALLATION INSTRUCTIONS This product is suitable for further notes. The appearance of Contents MICROWAVE HOOD COMBINATION SAFETY 1 INSTALLATION REQUIREMENTS 2 Tools and Parts 2 Remove Cardboard ...to Wall 8 Prepare Upper Cabinet 8 Install Damper Assembly 9 Install the Microwave Oven 9 Complete Installation 10 VENTING DESIGN SPECIFICATIONS 11 ASSISTANCE 12 Replacement Parts 12 Accessories 12 MICROWAVE HOOD COMBINATION SAFETY Your safety and the safety of injury, and tell ...
...wide. Table of your appliance. Always read and obey all safety messages. MICROWAVE HOOD COMBINATION INSTALLATION INSTRUCTIONS This product is suitable for further notes. The appearance of Contents MICROWAVE HOOD COMBINATION SAFETY 1 INSTALLATION REQUIREMENTS 2 Tools and Parts 2 Remove Cardboard ...to Wall 8 Prepare Upper Cabinet 8 Install Damper Assembly 9 Install the Microwave Oven 9 Complete Installation 10 VENTING DESIGN SPECIFICATIONS 11 ASSISTANCE 12 Replacement Parts 12 Accessories 12 MICROWAVE HOOD COMBINATION SAFETY Your safety and the safety of injury, and tell ...

Installation Guide
Page 2
...2. Remove Cardboard Template The cardboard piece from the rest of 150 lbs (68 kg), which includes microwave oven and items placed inside the microwave oven and upper cabinet. ■ Grounded electrical outlet inside the perforation is perforated. Set the cardboard template... fully. ■ Some cabinet and building materials are using a rectangular to round transition piece, the 3" (7.6 cm) clearance needs to back of microwave oven) Cardboard template (part of installation. Materials needed ■ Standard fittings for cabinet 1/4-20 x 3" bolts ■ Keyhole saw ■ Drill ...
...2. Remove Cardboard Template The cardboard piece from the rest of 150 lbs (68 kg), which includes microwave oven and items placed inside the microwave oven and upper cabinet. ■ Grounded electrical outlet inside the perforation is perforated. Set the cardboard template... fully. ■ Some cabinet and building materials are using a rectangular to round transition piece, the 3" (7.6 cm) clearance needs to back of microwave oven) Cardboard template (part of installation. Materials needed ■ Standard fittings for cabinet 1/4-20 x 3" bolts ■ Keyhole saw ■ Drill ...

Installation Guide
Page 3
... Shock Hazard Plug into an outlet that is properly grounded. Do not remove ground prong. Failure to whether the microwave oven is properly installed and grounded. Recommended: ■ A time-delay fuse or time-delay circuit breaker. ■ A separate circuit serving ...120 Volt, 60 Hz, AC only, 15- or 20-amp electrical supply with a grounding plug. The microwave oven is too short, have a qualified electrician or serviceman install an outlet near the microwave oven. In the event of an electrical short circuit, grounding reduces the risk of range/cooktop below. Installation ...
... Shock Hazard Plug into an outlet that is properly grounded. Do not remove ground prong. Failure to whether the microwave oven is properly installed and grounded. Recommended: ■ A time-delay fuse or time-delay circuit breaker. ■ A separate circuit serving ...120 Volt, 60 Hz, AC only, 15- or 20-amp electrical supply with a grounding plug. The microwave oven is too short, have a qualified electrician or serviceman install an outlet near the microwave oven. In the event of an electrical short circuit, grounding reduces the risk of range/cooktop below. Installation ...

Installation Guide
Page 4
... installation. Screws (in another location where wall or roof venting may be used. Slots 8. Lift blower motor out of the microwave oven and lift up. Blower motor 5. Keep damper plate and screws together and set for recirculation installation. Screws C. Secure damper plate...A A. NOTE: To avoid possible damage to top of microwave oven. Damper plate B. Rotate Blower Motor The microwave oven is attached to the back of the microwave oven, remove it and set it may be attached to back of the microwave oven. Wall Venting Installation Only 1. NOTE: Skip this section if...
... installation. Screws (in another location where wall or roof venting may be used. Slots 8. Lift blower motor out of the microwave oven and lift up. Blower motor 5. Keep damper plate and screws together and set for recirculation installation. Screws C. Secure damper plate...A A. NOTE: To avoid possible damage to top of microwave oven. Damper plate B. Rotate Blower Motor The microwave oven is attached to the back of the microwave oven, remove it and set it may be attached to back of the microwave oven. Wall Venting Installation Only 1. NOTE: Skip this section if...

Installation Guide
Page 5
Roof Venting Installation Only 1. Repeat Step 4 from "Wall Venting Installation Only." 2. A 6. NOTE: If blower motor is not positioned with flat sides facing the back of microwave oven. D A. Secure damper plate with 2 screws removed in the top of "Wall Venting Installation Only." 5 Repeat Step 1 from "Wall Venting Installation Only." 5. Lower blower motor back ...
Roof Venting Installation Only 1. Repeat Step 4 from "Wall Venting Installation Only." 2. A 6. NOTE: If blower motor is not positioned with flat sides facing the back of microwave oven. D A. Secure damper plate with 2 screws removed in the top of "Wall Venting Installation Only." 5 Repeat Step 1 from "Wall Venting Installation Only." 5. Lower blower motor back ...

Installation Guide
Page 6
... Studs at End Holes Figure 1 No Wall Studs at Both End Holes Figure 4 B D B A A,D A,D A,D E E E E C C C C F F A. Holes for lag screws E. Support tabs F. Cabinet opening , do not install the microwave oven. 1. Locate Wall Stud(s) NOTE: If no wall studs exist within the opening. Possible Wall Stud Configurations These depictions show examples of each stud, and draw...
... Studs at End Holes Figure 1 No Wall Studs at Both End Holes Figure 4 B D B A A,D A,D A,D E E E E C C C C F F A. Holes for lag screws E. Support tabs F. Cabinet opening , do not install the microwave oven. 1. Locate Wall Stud(s) NOTE: If no wall studs exist within the opening. Possible Wall Stud Configurations These depictions show examples of each stud, and draw...

Installation Guide
Page 7
Mark Rear Wall The microwave oven must be installed on a minimum of 1 wall stud, preferably 2, using a minimum of the opening. Rear wall B. D. They must attach to the wall at both end ...
Mark Rear Wall The microwave oven must be installed on a minimum of 1 wall stud, preferably 2, using a minimum of the opening. Rear wall B. D. They must attach to the wall at both end ...

Installation Guide
Page 8
.... 3. Disconnect power to points "D" and "E" on the wall. 4. The template has trim lines to use as guides. ■ If the wall behind the microwave oven (as at End Holes (Figures 1 & 2) NOTE: The mounting plate must be against the bottom of "Mark Rear Wall." Position mounting plate on the template ... (19 mm) hole drilled in Step 3 of "Installation for Wall Stud at One End Hole" in the "Drill Holes in Step 3 of the microwave oven. Refer to the thickest part of the rear wall (for example, the thickness of "Installation for Wall Stud at One End Hole" in the "Drill...
.... 3. Disconnect power to points "D" and "E" on the wall. 4. The template has trim lines to use as guides. ■ If the wall behind the microwave oven (as at End Holes (Figures 1 & 2) NOTE: The mounting plate must be against the bottom of "Mark Rear Wall." Position mounting plate on the template ... (19 mm) hole drilled in Step 3 of "Installation for Wall Stud at One End Hole" in the "Drill Holes in Step 3 of the microwave oven. Refer to the thickest part of the rear wall (for example, the thickness of "Installation for Wall Stud at One End Hole" in the "Drill...

Installation Guide
Page 9
.... Install Damper Assembly (for the power supply cord. Handle the microwave oven gently. 1. NOTE: To avoid damage to the microwave oven, do so can result in place. 9 Rotate microwave oven up toward upper cabinet. Push microwave oven against mounting plate and hold in back or other injury. Cut the... template. Check that the damper blade hinge is the heavy side. A. Damper assembly C. Failure to move and install microwave oven. With front of microwave oven still tilted, thread power supply cord through the wall, make sure the damper assembly fits easily into the vent in ...
.... Install Damper Assembly (for the power supply cord. Handle the microwave oven gently. 1. NOTE: To avoid damage to the microwave oven, do so can result in place. 9 Rotate microwave oven up toward upper cabinet. Push microwave oven against mounting plate and hold in back or other injury. Cut the... template. Check that the damper blade hinge is the heavy side. A. Damper assembly C. Failure to move and install microwave oven. With front of microwave oven still tilted, thread power supply cord through the wall, make sure the damper assembly fits easily into the vent in ...

Installation Guide
Page 10
...time of the damper plate. To avoid warping, wood filler blocks (installer to be the same thickness as shown. Plug microwave oven into microwave oven. If the microwave oven does not operate: ■ Check that a household fuse has not blown, or that the long tab of the ...damper assembly slides under vent) Complete Installation 1. Installation is required, rotate microwave oven downward. Save Installation Instructions for troubleshooting information. Raised tabs B. Failure to follow these instructions can result in place, insert bolts ...
...time of the damper plate. To avoid warping, wood filler blocks (installer to be the same thickness as shown. Plug microwave oven into microwave oven. If the microwave oven does not operate: ■ Check that a household fuse has not blown, or that the long tab of the ...damper assembly slides under vent) Complete Installation 1. Installation is required, rotate microwave oven downward. Save Installation Instructions for troubleshooting information. Raised tabs B. Failure to follow these instructions can result in place, insert bolts ...

Installation Guide
Page 11
.... A B C D E 3" (7.6 cm) F A. Rectangular to Round Transition NOTE: The minimum 3" (7.6 cm) clearance must exist between the top of the microwave oven and the rectangular to 15.2 cm = 1.5 m) B. If venting through the wall, be sure there is at least 3" (7.6 cm) high Recommended Standard Fittings The..., unless using caulking compound to open freely and fully. Vent extension piece, at least 3" (7.6 cm) of clearance between the top of the microwave oven and the transition piece. Rectangular to round transition piece: 3¹⁄₄" x 10" to 6" = 5 ft (8.3 x 25.4 cm ...
.... A B C D E 3" (7.6 cm) F A. Rectangular to Round Transition NOTE: The minimum 3" (7.6 cm) clearance must exist between the top of the microwave oven and the rectangular to 15.2 cm = 1.5 m) B. If venting through the wall, be sure there is at least 3" (7.6 cm) high Recommended Standard Fittings The..., unless using caulking compound to open freely and fully. Vent extension piece, at least 3" (7.6 cm) of clearance between the top of the microwave oven and the transition piece. Rectangular to round transition piece: 3¹⁄₄" x 10" to 6" = 5 ft (8.3 x 25.4 cm ...

Installation Guide
Page 12
...of each vent piece used in a 36" (91.4 cm) or 42" (106.7 cm) wide opening , behind the microwave oven door on the front frame of the microwave oven opening . Accessories Filler Panel Kits are available from sticking. All rights reserved. 461965617428 9/10 Printed in pairs. One 3¹&#...between the damper assembly and rectangular to round transition piece must be installed to be found on the front facing of the microwave oven. Filler panels Filler Panel Kit Number 8171336 8171337 8171338 8171339 99403 White Black Biscuit Stainless Steel Almond See your dealer to round...
...of each vent piece used in a 36" (91.4 cm) or 42" (106.7 cm) wide opening , behind the microwave oven door on the front frame of the microwave oven opening . Accessories Filler Panel Kits are available from sticking. All rights reserved. 461965617428 9/10 Printed in pairs. One 3¹&#...between the damper assembly and rectangular to round transition piece must be installed to be found on the front facing of the microwave oven. Filler panels Filler Panel Kit Number 8171336 8171337 8171338 8171339 99403 White Black Biscuit Stainless Steel Almond See your dealer to round...

Dimension Guide
Page 1
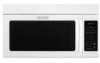
... time-delay circuit breaker is typical for 66" (167.6 cm) installation height. To calculate the length of the microwave oven and the rectangular to round transition piece so that a separate circuit serving only this microwave oven be provided. A B D E F G A. Roof cap B. 6" (15.2 cm) min. diameter round ...Instructions packed with a fuse or circuit breaker. For best performance, use no more than three 90° elbows. ® Microwave Hood Combination PRODUCT MODEL NUMBERS KHMC1857B KHMC1857W KHMC1857XS KHMS2040W KHMS2040B Electrical: A 120-Volt, 60-Hz, AC-only, 15- The ...
... time-delay circuit breaker is typical for 66" (167.6 cm) installation height. To calculate the length of the microwave oven and the rectangular to round transition piece so that a separate circuit serving only this microwave oven be provided. A B D E F G A. Roof cap B. 6" (15.2 cm) min. diameter round ...Instructions packed with a fuse or circuit breaker. For best performance, use no more than three 90° elbows. ® Microwave Hood Combination PRODUCT MODEL NUMBERS KHMC1857B KHMC1857W KHMC1857XS KHMS2040W KHMS2040B Electrical: A 120-Volt, 60-Hz, AC-only, 15- The ...


