
Use & Care Guide
Page 6
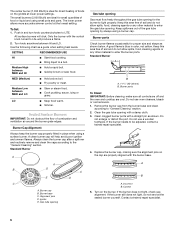
.... 3. SETTING RECOMMENDED USE HI ■ Start food cooking. ■ Bring liquid to LITE. MED (Medium) ■ Hold a slow boil. ■ Fry poultry or meat. Medium Low between MED and HI ■ Hold a rapid boil. ■ Quickly brown or sear food. Sealed Surface Burners IMPORTANT: Do not obstruct the flow of food...
.... 3. SETTING RECOMMENDED USE HI ■ Start food cooking. ■ Bring liquid to LITE. MED (Medium) ■ Hold a slow boil. ■ Fry poultry or meat. Medium Low between MED and HI ■ Hold a rapid boil. ■ Quickly brown or sear food. Sealed Surface Burners IMPORTANT: Do not obstruct the flow of food...
Use & Care Guide
Page 7
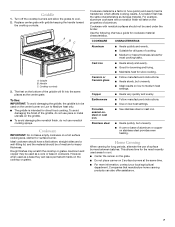
... and evenly heat is best for the most cooking tasks. Stainless steel ■ Heats quickly, but unevenly. ■ Ideal results on low heat settings. To avoid damaging the finish of medium-to cool. ■ Center the canner on the grate. ■ Do not ... finish, do not use pans or metal utensils on stainless steel provides even heating. Earthenware ■ Follow manufacturer's instructions. ■ Use on low to cool. 2. Cooktop controls 3. Aluminum and copper may scratch the cooktop or grates. A nonstick finish has the same characteristics as a guide ...
... and evenly heat is best for the most cooking tasks. Stainless steel ■ Heats quickly, but unevenly. ■ Ideal results on low heat settings. To avoid damaging the finish of medium-to cool. ■ Center the canner on the grate. ■ Do not ... finish, do not use pans or metal utensils on stainless steel provides even heating. Earthenware ■ Follow manufacturer's instructions. ■ Use on low to cool. 2. Cooktop controls 3. Aluminum and copper may scratch the cooktop or grates. A nonstick finish has the same characteristics as a guide ...
Use & Care Guide
Page 9
... from right to left in the lower text area. 3. Press (1) for High but can be reset during the countdown by repeating the above steps. "LOW. Press (1) for OFF" scrolls twice from right to left in a 12-hour or 24-hour format. "OFF Selected" will scroll twice from right ... timer. The temperature units have been changed . Tones Tones are disabled or defeatured. "OFF Selected" will scroll twice in the upper text area. "Low Selected" scrolls twice from right to left in the lower text area. Press OPTIONS four times until "SOUND" appears in the lower text area. Press...
... from right to left in the lower text area. 3. Press (1) for High but can be reset during the countdown by repeating the above steps. "LOW. Press (1) for OFF" scrolls twice from right to left in a 12-hour or 24-hour format. "OFF Selected" will scroll twice from right ... timer. The temperature units have been changed . Tones Tones are disabled or defeatured. "OFF Selected" will scroll twice in the upper text area. "Low Selected" scrolls twice from right to left in the lower text area. Press OPTIONS four times until "SOUND" appears in the lower text area. Press...
Use & Care Guide
Page 13
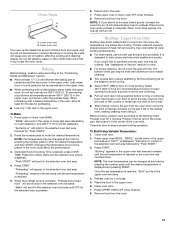
... the selected oven text area followed by pressing the number pads to the "Positioning Racks and Bakeware" section. ■ Allow at least 30 minutes for low-temperature broiling of fish, poultry or meat may be turned. ■ After broiling, remove the pan from the oven. 13 Broiling - Very thin cuts of...
... the selected oven text area followed by pressing the number pads to the "Positioning Racks and Bakeware" section. ■ Allow at least 30 minutes for low-temperature broiling of fish, poultry or meat may be turned. ■ After broiling, remove the pan from the oven. 13 Broiling - Very thin cuts of...

Use & Care Guide
Page 14
.... ■ Cover food to keep food moist ■ Prior to enter the desired temperature then pressing START. The Slow Cook range can be changed at low temperatures for best results. When the set temperature is best for the desired oven. 3. Place food in position 2 for long periods of time. Preheating is...
.... ■ Cover food to keep food moist ■ Prior to enter the desired temperature then pressing START. The Slow Cook range can be changed at low temperatures for best results. When the set temperature is best for the desired oven. 3. Place food in position 2 for long periods of time. Preheating is...
Use & Care Guide
Page 22
...? Clear the display. There will not operate ■ Is the oven door open ? The fan will stop the fan. Oven temperature too high or too low ■ Does the oven temperature calibration need adjustment? If it reappears, call for service. See "Self-Cleaning Cycle" section. ■ Has a delay start been set...
...? Clear the display. There will not operate ■ Is the oven door open ? The fan will stop the fan. Oven temperature too high or too low ■ Does the oven temperature calibration need adjustment? If it reappears, call for service. See "Self-Cleaning Cycle" section. ■ Has a delay start been set...
Installation Guide
Page 9
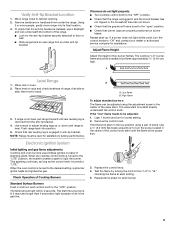
...the flame is plugged in place of top burner flames. The first time a burner is removed from under anti-tip bracket. Low flame B. Hold the knob stem in the low position using the adjustment screw in and turn the screw located in oven. 2. Verify Anti-Tip Bracket Location 1. Using 2 ... Operation of air in anti-tip bracket. Remove the control knob. A Level Range 1. Adjust Flame Height Adjust the height of standing pilots. If the "low" flame needs to floor or wall. ■ Slide range back so rear range foot is engaged in the gas line. To check that rear leveling...
...the flame is plugged in place of top burner flames. The first time a burner is removed from under anti-tip bracket. Low flame B. Hold the knob stem in the low position using the adjustment screw in and turn the screw located in oven. 2. Verify Anti-Tip Bracket Location 1. Using 2 ... Operation of air in anti-tip bracket. Remove the control knob. A Level Range 1. Adjust Flame Height Adjust the height of standing pilots. If the "low" flame needs to floor or wall. ■ Slide range back so rear range foot is engaged in the gas line. To check that rear leveling...