Owners Manual
Page 2
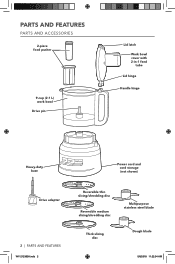
PARTS AND FEATURES PARTS AND ACCESSORIES 2-piece food pusher 9-cup (2.1 L) work bowl Drive pin Lid latch Work bowl cover with 2-in-1 feed tube Lid hinge Handle hinge Heavy-duty base Power cord and cord storage (not shown) Drive adapter 2 | PARTS AND FEATURES W11212365A.indb 2 Reversible thin slicing/shredding disc Reversible medium slicing/shredding disc Multipurpose stainless steel blade Thick slicing disc Dough blade 5/8/2018 11:22:54 AM
PARTS AND FEATURES PARTS AND ACCESSORIES 2-piece food pusher 9-cup (2.1 L) work bowl Drive pin Lid latch Work bowl cover with 2-in-1 feed tube Lid hinge Handle hinge Heavy-duty base Power cord and cord storage (not shown) Drive adapter 2 | PARTS AND FEATURES W11212365A.indb 2 Reversible thin slicing/shredding disc Reversible medium slicing/shredding disc Multipurpose stainless steel blade Thick slicing disc Dough blade 5/8/2018 11:22:54 AM
Owners Manual
Page 3
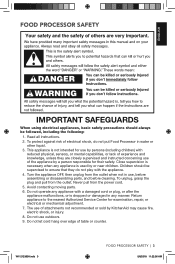
... persons (including children) with the appliance. 4. To protect against risk of attachments not recommended or sold by a person responsible for their safety. Never pull from the power cord. 5. Return appliance to ensure that they are closely supervised and instructed concerning use , before assembling or disassembling parts, and before cleaning. Do not use by or near children. Avoid contacting moving...
... persons (including children) with the appliance. 4. To protect against risk of attachments not recommended or sold by a person responsible for their safety. Never pull from the power cord. 5. Return appliance to ensure that they are closely supervised and instructed concerning use , before assembling or disassembling parts, and before cleaning. Do not use by or near children. Avoid contacting moving...
Owners Manual
Page 4
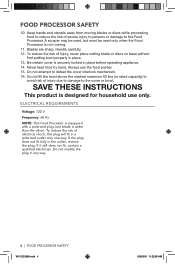
... use the food pusher. 15. Handle carefully. 12. Do not modify the plug in place before operating appliance. 14. Always use only. Be certain cover is equipped with a polarized plug (one way. Never feed food by hand. Do not fill the bowl above the marked maximum fill line (or rated capacity) to avoid risk of injury, never place cutting blade or discs on base...
... use the food pusher. 15. Handle carefully. 12. Do not modify the plug in place before operating appliance. 14. Always use only. Be certain cover is equipped with a polarized plug (one way. Never feed food by hand. Do not fill the bowl above the marked maximum fill line (or rated capacity) to avoid risk of injury, never place cutting blade or discs on base...
Owners Manual
Page 5
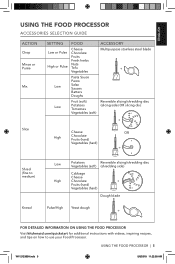
... (soft) ACCESSORY Multipurpose stainless steel blade + Reversible slicing/shredding disc (slicing side) OR slicing disc + High Cheese Chocolate Fruits (hard) Vegetables (hard) OR + Shred (fine to medium) Knead Low High Potatoes Reversible slicing/shredding disc Vegetables (soft) (shredding side) Cabbage Cheese Chocolate + Fruits (hard) Vegetables (hard) Dough blade Pulse/High Yeast dough + FOR DETAILED INFORMATION ON USING THE FOOD PROCESSOR Visit kitchenaid.com/quickstart for additional instructions with videos, inspiring recipes, and tips...
... (soft) ACCESSORY Multipurpose stainless steel blade + Reversible slicing/shredding disc (slicing side) OR slicing disc + High Cheese Chocolate Fruits (hard) Vegetables (hard) OR + Shred (fine to medium) Knead Low High Potatoes Reversible slicing/shredding disc Vegetables (soft) (shredding side) Cabbage Cheese Chocolate + Fruits (hard) Vegetables (hard) Dough blade Pulse/High Yeast dough + FOR DETAILED INFORMATION ON USING THE FOOD PROCESSOR Visit kitchenaid.com/quickstart for additional instructions with videos, inspiring recipes, and tips...
Owners Manual
Page 6
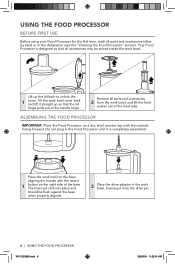
... Remove all parts and accessories 2 from the work bowl. Lift up so that the lid hinge pulls out of the handle hinge. Your Food Processor is completely assembled. Tilt the work bowl on the base, aligning the handle with the raised 1 button on a dry, level counter top with the controls facing forward. ASSEMBLING THE FOOD PROCESSOR IMPORTANT: Place the Food Processor on the right side of the feed tube. Place the work bowl cover...
... Remove all parts and accessories 2 from the work bowl. Lift up so that the lid hinge pulls out of the handle hinge. Your Food Processor is completely assembled. Tilt the work bowl on the base, aligning the handle with the raised 1 button on a dry, level counter top with the controls facing forward. ASSEMBLING THE FOOD PROCESSOR IMPORTANT: Place the Food Processor on the right side of the feed tube. Place the work bowl cover...

Owners Manual
Page 7
... the locked position. NOTE: Your Food Processor will not operate unless the work bowl cover is fully closed and the work bowl is closed, 4 push the lid hinge down into the handle hinge on the base. Install the work bowl and close the cover. INSTALLING THE MULTIPURPOSE BLADE OR DOUGH BLADE Place the blade on the drive adapter. 1 Rotate the blade so it falls down to the base of assembly, install the desired blade or disc before attaching the work bowl cover is...
... the locked position. NOTE: Your Food Processor will not operate unless the work bowl cover is fully closed and the work bowl is closed, 4 push the lid hinge down into the handle hinge on the base. Install the work bowl and close the cover. INSTALLING THE MULTIPURPOSE BLADE OR DOUGH BLADE Place the blade on the drive adapter. 1 Rotate the blade so it falls down to the base of assembly, install the desired blade or disc before attaching the work bowl cover is...

Owners Manual
Page 8
Install the work bowl cover, and be 3 sure the lid latch is facing up. 1 To shred: Turn the disc so that the raised slicing blade is pushed down to the locked position. 8 | USING THE FOOD PROCESSOR W11212365A.indb 8 5/8/2018 11:23:04 AM Alignment marks The disc can be level with the top of the bowl for storage. Hold the disc by its center hub and lower it again...
Install the work bowl cover, and be 3 sure the lid latch is facing up. 1 To shred: Turn the disc so that the raised slicing blade is pushed down to the locked position. 8 | USING THE FOOD PROCESSOR W11212365A.indb 8 5/8/2018 11:23:04 AM Alignment marks The disc can be level with the top of the bowl for storage. Hold the disc by its center hub and lower it again...
Owners Manual
Page 9
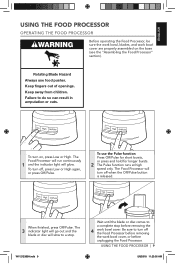
... the Food Processor before removing the work bowl cover are properly assembled on , press Low or High. The Food Processor will turn off , press Low or High again, or press Off/Pulse. When finished, press Off/Pulse. The 3 indicator light will go out and the blade or disc will glow. ENGLISH USING THE FOOD PROCESSOR OPERATING THE FOOD PROCESSOR Before operating the Food Processor, be sure the work bowl, blades, and work bowl cover, or before unplugging the Food Processor...
... the Food Processor before removing the work bowl cover are properly assembled on , press Low or High. The Food Processor will turn off , press Low or High again, or press Off/Pulse. When finished, press Off/Pulse. The 3 indicator light will go out and the blade or disc will glow. ENGLISH USING THE FOOD PROCESSOR OPERATING THE FOOD PROCESSOR Before operating the Food Processor, be sure the work bowl, blades, and work bowl cover, or before unplugging the Food Processor...
Owners Manual
Page 10
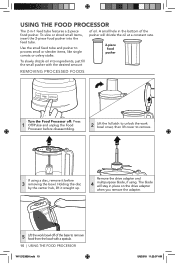
...:07 AM A small hole in the bottom of the pusher will stay in -1 feed tube features a 2-piece food pusher. Remove the drive adapter and 4 multipurpose blade, if using a disc, remove it straight up. USING THE FOOD PROCESSOR The 2-in place on the drive adapter when you remove the adapter. 5 Lift the work bowl cover, then lift cover to remove. Holding the disc by the center hub, lift it before disassembling. 2 Lift the lid latch to unlock the work bowl off : Press...
...:07 AM A small hole in the bottom of the pusher will stay in -1 feed tube features a 2-piece food pusher. Remove the drive adapter and 4 multipurpose blade, if using a disc, remove it straight up. USING THE FOOD PROCESSOR The 2-in place on the drive adapter when you remove the adapter. 5 Lift the work bowl cover, then lift cover to remove. Holding the disc by the center hub, lift it before disassembling. 2 Lift the lid latch to unlock the work bowl off : Press...
Owners Manual
Page 11
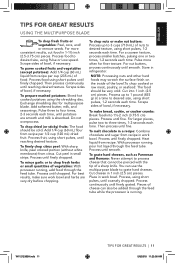
... and sugar from recipe in work bowl. Scrape sides of cheese can use the multipurpose blade to desired texture, using short pulses, until potatoes are very dry before chopping. To make nut butters: Process up to 1 pound (455 g) at a time to desired size, using short pulses until finely chopped. Process continuously until smooth. Pulse more consistent results, cut food in 1 inch (2.5 cm) pieces. Process until finely grated...
... and sugar from recipe in work bowl. Scrape sides of cheese can use the multipurpose blade to desired texture, using short pulses, until potatoes are very dry before chopping. To make nut butters: Process up to 1 pound (455 g) at a time to desired size, using short pulses until finely chopped. Process continuously until smooth. Pulse more consistent results, cut food in 1 inch (2.5 cm) pieces. Process until finely grated...
Owners Manual
Page 12
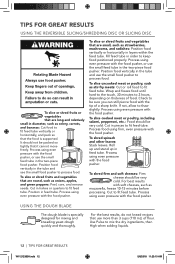
... dough blade is supported. Position food vertically in the tube and use the small feed tube in the two-piece food pusher. Check to process food. Cut in pieces to 2 hours, depending on thickness of a sharp knife. Roll up and stand up in feed tube. Wrap and freeze food until hard to the touch, 30 minutes to fit feed tube. Process using even pressure with the food pusher. Fill feed tube in order to fit feed tube. To slice...
... dough blade is supported. Position food vertically in the tube and use the small feed tube in the two-piece food pusher. Check to process food. Cut in pieces to 2 hours, depending on thickness of a sharp knife. Roll up and stand up in feed tube. Wrap and freeze food until hard to the touch, 30 minutes to fit feed tube. Process using even pressure with the food pusher. Fill feed tube in order to fit feed tube. To slice...
Owners Manual
Page 13
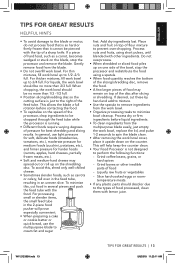
... be chopped through the feed tube while the processor is running. • Different foods require varying degrees of flour mixture to cream fat and sugar first. If a piece of food processed, clean them with other inedible parts of a sharp knife. Grind coffee beans, grains, or hard spices -- Slice hard-cooked eggs or roomtemperature meats. • If any plastic parts should discolor due to the types...
... be chopped through the feed tube while the processor is running. • Different foods require varying degrees of flour mixture to cream fat and sugar first. If a piece of food processed, clean them with other inedible parts of a sharp knife. Grind coffee beans, grains, or hard spices -- Slice hard-cooked eggs or roomtemperature meats. • If any plastic parts should discolor due to the types...
Owners Manual
Page 14
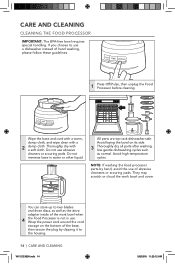
... not use of hand washing, please follow these guidelines. 1 Press Off/Pulse, then unplug the Food Processor before cleaning. CARE AND CLEANING CLEANING THE FOOD PROCESSOR IMPORTANT: The BPA-free bowl requires special handling. Thoroughly dry with a 2 damp cloth. Use gentle dishwashing cycles such as the drive adapter inside of the work bowl and cover. Wrap the power cord around the cord storage on its side. 3 Thoroughly dry all parts after washing...
... not use of hand washing, please follow these guidelines. 1 Press Off/Pulse, then unplug the Food Processor before cleaning. CARE AND CLEANING CLEANING THE FOOD PROCESSOR IMPORTANT: The BPA-free bowl requires special handling. Thoroughly dry with a 2 damp cloth. Use gentle dishwashing cycles such as the drive adapter inside of the work bowl and cover. Wrap the power cord around the cord storage on its side. 3 Thoroughly dry all parts after washing...
Owners Manual
Page 15
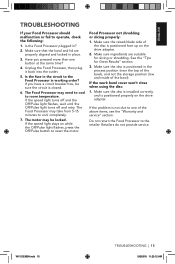
... and service" section. If you pressed more than one of the disc is closed. 6. If the work bowl cover won't close when using the disc: 1. W11212365A.indb 15 TROUBLESHOOTING | 15 5/8/2018 11:23:12 AM Make sure that the bowl and lid are suitable for Great Results" section. 3. The motor may be sure the circuit is positioned face up on the drive adapter. 2. The Food Processor...
... and service" section. If you pressed more than one of the disc is closed. 6. If the work bowl cover won't close when using the disc: 1. W11212365A.indb 15 TROUBLESHOOTING | 15 5/8/2018 11:23:12 AM Make sure that the bowl and lid are suitable for Great Results" section. 3. The motor may be sure the circuit is positioned face up on the drive adapter. 2. The Food Processor...
Owners Manual
Page 16
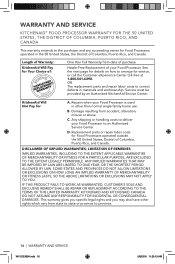
... handling costs to deliver your Food Processor is used in materials and workmanship. DISCLAIMER OF IMPLIED WARRANTIES; Service must be provided by an Authorized KitchenAid Service Center. This warranty gives you specific ...replacement parts and repair labor costs to arrange for Your Choice of: One Year Full Warranty from accident, alteration, misuse or abuse. Length of Warranty: KitchenAid Will Pay for service, or call the Customer eXperience Center toll-free at 1-800-541-6390. D. Hassle-Free Replacement of Columbia, Puerto Rico, and Canada. Replacement parts or repair...
... handling costs to deliver your Food Processor is used in materials and workmanship. DISCLAIMER OF IMPLIED WARRANTIES; Service must be provided by an Authorized KitchenAid Service Center. This warranty gives you specific ...replacement parts and repair labor costs to arrange for Your Choice of: One Year Full Warranty from accident, alteration, misuse or abuse. Length of Warranty: KitchenAid Will Pay for service, or call the Customer eXperience Center toll-free at 1-800-541-6390. D. Hassle-Free Replacement of Columbia, Puerto Rico, and Canada. Replacement parts or repair...
Owners Manual
Page 17
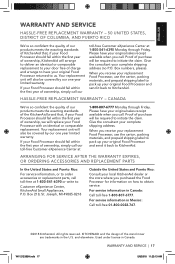
...:23:13 AM If your Food Processor should fail within the first year of ownership, simply call our toll-free Customer eXperience Center at 1-800-541-6390 or write to: Customer eXperience Center, KitchenAid Small Appliances, P.O. Give the consultant your complete shipping address. ARRANGING FOR SERVICE AFTER THE WARRANTY EXPIRES, OR ORDERING ACCESSORIES AND REPLACEMENT PARTS In the United States and...
...:23:13 AM If your Food Processor should fail within the first year of ownership, simply call our toll-free Customer eXperience Center at 1-800-541-6390 or write to: Customer eXperience Center, KitchenAid Small Appliances, P.O. Give the consultant your complete shipping address. ARRANGING FOR SERVICE AFTER THE WARRANTY EXPIRES, OR ORDERING ACCESSORIES AND REPLACEMENT PARTS In the United States and...


