
Owners Manual
Page 2
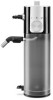
PARTS AND FEATURES 5 4 3 2 1 12 13 14 6 11 7 8 10 9 1 Storage container 2 Milk dispenser tube 3 Function knob 4 Steam port 5 Froth level adjustment knob 6 Brush 7 Milk tank lid 2 W11418293A.indb 2 8 Milk hose 9 Milk tank 10 Milk hose connector 11 Milk hose clip 12 Hot water function 13 Hot milk function 14 Froth milk function 4/7/2020 1:15:32 PM
PARTS AND FEATURES 5 4 3 2 1 12 13 14 6 11 7 8 10 9 1 Storage container 2 Milk dispenser tube 3 Function knob 4 Steam port 5 Froth level adjustment knob 6 Brush 7 Milk tank lid 2 W11418293A.indb 2 8 Milk hose 9 Milk tank 10 Milk hose connector 11 Milk hose clip 12 Hot water function 13 Hot milk function 14 Froth milk function 4/7/2020 1:15:32 PM

Owners Manual
Page 3
... is necessary when any appliance is designed for their safety. SAVE THESE INSTRUCTIONS This product is used by a person responsible for household use outdoors. 9. Make sure the steam/water flow stops completely before cleaning. Do not use . 12. This appliance is used by or near children. 6. Do not clean the Milk Frother Attachment with reduced physical, sensory, or mental capabilities, or lack...
... is necessary when any appliance is designed for their safety. SAVE THESE INSTRUCTIONS This product is used by a person responsible for household use outdoors. 9. Make sure the steam/water flow stops completely before cleaning. Do not use . 12. This appliance is used by or near children. 6. Do not clean the Milk Frother Attachment with reduced physical, sensory, or mental capabilities, or lack...

Owners Manual
Page 4
... release button to use , clean all parts and accessories. (See "Care and Cleaning" section). 1 2 Assembling Milk dispenser: Remove the Storage container and insert the Milk dispenser tube. Align Steam port to aid in the Milk hose connector. PRODUCT ASSEMBLY Before first use . 4 W11418293A.indb 4 4/7/2020 1:15:33 PM Also, you hear a click. Firmly insert the Milk hose in assembly. 3 Remove the Milk tank lid. Your Espresso Machine with the cold milk and replace the Milk tank lid. Direct the Milk...
... release button to use , clean all parts and accessories. (See "Care and Cleaning" section). 1 2 Assembling Milk dispenser: Remove the Storage container and insert the Milk dispenser tube. Align Steam port to aid in the Milk hose connector. PRODUCT ASSEMBLY Before first use . 4 W11418293A.indb 4 4/7/2020 1:15:33 PM Also, you hear a click. Firmly insert the Milk hose in assembly. 3 Remove the Milk tank lid. Your Espresso Machine with the cold milk and replace the Milk tank lid. Direct the Milk...

Owners Manual
Page 5
... throughout the automatic frothing cycle by rotating the Froth level adjustment knob. 2 12 Align Function knob on the Espresso Machine to 1 or 2 (1 for less milk and 2 for more milk). 4 Place the desired cup below the Portafilter and Milk dispenser. Toggle the Dose button to start with 90 Degrees rotation from the screwed down location. 3 12 Turn On the Espresso Machine and toggle...
... throughout the automatic frothing cycle by rotating the Froth level adjustment knob. 2 12 Align Function knob on the Espresso Machine to 1 or 2 (1 for less milk and 2 for more milk). 4 Place the desired cup below the Portafilter and Milk dispenser. Toggle the Dose button to start with 90 Degrees rotation from the screwed down location. 3 12 Turn On the Espresso Machine and toggle...

Owners Manual
Page 6
Press button on the Espresso Machine to start the cycle. 2 12 Align the Function knob on the Espresso Machine to start the cycle. 6 W11418293A.indb 6 4/7/2020 1:15:35 PM FOR HOT WATER 1 Press button on the Milk Frother Attachment to the Hot water function. 3 Turn On the Espresso Machine and toggle the Mode button to 1 or 2 (1 for less water and 2 for more water). 4 12 Place the desired cup below the Portafilter and Milk dispenser. Toggle the Dose button to Water. PRODUCT USAGE 3 4 12 Place the desired cup below the Portafilter and Milk dispenser.
Press button on the Espresso Machine to start the cycle. 2 12 Align the Function knob on the Espresso Machine to start the cycle. 6 W11418293A.indb 6 4/7/2020 1:15:35 PM FOR HOT WATER 1 Press button on the Milk Frother Attachment to the Hot water function. 3 Turn On the Espresso Machine and toggle the Mode button to 1 or 2 (1 for less water and 2 for more water). 4 12 Place the desired cup below the Portafilter and Milk dispenser. Toggle the Dose button to Water. PRODUCT USAGE 3 4 12 Place the desired cup below the Portafilter and Milk dispenser.

Owners Manual
Page 7
... cloth. CARE AND CLEANING CLEANING AFTER EVERY USE 1 2 Remove the Milk tank and lid and store in a refrigerator. 3 Wipe down the exterior of clean water. 4 12 Place a cup beneath the Milk dispenser. Insert the Milk hose into your cup. NOTE: Milk Frother Attachment must be saved. To store the Milk hose, bend the Milk hose and attach it into the Milk hose clip. ENGLISH PRODUCT USAGE PROGRAMMING FUNCTION The Espresso Machine is...
... cloth. CARE AND CLEANING CLEANING AFTER EVERY USE 1 2 Remove the Milk tank and lid and store in a refrigerator. 3 Wipe down the exterior of clean water. 4 12 Place a cup beneath the Milk dispenser. Insert the Milk hose into your cup. NOTE: Milk Frother Attachment must be saved. To store the Milk hose, bend the Milk hose and attach it into the Milk hose clip. ENGLISH PRODUCT USAGE PROGRAMMING FUNCTION The Espresso Machine is...

Owners Manual
Page 8
CARE AND CLEANING DEEP CLEANING THE MILK FROTHER ATTACHMENT 1 2 Press the Steam wand release button on Espresso Machine to reach any small areas for Milk Frothers. Pull out the Function knob. 5 Remove the Decorative plate. Remove the Black rubber frother component by pulling and twisting in warm, soapy water or cleaning solution designed for thorough cleaning. Thoroughly rinse with clean water and dry with warm soapy water. Remove the...
CARE AND CLEANING DEEP CLEANING THE MILK FROTHER ATTACHMENT 1 2 Press the Steam wand release button on Espresso Machine to reach any small areas for Milk Frothers. Pull out the Function knob. 5 Remove the Decorative plate. Remove the Black rubber frother component by pulling and twisting in warm, soapy water or cleaning solution designed for thorough cleaning. Thoroughly rinse with clean water and dry with warm soapy water. Remove the...

Owners Manual
Page 9
... Please refer to the "Product Assembly" section. If the problem is not being dispensed: The Milk hose and Milk hose connector may not be properly assembled. ENGLISH REASSEMBLING THE PRODUCT 1 2 Follow the steps of the above items: See the "Arranging for Service" chapter in the "Warranty and Service" section. Do not return the Espresso Machine to assemble again. If milk is not due to one...
... Please refer to the "Product Assembly" section. If the problem is not being dispensed: The Milk hose and Milk hose connector may not be properly assembled. ENGLISH REASSEMBLING THE PRODUCT 1 2 Follow the steps of the above items: See the "Arranging for Service" chapter in the "Warranty and Service" section. Do not return the Espresso Machine to assemble again. If milk is not due to one...
Owners Manual
Page 10
.... D. Replacement parts or repair labor costs for : A. Damage resulting from date of purchase. DISCLAIMER OF IMPLIED WARRANTIES; WARRANTY AND SERVICE KITCHENAID® MILK FROTHER ATTACHMENT WARRANTY FOR THE 50 UNITED STATES, THE DISTRICT OF COLUMBIA, PUERTO RICO, AND CANADA This warranty extends to the purchaser and any succeeding owner for Milk Frother Attachment operated in materials and workmanship. KitchenAid Will Not Pay for Milk Frother Attachment operated...
.... D. Replacement parts or repair labor costs for : A. Damage resulting from date of purchase. DISCLAIMER OF IMPLIED WARRANTIES; WARRANTY AND SERVICE KITCHENAID® MILK FROTHER ATTACHMENT WARRANTY FOR THE 50 UNITED STATES, THE DISTRICT OF COLUMBIA, PUERTO RICO, AND CANADA This warranty extends to the purchaser and any succeeding owner for Milk Frother Attachment operated in materials and workmanship. KitchenAid Will Not Pay for Milk Frother Attachment operated...

Owners Manual
Page 11
... Center at 1-800-541-6390 or write to: Customer eXperience Center, KitchenAid Small Appliances, P.O. Please have your original Milk Frother Attachment returned to us. ARRANGING FOR SERVICE AFTER THE WARRANTY EXPIRES, OR ORDERING ACCESSORIES AND REPLACEMENT PARTS In the United States and Puerto Rico: For service information, or to order accessories or replacement parts, call . Box 218, St. Proof of purchase will...
... Center at 1-800-541-6390 or write to: Customer eXperience Center, KitchenAid Small Appliances, P.O. Please have your original Milk Frother Attachment returned to us. ARRANGING FOR SERVICE AFTER THE WARRANTY EXPIRES, OR ORDERING ACCESSORIES AND REPLACEMENT PARTS In the United States and Puerto Rico: For service information, or to order accessories or replacement parts, call . Box 218, St. Proof of purchase will...


