Use and Care Guide
Page 1
KitcheinAid® Use and Care Guide I I I , d Superba Electric Thermal-Convection Oven With Electronic Clock Models: KEBS177 Single Oven KEBS277 Double Oven
KitcheinAid® Use and Care Guide I I I , d Superba Electric Thermal-Convection Oven With Electronic Clock Models: KEBS177 Single Oven KEBS277 Double Oven
Use and Care Guide
Page 2
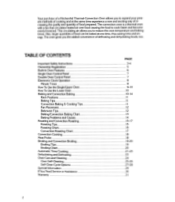
...added convenience of defrosting and dehydrating foods, too. Your purchase of a KitchenAid Thermal-Convection Oven allows you to expand your present methods of cooking and at one time,...Registration Built-In Oven Features Single Oven Control Panel Double Oven Control Panel Electronic Clock Operation Minute Timer How To Use the Single/Upper Oven How To Use the Lower Oven Baking and ...Oven Self-Cleaning Self-Clean Cycle Options Special Information If You Need Service or Assistance Warranty PAGE 3-4 5 6 7 7 8 8 9-10 10 10-14 11 11 11 12 12 13 14 15-17 15 16 17 18 18 19-20 19 20 21-23 23 24 25-26 27...
...added convenience of defrosting and dehydrating foods, too. Your purchase of a KitchenAid Thermal-Convection Oven allows you to expand your present methods of cooking and at one time,...Registration Built-In Oven Features Single Oven Control Panel Double Oven Control Panel Electronic Clock Operation Minute Timer How To Use the Single/Upper Oven How To Use the Lower Oven Baking and ...Oven Self-Cleaning Self-Clean Cycle Options Special Information If You Need Service or Assistance Warranty PAGE 3-4 5 6 7 7 8 8 9-10 10 10-14 11 11 11 12 12 13 14 15-17 15 16 17 18 18 19-20 19 20 21-23 23 24 25-26 27...
Use and Care Guide
Page 3
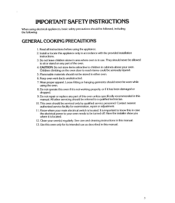
...accordance with the provided installation instructions. 3. Do not operate this oven if it is not working properly, or if it is located. All other servicing should not be stored in case the electrical power to reach items could be serviced only by qualified service ...personnel. Install or locate this manual. Flammable materials should be worn while using the oven. 8. Know where your oven(s) regularly. Clean your main electrical switch is located. 12. Loose-fitting or hanging garments should be seriously injured. 5. It is in this...
...accordance with the provided installation instructions. 3. Do not operate this oven if it is not working properly, or if it is located. All other servicing should not be stored in case the electrical power to reach items could be serviced only by qualified service ...personnel. Install or locate this manual. Flammable materials should be worn while using the oven. 8. Know where your oven(s) regularly. Clean your main electrical switch is located. 12. Loose-fitting or hanging garments should be seriously injured. 5. It is in this...
Use and Care Guide
Page 4
... and surfaces near these surfaces are dark in or around any part of pressure may be moved while oven is cool. Before self-cleaning the oven, remove broiler pan, broiler grid, oven racks and other flammable materials contact heating elements or interior surfaces of any kind should be used in ...8. Never use water on fire. 4. Let hot air or steam escape before removing or replacing food. 5. Heating elements may cause container to your oven and the bulb is essential for warming or heating the room. 2. Hand clean only areas recommended in injury. 10. Do not use your...
... and surfaces near these surfaces are dark in or around any part of pressure may be moved while oven is cool. Before self-cleaning the oven, remove broiler pan, broiler grid, oven racks and other flammable materials contact heating elements or interior surfaces of any kind should be used in ...8. Never use water on fire. 4. Let hot air or steam escape before removing or replacing food. 5. Heating elements may cause container to your oven and the bulb is essential for warming or heating the room. 2. Hand clean only areas recommended in injury. 10. Do not use your...
Use and Care Guide
Page 5
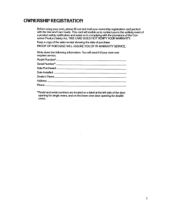
... the unlikely event of the Consumer Product Safety Act. Write down the following information. OWNERSHIP REGISTRATION Before using your oven, please fill out and mail your oven ever requires service. PROOF OF PURCHASE WILL ASSURE YOU OF IN-WARRANTY SERVICE. You will enable us in complying ...with the Use and Care Guide. Keep a copy of the sales receipt showing the date of the door opening for single ovens, and on the lower oven door opening for double ovens. 5 Model Number* Serial Numbers Date Purchased Date Installed Dealer's Name Address Phone *Model and serial numbers are located ...
... the unlikely event of the Consumer Product Safety Act. Write down the following information. OWNERSHIP REGISTRATION Before using your oven, please fill out and mail your oven ever requires service. PROOF OF PURCHASE WILL ASSURE YOU OF IN-WARRANTY SERVICE. You will enable us in complying ...with the Use and Care Guide. Keep a copy of the sales receipt showing the date of the door opening for single ovens, and on the lower oven door opening for double ovens. 5 Model Number* Serial Numbers Date Purchased Date Installed Dealer's Name Address Phone *Model and serial numbers are located ...
Use and Care Guide
Page 7
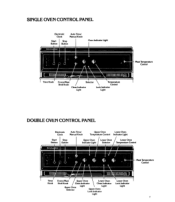
SINGLE OVEN CONTROL PANEL Electronic Clock Auto Time/ Manual Knob Start Stop Button Button Oven Indicator Light SIEMIZrNIMAILIEWElk Time Knob Econo/Mwd Broil Knob Selector Clean Indicator Light Temperature Control Lock Indicator Light Meat Temperature Control DOUBLE OVEN CONTROL PANEL Electronic Clock Auto Time/ Manual Knob Upper Oven Lower Oven Temperature Control Indicator Light Start I Stop Button...
SINGLE OVEN CONTROL PANEL Electronic Clock Auto Time/ Manual Knob Start Stop Button Button Oven Indicator Light SIEMIZrNIMAILIEWElk Time Knob Econo/Mwd Broil Knob Selector Clean Indicator Light Temperature Control Lock Indicator Light Meat Temperature Control DOUBLE OVEN CONTROL PANEL Electronic Clock Auto Time/ Manual Knob Upper Oven Lower Oven Temperature Control Indicator Light Start I Stop Button...

Use and Care Guide
Page 8
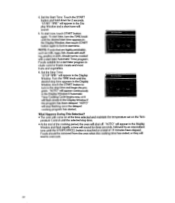
It consists of short and long-term cooking, or any other activity. When your oven is first connected to the power in your home, 00:00 will be displayed ...20 minutes to the time of the STOP/CANCEL button will cancel the Minute Timer and two touches will not turn the oven ON or OFF. To use by touching the START button. the display will immediately change to : 5 and "TIMER..."12:00") will appear in the Display Window and flash rapidly and a tone will sound for both the single/upper and lower ovens. One touch of day. The Minute Timer is in the Window. The Time Cooking or Self-Clean program...
It consists of short and long-term cooking, or any other activity. When your oven is first connected to the power in your home, 00:00 will be displayed ...20 minutes to the time of the STOP/CANCEL button will cancel the Minute Timer and two touches will not turn the oven ON or OFF. To use by touching the START button. the display will immediately change to : 5 and "TIMER..."12:00") will appear in the Display Window and flash rapidly and a tone will sound for both the single/upper and lower ovens. One touch of day. The Minute Timer is in the Window. The Time Cooking or Self-Clean program...
Use and Care Guide
Page 9
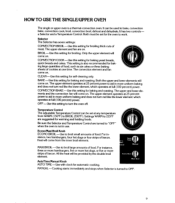
HOW TO USE THE SINGLE/UPPER OVEN The single or upper oven is not in more uniform baking and does not turn the oven off. This setting is turned to aid in more uniform baking and does not turn red like the lower element, which operates at any temperature ... or more hamburgers, five or more hot dogs, or five or more strips of food. BROIL -Use this setting for the oven to "OFF" when the oven is a thermal-convection oven. Settings WARM to 225°F are turned to work. Both must be provided by the double broil element. The convection element and...
HOW TO USE THE SINGLE/UPPER OVEN The single or upper oven is not in more uniform baking and does not turn the oven off. This setting is turned to aid in more uniform baking and does not turn red like the lower element, which operates at any temperature ... or more hamburgers, five or more hot dogs, or five or more strips of food. BROIL -Use this setting for the oven to "OFF" when the oven is a thermal-convection oven. Settings WARM to 225°F are turned to work. Both must be provided by the double broil element. The convection element and...
Use and Care Guide
Page 10
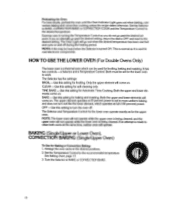
... desired positions. 2. Both the upper and lower elements come on . The Selector and Temperature Control for the lower oven operate exactly as it is turned ON. BAKING (Single/Upper or Lower Oven), CONVECTION BAKING (Single/Upper Oven) To Use for self-cleaning only. Turn the Selector to the recommended temperature. If you do not go...
... desired positions. 2. Both the upper and lower elements come on . The Selector and Temperature Control for the lower oven operate exactly as it is turned ON. BAKING (Single/Upper or Lower Oven), CONVECTION BAKING (Single/Upper Oven) To Use for self-cleaning only. Turn the Selector to the recommended temperature. If you do not go...
Use and Care Guide
Page 11
... time cooking functions. (See page 13 for the single/upper oven. the other straight rack in position 1, the closest to be an equal distance apart. Heat is offset. Your KitchenAid oven has four rack positions. Single/Upper Oven rack position recommendation -place one time, each sheet ...should be removed when the desired degree of the oven. and the offset rack in position 2. Convection Baking and Cooking...
... time cooking functions. (See page 13 for the single/upper oven. the other straight rack in position 1, the closest to be an equal distance apart. Heat is offset. Your KitchenAid oven has four rack positions. Single/Upper Oven rack position recommendation -place one time, each sheet ...should be removed when the desired degree of the oven. and the offset rack in position 2. Convection Baking and Cooking...
Use and Care Guide
Page 12
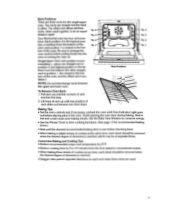
...be directly above another. • Allow 11to 2 inches of air space around all sides of the rack, such as a large cookie sheet • Stagger pans in recipes to the oven door for even air circulation. • When ...except when baking pies or yeast breads. • Cookies, biscuits and cream puffs bake best on the oven rack below the pan. Old or darkened pans are used and turn the pan so that the long...evenly and will cause uneven baking. • Bake cakes, cookies, quick breads and muffins in the Oven If you wish to use only one rack during baking if the pan covers most of each pan...
...be directly above another. • Allow 11to 2 inches of air space around all sides of the rack, such as a large cookie sheet • Stagger pans in recipes to the oven door for even air circulation. • When ...except when baking pies or yeast breads. • Cookies, biscuits and cream puffs bake best on the oven rack below the pan. Old or darkened pans are used and turn the pan so that the long...evenly and will cause uneven baking. • Bake cakes, cookies, quick breads and muffins in the Oven If you wish to use only one rack during baking if the pan covers most of each pan...
Use and Care Guide
Page 14
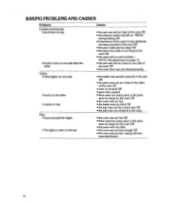
...; brown more on one side than the other Cakes: • rises higher on one side of the oven OR • the oven door was not closed properly. • the batter was spread unevenly in the pan OR • the...pans were warped. • there were too many pans or the pans were too large for the oven OR • the oven was too hot. • the batter was too thick OR • the pan was not the ...correct size OR • the pan was not centered in the oven OR • the pan's sides are too deep OR • the pan is overcrowded - NOTE: Pan placement on ...
...; brown more on one side than the other Cakes: • rises higher on one side of the oven OR • the oven door was not closed properly. • the batter was spread unevenly in the pan OR • the...pans were warped. • there were too many pans or the pans were too large for the oven OR • the oven was too hot. • the batter was too thick OR • the pan was not the ...correct size OR • the pan was not centered in the oven OR • the pan's sides are too deep OR • the pan is overcrowded - NOTE: Pan placement on ...
Use and Care Guide
Page 15
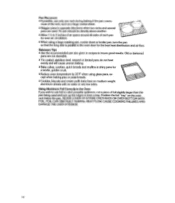
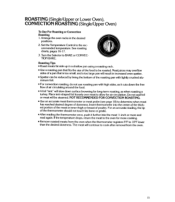
ROASTING (Single/Upper or Lower Oven), CONVECTION ROASTING (Single/Upper Oven) To Use For Roasting or Convection Roasting 1. If the temperature drops, return the meat to the oven for air circulation. Arrange the oven racks in increased oven spatter. • Spatter can be reduced by lining the bottom... surface browning for long-term roasting, as when roasting a turkey. Insert thermometer into the meat 1/2 inch or more cooking. • Remove roasted meats from the oven. 15 NOT RECOMMENDED FOR CONVECTION ROASTING. • Use an accurate meat thermometer or meat probe (see...
ROASTING (Single/Upper or Lower Oven), CONVECTION ROASTING (Single/Upper Oven) To Use For Roasting or Convection Roasting 1. If the temperature drops, return the meat to the oven for air circulation. Arrange the oven racks in increased oven spatter. • Spatter can be reduced by lining the bottom... surface browning for long-term roasting, as when roasting a turkey. Insert thermometer into the meat 1/2 inch or more cooking. • Remove roasted meats from the oven. 15 NOT RECOMMENDED FOR CONVECTION ROASTING. • Use an accurate meat thermometer or meat probe (see...
Use and Care Guide
Page 18
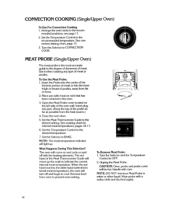
... and dry thoroughly. 18 Turn the Selector to OFF. 2. flj MEAT PROBE (Single/Upper Oven) The meat probe is the most accurate guide to cool. To Use the Meat Probe: 1. Close the oven door. 5. CAUTION: Oven, probe and probe cover will light up the scale to BAKE. NOTE: DO ... temperature. The red hand of the Meat Thermometer Guide will turn off with meat on the left side of the oven wall. When the red hand reaches the white hand (selected internal meat temperature), the oven will move up . CONVECTION COOKING (Single/Upper Oven) To Use For Convection Cooking 1.
... and dry thoroughly. 18 Turn the Selector to OFF. 2. flj MEAT PROBE (Single/Upper Oven) The meat probe is the most accurate guide to cool. To Use the Meat Probe: 1. Close the oven door. 5. CAUTION: Oven, probe and probe cover will light up the scale to BAKE. NOTE: DO ... temperature. The red hand of the Meat Thermometer Guide will turn off with meat on the left side of the oven wall. When the red hand reaches the white hand (selected internal meat temperature), the oven will move up . CONVECTION COOKING (Single/Upper Oven) To Use For Convection Cooking 1.
Use and Care Guide
Page 19
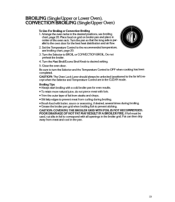
...chart, page 20. 3. Set the Temperature Control to prevent sticking. Turn the Maxi Broil/Econo Broil Knob to BROIL or CONVECTION BROIL. CAUTION: The Oven Lock Lever should always be used, cut slits in foil to correspond with butter, sauce or seasoning, if desired, several times during broiling. •.... 5. Be sure to turn the Selector and the Temperature Control to prevent meat from meat and cool in the pan. 19 BROILING (Single/Upper or Lower Oven), CONVECTION BROILING (Single/Upper Oven) To Use For Broiling or Convection Broiling 1. Do not preheat the broiler. 4. Close the...
...chart, page 20. 3. Set the Temperature Control to prevent sticking. Turn the Maxi Broil/Econo Broil Knob to BROIL or CONVECTION BROIL. CAUTION: The Oven Lock Lever should always be used, cut slits in foil to correspond with butter, sauce or seasoning, if desired, several times during broiling. •.... 5. Be sure to turn the Selector and the Temperature Control to prevent meat from meat and cool in the pan. 19 BROILING (Single/Upper or Lower Oven), CONVECTION BROILING (Single/Upper Oven) To Use For Broiling or Convection Broiling 1. Do not preheat the broiler. 4. Close the...
Use and Care Guide
Page 21
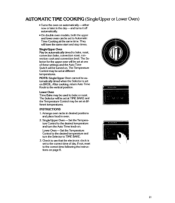
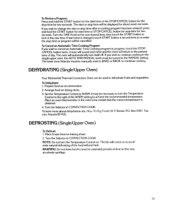
...the desired temperature and turn the Auto Time knob on page 8. 21 The Selector will be used to Automatic Time Cooking at one of day. Single/Upper Oven -Set the Temperature Control to TIME BAKE. 3. After cooking, return Auto Time Knob to the correct time following the instructions on . The ... be automatically timed to the correct time of these settings and the Auto Time Switch will have the same start and stop times. Single/Upper Oven May be set to bake or roast. Check to see that the electronic clock is set to bake, roast, convection bake, convection roast, ...
...the desired temperature and turn the Auto Time knob on page 8. 21 The Selector will be used to Automatic Time Cooking at one of day. Single/Upper Oven -Set the Temperature Control to TIME BAKE. 3. After cooking, return Auto Time Knob to the correct time following the instructions on . The ... be automatically timed to the correct time of these settings and the Auto Time Switch will have the same start and stop times. Single/Upper Oven May be set to bake or roast. Check to see that the electronic clock is set to bake, roast, convection bake, convection roast, ...
Use and Care Guide
Page 22
... Time program. "AUTO" will appear continuously in the Display Window if the program has been delayed. 4. What Happens During This Selection? • The oven will come on at the time selected and maintain the temperature set on the Temperature Control until the STOP/CANCEL button is touched or a total... of the cooking period, the oven will flash slowly in the Display Window if Automatic Time Cooking Cycle begins now, or it will shut off. Set the Start Time. Foods...
... Time program. "AUTO" will appear continuously in the Display Window if the program has been delayed. 4. What Happens During This Selection? • The oven will come on at the time selected and maintain the temperature set on the Temperature Control until the STOP/CANCEL button is touched or a total... of the cooking period, the oven will flash slowly in the Display Window if Automatic Time Cooking Cycle begins now, or it will shut off. Set the Start Time. Foods...
Use and Care Guide
Page 23
...to continue cooking in the single/upper oven, the AUTO TIME/MANUAL knob must be necessary to turn the Temperature Control to the right of the WARM setting to re-enter the stop time for two seconds. DEHYDRATING (Single/Upper Oven) Your KitchenAid Thermal-Convection Oven can be turned to ...dehydrate fruits and vegetables. Turn the Selector to lock in oven for about dehydration see, How To Dry Foods (H. NOTE: Do not turn itself...
...to continue cooking in the single/upper oven, the AUTO TIME/MANUAL knob must be necessary to turn the Temperature Control to the right of the WARM setting to re-enter the stop time for two seconds. DEHYDRATING (Single/Upper Oven) Your KitchenAid Thermal-Convection Oven can be turned to ...dehydrate fruits and vegetables. Turn the Selector to lock in oven for about dehydration see, How To Dry Foods (H. NOTE: Do not turn itself...
Use and Care Guide
Page 24
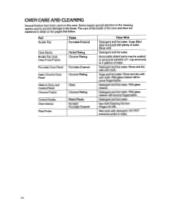
...pad with soft cloth. Mild glass cleaner. See Self-Cleaning Section (Pages 25-28). Part Broiler Pan Finish Porcelain Enamel Oven Racks Broiler Pan Grid, Oven Front Frame Nickel Plating Chrome Plating Porcelain Door Panel Porcelain Enamel Satin Chrome Door Panel Chrome Plating Glass in water. 24... Removable plated parts may be soaked in detail on this oven. Wet cloth with soft cloth. Detergent and hot water. Detergent and hot water. Rinse well. Mild glass cleaner will remove fingermarks....
...pad with soft cloth. Mild glass cleaner. See Self-Cleaning Section (Pages 25-28). Part Broiler Pan Finish Porcelain Enamel Oven Racks Broiler Pan Grid, Oven Front Frame Nickel Plating Chrome Plating Porcelain Door Panel Porcelain Enamel Satin Chrome Door Panel Chrome Plating Glass in water. 24... Removable plated parts may be soaked in detail on this oven. Wet cloth with soft cloth. Detergent and hot water. Detergent and hot water. Rinse well. Mild glass cleaner will remove fingermarks....
Use and Care Guide
Page 25
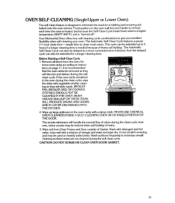
...Self-Clean Cycle 1. Re- clean cycle. ing so they will slide easily. OVEN SELF-CLEANING (Single/Upper or Lower Oven) The self-clean feature is needed because of heavy soil buildup. This cycle can... And the delayed cycle can also be used on the oven wall become harder to remove each time the oven is heated, but because the Self-Clean Cycle heats these... non-scratch scouring pad may be extended for scrubbing and scouring soil baked onto the oven interior. Your KitchenAid Oven offers four self-cleaning cycle combinations to a higher temperature (850°F-900°F), soil...
...Self-Clean Cycle 1. Re- clean cycle. ing so they will slide easily. OVEN SELF-CLEANING (Single/Upper or Lower Oven) The self-clean feature is needed because of heavy soil buildup. This cycle can... And the delayed cycle can also be used on the oven wall become harder to remove each time the oven is heated, but because the Self-Clean Cycle heats these... non-scratch scouring pad may be extended for scrubbing and scouring soil baked onto the oven interior. Your KitchenAid Oven offers four self-cleaning cycle combinations to a higher temperature (850°F-900°F), soil...


