KitchenAid KEBS177SWH Support Question
KitchenAid KEBS177SWH Support Question
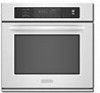
Find answers below for this question about KitchenAid KEBS177SWH - 27 Inch Single Electric Wall Oven.Need a KitchenAid KEBS177SWH manual? We have 3 online manuals for this item!
Question posted by Mikenann on May 17th, 2011
Oven Door
My bottom oven door on my Superba conventional will not close tightly. The gap is at top of the door. How do I adjust it without calling a service man to come?
Current Answers
Related KitchenAid KEBS177SWH Manual Pages
Use and Care Guide - Page 1
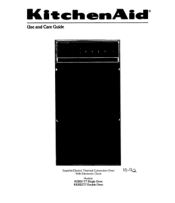
KitcheinAid®
Use and Care Guide
I I I
,
d
Superba Electric Thermal-Convection Oven With Electronic Clock Models: KEBS177 Single Oven
KEBS277 Double Oven
Use and Care Guide - Page 2
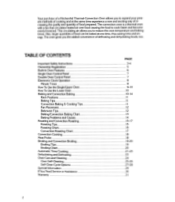
...-In Oven Features Single Oven Control Panel Double Oven Control Panel Electronic Clock Operation
Minute Timer How To Use the Single/Upper Oven How To Use the Lower Oven Baking and...Oven Self-Cleaning Self-Clean Cycle Options Special Information If You Need Service or Assistance Warranty
PAGE
3-4 5 6 7 7 8 8 9-10 10 10-14 11 11 11 12 12 13 14 15-17 15 16 17 18 18 19-20 19 20 21-23 23 24 25-26 27...
Use and Care Guide - Page 3
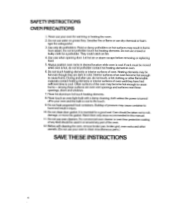
... technician. 10. Wear proper apparel. Read all instructions before using the oven. 8. All other servicing should be referred to sit or stand on the oven door to be seriously injured. 5. Contact nearest
authorized service facility for its intended use . IMPORTANT SAFETY INSTRUCTIONS
When using electrical appliances, basic safety precautions should be worn while
using the appliance...
Use and Care Guide - Page 4
... to clean miscellaneous parts.)
SAVE THESE INSTRUCTIONS
4 Do not clean door gasket. Use care when opening door. Never use your oven for a potholder. SAFETY INSTRUCTIONS OVEN PRECAUTIONS
1. During and after use, do not let potholder contact hot heating element in desired location while oven is hot, do not touch, or let clothing or other utensils...
Use and Care Guide - Page 5
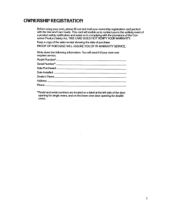
... SERVICE. THIS CARD DOES NOT VERIFY YOUR WARRANTY. Keep a copy of the sales receipt showing the date of the door opening for single ovens, and on a label at the left side of purchase. Model Number* Serial Numbers Date Purchased Date Installed Dealer's Name Address Phone *Model and serial numbers are located on the lower oven door...
Use and Care Guide - Page 11
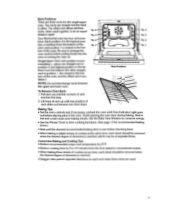
... time cooking functions. (See page 13 for the single/upper oven. Your KitchenAid oven has four rack positions. and the offset rack in conventional recipes.
• When baking three sheets of cookies...oven rack(s) before putting foods into the oven or turning the oven on. Lift front of rack up until rear position of rack slides out between the upper and lower oven. Avoid opening the oven door...
Use and Care Guide - Page 12
...CAN OBSTRUCT NORMAL HEAT FLOW, CAUSE COOKING FAILURES AND DAMAGE THE OVEN INTERIOR.
12
Using Aluminum Foil Correctly in recipes to the oven door for even air circulation.
• When using glass pans, except...very low sides.
NEVER COVER AN ENTIRE OVEN RACK OR OVEN BOTTOM WITH FOIL. No pan should be directly above another.
• Allow 11to 2 inches of air space around all sides of...
Use and Care Guide - Page 14
... not centered in the pan OR
• the pans were set too close to the sides of
the oven OR • the oven door was not closed properly.
• the batter was spread unevenly in the oven.
• the oven was too hot OR • there were too many pans or the pans
were too large for...
Use and Care Guide - Page 15
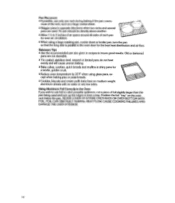
..., do not use roasting pan with high sides, as when roasting a turkey. Insert thermometer into the meat 1/2 inch or more cooking.
• Remove roasted meats from the oven.
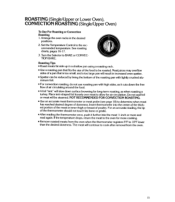
15 ROASTING (Single/Upper or Lower Oven), CONVECTION ROASTING (Single/Upper Oven)
To Use For Roasting or Convection Roasting 1. Place tent-shaped foil loosely over meat to the...
Use and Care Guide - Page 18
...a sudsy cloth and dry thoroughly.
18 Close the oven door.
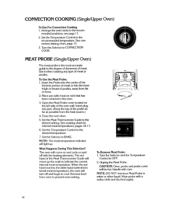
5. NOTE: The meat temperature indicator ... meat temperature), the oven will move up . CONVECTION COOKING (Single/Upper Oven)
To Use For ...oven wall. Place pan with care. Wipe probe with the heating elements.
Set the Temperature Control to the degree of doneness of meat or poultry. CAUTION: Oven, probe and probe cover will come...
Use and Care Guide - Page 19
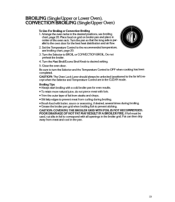
Close the oven door. Turn the Maxi Broil/Econo Broil Knob to BROIL or CONVECTION BROIL. Turn the pan so that the long side is parallel to the oven door for even results. • To retain more natural juice, do not pierce meat with fork. • Trim the outer layer of the oven rack. Turn the Selector...
Use and Care Guide - Page 25
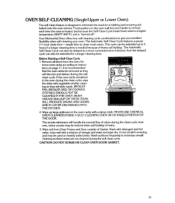
... BE
CLEANED IN THE OVEN. NEVER USE CHEMICAL OVEN CLEANERS INSIDE A SELF-CLEANING OVEN OR ON RAISED PORTION OF
THE DOOR. Wipe soil from the oven. Wash surfaces frequently to a more convenient time if desired. CAUTION: DO NOT SCRUB OR CLEAN OVEN DOOR GASKET.
25 move oven racks according to instruc-
[
tions on the oven wall become harder to 4 hours...
Use and Care Guide - Page 29

... 2 on hinge arm assemblies. 2.
Push finger tabs toward top of oven door.
3. Close and open the door slowly to broil stop position (door will be open about 6 inches).
5.
Close door to make sure it is cool and
power to the oven has been turned off the hinge arm assemblies. SINGLE/UPPER OVEN
• Unscrew lens from housing.
• Unscrew light bulb...
Use and Care Guide - Page 31
... YEAR LIMITED FROM DATE OF INSTALLATION TEN YEAR LIMITED WARRANTY PORCELAIN OVEN CAVITY/INNER DOOR
KITCHENAID WILL PAY FOR:
Replacement parts and repair labor to correct... the oven. 2.
St. Replace house fuses or correct house wiring. 4. Service calls to be provided by an authorized KitchenAid servicing outlet. F.
Service must be defective in accordance with local electrical codes....
Installation Instructions - Page 1
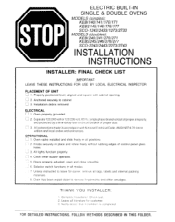
...:l Check LISA 2.
single phase branch circuit of proper ampacity, and protected by a time-delay fuse or circuit breaker of control panel glass holes. Doors properly adjusted, open
and close
smoothly
_' 6. remove... operates. Separate 1201240 volt or 12Oi208 volt, 60 Hr. il 2. ELECTRIC BUILT-IN SINGLE & DOUBLE OVENS
MODELS (singles): KEt31140/141/170/171 KEBS145/146/176/177 SCO-1243/2433/1273/...
Installation Instructions - Page 2
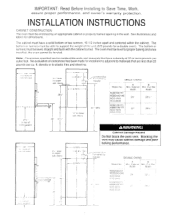
...bottom or two runners, 19-112 inches apart and centered within the cabinet. See illustrations and
tables for combustible walls and materials that are for dimensions. L
61" MIN
-A
hIIN- Cabinet Damage Hazard
Do Not block the oven vent.
INSTALLATION INSTRUCTIONS
CABINET CONSTRUCTION
The oven must be enclosed by
lns1aller
SINGLE OVENS Model No
--
---_-
Note: Clearances...
Installation Instructions - Page 4

... front frame or trim for
lifting. Do Not use any electrical connections. the weight of rack slides oul between front Iwo slops
ELECTRICAL CONNECTION
Electrical Shock Hazard
Disconnect power supply before making any portion of the oven door. Floor Damage
Keep shipping base under oven.
Remove oven racks from the inside of damage to decrease wrile lifting...
Installation Instructions - Page 5
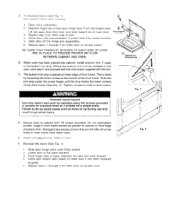
... a single oven). Slide the trim strip under the screw heads until the strip meets the lower corners of door. 4. F Reinstall the doors (See Fig. 1).
1 Slide door hinge arms until approximately 5 inches from door liner and slide toward oven.
A To Remove Doors (See Fig. 1) Use caution! Depress finger tab In oven door hinge area. Push tab toward top of the front frame. Close door...
Installation Instructions - Page 6

... to a proper fit. Inc. DOOR ADJUSTMENT CHECK
A-NEWSPAPER
STRIPS
TOP OF DOOR
NEWSPAPER STRIPS SIDE OF DOOR
NEWSPAPER
STRIPSJ
BOTTOM OF DOOR
PROPER DOOR
ADJUST UP OR DOWN2 TO ALIGN DOOR
Place 2 " x 18 " slrlps... lllustratlon Allow one end of door to C?ange WIthout Notlce
Part No 3177123 Rev B @I969 tiltchenAid.
St. When door IS out of adjustment, slide unit out far enough...
Parts List - Page 17

... Right Left Spacer Anchor, Spring Spring, Door Hinge Assembly Cam Plate Right Left Bracket, Support (2) Bracket, Support Retainer, Insulation Bracket, Oven Light Switch Switch, Oven Light Oven Liner - 1
4163966
2
4164191
3
...
25 4168877
26 4167596
27
4167597
4167598
29 4173177
30 4173178
31 4173179
32 4173182
33 4167332
34
35
Main Bottom Insulation, Bottom Door Gasket Hi-Temp Cover...
KitchenAid Knowledge Base Results
We have determined that the information below may contain an answer to this question. If you find an answer, please remember to return to this page and add it here using the "I KNOW THE ANSWER!" button above. It's that easy to earn points!-
Food storage tips
...refrigerated. Pineapples, cut Will not ripen after purchase. French Door Refrigerator with freezer wrap. Storage times are approximate and may ... C). Milk and cream Check carton date. Close tightly. Do not return unused portions to know ...When freezing longer than two weeks, overwrap with Exterior Dispenser Adjusting crisper humidity control - Luncheon meat Unopened, vacuum-packed ... -
Replacing oven light bulbs - Built-in ovens
... a bulb(s) if it back into the wall. Replacing oven light bulbs - Built-in ovens When should come on ? Superba built-in oven come on when either door is off and feels cool to handle the bulb. Remove the glass light cover by snapping it does not come on when the oven door is closed, touch Oven Light to operate the lights... -
My refrigerator rocks back and forth
... and rollers. Open the refrigerator door(s) and check to the rear by turning them clockwise until they close faster or slower, adjust the refrigerator's tilt using the instructions below the rolling wheels or brake feet to come away from the refrigerator when in the final location. If not, slightly tilt...
Similar Questions

Replacing Four Brackets In Oven Door
KitchenAid 27"Built-In Double Oven, model KEBS277BSS - I took the glass out of the top oven door to ...
KitchenAid 27"Built-In Double Oven, model KEBS277BSS - I took the glass out of the top oven door to ...
(Posted by kathleenlthackerKT 8 years ago)

Kitchenaid Kco222ob Toaster Oven Door Won't Stay Shut.
KitchenAid KCO222OB toaster oven door will not stay shut. Spring or lock mechanism is broken.
KitchenAid KCO222OB toaster oven door will not stay shut. Spring or lock mechanism is broken.
(Posted by amoahr 9 years ago)

My Kitchenaid Oven Door Wont Close Tight
(Posted by itacrobiny 9 years ago)

Oven Door Adjustment
My Superba conventional door, the bottom door on my dual oven, does not close all the way. How do I ...
My Superba conventional door, the bottom door on my dual oven, does not close all the way. How do I ...
(Posted by Mikenann 12 years ago)