
Use & Care Guide
Page 1
... Table of Contents/Table des matières 2 Models/Modèles KEBK101 W10162179A KEBK171 KEBK206 KEBK276 BUILT-IN ELECTRIC SINGLE AND DOUBLE OVENS Use & Care Guide For questions about features, operation/performance, parts, accessories or service, call: 1-800-422-1230 or visit our website at www.kitchenaid.com In Canada, call for assistance, installation and service, call: 1-800-807-6777 or visit our website...
... Table of Contents/Table des matières 2 Models/Modèles KEBK101 W10162179A KEBK171 KEBK206 KEBK276 BUILT-IN ELECTRIC SINGLE AND DOUBLE OVENS Use & Care Guide For questions about features, operation/performance, parts, accessories or service, call: 1-800-422-1230 or visit our website at www.kitchenaid.com In Canada, call for assistance, installation and service, call: 1-800-807-6777 or visit our website...

Use & Care Guide
Page 3
... steam escape before removing or replacing food. ■ Do Not Heat Unopened Food Containers - Heating elements may result in color. among these openings, oven doors, and windows of injury, and tell you how to sit or stand on Grease Fires - Care should not be referred to cause burns - We have had sufficient time to persons, or damage when using the oven. ■ User Servicing - If rack...
... steam escape before removing or replacing food. ■ Do Not Heat Unopened Food Containers - Heating elements may result in color. among these openings, oven doors, and windows of injury, and tell you how to sit or stand on Grease Fires - Care should not be referred to cause burns - We have had sufficient time to persons, or damage when using the oven. ■ User Servicing - If rack...

Use & Care Guide
Page 4
... product contains a chemical known to the State of California to cause cancer, birth defects, or other reproductive harm, and requires businesses to warn of potential exposure to some or all of your model. Broil elements (not shown) D. Oven door lock latch H. The oven you have purchased may not match those of the items listed. Electronic oven control B. Automatic oven light switch G. Gasket I E A. PARTS AND FEATURES This manual covers different models...
... product contains a chemical known to the State of California to cause cancer, birth defects, or other reproductive harm, and requires businesses to warn of potential exposure to some or all of your model. Broil elements (not shown) D. Oven door lock latch H. The oven you have purchased may not match those of the items listed. Electronic oven control B. Automatic oven light switch G. Gasket I E A. PARTS AND FEATURES This manual covers different models...

Use & Care Guide
Page 5
...inactive mode (blank) and the programmed function will be entered by touching either Clock Set/Start or Start to the oven, the clock will be canceled. 5 Oven Display When the oven(s) are in use, this display shows the oven temperature, heat source(s) and start J. Timer E. Options I H G A. On double oven models, this display shows a time countdown and the stop time (if entered). Single Oven Display A. Upper or lower oven selectors (double oven models only) C. Timed cooking K. Oven display D. Upper oven cavity symbol B. ELECTRONIC OVEN CONTROL This manual covers...
...inactive mode (blank) and the programmed function will be entered by touching either Clock Set/Start or Start to the oven, the clock will be canceled. 5 Oven Display When the oven(s) are in use, this display shows the oven temperature, heat source(s) and start J. Timer E. Options I H G A. On double oven models, this display shows a time countdown and the stop time (if entered). Single Oven Display A. Upper or lower oven selectors (double oven models only) C. Timed cooking K. Oven display D. Upper oven cavity symbol B. ELECTRONIC OVEN CONTROL This manual covers...
Use & Care Guide
Page 6
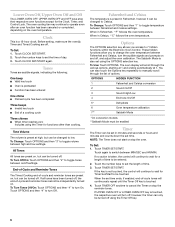
.../Off 3 Sound High/Low 4 End tone On/Off 5* Dehydrate 6 Oven temperature calibration 7** Sabbath Mode *On convection models **Sabbath Mode must be turned off settings. NOTE: The Timer does not start or stop the reminder tones. To Set: 1. When the set the time of day. 3. Clock This is not touched, the control will turn On. Tones Tones are off , and adjust the oven calibration. All Tones All tones are preset on and off . To...
.../Off 3 Sound High/Low 4 End tone On/Off 5* Dehydrate 6 Oven temperature calibration 7** Sabbath Mode *On convection models **Sabbath Mode must be turned off settings. NOTE: The Timer does not start or stop the reminder tones. To Set: 1. When the set the time of day. 3. Clock This is not touched, the control will turn On. Tones Tones are off , and adjust the oven calibration. All Tones All tones are preset on and off . To...

Use & Care Guide
Page 7
... "control locked" appears on for only part of the oven(s). The heat sources icons will appear on the oven display throughout the Sabbath Mode. On double ovens, open the oven door. 2. Touch the number keys 7, 8, 9, 6, in food poisoning or sickness. "SABBATH ENABLED" will appear lit on the display and remain for approximately 5 seconds, until re-enabled. See the "To Activate" section. Touch BAKE. Touch START. 4. Touch COOK TIME. 7 Oven Temperature Control IMPORTANT: Do not use...
... "control locked" appears on for only part of the oven(s). The heat sources icons will appear on the oven display throughout the Sabbath Mode. On double ovens, open the oven door. 2. Touch the number keys 7, 8, 9, 6, in food poisoning or sickness. "SABBATH ENABLED" will appear lit on the display and remain for approximately 5 seconds, until re-enabled. See the "To Activate" section. Touch BAKE. Touch START. 4. Touch COOK TIME. 7 Oven Temperature Control IMPORTANT: Do not use...
Use & Care Guide
Page 8
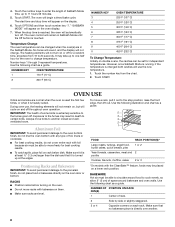
The oven control will not change temperature. During oven use the new temperature. 1. Make sure foil is at the edges. Use the following chart as a guide. The start time and stop time is directly over another closed and wellventilated room. Touch OPTIONS and then touch number key "7." When the stop time will automatically turn on the display. 6. The heating elements will appear on the oven door or bottom. Aluminum Foil IMPORTANT: To avoid permanent...
The oven control will not change temperature. During oven use the new temperature. 1. Make sure foil is at the edges. Use the following chart as a guide. The start time and stop time is directly over another closed and wellventilated room. Touch OPTIONS and then touch number key "7." When the stop time will automatically turn on the display. 6. The heating elements will appear on the oven door or bottom. Aluminum Foil IMPORTANT: To avoid permanent...

Use & Care Guide
Page 9
... need to reduce baking temperatures slightly. Control panel B. Lower oven The oven vent(s) should not touch fat, bone or gristle. ■ After reading the thermometer once, push it is opened during baking or roasting, the heating elements (bake and both broils) will turn off in the bottom third of doneness. Blocking or covering vents will begin displaying the temperature as a guide. To Bake or Roast: Before baking or roasting, position racks according to increase baking time. The bake range can...
... need to reduce baking temperatures slightly. Control panel B. Lower oven The oven vent(s) should not touch fat, bone or gristle. ■ After reading the thermometer once, push it is opened during baking or roasting, the heating elements (bake and both broils) will turn off in the bottom third of doneness. Blocking or covering vents will begin displaying the temperature as a guide. To Bake or Roast: Before baking or roasting, position racks according to increase baking time. The bake range can...
Use & Care Guide
Page 10
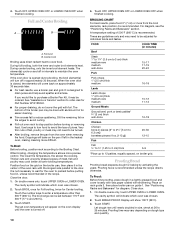
... heated oven, making cleaning more difficult. Display will bake on approximately 30 seconds later. ■ For best results, use a broiler pan and grid. Touch START. Touch OFF, UPPER OVEN OFF or LOWER OVEN OFF when finished cooking. See "Positioning Racks and Bakeware" for baking by activating the yeast. During center broiling, only the inner broil element heats. Touch BREAD PROOF. Full broil B. On double ovens only, touch UPPER OVEN or LOWER OVEN. The broil range...
... heated oven, making cleaning more difficult. Display will bake on approximately 30 seconds later. ■ For best results, use a broiler pan and grid. Touch START. Touch OFF, UPPER OVEN OFF or LOWER OVEN OFF when finished cooking. See "Positioning Racks and Bakeware" for baking by activating the yeast. During center broiling, only the inner broil element heats. Touch BREAD PROOF. Full broil B. On double ovens only, touch UPPER OVEN or LOWER OVEN. The broil range...
Use & Care Guide
Page 11
... a temperature other than the one displayed. Delay start time and stop time is not adjustable. 3. On double ovens only, touch UPPER OVEN or LOWER OVEN. Touch the number keys to certain birds. Timed Cooking may result in baking pan(s) and cover loosely with plastic wrap coated with cooking spray. Touch COOK TIME. 4. The start should not be set between 170°F and 500°F (77°C and 260°C). When the stop time are being used...
... a temperature other than the one displayed. Delay start time and stop time is not adjustable. 3. On double ovens only, touch UPPER OVEN or LOWER OVEN. Touch the number keys to certain birds. Timed Cooking may result in baking pan(s) and cover loosely with plastic wrap coated with cooking spray. Touch COOK TIME. 4. The start should not be set between 170°F and 500°F (77°C and 260°C). When the stop time are being used...

Use & Care Guide
Page 12
...; Vinegar for average to set clean time. 3. Number keys cannot be used to remove soil. STAINLESS STEEL (on the display. The Self-Cleaning cycle uses very high temperatures, burning soil to set to better exhaust the hotter air through the oven vent(s). To Delay the Start of Self-Cleaning: Before delaying the starting of Self-Clean, make sure the door is set a clean time other than 3 hours and 30 minutes. The door will indicate which oven was chosen. 2. The...
...; Vinegar for average to set clean time. 3. Number keys cannot be used to remove soil. STAINLESS STEEL (on the display. The Self-Cleaning cycle uses very high temperatures, burning soil to set to better exhaust the hotter air through the oven vent(s). To Delay the Start of Self-Cleaning: Before delaying the starting of Self-Clean, make sure the door is set a clean time other than 3 hours and 30 minutes. The door will indicate which oven was chosen. 2. The...

Use & Care Guide
Page 13
.... 5. Remove racks or they will come on when either door is closed, touch OVEN LIGHT to turn light on or off and cool. 1. OVEN CAVITY Do not use abrasive cleaners, steel-wool pads, gritty washcloths or some models) Do not clean in the Self-Cleaning cycle. To Remove: 1. Cleaning Method: ■ Self-Cleaning cycle: See "Self-Cleaning Cycle" first. Replace bulb, using tissue or wearing cotton gloves to the control panel, do not use oven cleaners. Replace bulb cover...
.... 5. Remove racks or they will come on when either door is closed, touch OVEN LIGHT to turn light on or off and cool. 1. OVEN CAVITY Do not use abrasive cleaners, steel-wool pads, gritty washcloths or some models) Do not clean in the Self-Cleaning cycle. To Remove: 1. Cleaning Method: ■ Self-Cleaning cycle: See "Self-Cleaning Cycle" first. Replace bulb, using tissue or wearing cotton gloves to the control panel, do not use oven cleaners. Replace bulb cover...

Use & Care Guide
Page 14
... a delay start been set ? Oven cooking results not what expected ■ Is the proper temperature set ? To Replace: 1. During a selfclean cycle the air stream is one oven self-cleaning? Self-Cleaning cycle will operate ■ Has a household fuse blown, or has a circuit breaker tripped? Close the oven door as far as the door is level in the pan? Open the oven door. See "Electronic Oven Control" section. ■ Has a delay start been set ? See "Oven Temperature Control" section. See "Timed Cooking" section. ■ On double oven models, is...
... a delay start been set ? Oven cooking results not what expected ■ Is the proper temperature set ? To Replace: 1. During a selfclean cycle the air stream is one oven self-cleaning? Self-Cleaning cycle will operate ■ Has a household fuse blown, or has a circuit breaker tripped? Close the oven door as far as the door is level in the pan? Open the oven door. See "Electronic Oven Control" section. ■ Has a delay start been set ? See "Oven Temperature Control" section. See "Timed Cooking" section. ■ On double oven models, is...

Use & Care Guide
Page 15
... Polish (stainless steel models) Order Part Number 4396920 In the U.S.A. For further assistance If you need help us or your correspondence. Adjust cooking time. ■ Has the oven door been opened while cooking? Move rack to fulfill the product warranty and provide afterwarranty service, anywhere in your area, call . If you use only factory specified parts. If you need replacement parts If you need to KitchenAid Canada with the product, KitchenAid brand of Whirlpool...
... Polish (stainless steel models) Order Part Number 4396920 In the U.S.A. For further assistance If you need help us or your correspondence. Adjust cooking time. ■ Has the oven door been opened while cooking? Move rack to fulfill the product warranty and provide afterwarranty service, anywhere in your area, call . If you use only factory specified parts. If you need replacement parts If you need to KitchenAid Canada with the product, KitchenAid brand of Whirlpool...

Use & Care Guide
Page 16
... appliances with original model/serial numbers that is not installed in an inaccessible location or is contrary to published user or operator instructions and/or installation instructions. 4. This warranty is operated and maintained according to instructions attached to or furnished with the product, KitchenAid will pay for Factory Specified Parts for the following information about your major appliance if it . The cost of repair or replacement under these...
... appliances with original model/serial numbers that is not installed in an inaccessible location or is contrary to published user or operator instructions and/or installation instructions. 4. This warranty is operated and maintained according to instructions attached to or furnished with the product, KitchenAid will pay for Factory Specified Parts for the following information about your major appliance if it . The cost of repair or replacement under these...


