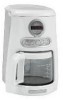
Use & Care Guide
Page 3
... How to Arrange for Service Outside these Locations 16 How to Arrange for Great Taste 11 CARE AND CLEANING Cleaning the Coffee Maker 12 Descaling the Coffee Maker 12 Troubleshooting ...13 WARRANTY AND SERVICE INFORMATION KitchenAid® Coffee Maker Warranty 14 Hassle-Free Replacement Warranty - 50 United States and District of Columbia ...........15 Hassle-Free Replacement Warranty -
... How to Arrange for Service Outside these Locations 16 How to Arrange for Great Taste 11 CARE AND CLEANING Cleaning the Coffee Maker 12 Descaling the Coffee Maker 12 Troubleshooting ...13 WARRANTY AND SERVICE INFORMATION KitchenAid® Coffee Maker Warranty 14 Hassle-Free Replacement Warranty - 50 United States and District of Columbia ...........15 Hassle-Free Replacement Warranty -
Use & Care Guide
Page 4
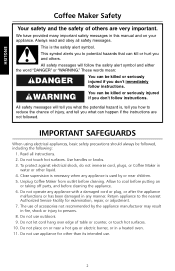
...words mean: DANGER You can kill or hurt you don't immediately follow the safety alert symbol and either the word "DANGER" or "WARNING." Unplug Coffee Maker from outlet before cleaning the appliance. 6. Always read and obey all instructions. 2. All safety messages will follow instructions. Use handles or knobs. 3.... edge of table or counter, or touch hot surfaces. 10. To protect against electrical shock, do not immerse cord, plugs, or Coffee Maker in any appliance with a damaged cord or plug, or after the appliance malfunctions or has been damaged in water or other than its...
...words mean: DANGER You can kill or hurt you don't immediately follow the safety alert symbol and either the word "DANGER" or "WARNING." Unplug Coffee Maker from outlet before cleaning the appliance. 6. Always read and obey all instructions. 2. All safety messages will follow instructions. Use handles or knobs. 3.... edge of table or counter, or touch hot surfaces. 10. To protect against electrical shock, do not immerse cord, plugs, or Coffee Maker in any appliance with a damaged cord or plug, or after the appliance malfunctions or has been damaged in water or other than its...
Use & Care Guide
Page 5
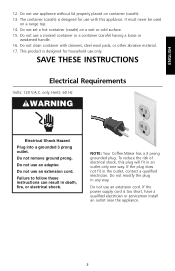
.... 15. This product is too short, have a qualified electrician or serviceman install an outlet near the appliance. 3 Do not use an extension cord. NOTE: Your Coffee Maker has a 3 prong grounded plug. Do not modify the plug in the outlet, contact a qualified electrician. Do not use an adapter. Do not set a hot container...
.... 15. This product is too short, have a qualified electrician or serviceman install an outlet near the appliance. 3 Do not use an extension cord. NOTE: Your Coffee Maker has a 3 prong grounded plug. Do not modify the plug in the outlet, contact a qualified electrician. Do not use an adapter. Do not set a hot container...
Use & Care Guide
Page 6
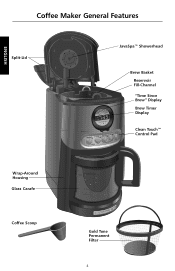
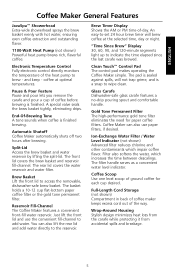
ENGLISH Coffee Maker General Features Split-Lid JavaSpa™ Showerhead Brew Basket Reservoir Fill-Channel "Time Since Brew" Display Brew Timer Display Clean Touch™ Control Pad Wrap-Around Housing Glass Carafe Coffee Scoop Gold Tone Permanent Filter 4
ENGLISH Coffee Maker General Features Split-Lid JavaSpa™ Showerhead Brew Basket Reservoir Fill-Channel "Time Since Brew" Display Brew Timer Display Clean Touch™ Control Pad Wrap-Around Housing Glass Carafe Coffee Scoop Gold Tone Permanent Filter 4
Use & Care Guide
Page 7
...scoop of -day. Pause & Pour Feature Pause and pour lets you remove the carafe and pour a cup of the way. Automatic Shutoff Coffee Maker automatically shuts off two hours after brewing. Just lift the front lid and use paper filters, if desired. Brew Basket Lift the front ...lid to add water. Reservoir Fill-Channel The Coffee Maker features a convenient front-fill water reservoir. Gold Tone Permanent Filter The high-performance gold tone filter eliminates the need for each cup desired....
...scoop of -day. Pause & Pour Feature Pause and pour lets you remove the carafe and pour a cup of the way. Automatic Shutoff Coffee Maker automatically shuts off two hours after brewing. Just lift the front lid and use paper filters, if desired. Brew Basket Lift the front ...lid to add water. Reservoir Fill-Channel The Coffee Maker features a convenient front-fill water reservoir. Gold Tone Permanent Filter The high-performance gold tone filter eliminates the need for each cup desired....
Use & Care Guide
Page 8
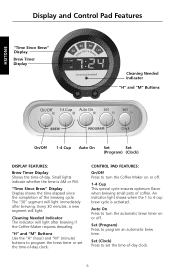
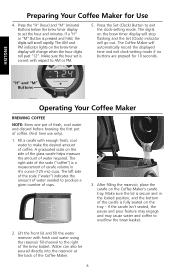
... "M" Buttons Use the "H" (hour) and "M" (minute) buttons to program an automatic brew time. Set (Clock) Press to turn the Coffee Maker on or off . 1-4 Cup This special cycle ensures optimum flavor when brewing small pots of -day clock. 6 CONTROL PAD FEATURES: On/Off Press to 4 cup ...
... "M" Buttons Use the "H" (hour) and "M" (minute) buttons to program an automatic brew time. Set (Clock) Press to turn the Coffee Maker on or off . 1-4 Cup This special cycle ensures optimum flavor when brewing small pots of -day clock. 6 CONTROL PAD FEATURES: On/Off Press to 4 cup ...
Use & Care Guide
Page 9
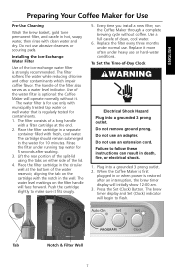
... will begin to follow these instructions can result in death, fire, or electrical shock. 1. Every time you install a new filter, run the Coffee Maker through a complete brewing cycle without it fits snugly. 5. Do not use abrasive cleansers or scouring pads. Plug into a grounded 3 prong outlet....ion-exchange water filter is restored after soaking. 3. Do not use an adapter. Press the Set (Clock) Button. ENGLISH Preparing Your Coffee Maker for Use Pre-Use Cleaning Wash the brew basket, gold tone permanent filter, and carafe in hot, soapy water, then rinse with ...
... will begin to follow these instructions can result in death, fire, or electrical shock. 1. Every time you install a new filter, run the Coffee Maker through a complete brewing cycle without it fits snugly. 5. Do not use abrasive cleansers or scouring pads. Plug into a grounded 3 prong outlet....ion-exchange water filter is restored after soaking. 3. Do not use an adapter. Press the Set (Clock) Button. ENGLISH Preparing Your Coffee Maker for Use Pre-Use Cleaning Wash the brew basket, gold tone permanent filter, and carafe in hot, soapy water, then rinse with ...
Use & Care Guide
Page 10
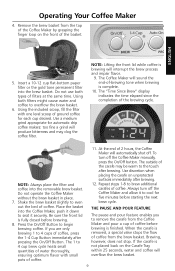
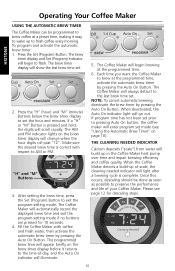
... make the desired amount of water needed to exit the clock-setting mode. ENGLISH "H" and "M" Buttons Operating Your Coffee Maker BREWING COFFEE NOTE: Brew one pot of fresh, cool water and discard before brewing the first pot of water required. Press the "H" (hour) and "M"... into the reservoir at the back of cups. 3. The AM and PM indicator lights on the Coffee Maker's carafe tray. Press the Set (Clock) Button to produce a given number of the Coffee Maker. 8 Preparing Your Coffee Maker for 10 seconds. If a "H" or "M" Button is correct with fresh cool water using the ...
... make the desired amount of water needed to exit the clock-setting mode. ENGLISH "H" and "M" Buttons Operating Your Coffee Maker BREWING COFFEE NOTE: Brew one pot of fresh, cool water and discard before brewing the first pot of water required. Press the "H" (hour) and "M"... into the reservoir at the back of cups. 3. The AM and PM indicator lights on the Coffee Maker's carafe tray. Press the Set (Clock) Button to produce a given number of the Coffee Maker. 8 Preparing Your Coffee Maker for 10 seconds. If a "H" or "M" Button is correct with fresh cool water using the ...
Use & Care Guide
Page 11
...the front of filters at the same time. The "Time Since Brew" display indicates the time elapsed since the completion of coffee. To turn off the Coffee Maker and allow it to overflow the brew basket. 6. Repeat steps 1-8 to 4 cup brew cycle heats small quantities of water ...when brewing is not placed back on unprotected surfaces immediately after brewing. The Coffee Maker will sound the end-of coffee. Place the basket into the Coffee Maker, push it securely. If you to 4 cups of coffee before brewing is fully closed before starting the next brew cycle. THE PAUSE...
...the front of filters at the same time. The "Time Since Brew" display indicates the time elapsed since the completion of coffee. To turn off the Coffee Maker and allow it to overflow the brew basket. 6. Repeat steps 1-8 to 4 cup brew cycle heats small quantities of water ...when brewing is not placed back on unprotected surfaces immediately after brewing. The Coffee Maker will sound the end-of coffee. Place the basket into the Coffee Maker, push it securely. If you to 4 cups of coffee before brewing is fully closed before starting the next brew cycle. THE PAUSE...
Use & Care Guide
Page 12
... returns to the time-of-day, and the Auto On indicator will illuminate. 5. To program and activate the automatic brew timer: 1. The Coffee Maker will begin to flash. THE CLEANING NEEDED INDICATOR Calcium deposits ("scale") from water will always default to the last brew time set the hour ...and minutes. The Coffee Maker will build up of scale, the cleaning needed indicator will light after a brewing cycle is pressed and held, the digits will scroll rapidly....
... returns to the time-of-day, and the Auto On indicator will illuminate. 5. To program and activate the automatic brew timer: 1. The Coffee Maker will begin to flash. THE CLEANING NEEDED INDICATOR Calcium deposits ("scale") from water will always default to the last brew time set the hour ...and minutes. The Coffee Maker will build up of scale, the cleaning needed indicator will light after a brewing cycle is pressed and held, the digits will scroll rapidly....
Use & Care Guide
Page 13
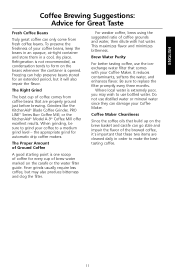
... stored for an extended period, but may wish to form on the beans whenever the container is one scoop of coffee for automatic drip coffee makers. Do not use the ionexchange water filter that build up on the carafe or the water filter guide. It reduces...Coffee Maker Cleanliness Since the coffee oils that comes with hot water. Finer grinds usually require less coffee, but it 's important that these two items are properly ground just before brewing. To preserve the freshness of the brewed coffee, it will also impair the flavor. Grinders like the KitchenAid® Blade Coffee...
... stored for an extended period, but may wish to form on the beans whenever the container is one scoop of coffee for automatic drip coffee makers. Do not use the ionexchange water filter that build up on the carafe or the water filter guide. It reduces...Coffee Maker Cleanliness Since the coffee oils that comes with hot water. Finer grinds usually require less coffee, but it 's important that these two items are properly ground just before brewing. To preserve the freshness of the brewed coffee, it will also impair the flavor. Grinders like the KitchenAid® Blade Coffee...
Use & Care Guide
Page 14
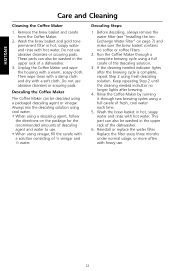
...descaling solution. 3. These parts can also be descaled using fresh descaling solution. If the cleaning needed indicator no coffee or coffee filters. 2. Descaling the Coffee Maker The Coffee Maker can be washed in the upper rack of descaling agent and water to use . 12 Before descaling, always ... the water filter (see "Installing the IonExchange Water Filter" on the package for the recommended amounts of a dishwasher. 3. Unplug the Coffee Maker and wipe the housing with a soft cloth. Always mix the descaling solution using cool water. • When using vinegar, fill the...
...descaling solution. 3. These parts can also be descaled using fresh descaling solution. If the cleaning needed indicator no coffee or coffee filters. 2. Descaling the Coffee Maker The Coffee Maker can be washed in the upper rack of descaling agent and water to use . 12 Before descaling, always ... the water filter (see "Installing the IonExchange Water Filter" on the package for the recommended amounts of a dishwasher. 3. Unplug the Coffee Maker and wipe the housing with a soft cloth. Always mix the descaling solution using cool water. • When using vinegar, fill the...
Use & Care Guide
Page 15
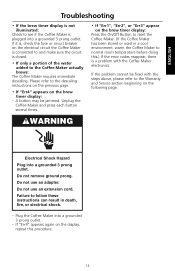
... on the previous page. • If "Err4" appears on the brew timer display: Press the On/Off Button to reset the Coffee Maker. (If the Coffee Maker has been stored or used in death, fire, or electrical shock. - If the problem cannot be jammed. Do not remove ground prong...• If the brew timer display is not illuminated: Check to see if the Coffee Maker is closed. • If only a portion of the water added to the Coffee Maker actually brews: The Coffee Maker requires immediate descaling. Unplug the Coffee Maker and press each button several times. • If "Err1", "Err2", or "...
... on the previous page. • If "Err4" appears on the brew timer display: Press the On/Off Button to reset the Coffee Maker. (If the Coffee Maker has been stored or used in death, fire, or electrical shock. - If the problem cannot be jammed. Do not remove ground prong...• If the brew timer display is not illuminated: Check to see if the Coffee Maker is closed. • If only a portion of the water added to the Coffee Maker actually brews: The Coffee Maker requires immediate descaling. Unplug the Coffee Maker and press each button several times. • If "Err1", "Err2", or "...
Use & Care Guide
Page 16
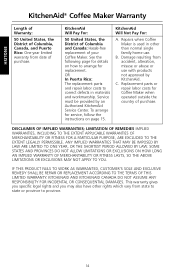
... For: 50 United States, the District of Columbia and Canada: Hassle-free replacement of your Coffee Maker. KitchenAid Will Not Pay For: A. Damage resulting from accident, alteration, misuse or abuse or use . SOME STATES AND PROVINCES DO NOT ALLOW LIMITATIONS OR EXCLUSIONS.... OR In Puerto Rico: The replacement parts and repair labor costs to correct defects in other rights which vary from date of purchase. ENGLISH KitchenAid® Coffee Maker Warranty Length of Warranty: 50 United States, the District of Columbia, Canada, and Puerto Rico: One-year limited warranty from state to state ...
... For: 50 United States, the District of Columbia and Canada: Hassle-free replacement of your Coffee Maker. KitchenAid Will Not Pay For: A. Damage resulting from accident, alteration, misuse or abuse or use . SOME STATES AND PROVINCES DO NOT ALLOW LIMITATIONS OR EXCLUSIONS.... OR In Puerto Rico: The replacement parts and repair labor costs to correct defects in other rights which vary from date of purchase. ENGLISH KitchenAid® Coffee Maker Warranty Length of Warranty: 50 United States, the District of Columbia, Canada, and Puerto Rico: One-year limited warranty from state to state ...
Use & Care Guide
Page 17
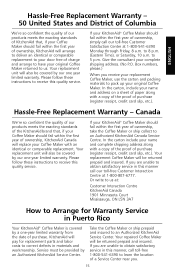
...50 United States and District of Columbia We're so confident the quality of our products meets the exacting standards of KitchenAid that , if your Coffee Maker should fail within the first year of a Service Center near you. 15 Your replacement unit will also be covered ...with an identical or comparable replacement. Please follow these instructions to obtain satisfactory service in Puerto Rico Your KitchenAid® Coffee Maker is covered by our one year limited warranty. Take the Coffee Maker or ship prepaid and insured to 8 p.m. (Eastern Time), or Saturday, 10 a.m. If you ...
...50 United States and District of Columbia We're so confident the quality of our products meets the exacting standards of KitchenAid that , if your Coffee Maker should fail within the first year of a Service Center near you. 15 Your replacement unit will also be covered ...with an identical or comparable replacement. Please follow these instructions to obtain satisfactory service in Puerto Rico Your KitchenAid® Coffee Maker is covered by our one year limited warranty. Take the Coffee Maker or ship prepaid and insured to 8 p.m. (Eastern Time), or Saturday, 10 a.m. If you ...
Use & Care Guide
Page 18
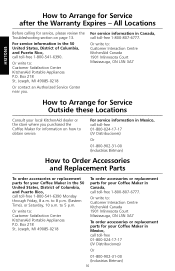
...Or contact an Authorized Service Center near you purchased the Coffee Maker for your Coffee Maker in the 50 United States, District of Columbia, and Puerto Rico, call toll-free 1-800-541-6390. Or write to: Customer Interaction Centre KitchenAid Canada 1901 Minnesota Court Mississauga, ON L5N 3A7 How to... Arrange for Service Outside these Locations Consult your Coffee Maker in Canada, call toll-free 01-800-024-17-17 (JV Distribuciones) Or ...
...Or contact an Authorized Service Center near you purchased the Coffee Maker for your Coffee Maker in the 50 United States, District of Columbia, and Puerto Rico, call toll-free 1-800-541-6390. Or write to: Customer Interaction Centre KitchenAid Canada 1901 Minnesota Court Mississauga, ON L5N 3A7 How to... Arrange for Service Outside these Locations Consult your Coffee Maker in Canada, call toll-free 01-800-024-17-17 (JV Distribuciones) Or ...


