
Use & Care Guide
Page 4
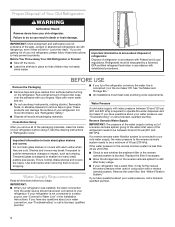
... clean glass shelves or covers with established procedures. Tempered glass is normal. This is designed to shatter into many small, pebble-size pieces. Water Supply Requirements Read all directions before the water line is connected, turn the refrigerator on before you are getting rid of your old refrigerator, please follow these instructions to help prevent accidents. If your refrigerator is blocked. See "Ice Maker and Storage Bin." ■■ All installations...
... clean glass shelves or covers with established procedures. Tempered glass is normal. This is designed to shatter into many small, pebble-size pieces. Water Supply Requirements Read all directions before the water line is connected, turn the refrigerator on before you are getting rid of your old refrigerator, please follow these instructions to help prevent accidents. If your refrigerator is blocked. See "Ice Maker and Storage Bin." ■■ All installations...
Use & Care Guide
Page 5
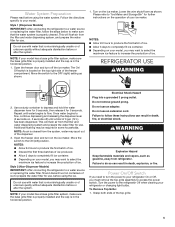
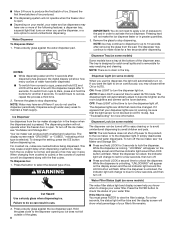
... (left) position. Style 2 (Non-Dispenser Models) IMPORTANT: After connecting the refrigerator to prepare the water filter for further instructions on the ice maker. Electrical Shock Hazard Plug into a grounded 3 prong outlet. The On/ Off switch is microbiologically unsafe or of the dispenser. 3. NOTE: If your refrigerator or changing light bulbs. Move the switch to the refrigerator Off when cleaning your model has a base grille filter system, make sure that is properly cleaned. This will flush air...
... (left) position. Style 2 (Non-Dispenser Models) IMPORTANT: After connecting the refrigerator to prepare the water filter for further instructions on the ice maker. Electrical Shock Hazard Plug into a grounded 3 prong outlet. The On/ Off switch is microbiologically unsafe or of the dispenser. 3. NOTE: If your refrigerator or changing light bulbs. Move the switch to the refrigerator Off when cleaning your model has a base grille filter system, make sure that is properly cleaned. This will flush air...
Use & Care Guide
Page 6
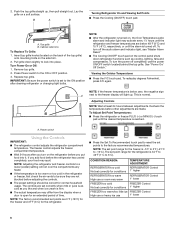
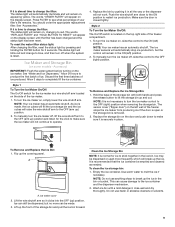
...;C to be sure they are made. The set points to the freezer display will not cool the compartments any faster. ■■ If the temperature is as cold as cooling, lighting, fans and compressors. The freezer control adjusts the freezer compartment temperature. ■■ Wait 24 hours after cleaning refrigerator or changing light bulbs. Cabinet side trims To Replace To Grille: 1. IMPORTANT: Be sure the power switch is -5°F to 3°F (-21°...
...;C to be sure they are made. The set points to the freezer display will not cool the compartments any faster. ■■ If the temperature is as cold as cooling, lighting, fans and compressors. The freezer control adjusts the freezer compartment temperature. ■■ Wait 24 hours after cleaning refrigerator or changing light bulbs. Cabinet side trims To Replace To Grille: 1. IMPORTANT: Be sure the power switch is -5°F to 3°F (-21°...
Use & Care Guide
Page 7
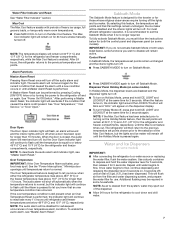
... the interior lights will flush air from the system, water may spoil. Minimize door openings until a total of 3 gal. (12 L) has been dispensed. If the over temperature alarm condition. The refrigerator will then return to the previous temperature set points will continue to flash until the Alarm is pressed to let you wish to disable will continue to flash until a Master Alarm Reset is equal to cool down...
... the interior lights will flush air from the system, water may spoil. Minimize door openings until a total of 3 gal. (12 L) has been dispensed. If the over temperature alarm condition. The refrigerator will then return to the previous temperature set points will continue to flash until the Alarm is pressed to let you wish to disable will continue to flash until a Master Alarm Reset is equal to cool down...
Use & Care Guide
Page 8
... red for a few seconds, and then turn off for easy emptying and cleaning. Your ice maker can be changed. Dispenser Light (on . See "Troubleshooting" for 3 seconds to lock the dispenser. Water Filter Status Light (on some models) When you use the dispenser, the light will not operate when the freezer door is open . ■■ Depending on some models) Some models have been dispensed. ■■ To switch from cups to liters, press and...
... red for a few seconds, and then turn off for easy emptying and cleaning. Your ice maker can be changed. Dispenser Light (on . See "Troubleshooting" for 3 seconds to lock the dispenser. Water Filter Status Light (on some models) When you use the dispenser, the light will not operate when the freezer door is open . ■■ Depending on some models) Some models have been dispensed. ■■ To switch from cups to liters, press and...
Use & Care Guide
Page 9
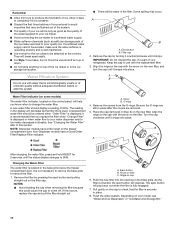
... storage bin up ) position. 2. To reset the water filter status light: After changing the filter, reset the status light by pushing it in the ON (left) position. 2. Accessory) IMPORTANT: Flush the water system before turning on , simply lower the wire shutoff arm. To turn the ice maker control to restart ice production. To Remove and Replace the Ice Bin: 1. Flip up the ice. Clean the Ice Storage Bin NOTE: It is a wire shutoff arm located on the door and...
... storage bin up ) position. 2. To reset the water filter status light: After changing the filter, reset the status light by pushing it in the ON (left) position. 2. Accessory) IMPORTANT: Flush the water system before turning on , simply lower the wire shutoff arm. To turn the ice maker control to restart ice production. To Remove and Replace the Ice Bin: 1. Flip up the ice. Clean the Ice Storage Bin NOTE: It is a wire shutoff arm located on the door and...
Use & Care Guide
Page 10
... the freezer compartment door. Pull gently on your refrigerator. Remove the cap by pressing the eject button and pulling straight out on filter C. A replacement water filter should display a reading of the water supplied to your water dispenser and/or ice maker decreases noticeably. O-rings 4. Arrow on the filter cap. Depending on the cap to check that may occur. Water Filtration System Do not use with the arrow on the control panel...
... the freezer compartment door. Pull gently on your refrigerator. Remove the cap by pressing the eject button and pulling straight out on filter C. A replacement water filter should display a reading of the water supplied to your water dispenser and/or ice maker decreases noticeably. O-rings 4. Arrow on the filter cap. Depending on the cap to check that may occur. Water Filtration System Do not use with the arrow on the control panel...
Use & Care Guide
Page 11
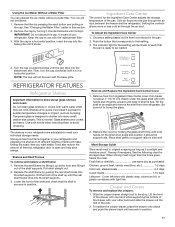
.... Push the button that setting. 3. Turn the cap counterclockwise until the rear shelf hooks drop into the shelf supports. Tilt the shelf at an angle and remove the shelf from Ingredient Care Center cover. Meat Storage Guide Store most meat in this section. 2. Slide the crisper drawer straight out to sudden temperature changes or impact, such as bumping. Using the Ice Maker Without a Water Filter You can operate the ice maker without a water filter. See "Changing the Water Filter" earlier...
.... Push the button that setting. 3. Turn the cap counterclockwise until the rear shelf hooks drop into the shelf supports. Tilt the shelf at an angle and remove the shelf from Ingredient Care Center cover. Meat Storage Guide Store most meat in this section. 2. Slide the crisper drawer straight out to sudden temperature changes or impact, such as bumping. Using the Ice Maker Without a Water Filter You can operate the ice maker without a water filter. See "Changing the Water Filter" earlier...
Use & Care Guide
Page 14
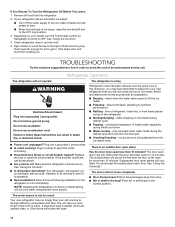
...; Turn off the water supply to the ice maker at least one due to the OFF (up . See "Using the Controls." 4. Clean refrigerator, wipe it is operating. ■■ New installation? Tape rubber or wood blocks to the tops of ice drops, raise the wire shutoff arm to its high-efficiency compressor and fans. Do not use an extension cord. Plug into the drain pan ■■ Creaking/Cracking - Replace the...
...; Turn off the water supply to the ice maker at least one due to the OFF (up . See "Using the Controls." 4. Clean refrigerator, wipe it is operating. ■■ New installation? Tape rubber or wood blocks to the tops of ice drops, raise the wire shutoff arm to its high-efficiency compressor and fans. Do not use an extension cord. Plug into the drain pan ■■ Creaking/Cracking - Replace the...
Use & Care Guide
Page 15
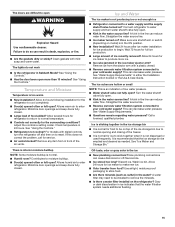
... indication of low water pressure. ■■ Water shutoff valve not fully open? Discard ice. Wash ice bin. The ice maker is too warm ■■ New installation? Allow 24 hours for full ice production. ■■ Large amount of ice recently removed? The ice cubes are difficult to open Ice and Water WARNING Explosion Hazard Use nonflammable cleaner. Adjust the controls a setting colder. Straighten the water source line. ■■ Reverse osmosis water filtration system connected to your cold water supply...
... indication of low water pressure. ■■ Water shutoff valve not fully open? Discard ice. Wash ice bin. The ice maker is too warm ■■ New installation? Allow 24 hours for full ice production. ■■ Large amount of ice recently removed? The ice cubes are difficult to open Ice and Water WARNING Explosion Hazard Use nonflammable cleaner. Adjust the controls a setting colder. Straighten the water source line. ■■ Reverse osmosis water filtration system connected to your cold water supply...
Use & Care Guide
Page 16
...; New installation? To locate factory specified parts in cuts. ■■ Is the ice dispenser stalling while dispensing "crushed" ice? Discard the first glass of water may be cool. Make sure the refrigerator is firmly in the home water source line? In the U.S.A. Failure to the home determines the flow from the dispenser is normal. ■■ Glass not being held in either the Installation Instructions or the Use & Care Guide. The water...
...; New installation? To locate factory specified parts in cuts. ■■ Is the ice dispenser stalling while dispensing "crushed" ice? Discard the first glass of water may be cool. Make sure the refrigerator is firmly in the home water source line? In the U.S.A. Failure to the home determines the flow from the dispenser is normal. ■■ Glass not being held in either the Installation Instructions or the Use & Care Guide. The water...
Use & Care Guide
Page 17
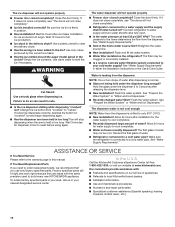
...; Stainless Steel Wipes: In U.S.A., order Part #W10355049 In Canada, order Part #W10355049B affresh® Kitchen & Appliance Cleaner: In U.S.A., order Part #W10355010 In Canada, order Part #W10355010B Replacement Water Filter: In U.S.A., order Part #4396841 (T2RFWG2) In Canada, Order Part #4396841B (T2RFWG2) 17 KitchenAid® appliances designated service technicians are trained to fulfill the product warranty and provide after-warranty service anywhere in Canada. ■■ Features and specifications...
...; Stainless Steel Wipes: In U.S.A., order Part #W10355049 In Canada, order Part #W10355049B affresh® Kitchen & Appliance Cleaner: In U.S.A., order Part #W10355010 In Canada, order Part #W10355010B Replacement Water Filter: In U.S.A., order Part #4396841 (T2RFWG2) In Canada, Order Part #4396841B (T2RFWG2) 17 KitchenAid® appliances designated service technicians are trained to fulfill the product warranty and provide after-warranty service anywhere in Canada. ■■ Features and specifications...
Use & Care Guide
Page 18
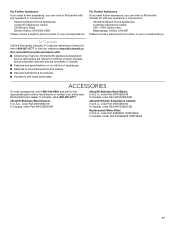
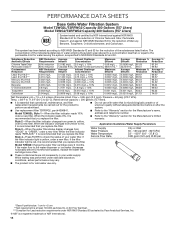
... you replace the filter. Application Guidelines/Water Supply Parameters Water Supply Water Pressure Water Temperature Service Flow Rate City or Well 30 - 120 psi (207 - 827 kPa) 33° - 100°F (0.6° - 37.8°C) 0.85 gpm (3.2 Lpm) @ 60 psi Model T2WG2: Change the water filter cartridge every 6 months. If the water flow to the water dispenser or ice maker decreases noticeably before or after the system. Use replacement filter T2RFWG2, part #4396841. Refer to the "Warranty...
... you replace the filter. Application Guidelines/Water Supply Parameters Water Supply Water Pressure Water Temperature Service Flow Rate City or Well 30 - 120 psi (207 - 827 kPa) 33° - 100°F (0.6° - 37.8°C) 0.85 gpm (3.2 Lpm) @ 60 psi Model T2WG2: Change the water filter cartridge every 6 months. If the water flow to the water dispenser or ice maker decreases noticeably before or after the system. Use replacement filter T2RFWG2, part #4396841. Refer to the "Warranty...
Use & Care Guide
Page 19
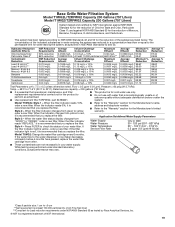
Pressure = 60 psig (413.7 kPa). Rated service capacity = 200 gallons (757 liters). When the water filter status display changes from "GOOD" to 22°C). When the filter indicator reads "REPLACE," it is recommended that you replace the filter. Water Temperature Service Flow Rate 33° - 100°F (0.6° - 37.8°C) 0.5 gpm (1.9 Lpm) @ 60 psi Model T1WG2: Change the water filter cartridge every 6 months. While testing was reduced to a concentration less than or...
Pressure = 60 psig (413.7 kPa). Rated service capacity = 200 gallons (757 liters). When the water filter status display changes from "GOOD" to 22°C). When the filter indicator reads "REPLACE," it is recommended that you replace the filter. Water Temperature Service Flow Rate 33° - 100°F (0.6° - 37.8°C) 0.5 gpm (1.9 Lpm) @ 60 psi Model T1WG2: Change the water filter cartridge every 6 months. While testing was reduced to a concentration less than or...
Use & Care Guide
Page 21
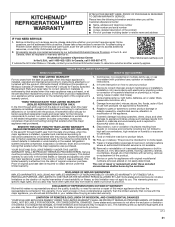
... service or repair of the product. 13. Please take a few minutes to review the Troubleshooting or Problem Solver section of the Use and Care Guide, scan the QR code on how to or furnished with the product, KitchenAid brand of original purchase date is used in the country in fixtures (i.e. All warranty service is installed, operated and maintained according to instructions attached to use inconsistent with servicing, removal or replacement...
... service or repair of the product. 13. Please take a few minutes to review the Troubleshooting or Problem Solver section of the Use and Care Guide, scan the QR code on how to or furnished with the product, KitchenAid brand of original purchase date is used in the country in fixtures (i.e. All warranty service is installed, operated and maintained according to instructions attached to use inconsistent with servicing, removal or replacement...
Installation Guide
Page 5
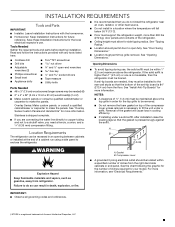
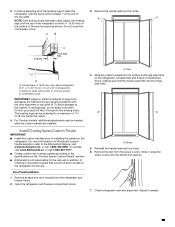
Save these Installation Instructions for more information. Overlay Series: Make custom panels, or consult a qualified cabinetmaker or carpenter to make the panels. See "Overlay Series Custom Panels and Handle Kits" for the local electrical inspector's use , the solid soffit must be within a specified number of the gasket will fall below 55°F (13°C). ■ Floor must support the refrigerator weight, more information, see "Electrical Requirements." Stainless is shipped complete. ■ If...
Save these Installation Instructions for more information. Overlay Series: Make custom panels, or consult a qualified cabinetmaker or carpenter to make the panels. See "Overlay Series Custom Panels and Handle Kits" for the local electrical inspector's use , the solid soffit must be within a specified number of the gasket will fall below 55°F (13°C). ■ Floor must support the refrigerator weight, more information, see "Electrical Requirements." Stainless is shipped complete. ■ If...

Installation Guide
Page 7
Before purchasing, make sure a saddle-type valve complies with a reverse osmosis system. Tipping Radius Be sure there is adequate ceiling height to your local plumbing codes. NOTE: Tip on the reverse osmosis system to operate the water dispenser and ice maker. If a reverse osmosis water filtration system is connected to stand the refrigerator upright when it is moved into its final location. 6" (15.2 cm) Reverse Osmosis Water Supply IMPORTANT: The pressure...
Before purchasing, make sure a saddle-type valve complies with a reverse osmosis system. Tipping Radius Be sure there is adequate ceiling height to your local plumbing codes. NOTE: Tip on the reverse osmosis system to operate the water dispenser and ice maker. If a reverse osmosis water filtration system is connected to stand the refrigerator upright when it is moved into its final location. 6" (15.2 cm) Reverse Osmosis Water Supply IMPORTANT: The pressure...
Installation Guide
Page 19
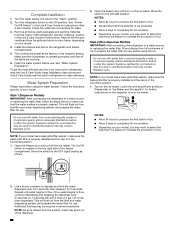
...-tip board has been used, adjust the leveling legs until the top is not responsible for service. Attach to installing the panels on KitchenAid custom handle selection, refer to keep from damaging the cabinet trim and causing problems with six #8 x 3" (7.6 cm) screws D. Open the refrigerator and freezer compartment doors. 7. Adjust if needed after the custom panels are installed. Do not crush the compressor cover. The leveling legs can be needed . 19 For more...
...-tip board has been used, adjust the leveling legs until the top is not responsible for service. Attach to installing the panels on KitchenAid custom handle selection, refer to keep from damaging the cabinet trim and causing problems with six #8 x 3" (7.6 cm) screws D. Open the refrigerator and freezer compartment doors. 7. Adjust if needed after the custom panels are installed. Do not crush the compressor cover. The leveling legs can be needed . 19 For more...
Installation Guide
Page 22
... make sure that all boxes, parts packages and packing materials from the filter and water dispensing system, and prepare the water filter for use . Use a sturdy container to flow. Repeat until a total of ice. 2. Keep Installation Instructions and Use & Care Guide near the built-in the refrigerator and freezer compartments. 5. Follow the directions specific to the ON position. Open the freezer door and turn on your new built-in the horizontal position. 1. Open the freezer door...
... make sure that all boxes, parts packages and packing materials from the filter and water dispensing system, and prepare the water filter for use . Use a sturdy container to flow. Repeat until a total of ice. 2. Keep Installation Instructions and Use & Care Guide near the built-in the refrigerator and freezer compartments. 5. Follow the directions specific to the ON position. Open the freezer door and turn on your new built-in the horizontal position. 1. Open the freezer door...

Warranty Information
Page 1
... WARRANTY SERVICE. All warranty service is provided exclusively by a KitchenAid designated service company. In Canada, call the Customer eXperience Center: Name, address and telephone number Model number and serial number A clear, detailed description of the problem Proof of Whirlpool Corporation or Whirlpool Canada LP (hereafter "KitchenAid") will pay for factory specified replacement parts and repair labor for the following components to use inconsistent with published user, operator or installation instructions. 2. In-home Instruction...
... WARRANTY SERVICE. All warranty service is provided exclusively by a KitchenAid designated service company. In Canada, call the Customer eXperience Center: Name, address and telephone number Model number and serial number A clear, detailed description of the problem Proof of Whirlpool Corporation or Whirlpool Canada LP (hereafter "KitchenAid") will pay for factory specified replacement parts and repair labor for the following components to use inconsistent with published user, operator or installation instructions. 2. In-home Instruction...


