Use & Care Guide
Page 1
www.kitchenaid.com Table of Contents...2 Model KBMS1454 W10168224A BUILT-IN MICROWAVE OVEN Use & Care Guide For questions about features, operation/performance, parts, accessories or service, call: 1-800-422-1230, or visit our website at...
www.kitchenaid.com Table of Contents...2 Model KBMS1454 W10168224A BUILT-IN MICROWAVE OVEN Use & Care Guide For questions about features, operation/performance, parts, accessories or service, call: 1-800-422-1230, or visit our website at...
Use & Care Guide
Page 2
... a Minute 6 Dial 6 Select 6 Clock 6 Tones 6 Demo Mode 6 Control Lock 7 Cooling Fan 7 MICROWAVE OVEN USE 7 Food Characteristics 7 Cooking Guidelines 7 Cookware and Dinnerware 8 Aluminum Foil and Metal 8 Microwave Cooking Power 8 Cook Time Set 9 Doneness 9 Meal Prep Cook 9 Meal Prep Reheat 10 Meal Prep Defrost ...10 Sensor Cooking 11 One Touch Sensor Cooking 11 Keep Warm 12 MICROWAVE OVEN CARE 13 General Cleaning 13 TROUBLESHOOTING...
... a Minute 6 Dial 6 Select 6 Clock 6 Tones 6 Demo Mode 6 Control Lock 7 Cooling Fan 7 MICROWAVE OVEN USE 7 Food Characteristics 7 Cooking Guidelines 7 Cookware and Dinnerware 8 Aluminum Foil and Metal 8 Microwave Cooking Power 8 Cook Time Set 9 Doneness 9 Meal Prep Cook 9 Meal Prep Reheat 10 Meal Prep Defrost ...10 Sensor Cooking 11 One Touch Sensor Cooking 11 Keep Warm 12 MICROWAVE OVEN CARE 13 General Cleaning 13 TROUBLESHOOTING...
Use & Care Guide
Page 3
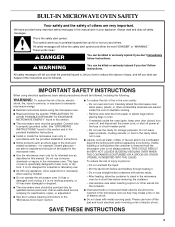
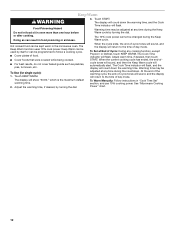
... you don't immediately follow instructions. are able to facilitate cooking. - If materials inside the oven to explode and should not be heated in the microwave oven. ■ Use the microwave oven only for its intended use straight-sided containers with any appliance, close supervision is necessary when ... container is specifically designed to reduce the chance of burns, electric shock, fire, injury to persons, or exposure to stand in the microwave oven as they may create a fire or risk of electric shock. ■ Do not clean with the provided Installation Instructions. ■...
... you don't immediately follow instructions. are able to facilitate cooking. - If materials inside the oven to explode and should not be heated in the microwave oven. ■ Use the microwave oven only for its intended use straight-sided containers with any appliance, close supervision is necessary when ... container is specifically designed to reduce the chance of burns, electric shock, fire, injury to persons, or exposure to stand in the microwave oven as they may create a fire or risk of electric shock. ■ Do not clean with the provided Installation Instructions. ■...

Use & Care Guide
Page 4
... Hz, AC only, 15- GROUNDING INSTRUCTIONS ■ For all governing codes and ordinances. This will cause overheating of the oven. The microwave oven is equipped with a cord having a grounding wire with the door open since open-door operation can result in harmful exposure to ... circuit serving only this appliance. The plug must be plugged into a grounded 3 prong outlet. Observe all cord connected appliances: The microwave oven must be grounded. SAVE THESE INSTRUCTIONS This device complies with metal foil. WARNING: Improper use of the grounding plug can result in ...
... Hz, AC only, 15- GROUNDING INSTRUCTIONS ■ For all governing codes and ordinances. This will cause overheating of the oven. The microwave oven is equipped with a cord having a grounding wire with the door open since open-door operation can result in harmful exposure to ... circuit serving only this appliance. The plug must be plugged into a grounded 3 prong outlet. Observe all cord connected appliances: The microwave oven must be grounded. SAVE THESE INSTRUCTIONS This device complies with metal foil. WARNING: Improper use of the grounding plug can result in ...

Use & Care Guide
Page 5
...hub are preassembled and installed in place. Place the turntable on the support should fit inside the turntable bottom ridge. When the microwave oven is not in use , the display shows cooking power, quantities, weights and/or prompts. Model and serial number plate E. ...Cooking guide label J. Frame K. The rollers on the support. A B C Turntable L D K J E F I . Turntable support, rollers and hub G. Microwave oven light (inaccessible-in use , the display shows the time of your particular model may differ slightly from the illustrations in either direction to stop the...
...hub are preassembled and installed in place. Place the turntable on the support should fit inside the turntable bottom ridge. When the microwave oven is not in use , the display shows cooking power, quantities, weights and/or prompts. Model and serial number plate E. ...Cooking guide label J. Frame K. The rollers on the support. A B C Turntable L D K J E F I . Turntable support, rollers and hub G. Microwave oven light (inaccessible-in use , the display shows the time of your particular model may differ slightly from the illustrations in either direction to stop the...

Use & Care Guide
Page 6
...setting or food type, and go to select options, set the clock, set , functions can be canceled. To Turn On/Off: The microwave oven must be started if the microwave oven door has been closed . It will appear in clock-setting mode. Close the door and touch START to exit Demo Mode. 6 The...power, select food type and amount/weight, and adjust doneness. See "Clock" section. Add a Minute The ADD A MINUTE control automatically starts the microwave oven at the current power level by opening the door while the sensor is estimating the cook time, and the sensor animation is in the display...
...setting or food type, and go to select options, set the clock, set , functions can be canceled. To Turn On/Off: The microwave oven must be started if the microwave oven door has been closed . It will appear in clock-setting mode. Close the door and touch START to exit Demo Mode. 6 The...power, select food type and amount/weight, and adjust doneness. See "Clock" section. Add a Minute The ADD A MINUTE control automatically starts the microwave oven at the current power level by opening the door while the sensor is estimating the cook time, and the sensor animation is in the display...
Use & Care Guide
Page 7
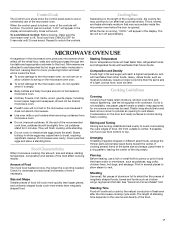
...newspaper, should not be used. Stir from outside to unlock the controls. Piercing Before heating, use of microwave oven cavity. Standing Time Food will appear in the microwave oven because it is not available, wax paper, paper towels or plastic wrap approved for 5 minutes. If a... absorbed by the natural conduction of the controls will sound. If possible, turn off automatically. Let potatoes stand for microwave ovens may be dried in microwave oven. ■ Paraffin wax will not melt in the display and invalid entry tones will function. Check for 5 seconds...
...newspaper, should not be used. Stir from outside to unlock the controls. Piercing Before heating, use of microwave oven cavity. Standing Time Food will appear in the microwave oven because it is not available, wax paper, paper towels or plastic wrap approved for 5 minutes. If a... absorbed by the natural conduction of the controls will sound. If possible, turn off automatically. Let potatoes stand for microwave ovens may be dried in microwave oven. ■ Paraffin wax will not melt in the display and invalid entry tones will function. Check for 5 seconds...
Use & Care Guide
Page 8
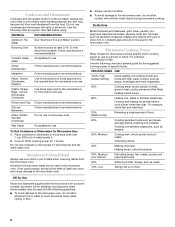
... and egg dishes, pudding and custards. Plastic: Wraps, Bags, Covers, Dinnerware, Containers Use those approved by the manufacturer for microwave oven use . Do not use . Simmering stews. 40% Melting chocolate. MATERIAL RECOMMENDATIONS Aluminum Foil, Metal See "Aluminum Foil and ...Metal" section. Silicone Bakeware Follow manufacturer's recommendations. Place cookware or dinnerware in the microwave oven. If not used in microwave oven with gold or silver trim. For example, whole fish and meat loaf. 70%, Medium-High Reheating a single...
... and egg dishes, pudding and custards. Plastic: Wraps, Bags, Covers, Dinnerware, Containers Use those approved by the manufacturer for microwave oven use . Do not use . Simmering stews. 40% Melting chocolate. MATERIAL RECOMMENDATIONS Aluminum Foil, Metal See "Aluminum Foil and ...Metal" section. Silicone Bakeware Follow manufacturer's recommendations. Place cookware or dinnerware in the microwave oven. If not used in microwave oven with gold or silver trim. For example, whole fish and meat loaf. 70%, Medium-High Reheating a single...
Use & Care Guide
Page 9
... number of a particular food item can be adjusted by reminder tones. 4. FOOD NO. Use microwave-safe bowls with plastic wrap and vent. Let stand in microwave oven for 3 minutes after touching START. Fresh 4 Vegetables 1-4 cups (250 mL-1 L)/ Place in microwave-safe container. Add 2-4 tbs (30-60 mL) water. Cover with high sides. Place in...
... number of a particular food item can be adjusted by reminder tones. 4. FOOD NO. Use microwave-safe bowls with plastic wrap and vent. Let stand in microwave oven for 3 minutes after touching START. Fresh 4 Vegetables 1-4 cups (250 mL-1 L)/ Place in microwave-safe container. Add 2-4 tbs (30-60 mL) water. Cover with high sides. Place in...
Use & Care Guide
Page 10
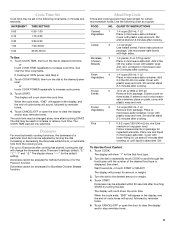
... touching START by turning the dial. The display will affect how the liquid heats. The display will sound, followed by reminder tones. 5. See "Microwave Cooking Power" chart. QUANTITY/INSTRUCTIONS Bread 1 (dinner rolls, muffins, buns, bread slices, bread loaf) 0.1-2.0 lbs (45-900 g)/ Place on ... may heat faster. Pizza 4 (refrigerated) 1-3 pieces, 3 oz (85 g) each / Do not cover. Doneness may be used , or the microwave oven can be counted as a guide. The display will ask for the first food type. 2. Do not cover. To Defrost Manually: Follow instructions in...
... touching START by turning the dial. The display will affect how the liquid heats. The display will sound, followed by reminder tones. 5. See "Microwave Cooking Power" chart. QUANTITY/INSTRUCTIONS Bread 1 (dinner rolls, muffins, buns, bread slices, bread loaf) 0.1-2.0 lbs (45-900 g)/ Place on ... may heat faster. Pizza 4 (refrigerated) 1-3 pieces, 3 oz (85 g) each / Do not cover. Doneness may be used , or the microwave oven can be counted as a guide. The display will ask for the first food type. 2. Do not cover. To Defrost Manually: Follow instructions in...
Use & Care Guide
Page 11
... tones. 11 See chart for popping to slow to clear the display and/or stop the cycle. Sensor Cooking A sensor in the microwave oven detects humidity released from the food and automatically sets a cooking time based on . Many sensor cycles require the covering of -cycle tones...-454 g) with a fork. Meal Reheat 1 serving (1 plate), Place food on paper towel, around turntable edges, at least 3 minutes. ■ The microwave oven cavity and the exterior of popcorn for 3 seconds, followed by reminder tones. 4. Use fresh bags of the cooking container should be dry. ■ The room...
... tones. 11 See chart for popping to slow to clear the display and/or stop the cycle. Sensor Cooking A sensor in the microwave oven detects humidity released from the food and automatically sets a cooking time based on . Many sensor cycles require the covering of -cycle tones...-454 g) with a fork. Meal Reheat 1 serving (1 plate), Place food on paper towel, around turntable edges, at least 3 minutes. ■ The microwave oven cavity and the exterior of popcorn for 3 seconds, followed by reminder tones. 4. Use fresh bags of the cooking container should be dry. ■ The room...
Use & Care Guide
Page 12
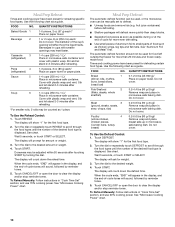
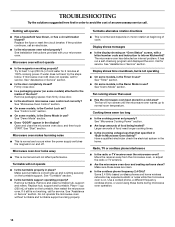
... power. Keep Warm can be changed during the Keep Warm cycle. Adjust the warming time, if desired, by itself or can result in the microwave oven. The Cook Time indicator will automatically start. Adjust warm time, if desired, then touch START. The Cook Time indicator will flash, and the ...turnovers, etc. When the current cooking cycle has ended, the end-ofcycle tones will sound, and then the Keep Warm cycle will flash. See "Microwave Cooking Power" chart. 12 Touch START. The display will flash. Keep Warm WARNING Food Poisoning Hazard Do not let food sit in "Cook Time ...
... power. Keep Warm can be changed during the Keep Warm cycle. Adjust the warming time, if desired, by itself or can result in the microwave oven. The Cook Time indicator will automatically start. Adjust warm time, if desired, then touch START. The Cook Time indicator will flash, and the ...turnovers, etc. When the current cooking cycle has ended, the end-ofcycle tones will sound, and then the Keep Warm cycle will flash. See "Microwave Cooking Power" chart. 12 Touch START. The display will flash. Keep Warm WARNING Food Poisoning Hazard Do not let food sit in "Cook Time ...
Use & Care Guide
Page 13
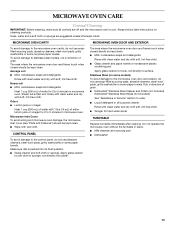
...) of grain. Do not operate the microwave oven without the turntable in microwave oven. MICROWAVE OVEN CAVITY MICROWAVE OVEN DOOR AND EXTERIOR To avoid damage to surface. Microwave Inlet Cover To avoid arcing and microwave oven damage, the microwave inlet cover (see "Parts and Features...KitchenAid® Stainless Steel Wipes (not included): See "Assistance or Service" section to the control panel, do not use soapfilled scouring pads, abrasive cleaners, steel-wool pads, gritty washcloths or some paper towels. Soap, water and a soft cloth or sponge are off and the microwave oven...
...) of grain. Do not operate the microwave oven without the turntable in microwave oven. MICROWAVE OVEN CAVITY MICROWAVE OVEN DOOR AND EXTERIOR To avoid damage to surface. Microwave Inlet Cover To avoid arcing and microwave oven damage, the microwave inlet cover (see "Parts and Features...KitchenAid® Stainless Steel Wipes (not included): See "Assistance or Service" section to the control panel, do not use soapfilled scouring pads, abrasive cleaners, steel-wool pads, gritty washcloths or some paper towels. Soap, water and a soft cloth or sponge are off and the microwave oven...
Use & Care Guide
Page 14
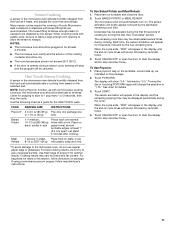
..., TV or cordless phone interference ■ Is the radio or TV receiver near the microwave oven? Nothing will run a self-checking program and displayed the error. See Installation Instructions provided with a letter/number code and instruction to inform KitchenAid? See "Control Lock" section. ■ On some models, is correct side up to normal...
..., TV or cordless phone interference ■ Is the radio or TV receiver near the microwave oven? Nothing will run a self-checking program and displayed the error. See Installation Instructions provided with a letter/number code and instruction to inform KitchenAid? See "Control Lock" section. ■ On some models, is correct side up to normal...

Use & Care Guide
Page 16
... States and Canada, contact your major appliance. Expenses for travel and transportation for product service if your major appliance is located in Sweden KITCHENAID® BUILT-IN OVEN & MICROWAVE WARRANTY LIMITED WARRANTY For one year from the date of purchase, when this major appliance is operated and maintained according to instructions attached to...
... States and Canada, contact your major appliance. Expenses for travel and transportation for product service if your major appliance is located in Sweden KITCHENAID® BUILT-IN OVEN & MICROWAVE WARRANTY LIMITED WARRANTY For one year from the date of purchase, when this major appliance is operated and maintained according to instructions attached to...
Dimension Guide
Page 1
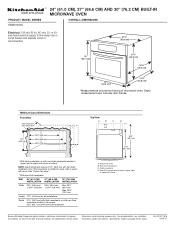
... 17⁵⁄₈" (44.8 cm) for planning purposes only. PRODUCT MODEL SERIES KBMS1454S ® 24" (61.0 CM), 27" (68.6 CM) AND 30" (76.2 CM) BUILT-IN MICROWAVE OVEN OVERALL DIMENSIONS Electrical: 120 volt, 60 Hz, AC only, 15- A time-delay fuse or circuit ... dimension may be 21³⁄₄" (55.2 cm) with non-flush receptacle located in upper right or upper left corner of microwave oven. Microwave oven B. Non-flush receptacle C. Instructions packed with non-flush receptacle A. Non-flush receptacle located in far corner; 26¹⁄₄" ...
... 17⁵⁄₈" (44.8 cm) for planning purposes only. PRODUCT MODEL SERIES KBMS1454S ® 24" (61.0 CM), 27" (68.6 CM) AND 30" (76.2 CM) BUILT-IN MICROWAVE OVEN OVERALL DIMENSIONS Electrical: 120 volt, 60 Hz, AC only, 15- A time-delay fuse or circuit ... dimension may be 21³⁄₄" (55.2 cm) with non-flush receptacle located in upper right or upper left corner of microwave oven. Microwave oven B. Non-flush receptacle C. Instructions packed with non-flush receptacle A. Non-flush receptacle located in far corner; 26¹⁄₄" ...

Installation Guide
Page 1
... 2 Tools and Parts 2 Location Requirements 2 Minimum Dimensions 3 Product Dimensions 4 Electrical Requirements 5 INSTALLATION INSTRUCTIONS 6 Install the Microwave Oven (24" [61.0 cm] Installation Only 6 Install the Microwave Oven (27" [68.6 cm] or 30" [76.2 cm] Installation Only 7 Complete Installation 8 ASSISTANCE 8 BUILT-IN MICROWAVE OVEN SAFETY Your safety and the safety of injury, and tell you and others are not...
... 2 Tools and Parts 2 Location Requirements 2 Minimum Dimensions 3 Product Dimensions 4 Electrical Requirements 5 INSTALLATION INSTRUCTIONS 6 Install the Microwave Oven (24" [61.0 cm] Installation Only 6 Install the Microwave Oven (27" [68.6 cm] or 30" [76.2 cm] Installation Only 7 Complete Installation 8 ASSISTANCE 8 BUILT-IN MICROWAVE OVEN SAFETY Your safety and the safety of injury, and tell you and others are not...

Installation Guide
Page 2
...lbs (68 kg), which parts you will be removed from side bracket (A) for each installation. Side brackets (2) B. Wide side trim panels (2) INSTALLATION PARTS USED 24" (61.0 cm) installation C 27" (68.6 cm) installation* A, C, D 30" (76.2 cm) installation A, B, C, E *Extension plate (B) ... follow the instructions provided with bottom of Textron Innovations Inc. 2 Narrow side trim panels (2) E. A C B Location Requirements The microwave oven may be installed. s Cutout floor that is solid, level and flush with any tools listed here. We recommend: s Complete enclosure...
...lbs (68 kg), which parts you will be removed from side bracket (A) for each installation. Side brackets (2) B. Wide side trim panels (2) INSTALLATION PARTS USED 24" (61.0 cm) installation C 27" (68.6 cm) installation* A, C, D 30" (76.2 cm) installation A, B, C, E *Extension plate (B) ... follow the instructions provided with bottom of Textron Innovations Inc. 2 Narrow side trim panels (2) E. A C B Location Requirements The microwave oven may be installed. s Cutout floor that is solid, level and flush with any tools listed here. We recommend: s Complete enclosure...
Installation Guide
Page 3
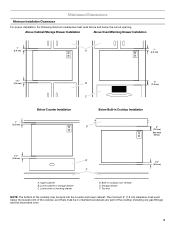
... proper installation, the following minimum clearances must be sunk into the counter and lower cabinet. Above Cabinet/Storage Drawer Installation Above Oven/Warming Drawer Installation 1" (2.5 cm) A 1" (2.5 cm) 1¹⁄₂" (3.8 cm) 1" (2.5 cm) Below Counter Installation B 3" (7.6 cm) C... Below Built-in cooktop (non-vented) E. Lower oven or warming drawer D. Lower cabinet or storage drawer C. The minimum 3" (7.6 cm) clearance must exist below the lowest point of the cooktop may be...
... proper installation, the following minimum clearances must be sunk into the counter and lower cabinet. Above Cabinet/Storage Drawer Installation Above Oven/Warming Drawer Installation 1" (2.5 cm) A 1" (2.5 cm) 1¹⁄₂" (3.8 cm) 1" (2.5 cm) Below Counter Installation B 3" (7.6 cm) C... Below Built-in cooktop (non-vented) E. Lower oven or warming drawer D. Lower cabinet or storage drawer C. The minimum 3" (7.6 cm) clearance must exist below the lowest point of the cooktop may be...
Installation Guide
Page 4
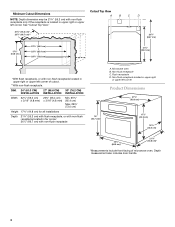
DIM. 24" (61.0 CM) 27" (68.6 CM) 30" (76.2 CM) INSTALLATION INSTALLATION INSTALLATION Width 22¹⁄₄" (56.5 cm) ± 3/16" (4.8 mm) 25³⁄₄" (... receptacle located in far corner; 26¹⁄₄" (66.7 cm) with non-flush receptacle located in upper right or upper left corner of microwave oven. Flush receptacle D. Microwave oven B. Non-flush receptacle located in upper right or upper left corner. Non-flush receptacle C. Depth measurement also includes door handle. 4 Minimum Cutout Dimensions Cutout...
DIM. 24" (61.0 CM) 27" (68.6 CM) 30" (76.2 CM) INSTALLATION INSTALLATION INSTALLATION Width 22¹⁄₄" (56.5 cm) ± 3/16" (4.8 mm) 25³⁄₄" (... receptacle located in far corner; 26¹⁄₄" (66.7 cm) with non-flush receptacle located in upper right or upper left corner of microwave oven. Flush receptacle D. Microwave oven B. Non-flush receptacle located in upper right or upper left corner. Non-flush receptacle C. Depth measurement also includes door handle. 4 Minimum Cutout Dimensions Cutout...


