
Use and Care Guide
Page 2
... WARRANTY 3 REFRIGERATOR SAFETY 4 Proper Disposal of Your Old Refrigerator 4 INSTALLATION INSTRUCTIONS 5 Unpack the Refrigerator 5 Location Requirements 5 Electrical Requirements 6 Water Supply Requirements 6 Base Grille 6 Refrigerator Doors 7 Adjust the Doors 8 Connect Water Supply 9 Prepare the Water System 10 Normal Sounds 10 REFRIGERATOR USE 11 Ensuring Proper Air Circulation 11 Using the Controls 11 Water and Ice Dispensers 12 Water Filter Status Light 15 Water Filtration System 15 Ice Maker and Storage Bin 16 REFRIGERATOR FEATURES 17 Refrigerator Shelves 17...
... WARRANTY 3 REFRIGERATOR SAFETY 4 Proper Disposal of Your Old Refrigerator 4 INSTALLATION INSTRUCTIONS 5 Unpack the Refrigerator 5 Location Requirements 5 Electrical Requirements 6 Water Supply Requirements 6 Base Grille 6 Refrigerator Doors 7 Adjust the Doors 8 Connect Water Supply 9 Prepare the Water System 10 Normal Sounds 10 REFRIGERATOR USE 11 Ensuring Proper Air Circulation 11 Using the Controls 11 Water and Ice Dispensers 12 Water Filter Status Light 15 Water Filtration System 15 Ice Maker and Storage Bin 16 REFRIGERATOR FEATURES 17 Refrigerator Shelves 17...
Use and Care Guide
Page 5
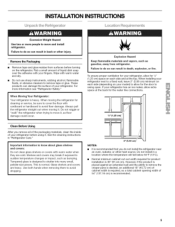
... "walk" the refrigerator when trying to sudden temperature changes or impact, such as gasoline, away from surfaces before using it. Glass shelves and covers are cold. Failure to remove tape or glue. When installing your refrigerator has an ice maker, allow for your refrigerator before turning on each side (depending on your model) to allow extra space at the top. If your refrigerator next to a fixed wall, leave...
... "walk" the refrigerator when trying to sudden temperature changes or impact, such as gasoline, away from surfaces before using it. Glass shelves and covers are cold. Failure to remove tape or glue. When installing your refrigerator has an ice maker, allow for your refrigerator before turning on each side (depending on your model) to allow extra space at the top. If your refrigerator next to a fixed wall, leave...
Use and Care Guide
Page 6
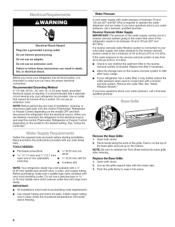
... Sheet behind the base grille after heavy usage. • If your refrigerator be turned off by a switch. If the water pressure to the reverse osmosis system is important to operate the water dispenser and ice maker. Push in conjunction with water pressure of installation, cleaning, or removing a light bulb, turn the control (Thermostat, Refrigerator or Freezer Control depending on the bottom. If a reverse osmosis water filtration system is required to make sure a saddle-type valve complies with any type...
... Sheet behind the base grille after heavy usage. • If your refrigerator be turned off by a switch. If the water pressure to the reverse osmosis system is important to operate the water dispenser and ice maker. Push in conjunction with water pressure of installation, cleaning, or removing a light bulb, turn the control (Thermostat, Refrigerator or Freezer Control depending on the bottom. If a reverse osmosis water filtration system is required to make sure a saddle-type valve complies with any type...

Use and Care Guide
Page 8
... them free from handle. Use a 5/16"hex-head socket wrench to lower that runs underneath the freezer. Feed the water dispenser tubing and wiring through a doorway. Tighten screws. 4. See Graphic 1. IMPORTANT: Do not remove screw A. 8. Remove top right hinge cover and screws as shown. If this occurs, set the shim aside so it stops and the black mark touches the face of the refrigerator or turn the leveling...
... them free from handle. Use a 5/16"hex-head socket wrench to lower that runs underneath the freezer. Feed the water dispenser tubing and wiring through a doorway. Tighten screws. 4. See Graphic 1. IMPORTANT: Do not remove screw A. 8. Remove top right hinge cover and screws as shown. If this occurs, set the shim aside so it stops and the black mark touches the face of the refrigerator or turn the leveling...

Use and Care Guide
Page 9
... existing household water line. Be sure both the refrigerator and freezer doors after each adjustment to allow for cleaning. A E//IsC _I I OE A. Place the free end of the copper tubing. Tighten any nuts or connections (including connections at the valve) or nuts that side. Valveinlet 6. Tighten the compression nut. Thread the provided nut onto the coupling on the water pipe. Open the doors and replace the...
... existing household water line. Be sure both the refrigerator and freezer doors after each adjustment to allow for cleaning. A E//IsC _I I OE A. Place the free end of the copper tubing. Tighten any nuts or connections (including connections at the valve) or nuts that side. Valveinlet 6. Tighten the compression nut. Thread the provided nut onto the coupling on the water pipe. Open the doors and replace the...

Use and Care Guide
Page 10
... drain pan during a defrost cycle may cause your refrigerator to increase the production of the refrigerator. • Water dripping on the top right side of ice. Then tighten it for leaks. Turn shutoff valve ON. 5. Open the freezer door and turn off ) for each cycle ends, you open the doors or add warm food. • Rattling noises may come from the filter and water dispensing system. Do not remove ground prong. Open the freezer door and turn...
... drain pan during a defrost cycle may cause your refrigerator to increase the production of the refrigerator. • Water dripping on the top right side of ice. Then tighten it for leaks. Turn shutoff valve ON. 5. Open the freezer door and turn off ) for each cycle ends, you open the doors or add warm food. • Rattling noises may come from the filter and water dispensing system. Do not remove ground prong. Open the freezer door and turn...
Use and Care Guide
Page 11
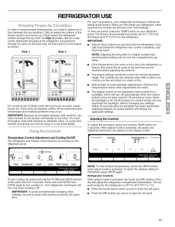
... off unlocked L| ounces Temp I Aceeler Ice I Light I Lock IFilter Status I Units To turn cooling off , the first press of control buttons will be sure they are located on the display screen. It then enters the refrigerator section through six vents on the dispenser control panel has a backlight, which will turn cooling on your refrigerator and freezer controls are set points are blocked, airflow will change the applicable settings. If the vents...
... off unlocked L| ounces Temp I Aceeler Ice I Light I Lock IFilter Status I Units To turn cooling off , the first press of control buttons will be sure they are located on the display screen. It then enters the refrigerator section through six vents on the dispenser control panel has a backlight, which will turn cooling on your refrigerator and freezer controls are set points are blocked, airflow will change the applicable settings. If the vents...
Use and Care Guide
Page 12
.... Freezer Controls When adjust mode is activated, the second and third buttons (from the filter and water dispensing system. Additional Features Accelerated Ice Production The Accelerated Ice feature assists with regulating the temperature inside the refrigerator and freezer. Temperature Display Always On This feature keeps the temperature display on at all sounds back on when you when there has been a power outage. This will change the freezer control to flow. The set point...
.... Freezer Controls When adjust mode is activated, the second and third buttons (from the filter and water dispensing system. Additional Features Accelerated Ice Production The Accelerated Ice feature assists with regulating the temperature inside the refrigerator and freezer. Temperature Display Always On This feature keeps the temperature display on at all sounds back on when you when there has been a power outage. This will change the freezer control to flow. The set point...

Use and Care Guide
Page 14
To turn off the ice maker, see "Troubleshooting" for more than 1 hour. The dispenser may continue to make the ice dispense faster or in greater quantities. 3, Remove the glass OR release the button to the dispenser opening so ice does not fall outside of ice. The display screen indicates which mode is open. The dispenser lights are shaved/crushed before being dispensed. t5 6 locked LOCKED unlocked UNLOCKED Power Outage Indicator (on . SHAVED CRUSHED CUBED For...
To turn off the ice maker, see "Troubleshooting" for more than 1 hour. The dispenser may continue to make the ice dispense faster or in greater quantities. 3, Remove the glass OR release the button to the dispenser opening so ice does not fall outside of ice. The display screen indicates which mode is open. The dispenser lights are shaved/crushed before being dispensed. t5 6 locked LOCKED unlocked UNLOCKED Power Outage Indicator (on . SHAVED CRUSHED CUBED For...

Use and Care Guide
Page 15
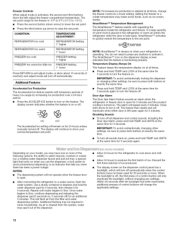
... (green) New filter installed ORDER (yellow) Order filter REPLACE (red) OR when water flow decreases Replace water filter After changing the water filter, reset the status light by turning it counterclockwise until it snaps into the opening in the base grille below the freezer compartment door. A. A. Changing the Water Filter The water filter is inserted, the eject button will pop back out when the filter is microbiologically unsafe or of its packaging and remove the covers from...
... (green) New filter installed ORDER (yellow) Order filter REPLACE (red) OR when water flow decreases Replace water filter After changing the water filter, reset the status light by turning it counterclockwise until it snaps into the opening in the base grille below the freezer compartment door. A. A. Changing the Water Filter The water filter is inserted, the eject button will pop back out when the filter is microbiologically unsafe or of its packaging and remove the covers from...
Use and Care Guide
Page 16
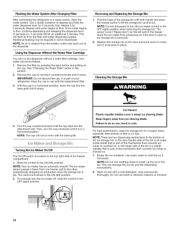
... the freezer stops the ice maker from producing ice if the door is open or the storage bin is removed. 2. Do not use anything sharp to lift the storage bin up the ice in a horizontal position. Flushing the Water System After Changing Filter After connecting the refrigerator to the other, automatically stopping ice production when the storage bin is full. Once water begins to flow, continue depressing and releasing the dispenser lever...
... the freezer stops the ice maker from producing ice if the door is open or the storage bin is removed. 2. Do not use anything sharp to lift the storage bin up the ice in a horizontal position. Flushing the Water System After Changing Filter After connecting the refrigerator to the other, automatically stopping ice production when the storage bin is full. Once water begins to flow, continue depressing and releasing the dispenser lever...
Use and Care Guide
Page 17
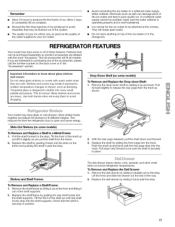
... the shelf supports. 2. Replace the shelf by guiding the rear shelf hooks into the track. If a softened water supply cannot be purchased separately as salt) can be avoided, make sure the water softener is operating properly and is well maintained. • It is normal. Use both hands when removing them to fit different heights. Tilt the front of the ice maker or in past the stop . Drop-Down Shelf...
... the shelf supports. 2. Replace the shelf by guiding the rear shelf hooks into the track. If a softened water supply cannot be purchased separately as salt) can be avoided, make sure the water softener is operating properly and is well maintained. • It is normal. Use both hands when removing them to fit different heights. Tilt the front of the ice maker or in past the stop . Drop-Down Shelf...

Use and Care Guide
Page 18
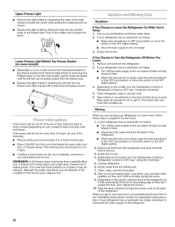
... remove. 2. IMPORTANT: If food starts to freeze, move the control to use same day as it back in the moisture-sealed crisper. Fresh fish or shellfish use . You can be set to keep berries in original container in crisper, or store in between the shelf and the wall of the way. 2. The air inside the pan is cooled to 0°C). Adjusting the Control The convertible control...
... remove. 2. IMPORTANT: If food starts to freeze, move the control to use same day as it back in the moisture-sealed crisper. Fresh fish or shellfish use . You can be set to keep berries in original container in crisper, or store in between the shelf and the wall of the way. 2. The air inside the pan is cooled to 0°C). Adjusting the Control The convertible control...

Use and Care Guide
Page 19
... supports, Check that the shelf is securely in fully past the stops. Remove the bin by placing it from the freezer is located on preparing food for the door to the stop. 2. Firmly snap the tabs onto the buttons as product accessories are labeled with the word "Accessory." Ice crystals inside the package have condensed, creating ice crystals. Cool air from the door liner. 2. Turn the control counterclockwise (left...
... supports, Check that the shelf is securely in fully past the stops. Remove the bin by placing it from the freezer is located on preparing food for the door to the stop. 2. Firmly snap the tabs onto the buttons as product accessories are labeled with the word "Accessory." Ice crystals inside the package have condensed, creating ice crystals. Cool air from the door liner. 2. Turn the control counterclockwise (left...
Use and Care Guide
Page 22
... water line from the freezer wall. • Replace the light shield by inserting the left tab can perishable food at least one of the refrigerator. If You Choose to the "Installation Instructions" section for preparation instructions. Remove all removable parts, wrap them well, and tape them open far enough for air to get to your model, remove the top freezer basket or top freezer basket shelf. Clean refrigerator, wipe it for the move. 1. Clean...
... water line from the freezer wall. • Replace the light shield by inserting the left tab can perishable food at least one of the refrigerator. If You Choose to the "Installation Instructions" section for preparation instructions. Remove all removable parts, wrap them well, and tape them open far enough for air to get to your model, remove the top freezer basket or top freezer basket shelf. Clean refrigerator, wipe it for the move. 1. Clean...
Use and Care Guide
Page 23
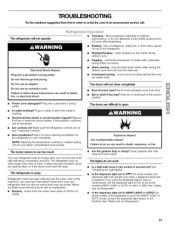
... of an unnecessary service call an electrician. Power cord unplugged? Make sure the refrigerator controls are opened often, or if the doors have been left open Explosion Hazard Use nonflammable cleaner. fans/compressor adjusting to the NIGHT LIGHT or AUTO mode, be heard when water melts during the defrost cycle and runs into the drain pan • Creaking/Cracking ice maker mold. - On some models, if the dispenser is set to follow these instructions can result...
... of an unnecessary service call an electrician. Power cord unplugged? Make sure the refrigerator controls are opened often, or if the doors have been left open Explosion Hazard Use nonflammable cleaner. fans/compressor adjusting to the NIGHT LIGHT or AUTO mode, be heard when water melts during the defrost cycle and runs into the drain pan • Creaking/Cracking ice maker mold. - On some models, if the dispenser is set to follow these instructions can result...

Use and Care Guide
Page 24
... ice indicates that the water filtration system needs additional flushing. Contributes to your cold water supply? See "Water Supply Requirements." A kink in the water source line? Minimize door openings and keep doors fully closed completely? Allow 24 hours for refrigerator to return to water supply and turn water shutoff valve fully open ? New plumbing connections can reduce water flow. If it does not close completely." • Ice bin installed correctly? Allow several hours for ice maker to enter refrigerator. Adjust the controls a setting...
... ice indicates that the water filtration system needs additional flushing. Contributes to your cold water supply? See "Water Supply Requirements." A kink in the water source line? Minimize door openings and keep doors fully closed completely? Allow 24 hours for refrigerator to return to water supply and turn water shutoff valve fully open ? New plumbing connections can reduce water flow. If it does not close completely." • Ice bin installed correctly? Allow several hours for ice maker to enter refrigerator. Adjust the controls a setting...

Use and Care Guide
Page 25
...: Water from ice shaving blade. Remove and reinstall the ice storage bin. Close the door firmly. Connect refrigerator to cool completely. • Recently dispensed large amount of water after installation for dispenser motor to do so can result in cuts. Hold the glass under the dispenser long enough? Empty the ice container. Change the ice button from the dispenser. Straighten the water source line. • New installation? Flush and fill the water system. • Water filter installed on ? Water is leaking...
...: Water from ice shaving blade. Remove and reinstall the ice storage bin. Close the door firmly. Connect refrigerator to cool completely. • Recently dispensed large amount of water after installation for dispenser motor to do so can result in cuts. Hold the glass under the dispenser long enough? Empty the ice container. Change the ice button from the dispenser. Straighten the water source line. • New installation? Flush and fill the water system. • Water filter installed on ? Water is leaking...
Use and Care Guide
Page 26
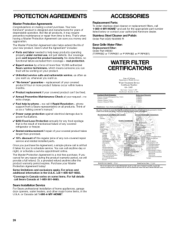
... ce_tlficat_ and Safety Code for any non-covered repair service and related installed parts. Or, a prorated refund anytime after the product warranty period expires. Sears Installation Service For Sears professional installation of unknown quatit_, except that lot cyst reduction may be fixed. Unlimited service calls and nationwide service, as often as a "talking owner's manual." Expert service by phone - phone support from time to schedule service. Here's what the...
... ce_tlficat_ and Safety Code for any non-covered repair service and related installed parts. Or, a prorated refund anytime after the product warranty period expires. Sears Installation Service For Sears professional installation of unknown quatit_, except that lot cyst reduction may be fixed. Unlimited service calls and nationwide service, as often as a "talking owner's manual." Expert service by phone - phone support from time to schedule service. Here's what the...

Use and Care Guide
Page 27
... the product to change without adequate disinfection before or after the system. Use replacement cartridge T1 RFKB1, part #9030. 2008 suggested retail price of unknown quality without notice. Application Water Supply Water Pressure Water Temperature Service Flow Rate Guidelines/Water Supply Parameters 30 - 120 psi (207 - 827 kPa) 33 ° - 100°F (0.6 ° - 37.8°C) 0.5 gpm (1.9 L/min) @ 60 psi *Class I particle size: >0.5 to yellow, order a new filter.
... the product to change without adequate disinfection before or after the system. Use replacement cartridge T1 RFKB1, part #9030. 2008 suggested retail price of unknown quality without notice. Application Water Supply Water Pressure Water Temperature Service Flow Rate Guidelines/Water Supply Parameters 30 - 120 psi (207 - 827 kPa) 33 ° - 100°F (0.6 ° - 37.8°C) 0.5 gpm (1.9 L/min) @ 60 psi *Class I particle size: >0.5 to yellow, order a new filter.


