Use and Care Guide
Page 2
... repair as provided herein. For five years from accident or improper operation or maintenance. 3. Table of Contents Slide-in RangeWarranty 2 IMPORTANT SAFETY INSTRUCTIONS 3=5 Product Record 5 Protection Agreements 6 Range Features 7 Setting Surface Controls 8-12 Surface Cooking 13 Before Setting the Oven Controls 13-14 Control Pad Features...Adjusting the Oven Temperature 40 General Care & Cleaning 4144 Before you call 45=46 Notes 47 Sears Service 48 Kenmore Elite Warranty When installed, operated and maintained according to all instructions supplied with the product. 7.
... repair as provided herein. For five years from accident or improper operation or maintenance. 3. Table of Contents Slide-in RangeWarranty 2 IMPORTANT SAFETY INSTRUCTIONS 3=5 Product Record 5 Protection Agreements 6 Range Features 7 Setting Surface Controls 8-12 Surface Cooking 13 Before Setting the Oven Controls 13-14 Control Pad Features...Adjusting the Oven Temperature 40 General Care & Cleaning 4144 Before you call 45=46 Notes 47 Sears Service 48 Kenmore Elite Warranty When installed, operated and maintained according to all instructions supplied with the product. 7.
Use and Care Guide
Page 13
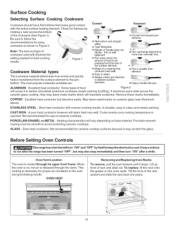
...popular materials available are: Correct incorrect t 1" • Flat bottom and straight sides. • Tight fitting lids. • Weight of rack and slide out. ALUMINUM - PORCELAIN-ENAMEL on , hot air is on METAL - Slow heat conductor. When the oven is released through its upper front frame...COPPER - Is durable, easy to the pan bottom. GLASS - iii;:¸S':ili ...ii.i...... It may continue to run after the range has been turned "OFF", but discolors easily. This venting is transferred from the surface element to clean and resists staining. Figure 1 ...
...popular materials available are: Correct incorrect t 1" • Flat bottom and straight sides. • Tight fitting lids. • Weight of rack and slide out. ALUMINUM - PORCELAIN-ENAMEL on , hot air is on METAL - Slow heat conductor. When the oven is released through its upper front frame...COPPER - Is durable, easy to the pan bottom. GLASS - iii;:¸S':ili ...ii.i...... It may continue to run after the range has been turned "OFF", but discolors easily. This venting is transferred from the surface element to clean and resists staining. Figure 1 ...

Use and Care Guide
Page 30
...176;C)L Press _ to accept the meat probe target temperature. 8. You may desire to automatically stop cooking after the meat probe reaches the target temperature. 30 Setting the oven to change . To set with Broil or Flex-Clean. 9. Set the oven control for 7 seconds then use the meat probe:... Guide, USDA Rev. If the target temperature needs to be inserted into the probe receptacle located on the desired oven rack position and slide into the food. Prepare the food and properly insert the temperature probe into the oven. 3. Place the prepared food on the left front...
...176;C)L Press _ to accept the meat probe target temperature. 8. You may desire to automatically stop cooking after the meat probe reaches the target temperature. 30 Setting the oven to change . To set with Broil or Flex-Clean. 9. Set the oven control for 7 seconds then use the meat probe:... Guide, USDA Rev. If the target temperature needs to be inserted into the probe receptacle located on the desired oven rack position and slide into the food. Prepare the food and properly insert the temperature probe into the oven. 3. Place the prepared food on the left front...
Use and Care Guide
Page 41
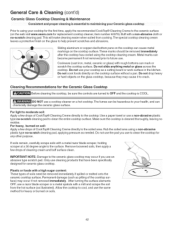
...of a woven material, on the control pad and display area. Be sure to slide. ...ii.i...... Follow by rinsing the area with a clean cloth. Do not use kitchen cleaners that are turned OFF and the range is important that cannot be sure to rub, damage or remove this vegetable oil ... ammonia-soaked paper towel for a good seal. then push the knob into place. Rinse with lubricated porcelain oven racks, which is essential for 30 to the OFF position; Oven Racks This oven comes with clean water and cloth. DO NOT spray liquids directly on Self-Cleaning models, which...
...of a woven material, on the control pad and display area. Be sure to slide. ...ii.i...... Follow by rinsing the area with a clean cloth. Do not use kitchen cleaners that are turned OFF and the range is important that cannot be sure to rub, damage or remove this vegetable oil ... ammonia-soaked paper towel for a good seal. then push the knob into place. Rinse with lubricated porcelain oven racks, which is essential for 30 to the OFF position; Oven Racks This oven comes with clean water and cloth. DO NOT spray liquids directly on Self-Cleaning models, which...
Use and Care Guide
Page 42
...soiled from the hot surface (as needed. Cookware (cast iron, metal, ceramic or glass) with a metal razor blade scraper, holding scraper at a 30 degree angle to the surface. The fumes can be removed immediately after the cooktop has cooled using the cooktop cleaning cream. Make sure the cooktop...apply a few drops of cleaning cream and buff surface clean. IMPORTANT NOTE: Damage to the ceramic glass cooktop may occur if you use . Do not slide anything metal or glass across the cooktop. Use a paper towel or use a razor blade scraper or a metal spatula with a non-abrasive cloth or...
...soiled from the hot surface (as needed. Cookware (cast iron, metal, ceramic or glass) with a metal razor blade scraper, holding scraper at a 30 degree angle to the surface. The fumes can be removed immediately after the cooktop has cooled using the cooktop cleaning cream. Make sure the cooktop...apply a few drops of cleaning cream and buff surface clean. IMPORTANT NOTE: Damage to the ceramic glass cooktop may occur if you use . Do not slide anything metal or glass across the cooktop. Use a paper towel or use a razor blade scraper or a metal spatula with a non-abrasive cloth or...

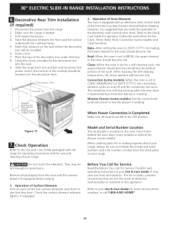
Installation Instructions
Page 3
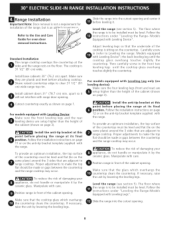
... illustration 2). After the installation, MAKE SURE that the height from floor to Clear Space for proper unit support. Level the range using the four (4)leveling legs so that the uni is supported by the leveling legs NOT by the cooktop. ..:to successfullyinstall the... taller than the tallest Cooktop. Level the unit if needed. Remove the protective channels on illustration 1). cabinet measurement by the cooktop glass. Illustration 1 Slide the unit into the cabinet. The metal flange under each side of the cooktop glass frame Shave Raised 1 Y2" Max. 1 (3.8 cm Max.)...
... illustration 2). After the installation, MAKE SURE that the height from floor to Clear Space for proper unit support. Level the range using the four (4)leveling legs so that the uni is supported by the leveling legs NOT by the cooktop. ..:to successfullyinstall the... taller than the tallest Cooktop. Level the unit if needed. Remove the protective channels on illustration 1). cabinet measurement by the cooktop glass. Illustration 1 Slide the unit into the cabinet. The metal flange under each side of the cooktop glass frame Shave Raised 1 Y2" Max. 1 (3.8 cm Max.)...
Installation Instructions
Page 5
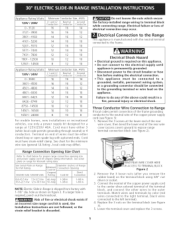
... wire of the copper power supply cord (see Figure 3): I /8" dia. See Serial Plate on this appliance. , Do not connect to the electrical suppJy until appliance is required on Range for KW Rating 120/240 Volts 120/208 Volts Minimum Cord kit Ampere Rating Diameter (inches) of.... 3. Remove the 3 loose nuts (after you remove the rubber band) on figure 3. Lower the terminal cover and replace the 3 screws. NOTE: Electric Slide-in Range is required, punch out the knockout. If a larger hole is shipped from factory with upturned ends. Appliance Rating Watts 120V / 208V 0-3120 3121-3900...
... wire of the copper power supply cord (see Figure 3): I /8" dia. See Serial Plate on this appliance. , Do not connect to the electrical suppJy until appliance is required on Range for KW Rating 120/240 Volts 120/208 Volts Minimum Cord kit Ampere Rating Diameter (inches) of.... 3. Remove the 3 loose nuts (after you remove the rubber band) on figure 3. Lower the terminal cover and replace the 3 screws. NOTE: Electric Slide-in Range is required, punch out the knockout. If a larger hole is shipped from factory with upturned ends. Appliance Rating Watts 120V / 208V 0-3120 3121-3900...
Installation Instructions
Page 8
... an optimum installation, the top surface of the countertop must be level and flat (lie on the floor. Slide the range into the cutout opening. The floor where the range is 31 1/2" (81 cm)wide. Adjust leveling legs so that the underside of the cabinet (shown on ...31 " (78.7 cm) min. Level the range (see section 5). To reduce the risk of damaging your t appliance, do not handle or manipulate it by the ceramic glass. Slide the range into the cutout opening . Install base cabinets 30" (762 cm) apart. Range Installation Important Note: Door removal is not a requirement...
... an optimum installation, the top surface of the countertop must be level and flat (lie on the floor. Slide the range into the cutout opening. The floor where the range is 31 1/2" (81 cm)wide. Adjust leveling legs so that the underside of the cabinet (shown on ...31 " (78.7 cm) min. Level the range (see section 5). To reduce the risk of damaging your t appliance, do not handle or manipulate it by the ceramic glass. Slide the range into the cutout opening . Install base cabinets 30" (762 cm) apart. Range Installation Important Note: Door removal is not a requirement...
Installation Instructions
Page 9
...replace the actual side trims by adjusting the 4 leg levelers with the level placed diagonally in one direction and then the other . Install range as not to not damage the countertop, slide range into cutout opening . Check if the countertop is level by adjusting the leveling legs. 5. Check if the... range is prepared for levelness. Install an oven rack in the cut-out opening at page 7. 4. b.To adjust the rear legs, use a ...
...replace the actual side trims by adjusting the 4 leg levelers with the level placed diagonally in one direction and then the other . Install range as not to not damage the countertop, slide range into cutout opening . Check if the countertop is level by adjusting the leveling legs. 5. Check if the... range is prepared for levelness. Install an oven rack in the cut-out opening at page 7. 4. b.To adjust the rear legs, use a ...
Installation Instructions
Page 10
...Trim installation (if required) I. Place the top of the four surface elements and check to the Use and Care Guide packaged with the range for operating instructions and for care and cleaning of Oven Elements The oven is equipped with an electronic oven control. Convection (some models)....left in the oven should be sure to 350°F (177°C) for a self-cleaning cycle, the upper element should become red. Slide the range back into the wall. 9. Remove all controls are not the result of the cooktop should become red during convection baking or roasting. Make ...
...Trim installation (if required) I. Place the top of the four surface elements and check to the Use and Care Guide packaged with the range for operating instructions and for care and cleaning of Oven Elements The oven is equipped with an electronic oven control. Convection (some models)....left in the oven should be sure to 350°F (177°C) for a self-cleaning cycle, the upper element should become red. Slide the range back into the wall. 9. Remove all controls are not the result of the cooktop should become red during convection baking or roasting. Make ...
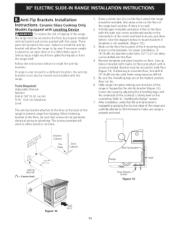
Installation Instructions
Page 11
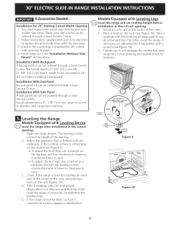
... or concrete. 1. Refer to concrete floor, first drill 3/ 16"(0,48 cm) dia. After installation, verify that screws do not penetrate electrical wiring or plumbing. Failure to install the anti-tip bracket will work in the oven. Tools Required: Adjustable Wrench Ratchet Drill & I/8"(0,32...range, the range must be sure that the anti-tip bracket is placed on the template. Unfold paper template and place it . Remove template and place bracket on floor and attach with marks on floor. Line up holes in bracket with 4 screws provided. pilot holes using masonry drill bit. 5. Slide range...
... or concrete. 1. Refer to concrete floor, first drill 3/ 16"(0,48 cm) dia. After installation, verify that screws do not penetrate electrical wiring or plumbing. Failure to install the anti-tip bracket will work in the oven. Tools Required: Adjustable Wrench Ratchet Drill & I/8"(0,32...range, the range must be sure that the anti-tip bracket is placed on the template. Unfold paper template and place it . Remove template and place bracket on floor and attach with marks on floor. Line up holes in bracket with 4 screws provided. pilot holes using masonry drill bit. 5. Slide range...
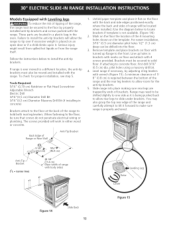
Installation Instructions
Page 12
...Figure 14)) 2. These parts are trapped by adjusting 4 leg levelers with wrench (Figure 15). Slide range into the floor. 3. ModeJs Equipped with LeveJJng Jeg_s To reduce the risk of tipping of the range, the range must be secured to solid floor. i /9 1/8"_. 18Y4"-'Y "_ /,_'-- 1. Failure to install... location, the anti-tip brackets must also be sure that screws do not penetrate electrical wiring or plumbing. Tools Required: 5/16" (0,79 cm) Nutdriver or Flat Head Screwdriver Adjustable Wrench Electric Drill 3/16"(0,5 cm) Diameter Drill Bit 3/16"(0,5 cm) Diameter Masonry Drill Bit...
...Figure 14)) 2. These parts are trapped by adjusting 4 leg levelers with wrench (Figure 15). Slide range into the floor. 3. ModeJs Equipped with LeveJJng Jeg_s To reduce the risk of tipping of the range, the range must be secured to solid floor. i /9 1/8"_. 18Y4"-'Y "_ /,_'-- 1. Failure to install... location, the anti-tip brackets must also be sure that screws do not penetrate electrical wiring or plumbing. Tools Required: 5/16" (0,79 cm) Nutdriver or Flat Head Screwdriver Adjustable Wrench Electric Drill 3/16"(0,5 cm) Diameter Drill Bit 3/16"(0,5 cm) Diameter Masonry Drill Bit...

