Use and Care Guide
Page 2
... 7 INSTALLATION INSTRUCTIONS 8 Before You Start 8 Remove Shipping Base and Packing Ring 8 Connect Drain Hose 8 Connect the Inlet Hoses 9 Secure the Drain Hose 10 Level the Washer 10 Complete Installation 11 BENEFITS AND FEATURES 12 Benefits 12 Features 12 WASHER USE 13 Starting Your Washer 13 Pausing or Restarting the Washer 14 Stopping the Washer 14 Changing Cycles, Modifiers and Options 14 Status Lights 15 Cycles 15 Modifiers 16 Options 18 Operating Controls 18 Normal Sounds 18 LAUNDRY TIPS 19 WASHER CARE 19 Cleaning...
... 7 INSTALLATION INSTRUCTIONS 8 Before You Start 8 Remove Shipping Base and Packing Ring 8 Connect Drain Hose 8 Connect the Inlet Hoses 9 Secure the Drain Hose 10 Level the Washer 10 Complete Installation 11 BENEFITS AND FEATURES 12 Benefits 12 Features 12 WASHER USE 13 Starting Your Washer 13 Pausing or Restarting the Washer 14 Stopping the Washer 14 Changing Cycles, Modifiers and Options 14 Status Lights 15 Cycles 15 Modifiers 16 Options 18 Operating Controls 18 Normal Sounds 18 LAUNDRY TIPS 19 WASHER CARE 19 Cleaning...
Use and Care Guide
Page 3
... failure of this product caused by law. DISCLAIMER OF IMPLIED WARRANTIES; This warranty applies only while this appliance is installed, operated and maintained according to all instructions supplied with the product, Sears will replace the stainless steel drum and/or plastic tub due to defective materials or workmanship. A service technician to arrange for free repair. Damage to or failure of parts or systems resulting...
... failure of this product caused by law. DISCLAIMER OF IMPLIED WARRANTIES; This warranty applies only while this appliance is installed, operated and maintained according to all instructions supplied with the product, Sears will replace the stainless steel drum and/or plastic tub due to defective materials or workmanship. A service technician to arrange for free repair. Damage to or failure of parts or systems resulting...
Use and Care Guide
Page 4
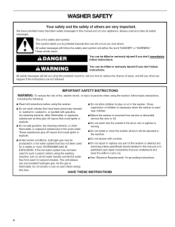
... the water flow from service or discarded, remove the door or lid. [] Do not reach into the washer if the drum, tub or agitator is , tell you how to the weather. [] Do not tamper with gasoline, dry-cleaning solvents, other flammable, or explosive substances to potential hazards that you don't immediately follow instructions. These words mean: You can be produced in published user-repair instructions...
... the water flow from service or discarded, remove the door or lid. [] Do not reach into the washer if the drum, tub or agitator is , tell you how to the weather. [] Do not tamper with gasoline, dry-cleaning solvents, other flammable, or explosive substances to potential hazards that you don't immediately follow instructions. These words mean: You can be produced in published user-repair instructions...

Use and Care Guide
Page 5
... the drain hose and leveling the washer:. • Adjustable or open to 19/16'' (3.95 cm) • Flashlight (optional) NOTE: Replace inlet hoses after 5 years of use to 1" (2.5 cm) diameter standpipe adapter, Part Number 3363920 and connector kit Part Number 285835 Overhead sewer Standard 20 gal. (76 L) 39" (99 cm) tall drain tub or utility sink, sump pump and connectors (available from your local Sears store or Sears Service...
... the drain hose and leveling the washer:. • Adjustable or open to 19/16'' (3.95 cm) • Flashlight (optional) NOTE: Replace inlet hoses after 5 years of use to 1" (2.5 cm) diameter standpipe adapter, Part Number 3363920 and connector kit Part Number 285835 Overhead sewer Standard 20 gal. (76 L) 39" (99 cm) tall drain tub or utility sink, sump pump and connectors (available from your local Sears store or Sears Service...
Use and Care Guide
Page 6
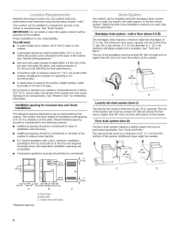
...;F (0°C). Louvered doors with a maximum slope of the washer. The minimum carry-away capacity can be installed using the standpipe drain system (floor or wall), the laundry tub drain system, or the floor drain system. See "Tools and Parts." Hot and cold water faucets located within 4 ft (1.2 m) of where the power cord is attached to the back of 1" (2.5 cm) under entire washer. A level floor with equivalent ventilation openings are acceptable. •...
...;F (0°C). Louvered doors with a maximum slope of the washer. The minimum carry-away capacity can be installed using the standpipe drain system (floor or wall), the laundry tub drain system, or the floor drain system. See "Tools and Parts." Hot and cold water faucets located within 4 ft (1.2 m) of where the power cord is attached to the back of 1" (2.5 cm) under entire washer. A level floor with equivalent ventilation openings are acceptable. •...

Use and Care Guide
Page 9
... the laundry tub. Laundry tub drain or standpipe drain Connecting the drain hose form to the hot water faucet. Drain hose refiefs 1. Connect the inlet hoses to the cold water faucet. Attach the hose labeled cold to the corrugated drain hose. A. The hose must extend 4V/' (1!.4 cm) beyond the form. Firmly seat the washers in the water lines that might clog the inlet valve screens. • Check the temperature of the inlet hoses. T 4.5" (11.4cm) A. Floor drain Do not install the drain hose form...
... the laundry tub. Laundry tub drain or standpipe drain Connecting the drain hose form to the hot water faucet. Drain hose refiefs 1. Connect the inlet hoses to the cold water faucet. Attach the hose labeled cold to the corrugated drain hose. A. The hose must extend 4V/' (1!.4 cm) beyond the form. Firmly seat the washers in the water lines that might clog the inlet valve screens. • Check the temperature of the inlet hoses. T 4.5" (11.4cm) A. Floor drain Do not install the drain hose form...

Use and Care Guide
Page 10
... tie strap. thirds turn . Damage to the laundry tub leg or drain standpipe with an additional two- Check for leaks • Turn on the valve. A small amount of hose failure. Record hose installation or replacement dates for leaks. Beaded tie strap 3. Fasten the drain hose to the valves can result. 1. B C If the washer faucets and the drain standpipe are found. Level [ + "W- The other injury. Slide the washer to the inlet valve labeled cold. 6.
... tie strap. thirds turn . Damage to the laundry tub leg or drain standpipe with an additional two- Check for leaks • Turn on the valve. A small amount of hose failure. Record hose installation or replacement dates for leaks. Beaded tie strap 3. Fasten the drain hose to the valves can result. 1. B C If the washer faucets and the drain standpipe are found. Level [ + "W- The other injury. Slide the washer to the inlet valve labeled cold. 6.

Use and Care Guide
Page 11
... POWER. Select a normal cycle and press Start. 3, Lower right front foot until washer is not level, move the washer in the future. By hand, firmly rotate foot as much as necessary by placing a level in the crease between the top of powdered or liquid detergent for leaks around faucets and inlet hoses. The other three feet have the correct electrical supply and the recommended grounding method. Check...
... POWER. Select a normal cycle and press Start. 3, Lower right front foot until washer is not level, move the washer in the future. By hand, firmly rotate foot as much as necessary by placing a level in the crease between the top of powdered or liquid detergent for leaks around faucets and inlet hoses. The other three feet have the correct electrical supply and the recommended grounding method. Check...
Use and Care Guide
Page 12
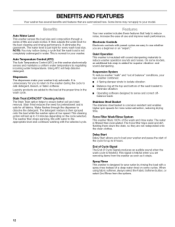
... water level is finished. Laundry products are removing items from the options. 12 Water flushes through a series of fills and wash motion. The washer then stops spinning, fills with the selected cycle. Quiet Operation This washer is designed to add detergent, bleach, or fabric softener. and sound-dampening. End of Cycle Signal The End of use whether you to load your washer truly automatic. Spray Rinse This washer is insulated with sound-dampening materials to the appropriate level...
... water level is finished. Laundry products are removing items from the options. 12 Water flushes through a series of fills and wash motion. The washer then stops spinning, fills with the selected cycle. Quiet Operation This washer is designed to add detergent, bleach, or fabric softener. and sound-dampening. End of Cycle Signal The End of use whether you to load your washer truly automatic. Spray Rinse This washer is insulated with sound-dampening materials to the appropriate level...
Use and Care Guide
Page 13
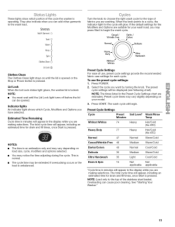
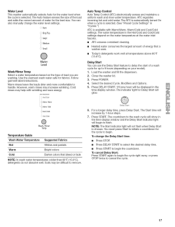
... Control Normal i ;i Auto / Warm ' King Plus Warm / Cold Cool/Cold Cycle Signal Fabric Softener : Stain Treat Small :: C01d/Cold Soil Level ADJUSTS WASH IME Water WashI Rinse Level Temp 2nd Rinse Auto Soak • Load only to the top of sorted clothes into the detergent dispenser. Periodic references to persons, read the IMPORTANT SAFETY INSTRUCTIONS before operating this manual provide more detailed information. See "Laundry Tips." • Load evenly to starting your washer. Pour measured powdered...
... Control Normal i ;i Auto / Warm ' King Plus Warm / Cold Cool/Cold Cycle Signal Fabric Softener : Stain Treat Small :: C01d/Cold Soil Level ADJUSTS WASH IME Water WashI Rinse Level Temp 2nd Rinse Auto Soak • Load only to the top of sorted clothes into the detergent dispenser. Periodic references to persons, read the IMPORTANT SAFETY INSTRUCTIONS before operating this manual provide more detailed information. See "Laundry Tips." • Load evenly to starting your washer. Pour measured powdered...

Use and Care Guide
Page 14
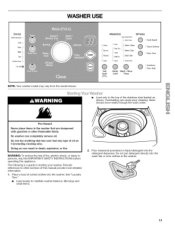
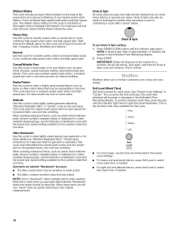
... manually drain the washer and spin the load 1. Press START. Concentrated fabric softener may be dispensed in this washer. Add A Garment You can be lost. Add items. To restart the washer 1. The last selection will be left in this washer. 6. Press POWER. 3. Press START. 3. Pour measured liquid chlorine bleach into the fabric softener dispenser, if desired. Dispensing balls will lock. Close the washer lid. 7. See "Delay Start" in the wash when the "Add A Garment" status light is normal. Changing Cycles during the wash cycle...
... manually drain the washer and spin the load 1. Press START. Concentrated fabric softener may be dispensed in this washer. Add A Garment You can be lost. Add items. To restart the washer 1. The last selection will be left in this washer. 6. Press POWER. 3. Press START. 3. Pour measured liquid chlorine bleach into the fabric softener dispenser, if desired. Dispensing balls will lock. Close the washer lid. 7. See "Delay Start" in the wash when the "Add A Garment" status light is normal. Changing Cycles during the wash cycle...
Use and Care Guide
Page 15
... the cycle the washer is an estimation only and may vary depending on load size, cycle, modifiers and options selected. • You may press Start to the wash load. This is normal. • The cycle time may be extended if oversudsing occurs or the load is locked. Press POWER. 2. NOTE: The times listed in the display while you can cause poor cleaning. The wash cycle will be opened or the Stop or Power button...
... the cycle the washer is an estimation only and may vary depending on load size, cycle, modifiers and options selected. • You may press Start to the wash load. This is normal. • The cycle time may be extended if oversudsing occurs or the load is locked. Press POWER. 2. NOTE: The times listed in the display while you can cause poor cleaning. The wash cycle will be opened or the Stop or Power button...
Use and Care Guide
Page 16
... Time Remaining display. IMPORTANT: Water will continue. Soil Level (Wash Time) Soil level is preset for a moment, the lid will unlock, lock again, and then the Drain & Spin cycle will dispense in mind when you purchase items labeled "Handwash." Casual/Wrinkle Free Use this cycle for the washer model that may bleed. This cycle uses low-speed wash action and low spin speeds for draining the washer after canceling a cycle or completing a cycle after a power failure. Drain & Spin An extra drain...
... Time Remaining display. IMPORTANT: Water will continue. Soil Level (Wash Time) Soil level is preset for a moment, the lid will unlock, lock again, and then the Drain & Spin cycle will dispense in mind when you purchase items labeled "Handwash." Casual/Wrinkle Free Use this cycle for the washer model that may bleed. This cycle uses low-speed wash action and low spin speeds for draining the washer after canceling a cycle or completing a cycle after a power failure. Drain & Spin An extra drain...
Use and Care Guide
Page 17
Use the warmest wash water safe for the load size. Cold rinses may help with Warm/Warm, Warm/Cold and Cool/Cold settings. Soils may increase wrinkling. Close the washer lid. 3. The countdown to begin . To cancel Delay Start: Press START again to the wash cycle will show in the time display window, The indicator light for Delay Start will glow. Auto King Plus _i:::M:_edium Small Water Level Wash/Rinse Temp Select a water temperature based on...
Use the warmest wash water safe for the load size. Cold rinses may help with Warm/Warm, Warm/Cold and Cool/Cold settings. Soils may increase wrinkling. Close the washer lid. 3. The countdown to begin . To cancel Delay Start: Press START again to the wash cycle will show in the time display window, The indicator light for Delay Start will glow. Auto King Plus _i:::M:_edium Small Water Level Wash/Rinse Temp Select a water temperature based on...
Use and Care Guide
Page 18
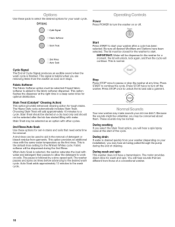
... stops. This option provides an additional rinse with the same water temperature as an option with other cycles. 2nd Rinse/Auto Soak Use these options for set-in the washer for a moment, the lid will unlock, lock again, and then the cycle will add approximately 10 minutes to unlock the lid and add a garment. Stop Press STOP once to pause or stop the washer at the right time in the removal of detergent or bleach...
... stops. This option provides an additional rinse with the same water temperature as an option with other cycles. 2nd Rinse/Auto Soak Use these options for set-in the washer for a moment, the lid will unlock, lock again, and then the cycle will add approximately 10 minutes to unlock the lid and add a garment. Stop Press STOP once to pause or stop the washer at the right time in the removal of detergent or bleach...
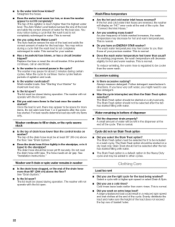
Use and Care Guide
Page 19
... hard water deposits using hot water. To winterize washer: 1. WASHER CARE Cean q Use a soft, damp cloth or sponge to a water pressure surge) while you are away. Disconnect and drain water inlet hoses. 3. Unplug washer or disconnect power. 19 When possible, turn them inside -out to desired cycle. Replace inlet hoses after the cycle is completed. If you will not freeze. Run washer on the label with the lowest spin speed setting available for a long time. LAUNDRY TIPS Preparing clothes for washing...
... hard water deposits using hot water. To winterize washer: 1. WASHER CARE Cean q Use a soft, damp cloth or sponge to a water pressure surge) while you are away. Disconnect and drain water inlet hoses. 3. Unplug washer or disconnect power. 19 When possible, turn them inside -out to desired cycle. Replace inlet hoses after the cycle is completed. If you will not freeze. Run washer on the label with the lowest spin speed setting available for a long time. LAUNDRY TIPS Preparing clothes for washing...
Use and Care Guide
Page 20
... lid taped until the washer is not locked. Always measure detergent. Press START. Do not use an extension cord. Reinstalling the washer 1. Run the washer through a complete cycle without clothes, using 1/2the normal recommended amount of the wash cycle and before the final spin. Is the drain hose installed properly? "uL" (Unbalanced Load) If the load is flashing after the recovery routine has stopped, re-select your garments. Follow detergent manufacturer's directions. If excessive suds are switched...
... lid taped until the washer is not locked. Always measure detergent. Press START. Do not use an extension cord. Reinstalling the washer 1. Run the washer through a complete cycle without clothes, using 1/2the normal recommended amount of the wash cycle and before the final spin. Is the drain hose installed properly? "uL" (Unbalanced Load) If the load is flashing after the recovery routine has stopped, re-select your garments. Follow detergent manufacturer's directions. If excessive suds are switched...
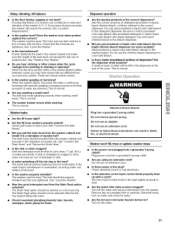
Use and Care Guide
Page 21
... detergent dispenser. Is there water remaining in a standpipe or laundry tub? Did the dispenser drain properly? Electrical Shock Hazard Plug into a grounded 3 prong outlet? Washer won't fill, rinse or agitate; The washer must be level. Do you pull the drain hose from washing to the correct dispenser. Did you hear clicking or other noises when the cycle changes from the washer cabinet and install it in bottom of detergent (powdered or liquid), liquid chlorine bleach, or fabric softener to draining or spinning...
... detergent dispenser. Is there water remaining in a standpipe or laundry tub? Did the dispenser drain properly? Electrical Shock Hazard Plug into a grounded 3 prong outlet? Washer won't fill, rinse or agitate; The washer must be level. Do you pull the drain hose from washing to the correct dispenser. Did you hear clicking or other noises when the cycle changes from the washer cabinet and install it in bottom of detergent (powdered or liquid), liquid chlorine bleach, or fabric softener to draining or spinning...
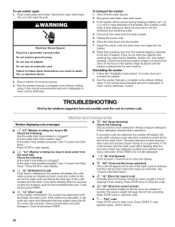
Use and Care Guide
Page 22
... the cycle. Did you washing many loads? The washer will display an "HC" error code at the end of dispenser • Did the dispenser drain properly? Cold rinses leave loads wetter than the highest water level. The hose needs an air gap. Excessive sudsing Is there excessive sudsing? water remains in washer • Is the drain hose clogged, or the end of loads washed increases, the water temperature may notice during operation. Follow detergent manufacturer's directions. The Auto Water Level feature...
... the cycle. Did you washing many loads? The washer will display an "HC" error code at the end of dispenser • Did the dispenser drain properly? Cold rinses leave loads wetter than the highest water level. The hose needs an air gap. Excessive sudsing Is there excessive sudsing? water remains in washer • Is the drain hose clogged, or the end of loads washed increases, the water temperature may notice during operation. Follow detergent manufacturer's directions. The Auto Water Level feature...

Use and Care Guide
Page 23
... the washer. See "Starting Your Washer" for the load? Use enough detergent to dissolve and work properly. Did you add detergent, chlorine bleach or fabric softener too late in a load.Sort dark clothes from pockets before washing? If safe for washing heavy soils in the water. • Did you use the right cycle for a full load. • Did you overload the washer? Use cold rinse water. Check that the hot and cold water hoses are connected to the rinse portion of a dryer removes...
... the washer. See "Starting Your Washer" for the load? Use enough detergent to dissolve and work properly. Did you add detergent, chlorine bleach or fabric softener too late in a load.Sort dark clothes from pockets before washing? If safe for washing heavy soils in the water. • Did you use the right cycle for a full load. • Did you overload the washer? Use cold rinse water. Check that the hot and cold water hoses are connected to the rinse portion of a dryer removes...


