
Instruction Manual
Page 3
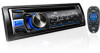
... + or VOL -. How to reset Pull out the insulation sheet when using for the first time. Turn the volume knob. BASICS Faceplate Volume knob KD-A845BT (turn/press) KD-R840BT Loading slot Display window Attach Remote control (RM-RK52) Remote sensor (Do not expose to bright sunlight.) Detach KD-R740BT Detach button To Turn on...
... + or VOL -. How to reset Pull out the insulation sheet when using for the first time. Turn the volume knob. BASICS Faceplate Volume knob KD-A845BT (turn/press) KD-R840BT Loading slot Display window Attach Remote control (RM-RK52) Remote sensor (Do not expose to bright sunlight.) Detach KD-R740BT Detach button To Turn on...

Instruction Manual
Page 10
...into the Bluetooth device. (You can be registered (paired) in the unit even if you turn on the unit. 2 Search and select "JVC UNIT" on the Bluetooth device. "PAIRING COMPLETED" appears when pairing is completed and " " will light up when Bluetooth connection is established. &#..." is a 6-digit passkey randomly generated during a phone call conversation, the Bluetooth connection is connected. Rear panel Adjust the microphone angle If you reset the unit. • Up to enter the Personal Identification Number (PIN) code immediately after pairing. "BT PAIRING" flashes on the display. &#...
...into the Bluetooth device. (You can be registered (paired) in the unit even if you turn on the unit. 2 Search and select "JVC UNIT" on the Bluetooth device. "PAIRING COMPLETED" appears when pairing is completed and " " will light up when Bluetooth connection is established. &#..." is a 6-digit passkey randomly generated during a phone call conversation, the Bluetooth connection is connected. Rear panel Adjust the microphone angle If you reset the unit. • Up to enter the Personal Identification Number (PIN) code immediately after pairing. "BT PAIRING" flashes on the display. &#...

Instruction Manual
Page 17
...its connection are in supported formats. (« 16) • Reattach the device. If this unit and iPod/iPhone. • Detach and reset the iPod/iPhone using shorter and thicker cords. noise while listening to forcibly eject the disc. Press 0, then insert the disc correctly. "IN... level. • Check the cords and connections. • Be sure the rear ground terminal connected to the car's chassis are using hard reset. • Check whether the [IPOD SWITCH] setting is appropriate. (« 4) New station creation is unsuccessful. Correct characters are not displayed....
...its connection are in supported formats. (« 16) • Reattach the device. If this unit and iPod/iPhone. • Detach and reset the iPod/iPhone using shorter and thicker cords. noise while listening to forcibly eject the disc. Press 0, then insert the disc correctly. "IN... level. • Check the cords and connections. • Be sure the rear ground terminal connected to the car's chassis are using hard reset. • Check whether the [IPOD SWITCH] setting is appropriate. (« 4) New station creation is unsuccessful. Correct characters are not displayed....

Instruction Manual
Page 18
... not support Voice Recognition feature. Symptom The unit does not respond when you try the following: 1 Check TROUBLESHOOTING 2 Reset the unit (« 3) 3 Contact (USA only) Call: 1-800-252-5722 ( or ) visit: http://www.jvc.com 18 EN_KD-A845BT[J]3.indd 18 9/25/12 12:16:13 PM Remedy You may have entered the... same PIN code to the unit. Reset the unit and try to connect again. • Other Bluetooth devices might be...
... not support Voice Recognition feature. Symptom The unit does not respond when you try the following: 1 Check TROUBLESHOOTING 2 Reset the unit (« 3) 3 Contact (USA only) Call: 1-800-252-5722 ( or ) visit: http://www.jvc.com 18 EN_KD-A845BT[J]3.indd 18 9/25/12 12:16:13 PM Remedy You may have entered the... same PIN code to the unit. Reset the unit and try to connect again. • Other Bluetooth devices might be...

Instruction Manual
Page 20
... switch, then disconnect the · terminal of the trim plate. See Installing the unit (in-dash mounting). 4 Connect the · terminal of the car battery. 5 Reset the unit. (« 3) Installing the unit (in-dash mounting) Do the required wiring. (« 21) Bend the appropriate tabs to hold the sleeve firmly in...
... switch, then disconnect the · terminal of the trim plate. See Installing the unit (in-dash mounting). 4 Connect the · terminal of the car battery. 5 Reset the unit. (« 3) Installing the unit (in-dash mounting) Do the required wiring. (« 21) Bend the appropriate tabs to hold the sleeve firmly in...


