Instruction Manual
Page 7
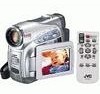
Indicators T POWER/CHARGE Lamp (੬ pg. 13, 18) GETTING STARTED EN 7 Other Parts U Monitor Latch (੬ pg....; pg. 37) (When using an optional conversion lens, it may cover this area and block the light.) e Remote Sensor (GR-D290 only) (੬ pg. 23) f Camera Sensor (Be careful not to the IEEE1394-1995 industry specification and extensions thereof. P...Q Audio/Video Output Connector [AV] (੬ pg. 22, 43) R DC Input Connector [DC] (੬ pg. 13) S Digital Video Connector [DV IN/OUT] (i.Link*) (੬ pg. 44, 45) * i.Link refers to cover this area, a sensor necessary for shooting is...
Indicators T POWER/CHARGE Lamp (੬ pg. 13, 18) GETTING STARTED EN 7 Other Parts U Monitor Latch (੬ pg....; pg. 37) (When using an optional conversion lens, it may cover this area and block the light.) e Remote Sensor (GR-D290 only) (੬ pg. 23) f Camera Sensor (Be careful not to the IEEE1394-1995 industry specification and extensions thereof. P...Q Audio/Video Output Connector [AV] (੬ pg. 22, 43) R DC Input Connector [DC] (੬ pg. 13) S Digital Video Connector [DV IN/OUT] (i.Link*) (੬ pg. 44, 45) * i.Link refers to cover this area, a sensor necessary for shooting is...
Instruction Manual
Page 13
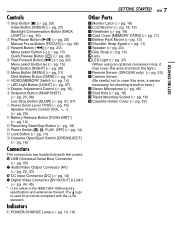
.... Using The Battery Pack Perform steps 2 - 3 in "Charging The Battery Pack". The POWER/CHARGE lamp on the camcorder blinks to indicate charging has started. 6 When the POWER/CHARGE lamp goes out, charging is attached to the camcorder. 5 Plug the AC Adapter into an AC outlet. Using generic non-JVC batteries can charge the BN-VF707U/VF714U/VF733U battery pack...
.... Using The Battery Pack Perform steps 2 - 3 in "Charging The Battery Pack". The POWER/CHARGE lamp on the camcorder blinks to indicate charging has started. 6 When the POWER/CHARGE lamp goes out, charging is attached to the camcorder. 5 Plug the AC Adapter into an AC outlet. Using generic non-JVC batteries can charge the BN-VF707U/VF714U/VF733U battery pack...
Instruction Manual
Page 14
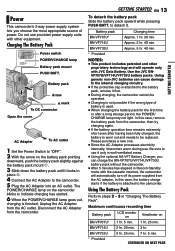
... Switch. WARNING! Operation Mode To turn back if the battery was used . ● Before extended use, it is recommended that the camcorder's power is pressed and hold for standard recording. Power Switch Position A (Full Auto Recording): Allows you to transfer a still image stored... pressing down . To resume the original function of the battery status even though you to your nearest JVC dealer. MENU/DATA Power Switch Lock Button MA POWER/ CHARGE POWER/ CHARGE lamp VIDEO/MEMORY Choose the appropriate operation mode according to play back a recording on the display.
... Switch. WARNING! Operation Mode To turn back if the battery was used . ● Before extended use, it is recommended that the camcorder's power is pressed and hold for standard recording. Power Switch Position A (Full Auto Recording): Allows you to transfer a still image stored... pressing down . To resume the original function of the battery status even though you to your nearest JVC dealer. MENU/DATA Power Switch Lock Button MA POWER/ CHARGE POWER/ CHARGE lamp VIDEO/MEMORY Choose the appropriate operation mode according to play back a recording on the display.

Instruction Manual
Page 17
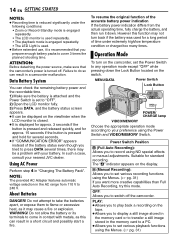
... cassette holder cover and try again. To protect valuable recordings Slide the erase protection tab on the back of the tape in the camcorder at the time of purchase. (GR-D290 only) Card Cover (MEMORY CARD) Label Memory card Write/erase protection tab Clipped edge 1 Make sure the... it is necessary to format the card. (੬ pg. 30) ATTENTION: Do not insert or remove the memory card while the camcorder is installed. ● When the battery pack's charge is suddenly moved from a cold place to a warm environment, wait a short time before opening the cassette holder cover. If the ...
... cassette holder cover and try again. To protect valuable recordings Slide the erase protection tab on the back of the tape in the camcorder at the time of purchase. (GR-D290 only) Card Cover (MEMORY CARD) Label Memory card Write/erase protection tab Clipped edge 1 Make sure the... it is necessary to format the card. (੬ pg. 30) ATTENTION: Do not insert or remove the memory card while the camcorder is installed. ● When the battery pack's charge is suddenly moved from a cold place to a warm environment, wait a short time before opening the cassette holder cover. If the ...

Instruction Manual
Page 18
...the tape, the time code is not a malfunction. (੬ pg. 48) NOTES: ● If the Record-Standby mode continues for 5 minutes, the camcorder's power shuts off , ੬ pg. 31, 33. When the remaining time reaches 2 minutes, the indication starts blinking. ● The time required to... "Recording From The Middle Of A Tape" (੬ pg. 20). ● To turn the camcorder on the switch. ● The POWER/CHARGE lamp lights and the camcorder enters the Record-Standby mode. The camcorder re-enters the Record-Standby mode. To turn the beep sounds off automatically. To avoid this is...
...the tape, the time code is not a malfunction. (੬ pg. 48) NOTES: ● If the Record-Standby mode continues for 5 minutes, the camcorder's power shuts off , ੬ pg. 31, 33. When the remaining time reaches 2 minutes, the indication starts blinking. ● The time required to... "Recording From The Middle Of A Tape" (੬ pg. 20). ● To turn the camcorder on the switch. ● The POWER/CHARGE lamp lights and the camcorder enters the Record-Standby mode. The camcorder re-enters the Record-Standby mode. To turn the beep sounds off automatically. To avoid this is...
Instruction Manual
Page 47
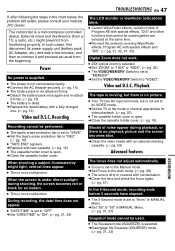
... moving, but is set to "SAVE". HClean the video heads with a fully charged one. (੬ pg. 13) Video and D.S.C. HReplace the dead battery with ...covered with special effects and "DIS". (੬ pg. 31, 32, 41, 42) Digital Zoom does not work. ● 25X optical zoom is dead. When shooting a subject ...SQUEEZE) is not a malfunction. If, after following the steps in MANUAL Menu. The camcorder is not a malfunction. External noise and interference (from the beginning. and then re-connect...JVC dealer. HDisengage the Squeeze (SQUEEZE) mode. (੬ pg. 31, 33) ...
... moving, but is set to "SAVE". HClean the video heads with a fully charged one. (੬ pg. 13) Video and D.S.C. HReplace the dead battery with ...covered with special effects and "DIS". (੬ pg. 31, 32, 41, 42) Digital Zoom does not work. ● 25X optical zoom is dead. When shooting a subject ...SQUEEZE) is not a malfunction. If, after following the steps in MANUAL Menu. The camcorder is not a malfunction. External noise and interference (from the beginning. and then re-connect...JVC dealer. HDisengage the Squeeze (SQUEEZE) mode. (੬ pg. 31, 33) ...
Instruction Manual
Page 48
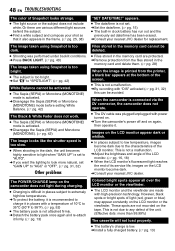
...was plugged/unplugged with a temperature of the screen. ● This is low. When the camcorder is not attached firmly. This is activated. HConsult your nearest JVC dealer for replacement. HInstall a fully charged battery. (੬ pg. 13) HFind a white subject and compose your shot so that ...it is recommended to 95°F). (੬ pg. 52) ● The battery pack is connected via the DV connector, the camcorder does not operate. ● The DV...
...was plugged/unplugged with a temperature of the screen. ● This is low. When the camcorder is not attached firmly. This is activated. HConsult your nearest JVC dealer for replacement. HInstall a fully charged battery. (੬ pg. 13) HFind a white subject and compose your shot so that ...it is recommended to 95°F). (੬ pg. 52) ● The battery pack is connected via the DV connector, the camcorder does not operate. ● The DV...
Instruction Manual
Page 52
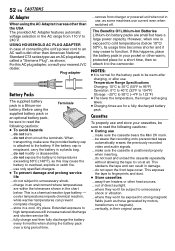
... or vibration. ... where they won 't be warm after charging, or after use and store your cassettes, be exposed to the camcorder. do not open the front tape cover. do not subject... allowing the tape to unnecessary shock. ... charge in an environment where temperatures are within the tolerances shown in your nearest JVC dealer. If this AC plug adapter, consult... This slackens the tape and can prevent complete charging. ... USING HOUSEHOLD AC PLUG ADAPTER In case of direct sunlight. ... make sure the cassette bears the Mini DV mark. ... For this happens, place the ...
... or vibration. ... where they won 't be warm after charging, or after use and store your cassettes, be exposed to the camcorder. do not open the front tape cover. do not subject... allowing the tape to unnecessary shock. ... charge in an environment where temperatures are within the tolerances shown in your nearest JVC dealer. If this AC plug adapter, consult... This slackens the tape and can prevent complete charging. ... USING HOUSEHOLD AC PLUG ADAPTER In case of direct sunlight. ... make sure the cassette bears the Mini DV mark. ... For this happens, place the ...
Instruction Manual
Page 55
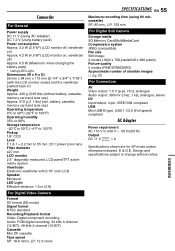
...., LP: 120 min. REFERENCES when charging the battery pack) * Using LED Light Dimensions (W x H x D) 56 mm x 94 mm x 112 mm (2-1/4" x 3/4" x 7/16") (with 0.16" color LCD Speaker Monaural LED Light Effective distance: 1.5 m (5 ft) For Digital Video Camera Format DV format (SD mode) Signal format NTSC...Playback format Video: Digital component recording Audio: PCM digital recording, 32 kHz 4-channel (12-BIT), 48 kHz 2-channel (16-BIT) Cassette Mini DV cassette Tape speed SP: 18.8 mm/s, LP: 12.5 mm/s SPECIFICATIONS EN 55 Maximum recording time (using 80 min. E & O.E. Camcorder For General Power...
...., LP: 120 min. REFERENCES when charging the battery pack) * Using LED Light Dimensions (W x H x D) 56 mm x 94 mm x 112 mm (2-1/4" x 3/4" x 7/16") (with 0.16" color LCD Speaker Monaural LED Light Effective distance: 1.5 m (5 ft) For Digital Video Camera Format DV format (SD mode) Signal format NTSC...Playback format Video: Digital component recording Audio: PCM digital recording, 32 kHz 4-channel (12-BIT), 48 kHz 2-channel (16-BIT) Cassette Mini DV cassette Tape speed SP: 18.8 mm/s, LP: 12.5 mm/s SPECIFICATIONS EN 55 Maximum recording time (using 80 min. E & O.E. Camcorder For General Power...
Instruction Manual
Page 56
... Audio Dubbing 46 B Backlight Compensation 40 Battery Pack 13, 14, 52 Beep 33 Blank Search 21 C Changing The Menu Settings 31 - 36 Charging The Battery Pack 13 Connection To A Personal Computer 45 Connections To A TV Or VCR 22 D Data Battery 14 Date/Time Settings 15 Deleting ...Files 29 Demonstration Mode 33 Digital Image Stabilization (DIS 32 DPOF Setting (Digital Print Order Format 29, 30 Dubbing 28, 43, 44 E Exposure Control 39 I Image Size 34 Initializing A Memory Card 30...
... Audio Dubbing 46 B Backlight Compensation 40 Battery Pack 13, 14, 52 Beep 33 Blank Search 21 C Changing The Menu Settings 31 - 36 Charging The Battery Pack 13 Connection To A Personal Computer 45 Connections To A TV Or VCR 22 D Data Battery 14 Date/Time Settings 15 Deleting ...Files 29 Demonstration Mode 33 Digital Image Stabilization (DIS 32 DPOF Setting (Digital Print Order Format 29, 30 Dubbing 28, 43, 44 E Exposure Control 39 I Image Size 34 Initializing A Memory Card 30...

