Owners Manual
Page 4
... WHEELS ...49 Removing/Installing Rear Wheels...49 Replacing Rear Wheel Handrim ...50 9 FRONT CASTERS ...51 Installing/Replacing Six/Eight Inch Front Casters/Forks ...51 Adjusting Forks...52 Replacing Front Casters ...52 10 ANTI-TIPPERS/WHEEL LOCKS ...54 Installing/Adjusting Anti-Tippers...54 Using/Adjusting Patient Operated Wheel Locks...57 11 SEAT TO FLOOR ...60 Changing Seat-to-Floor Height ...60 Invacare® Tracer® SX5 Wheelchair 4 Part...
... WHEELS ...49 Removing/Installing Rear Wheels...49 Replacing Rear Wheel Handrim ...50 9 FRONT CASTERS ...51 Installing/Replacing Six/Eight Inch Front Casters/Forks ...51 Adjusting Forks...52 Replacing Front Casters ...52 10 ANTI-TIPPERS/WHEEL LOCKS ...54 Installing/Adjusting Anti-Tippers...54 Using/Adjusting Patient Operated Wheel Locks...57 11 SEAT TO FLOOR ...60 Changing Seat-to-Floor Height ...60 Invacare® Tracer® SX5 Wheelchair 4 Part...

Owners Manual
Page 5
CONTENTS 12 RECLINER ...64 Recliner Operation...64 Replacing the Headrest Pillow ...66 Replacing the Headrest/Back Upholstery...67 Removing/Installing the Spreader Bar ...69 Removing and Installing Fixed Height Armrest ...70 Removing/Installing the Rear Wheels...71 Using/adjusting the Clamp-On Wheel Locks ...72 13 OPTIONS ...74 Installing Amputee Bracket...74 Installing Crutch and Cane Carrier...76 Installing the Seat Positioning Strap ...77 Installing the Wheel Lock Extension Handle...78 Part No. 1110550 5 Invacare® Tracer® SX5 Wheelchair
CONTENTS 12 RECLINER ...64 Recliner Operation...64 Replacing the Headrest Pillow ...66 Replacing the Headrest/Back Upholstery...67 Removing/Installing the Spreader Bar ...69 Removing and Installing Fixed Height Armrest ...70 Removing/Installing the Rear Wheels...71 Using/adjusting the Clamp-On Wheel Locks ...72 13 OPTIONS ...74 Installing Amputee Bracket...74 Installing Crutch and Cane Carrier...76 Installing the Seat Positioning Strap ...77 Installing the Wheel Lock Extension Handle...78 Part No. 1110550 5 Invacare® Tracer® SX5 Wheelchair
Owners Manual
Page 7
... this page. Part No. 1110550 7 Invacare® Tracer® SX5 Wheelchair This warranty is not transferable or assignable to be limited to any such subsequent sale or other person. Invacare's sole obligation and your Invacare product. Provide dealer's name, address, the product model number, date of purchase, indicate nature of title to such repair and/or replacement. products damaged...
... this page. Part No. 1110550 7 Invacare® Tracer® SX5 Wheelchair This warranty is not transferable or assignable to be limited to any such subsequent sale or other person. Invacare's sole obligation and your Invacare product. Provide dealer's name, address, the product model number, date of purchase, indicate nature of title to such repair and/or replacement. products damaged...

Owners Manual
Page 8
... MUST perform the initial set up of this product or optional equipment. WARNING DO NOT use this product or any available optional equipment without first completely reading and understanding these instructions and any additional instructional material such as owner's manuals, service manuals or instruction sheets supplied with this wheelchair. Check all procedures specifically indicated in conjunction with Invacare products. also, a qualified technician...
... MUST perform the initial set up of this product or optional equipment. WARNING DO NOT use this product or any available optional equipment without first completely reading and understanding these instructions and any additional instructional material such as owner's manuals, service manuals or instruction sheets supplied with this wheelchair. Check all procedures specifically indicated in conjunction with Invacare products. also, a qualified technician...

Owners Manual
Page 9
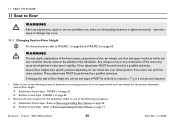
When outdoors on wet, soft ground or on page 54 for the wheelchair user. If changing the seat-to 2-inch ground clearance. Part No. 1110550 9 Invacare® Tracer® SX5 Wheelchair Anti-tippers must be achieved, DO NOT use anti-tippers. Inasmuch as a safeguard for correct usage and adjustment. 2 SAFETY... specific to the different seat-to-floor angles and/or seat-to -floor angle, the correct anti-tippers must be attached at all times. Refer to the charts in Installing/Adjusting Anti-Tippers on gravel surfaces, anti tippers may order with or without a change to seat-...
When outdoors on wet, soft ground or on page 54 for the wheelchair user. If changing the seat-to 2-inch ground clearance. Part No. 1110550 9 Invacare® Tracer® SX5 Wheelchair Anti-tippers must be achieved, DO NOT use anti-tippers. Inasmuch as a safeguard for correct usage and adjustment. 2 SAFETY... specific to the different seat-to-floor angles and/or seat-to -floor angle, the correct anti-tippers must be attached at all times. Refer to the charts in Installing/Adjusting Anti-Tippers on gravel surfaces, anti tippers may order with or without a change to seat-...

Owners Manual
Page 11
...Part No. 1110550 11 Invacare® Tracer® SX5 Wheelchair Use of the wheelchair may result in any removable (detachable) parts. Otherwise, damage or injury may result in the wheelchair before using the wheelchair. Make sure to use . If the wheelchair is properly positioned in injury to the wheelchair. ALWAYS engage both wheel.../or worn, replace IMMEDIATELY. Make sure the patient is exposed to extreme temperature (above 100°F or below 32°F), high humidity and/or becomes wet, prior to use proper body mechanics (use only a clean towel lightly dampened with cool...
...Part No. 1110550 11 Invacare® Tracer® SX5 Wheelchair Use of the wheelchair may result in any removable (detachable) parts. Otherwise, damage or injury may result in the wheelchair before using the wheelchair. Make sure to use . If the wheelchair is properly positioned in injury to the wheelchair. ALWAYS engage both wheel.../or worn, replace IMMEDIATELY. Make sure the patient is exposed to extreme temperature (above 100°F or below 32°F), high humidity and/or becomes wet, prior to use proper body mechanics (use only a clean towel lightly dampened with cool...

Owners Manual
Page 12
Doing so may cause your seat positioning strap. After ANY adjustments, repair or service and BEFORE use as a safety device withstanding high stress loads such as the seat positioning strap is not designed for the wheelchair user. Invacare® Tracer® SX5 Wheelchair 12 Part No. 1110550 DO NOT attempt to seat/chest positioning straps - Seat Positioning Straps ƽ WARNING ALWAYS wear your...
Doing so may cause your seat positioning strap. After ANY adjustments, repair or service and BEFORE use as a safety device withstanding high stress loads such as the seat positioning strap is not designed for the wheelchair user. Invacare® Tracer® SX5 Wheelchair 12 Part No. 1110550 DO NOT attempt to seat/chest positioning straps - Seat Positioning Straps ƽ WARNING ALWAYS wear your...

Owners Manual
Page 13
...; ✓ ✓✓✓ • Part No. 1110550 13 Invacare® Tracer® SX5 Wheelchair The various seat-to-floor heights require specific settings depending on rear wheel size, rear wheel position, front caster size/position and desired seat-to the stability of the wheelchair. SEAT DEPTH CASTER SIZE CASTER POSITION WHEEL SIZE WHEEL POSITION ANTI-TIPPERS USER CONDITION NOTE: When changes to the...
...; ✓ ✓✓✓ • Part No. 1110550 13 Invacare® Tracer® SX5 Wheelchair The various seat-to-floor heights require specific settings depending on rear wheel size, rear wheel position, front caster size/position and desired seat-to the stability of the wheelchair. SEAT DEPTH CASTER SIZE CASTER POSITION WHEEL SIZE WHEEL POSITION ANTI-TIPPERS USER CONDITION NOTE: When changes to the...

Owners Manual
Page 14
... bodily injury or damage to 18-inches, the weight limitation is void. Weight Training ƽ WARNING Invacare does not recommend the use your wheelchair unless it has the proper tire pressure (p.s.i.). Invacare wheelchairs have the following weight limitations: For chairs with a seat width of 20 to explode and cause bodily harm. 2 SAFETY Tire Pressure ƽ WARNING DO...
... bodily injury or damage to 18-inches, the weight limitation is void. Weight Training ƽ WARNING Invacare does not recommend the use your wheelchair unless it has the proper tire pressure (p.s.i.). Invacare wheelchairs have the following weight limitations: For chairs with a seat width of 20 to explode and cause bodily harm. 2 SAFETY Tire Pressure ƽ WARNING DO...

Owners Manual
Page 15
... seating in vehicles for transportation of a user while in a wheelchair, in a moving vehicle of any kind while in vehicles of any type. Invacare cannot and does not recommend any tie-down systems for transportation and use be transferred into or out of the restraints made of the wheelchair. Interference between the top of the elevating legrest and the wheel...
... seating in vehicles for transportation of a user while in a wheelchair, in a moving vehicle of any kind while in vehicles of any type. Invacare cannot and does not recommend any tie-down systems for transportation and use be transferred into or out of the restraints made of the wheelchair. Interference between the top of the elevating legrest and the wheel...

Owners Manual
Page 16
... gravity, and the weight distribution of the wheelchair user as well as you lean forward. Make sure the casters are a starting point for the new wheelchair user and assistant with "safety" as a basic guide. These movements will cause a change to ...user and passenger and damage to reach, bend and transfer in a straight line. To assure stability and proper operation of the wheelchair. This can be heeded. Many activities require the wheelchair owner to the wheelchair and surrounding property. Proper positioning is important to use of gravity. Invacare recommends using seat...
... gravity, and the weight distribution of the wheelchair user as well as you lean forward. Make sure the casters are a starting point for the new wheelchair user and assistant with "safety" as a basic guide. These movements will cause a change to ...user and passenger and damage to reach, bend and transfer in a straight line. To assure stability and proper operation of the wheelchair. This can be heeded. Many activities require the wheelchair owner to the wheelchair and surrounding property. Proper positioning is important to use of gravity. Invacare recommends using seat...

Owners Manual
Page 22
Point your hand on the seat rail and the seat upholstery with the entire hand. Refer to the inside of the wheelchair. 4. DO NOT place any part of this manual. 6. Place your fingers and thumb to Removing/Installing the spreader bar in the H-blocks. 5. Tracer SX5 RECLINERS ONLY - Engage both wheel locks, 7. Point fingers and thumb to you...
Point your hand on the seat rail and the seat upholstery with the entire hand. Refer to the inside of the wheelchair. 4. DO NOT place any part of this manual. 6. Place your fingers and thumb to Removing/Installing the spreader bar in the H-blocks. 5. Tracer SX5 RECLINERS ONLY - Engage both wheel locks, 7. Point fingers and thumb to you...

Owners Manual
Page 42
... 3. For recliner models, refer to 60-80 inch pounds. 6. Position the hex screw through the wheelchair frame, back cane, and threaded insert. The hex screw should be inserted from the bottom of the wheelchair frame. 5. Outside of Wheelchair Nut Back Cane Threaded... outside of Wheelchair FIGURE 1 Installing the Back Canes Invacare® Tracer® SX5 Wheelchair 42 Part No. 1110550 Torque the hex screw to Recliner on page 64. 7.1 Installing the Back Canes 1. 7 SEAT AND BACK 7 Seat and Back ƽ WARNING After any adjustments, repair or service and before use, make sure...
... 3. For recliner models, refer to 60-80 inch pounds. 6. Position the hex screw through the wheelchair frame, back cane, and threaded insert. The hex screw should be inserted from the bottom of the wheelchair frame. 5. Outside of Wheelchair Nut Back Cane Threaded... outside of Wheelchair FIGURE 1 Installing the Back Canes Invacare® Tracer® SX5 Wheelchair 42 Part No. 1110550 Torque the hex screw to Recliner on page 64. 7.1 Installing the Back Canes 1. 7 SEAT AND BACK 7 Seat and Back ƽ WARNING After any adjustments, repair or service and before use, make sure...

Owners Manual
Page 43
... canes. 2. Replacing Seat Upholstery 1. Install new seat upholstery by reversing STEPS 1-2. Replacing Back Upholstery 1. Remove the eight phillips screws and washers that secure the existing back upholstery to the crossbraces. 2. Part No. 1110550 43 Washers 7 SEAT AND BACK Back Upholstery Mounting Screws Washers FIGURE 2 Replacing Back Upholstery Mounting Screw 16-inch Seat Depth Seat Upholstery Wheelchair Frame FIGURE 3 Replacing Seat Upholstery Invacare® Tracer...
... canes. 2. Replacing Seat Upholstery 1. Install new seat upholstery by reversing STEPS 1-2. Replacing Back Upholstery 1. Remove the eight phillips screws and washers that secure the existing back upholstery to the crossbraces. 2. Part No. 1110550 43 Washers 7 SEAT AND BACK Back Upholstery Mounting Screws Washers FIGURE 2 Replacing Back Upholstery Mounting Screw 16-inch Seat Depth Seat Upholstery Wheelchair Frame FIGURE 3 Replacing Seat Upholstery Invacare® Tracer...

Owners Manual
Page 48
7 SEAT AND BACK Washer Locknut DETAIL "B" Coved Washers Washer Coved Washer DETAIL "A" Wheelchair Frame Washer Crossbraces Coved Washers Hex Screw DETAIL "B" - CROSSBRACE HARDWARE (STEPS 4,5) Washer Crossbrace Saddle Invacare® Tracer® SX5 Wheelchair FIGURE 7 Adjusting the Seat Width 48 Part No. 1110550
7 SEAT AND BACK Washer Locknut DETAIL "B" Coved Washers Washer Coved Washer DETAIL "A" Wheelchair Frame Washer Crossbraces Coved Washers Hex Screw DETAIL "B" - CROSSBRACE HARDWARE (STEPS 4,5) Washer Crossbrace Saddle Invacare® Tracer® SX5 Wheelchair FIGURE 7 Adjusting the Seat Width 48 Part No. 1110550

Owners Manual
Page 50
... the wheelchair. For recliner models, refer to the rear wheel with Removable Arms ONLY) FIGURE 1 Removing/Installing Rear Wheels - Secure the new handrim to Removing/Installing the Rear Wheels on page 71. 2. To reinstall the rear wheel(s) onto the wheelchair, reverse STEPS 1-2 and torque locknut to rear wheel. 3. Invacare® Tracer® SX5 Wheelchair 50 Rear Wheel Handrim Mounting Screw FIGURE 2 Replacing Rear Wheel Handrim Part...
... the wheelchair. For recliner models, refer to the rear wheel with Removable Arms ONLY) FIGURE 1 Removing/Installing Rear Wheels - Secure the new handrim to Removing/Installing the Rear Wheels on page 71. 2. To reinstall the rear wheel(s) onto the wheelchair, reverse STEPS 1-2 and torque locknut to rear wheel. 3. Invacare® Tracer® SX5 Wheelchair 50 Rear Wheel Handrim Mounting Screw FIGURE 2 Replacing Rear Wheel Handrim Part...

Owners Manual
Page 55
...-tipper wheels and the ground/floor MUST be maintained at all times. 5. Part No. 1110550 55 Invacare® Tracer® SX5 Wheelchair Anti-Tipper Wheels Anti-Rattle Anti-Tipper Release Buttons Rear Frame Tubing FIGURE 1 Installing Anti-Tippers...wheels and the ground/floor is used refer to Adjusting the Anti-Tippers on a flat surface. 4. Place the wheelchair on page 56. Ensure that the release button of the anti-tipper fully protrudes out of the hole in bottom hole position. MODEL SEAT-TO-FLOOR HEIGHT ANTI-TIPPER (MEASUREMENTS IN INCHES) LENGTH HEIGHT MODEL PART...
...-tipper wheels and the ground/floor MUST be maintained at all times. 5. Part No. 1110550 55 Invacare® Tracer® SX5 Wheelchair Anti-Tipper Wheels Anti-Rattle Anti-Tipper Release Buttons Rear Frame Tubing FIGURE 1 Installing Anti-Tippers...wheels and the ground/floor is used refer to Adjusting the Anti-Tippers on a flat surface. 4. Place the wheelchair on page 56. Ensure that the release button of the anti-tipper fully protrudes out of the hole in bottom hole position. MODEL SEAT-TO-FLOOR HEIGHT ANTI-TIPPER (MEASUREMENTS IN INCHES) LENGTH HEIGHT MODEL PART...

Owners Manual
Page 59
... at least 1/8 inch (3/16 inch for pneumatic tires) and holds the wheelchair. 4. Tire DETAIL "A" Mounting Positions Rear Wheel Wheel Lock Wheel Lock Shoe 8. FIGURE 4 Using Patient Operated Wheel Locks Part No. 1110550 59 Invacare® Tracer® SX5 Wheelchair Loosen the bolt and locknut that when engaged, the wheel lock shoe embeds the tire 1/8 inch (3/16 inch for pneumatic tires...
... at least 1/8 inch (3/16 inch for pneumatic tires) and holds the wheelchair. 4. Tire DETAIL "A" Mounting Positions Rear Wheel Wheel Lock Wheel Lock Shoe 8. FIGURE 4 Using Patient Operated Wheel Locks Part No. 1110550 59 Invacare® Tracer® SX5 Wheelchair Loosen the bolt and locknut that when engaged, the wheel lock shoe embeds the tire 1/8 inch (3/16 inch for pneumatic tires...
Owners Manual
Page 60
... - Refer to one or any adjustments, repair or service and before use of an anti-tipper model, as well as the user condition directly relate to the stability of the seven may occur. 11.1 Changing Seat-to-Floor Height For this procedure...specific positions depending on page 49. Remove the rear wheels from the wheelchair. Refer to Removing/Installing Rear Wheels on rear wheel size, rear wheel position, front caster size and front caster position. FIGURE 2 on page 63. ƽ WARNING The seat depth, size/position of the front casters, size/position of the rear wheels, use...
... - Refer to one or any adjustments, repair or service and before use of an anti-tipper model, as well as the user condition directly relate to the stability of the seven may occur. 11.1 Changing Seat-to-Floor Height For this procedure...specific positions depending on page 49. Remove the rear wheels from the wheelchair. Refer to Removing/Installing Rear Wheels on rear wheel size, rear wheel position, front caster size and front caster position. FIGURE 2 on page 63. ƽ WARNING The seat depth, size/position of the front casters, size/position of the rear wheels, use...

Owners Manual
Page 76
.... 13 OPTIONS 13.2 Installing Crutch and Cane Carrier ƽ WARNING Check base weekly to the wheelchair. 7. Also ensure that secures the base to FIGURE 2. 1. Securely tighten the locknut that there is no interference with folding the wheelchair, the rear wheels, or the swing-back...items while wheelchair is towards the inside of the wheelchair. 4. The base cleans easily with the base attached over the end of the step tube of the wheelchair. Base Step Tube Locknut Clamp FIGURE 2 Installing Crutch and Cane Carrier Invacare® Tracer® SX5 Wheelchair 76 Part No. ...
.... 13 OPTIONS 13.2 Installing Crutch and Cane Carrier ƽ WARNING Check base weekly to the wheelchair. 7. Also ensure that secures the base to FIGURE 2. 1. Securely tighten the locknut that there is no interference with folding the wheelchair, the rear wheels, or the swing-back...items while wheelchair is towards the inside of the wheelchair. 4. The base cleans easily with the base attached over the end of the step tube of the wheelchair. Base Step Tube Locknut Clamp FIGURE 2 Installing Crutch and Cane Carrier Invacare® Tracer® SX5 Wheelchair 76 Part No. ...


