
Owners Manual
Page 4
... WHEELS ...49 Removing/Installing Rear Wheels...49 Replacing Rear Wheel Handrim ...50 9 FRONT CASTERS ...51 Installing/Replacing Six/Eight Inch Front Casters/Forks ...51 Adjusting Forks...52 Replacing Front Casters ...52 10 ANTI-TIPPERS/WHEEL LOCKS ...54 Installing/Adjusting Anti-Tippers...54 Using/Adjusting Patient Operated Wheel Locks...57 11 SEAT TO FLOOR ...60 Changing Seat-to-Floor Height ...60 Invacare® Tracer® SX5 Wheelchair 4 Part...
... WHEELS ...49 Removing/Installing Rear Wheels...49 Replacing Rear Wheel Handrim ...50 9 FRONT CASTERS ...51 Installing/Replacing Six/Eight Inch Front Casters/Forks ...51 Adjusting Forks...52 Replacing Front Casters ...52 10 ANTI-TIPPERS/WHEEL LOCKS ...54 Installing/Adjusting Anti-Tippers...54 Using/Adjusting Patient Operated Wheel Locks...57 11 SEAT TO FLOOR ...60 Changing Seat-to-Floor Height ...60 Invacare® Tracer® SX5 Wheelchair 4 Part...

Owners Manual
Page 5
CONTENTS 12 RECLINER ...64 Recliner Operation...64 Replacing the Headrest Pillow ...66 Replacing the Headrest/Back Upholstery...67 Removing/Installing the Spreader Bar ...69 Removing and Installing Fixed Height Armrest ...70 Removing/Installing the Rear Wheels...71 Using/adjusting the Clamp-On Wheel Locks ...72 13 OPTIONS ...74 Installing Amputee Bracket...74 Installing Crutch and Cane Carrier...76 Installing the Seat Positioning Strap ...77 Installing the Wheel Lock Extension Handle...78 Part No. 1110550 5 Invacare® Tracer® SX5 Wheelchair
CONTENTS 12 RECLINER ...64 Recliner Operation...64 Replacing the Headrest Pillow ...66 Replacing the Headrest/Back Upholstery...67 Removing/Installing the Spreader Bar ...69 Removing and Installing Fixed Height Armrest ...70 Removing/Installing the Rear Wheels...71 Using/adjusting the Clamp-On Wheel Locks ...72 13 OPTIONS ...74 Installing Amputee Bracket...74 Installing Crutch and Cane Carrier...76 Installing the Seat Positioning Strap ...77 Installing the Wheel Lock Extension Handle...78 Part No. 1110550 5 Invacare® Tracer® SX5 Wheelchair
Owners Manual
Page 7
... warranty is serialized, indicate the serial number. Invacare warrants the side frames and cross members of this warranty will be free from whom you do not receive satisfactory warranty service, please write directly to the product instructions. For warranty service, please contact the dealer from defects in replacement part installation or repair of title to be solely determined by...
... warranty is serialized, indicate the serial number. Invacare warrants the side frames and cross members of this warranty will be free from whom you do not receive satisfactory warranty service, please write directly to the product instructions. For warranty service, please contact the dealer from defects in replacement part installation or repair of title to be solely determined by...

Owners Manual
Page 8
... completely reading and understanding these instructions and any additional instructional material such as owner's manuals, service manuals or instruction sheets supplied with Invacare accessories. otherwise, injury or damage may occur. Invacare® Tracer® SX5 Wheelchair 8 Part No. 1110550 2 SAFETY 2 Safety The safety section contains important information for the safe operation and use of this wheelchair. Check all procedures specifically indicated in conjunction with...
... completely reading and understanding these instructions and any additional instructional material such as owner's manuals, service manuals or instruction sheets supplied with Invacare accessories. otherwise, injury or damage may occur. Invacare® Tracer® SX5 Wheelchair 8 Part No. 1110550 2 SAFETY 2 Safety The safety section contains important information for the safe operation and use of this wheelchair. Check all procedures specifically indicated in conjunction with...

Owners Manual
Page 9
... angles and/or seat-to-floor heights. If these requirements cannot be used to maintain a 11/2 to 2-inch ground clearance. ALWAYS use the wheelchair. Part No. 1110550 9 Invacare® Tracer® SX5 Wheelchair Inasmuch as a safeguard for correct usage and adjustment. Refer to the charts in Installing/Adjusting Anti-Tippers on page 54 for the wheelchair user. Anti-tippers must...
... angles and/or seat-to-floor heights. If these requirements cannot be used to maintain a 11/2 to 2-inch ground clearance. ALWAYS use the wheelchair. Part No. 1110550 9 Invacare® Tracer® SX5 Wheelchair Inasmuch as a safeguard for correct usage and adjustment. Refer to the charts in Installing/Adjusting Anti-Tippers on page 54 for the wheelchair user. Anti-tippers must...

Owners Manual
Page 11
.... When cleaning rear cane or hand grip areas use your legs) or seek assistance if necessary to the wheelchair. If loose and/or worn, replace IMMEDIATELY. Use of the wheelchair may occur. Part No. 1110550 11 Invacare® Tracer® SX5 Wheelchair If the wheelchair is properly positioned in injury to the user or damage to avoid injury. Lifting by...
.... When cleaning rear cane or hand grip areas use your legs) or seek assistance if necessary to the wheelchair. If loose and/or worn, replace IMMEDIATELY. Use of the wheelchair may occur. Part No. 1110550 11 Invacare® Tracer® SX5 Wheelchair If the wheelchair is properly positioned in injury to the user or damage to avoid injury. Lifting by...

Owners Manual
Page 12
... incline. With regards to the wheelchair. Doing so may order with a water, ice or oil film. Invacare® Tracer® SX5 Wheelchair 12 Part No. 1110550 NEVER leave an unoccupied wheelchair on this equipment by the user. The seat positioning strap is not designed for the wheelchair user. After ANY adjustments, repair or service and BEFORE use as a safety device withstanding high...
... incline. With regards to the wheelchair. Doing so may order with a water, ice or oil film. Invacare® Tracer® SX5 Wheelchair 12 Part No. 1110550 NEVER leave an unoccupied wheelchair on this equipment by the user. The seat positioning strap is not designed for the wheelchair user. After ANY adjustments, repair or service and BEFORE use as a safety device withstanding high...

Owners Manual
Page 13
... Part No. 1110550 13 Invacare® Tracer® SX5 Wheelchair The various seat-to-floor heights require specific settings depending on rear wheel size, rear wheel position, front caster size/position and desired seat-to the stability of the wheelchair. SEAT DEPTH CASTER SIZE CASTER POSITION WHEEL SIZE WHEEL POSITION ANTI-TIPPERS USER... may cause the wheelchair to one or any combination of the wheelchair. All Models ƽ WARNING The seat depth, size/position of the front casters, size/position of the rear wheels, use of anti-tipper model, as well as the user condition directly relate ...
... Part No. 1110550 13 Invacare® Tracer® SX5 Wheelchair The various seat-to-floor heights require specific settings depending on rear wheel size, rear wheel position, front caster size/position and desired seat-to the stability of the wheelchair. SEAT DEPTH CASTER SIZE CASTER POSITION WHEEL SIZE WHEEL POSITION ANTI-TIPPERS USER... may cause the wheelchair to one or any combination of the wheelchair. All Models ƽ WARNING The seat depth, size/position of the front casters, size/position of the rear wheels, use of anti-tipper model, as well as the user condition directly relate ...

Owners Manual
Page 14
...tire pressure is void. If occupant uses said wheelchair as a weight training apparatus, Invacare shall not be liable for any kind of 14 to explode and cause bodily harm. Invacare® Tracer® SX5 Wheelchair 14 Part No. 1110550 For chairs with a seat width of weight training. 2 ...SAFETY Tire Pressure ƽ WARNING DO NOT use of its wheelchairs as a seat for bodily injury or damage to the wheelchair and the warranty is...
...tire pressure is void. If occupant uses said wheelchair as a weight training apparatus, Invacare shall not be liable for any kind of 14 to explode and cause bodily harm. Invacare® Tracer® SX5 Wheelchair 14 Part No. 1110550 For chairs with a seat width of weight training. 2 ...SAFETY Tire Pressure ƽ WARNING DO NOT use of its wheelchairs as a seat for bodily injury or damage to the wheelchair and the warranty is...
Owners Manual
Page 15
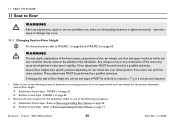
...; WARNING Wheelchair users should be transferred into or out of the elevating legrest and the wheel lock extension handle causes the wheel lock to meet many needs of making such a selection. Invacare cannot and does not recommend any wheelchair transportation systems. Wheelchair User ƽ WARNING As a manufacturer of wheelchairs, Invacare endeavors to supply a wide variety of wheelchairs to disengage. Wheel locks are not brakes.
...; WARNING Wheelchair users should be transferred into or out of the elevating legrest and the wheel lock extension handle causes the wheel lock to meet many needs of making such a selection. Invacare cannot and does not recommend any wheelchair transportation systems. Wheelchair User ƽ WARNING As a manufacturer of wheelchairs, Invacare endeavors to supply a wide variety of wheelchairs to disengage. Wheel locks are not brakes.

Owners Manual
Page 16
This manual points out the most important consideration for all warnings and cautions given in overcoming architectural obstacles that may encounter. Individual wheelchair users often develop skills to use of the wheelchair, resulting in a straight line. Invacare recognizes and encourages each individual to try what works best for the new wheelchair user and assistant with daily living activities that...
This manual points out the most important consideration for all warnings and cautions given in overcoming architectural obstacles that may encounter. Individual wheelchair users often develop skills to use of the wheelchair, resulting in a straight line. Invacare recognizes and encourages each individual to try what works best for the new wheelchair user and assistant with daily living activities that...

Owners Manual
Page 22
... Removing/Installing the spreader bar in the H-blocks. 5. 2 SAFETY Folding/Unfolding the Wheelchair Unfolding the Wheelchair 1. Press downward on the seat rail and the seat upholstery with the entire hand. Engage both wheel locks, 7. Refer to you (raising the opposite wheel and caster off the ground/floor). 2. FIGURE 6 Folding/Unfolding the Wheelchair Invacare® Tracer® SX5 Wheelchair 22 Part No...
... Removing/Installing the spreader bar in the H-blocks. 5. 2 SAFETY Folding/Unfolding the Wheelchair Unfolding the Wheelchair 1. Press downward on the seat rail and the seat upholstery with the entire hand. Engage both wheel locks, 7. Refer to you (raising the opposite wheel and caster off the ground/floor). 2. FIGURE 6 Folding/Unfolding the Wheelchair Invacare® Tracer® SX5 Wheelchair 22 Part No...

Owners Manual
Page 42
... of the back cane. 3. For recliner models, refer to 60-80 inch pounds. 6. Remove the hex screw and locknut from the inside of Wheelchair FIGURE 1 Installing the Back Canes Invacare® Tracer® SX5 Wheelchair 42 Part No. 1110550 Position threaded insert into the ... inch pounds. Outside of Wheelchair Nut Back Cane Threaded Insert Hex Screw Locknut Wheelchair Frame Inside of the wheelchair frame. 5. Install the locknut onto the hex screw. 7 SEAT AND BACK 7 Seat and Back ƽ WARNING After any adjustments, repair or service and before use, make sure all attaching ...
... of the back cane. 3. For recliner models, refer to 60-80 inch pounds. 6. Remove the hex screw and locknut from the inside of Wheelchair FIGURE 1 Installing the Back Canes Invacare® Tracer® SX5 Wheelchair 42 Part No. 1110550 Position threaded insert into the ... inch pounds. Outside of Wheelchair Nut Back Cane Threaded Insert Hex Screw Locknut Wheelchair Frame Inside of the wheelchair frame. 5. Install the locknut onto the hex screw. 7 SEAT AND BACK 7 Seat and Back ƽ WARNING After any adjustments, repair or service and before use, make sure all attaching ...

Owners Manual
Page 43
... from the back canes. 3. Replacing Seat Upholstery 1. Ensure positioning of mounting screws for each seat depth. Install new seat upholstery by reversing STEPS 1-2. Part No. 1110550 43 Washers 7 SEAT AND BACK Back Upholstery Mounting Screws Washers FIGURE 2 Replacing Back Upholstery Mounting Screw 16-inch Seat Depth Seat Upholstery Wheelchair Frame FIGURE 3 Replacing Seat Upholstery Invacare® Tracer® SX5 Wheelchair Remove the eight phillips screws...
... from the back canes. 3. Replacing Seat Upholstery 1. Ensure positioning of mounting screws for each seat depth. Install new seat upholstery by reversing STEPS 1-2. Part No. 1110550 43 Washers 7 SEAT AND BACK Back Upholstery Mounting Screws Washers FIGURE 2 Replacing Back Upholstery Mounting Screw 16-inch Seat Depth Seat Upholstery Wheelchair Frame FIGURE 3 Replacing Seat Upholstery Invacare® Tracer® SX5 Wheelchair Remove the eight phillips screws...

Owners Manual
Page 48
7 SEAT AND BACK Washer Locknut DETAIL "B" Coved Washers Washer Coved Washer DETAIL "A" Wheelchair Frame Washer Crossbraces Coved Washers Hex Screw DETAIL "B" - CROSSBRACE HARDWARE (STEPS 4,5) Washer Crossbrace Saddle Invacare® Tracer® SX5 Wheelchair FIGURE 7 Adjusting the Seat Width 48 Part No. 1110550
7 SEAT AND BACK Washer Locknut DETAIL "B" Coved Washers Washer Coved Washer DETAIL "A" Wheelchair Frame Washer Crossbraces Coved Washers Hex Screw DETAIL "B" - CROSSBRACE HARDWARE (STEPS 4,5) Washer Crossbrace Saddle Invacare® Tracer® SX5 Wheelchair FIGURE 7 Adjusting the Seat Width 48 Part No. 1110550

Owners Manual
Page 50
... rear wheel if desired. 3. Refer to Using/Adjusting Patient Operated Wheel Locks on page 49. Tighten securely. 5. Invacare® Tracer® SX5 Wheelchair 50 Rear Wheel Handrim Mounting Screw FIGURE 2 Replacing Rear Wheel Handrim Part No. 1110550 For non-recliner models, refer to the rear wheel with Removable Arms ONLY) FIGURE 1 Removing/Installing Rear Wheels - Secure the new handrim to Removing/Installing Rear Wheels on...
... rear wheel if desired. 3. Refer to Using/Adjusting Patient Operated Wheel Locks on page 49. Tighten securely. 5. Invacare® Tracer® SX5 Wheelchair 50 Rear Wheel Handrim Mounting Screw FIGURE 2 Replacing Rear Wheel Handrim Part No. 1110550 For non-recliner models, refer to the rear wheel with Removable Arms ONLY) FIGURE 1 Removing/Installing Rear Wheels - Secure the new handrim to Removing/Installing Rear Wheels on...

Owners Manual
Page 55
...the bottom of the wheelchair frame tubing. 3. Ensure that the release button of the anti-tipper fully protrudes out of the anti-tipper wheels and the ground/floor. Anti-Tipper Wheels Anti-Rattle Anti-Tipper Release Buttons Rear Frame Tubing FIGURE 1 Installing Anti-Tippers ... Flat Surface 1. Part No. 1110550 55 Invacare® Tracer® SX5 Wheelchair Measure the distance between the bottom of anti-tipper wheels and the ground/floor is used refer to chart below. MODEL SEAT-TO-FLOOR HEIGHT ANTI-TIPPER (MEASUREMENTS IN INCHES) LENGTH HEIGHT MODEL PART NO. Anti-Tipper...
...the bottom of the wheelchair frame tubing. 3. Ensure that the release button of the anti-tipper fully protrudes out of the anti-tipper wheels and the ground/floor. Anti-Tipper Wheels Anti-Rattle Anti-Tipper Release Buttons Rear Frame Tubing FIGURE 1 Installing Anti-Tippers ... Flat Surface 1. Part No. 1110550 55 Invacare® Tracer® SX5 Wheelchair Measure the distance between the bottom of anti-tipper wheels and the ground/floor is used refer to chart below. MODEL SEAT-TO-FLOOR HEIGHT ANTI-TIPPER (MEASUREMENTS IN INCHES) LENGTH HEIGHT MODEL PART NO. Anti-Tipper...

Owners Manual
Page 59
... engaged. 7. Tire DETAIL "A" Mounting Positions Rear Wheel Wheel Lock Wheel Lock Shoe 8. Reposition the wheel lock so that secure the wheel lock assembly to stop a moving wheelchair with wheel locks. FIGURE 4 Using Patient Operated Wheel Locks Part No. 1110550 59 Invacare® Tracer® SX5 Wheelchair Engage the wheel lock. 6. 10 ANTI-TIPPERS/WHEEL LOCKS Adjusting Patient Operated Wheel Locks ƽ WARNING DO NOT attempt...
... engaged. 7. Tire DETAIL "A" Mounting Positions Rear Wheel Wheel Lock Wheel Lock Shoe 8. Reposition the wheel lock so that secure the wheel lock assembly to stop a moving wheelchair with wheel locks. FIGURE 4 Using Patient Operated Wheel Locks Part No. 1110550 59 Invacare® Tracer® SX5 Wheelchair Engage the wheel lock. 6. 10 ANTI-TIPPERS/WHEEL LOCKS Adjusting Patient Operated Wheel Locks ƽ WARNING DO NOT attempt...
Owners Manual
Page 60
... change to one or any adjustments, repair or service and before use of an anti-tipper model, as well as the user condition directly relate to the stability of the following charts to determine mounting positions for front casters/forks and rear wheels for the desired obtainable seat-to one of the wheelchair. Seat-to 2 inch ground clearance. 1. FIGURE...
... change to one or any adjustments, repair or service and before use of an anti-tipper model, as well as the user condition directly relate to the stability of the following charts to determine mounting positions for front casters/forks and rear wheels for the desired obtainable seat-to one of the wheelchair. Seat-to 2 inch ground clearance. 1. FIGURE...

Owners Manual
Page 76
... folding the wheelchair, the rear wheels, or the swing-back arms. Strap MUST be parallel to step tube to FIGURE 2. 1. Ensure the base is moving. For ths procedure, refer to avoid Strap bending spokes when folding the wheelchair. 3. Base Step Tube Locknut Clamp FIGURE 2 Installing Crutch and Cane Carrier Invacare® Tracer® SX5 Wheelchair 76 Part No...
... folding the wheelchair, the rear wheels, or the swing-back arms. Strap MUST be parallel to step tube to FIGURE 2. 1. Ensure the base is moving. For ths procedure, refer to avoid Strap bending spokes when folding the wheelchair. 3. Base Step Tube Locknut Clamp FIGURE 2 Installing Crutch and Cane Carrier Invacare® Tracer® SX5 Wheelchair 76 Part No...


