
User Guide
Page 4
...the chassis CD-ROM / DVD drive tray, installed in the chassis Four system fans, installed in the chassis Chassis intrusion switch, installed in the chassis Air baffle, installed in the chassis Processor air duct, installed in the chassis CD-ROM filler panel, in the ...2: A box of hardware components, referred to determine which option(s) are supported on your server board. 4 The Intel® Local Control Panel requires the installation of the optional Intel® Management Module - Your Server Chassis SR2400/SR2400DC shipped with the following groups 3: Riser option, choose one: ⎯ ...
...the chassis CD-ROM / DVD drive tray, installed in the chassis Four system fans, installed in the chassis Chassis intrusion switch, installed in the chassis Air baffle, installed in the chassis Processor air duct, installed in the chassis CD-ROM filler panel, in the ...2: A box of hardware components, referred to determine which option(s) are supported on your server board. 4 The Intel® Local Control Panel requires the installation of the optional Intel® Management Module - Your Server Chassis SR2400/SR2400DC shipped with the following groups 3: Riser option, choose one: ⎯ ...
User Guide
Page 5
...one or more of the following items for your server: 5 Server rack cabinet and rails / brackets to mount the server into a rack Cable management arm Front bezel for the selected control panel option Processor(s) and heat sink(s) Memory DIMMs Intel® Management Module (Advanced or Professional) Tape... tested and can be used with your chassis, and for ordering information for Intel products, see http://www.support.intel.com/support/motherboards/server/chassis/SR2400/ 5 Before purchasing any optional items, refer to your server board documentation to determine which items are supported on your...
...one or more of the following items for your server: 5 Server rack cabinet and rails / brackets to mount the server into a rack Cable management arm Front bezel for the selected control panel option Processor(s) and heat sink(s) Memory DIMMs Intel® Management Module (Advanced or Professional) Tape... tested and can be used with your chassis, and for ordering information for Intel products, see http://www.support.intel.com/support/motherboards/server/chassis/SR2400/ 5 Before purchasing any optional items, refer to your server board documentation to determine which items are supported on your...

User Guide
Page 6
... the screen Accessories or other Intel server products Search for "Spares and Configuration Guide" Hardware (peripheral boards, adapter cards) and operating systems that have been tested with this product Search for "Tested Hardware and Operating System List" Server boards that have been tested with this product Search for "Compatible Server Board" Processors that have been tested with...
... the screen Accessories or other Intel server products Search for "Spares and Configuration Guide" Hardware (peripheral boards, adapter cards) and operating systems that have been tested with this product Search for "Tested Hardware and Operating System List" Server boards that have been tested with this product Search for "Compatible Server Board" Processors that have been tested with...
User Guide
Page 19
...Drive...10 Advanced Management Options 11 Intel® Management Module 11 Rack-Mounted Systems ...11 Front Bezels ...11 2 Hardware Installations and Upgrades 13 Before You Begin ...13 Tools and Supplies Needed 13 System References ...13 Removing and Installing...17 Removing and Installing the Processor Air Duct and Processor Air Dam 18 Removing the Processor Air Duct 18 Installing the Processor Air Duct 19 Removing the Processor Air Dam 20 Installing the Processor Air Dam 21 Removing ... SATA or SCSI Hot-swap Hard Disk Drive 31 Intel® Server Chassis SR2400/SR2400DC User Guide xix
...Drive...10 Advanced Management Options 11 Intel® Management Module 11 Rack-Mounted Systems ...11 Front Bezels ...11 2 Hardware Installations and Upgrades 13 Before You Begin ...13 Tools and Supplies Needed 13 System References ...13 Removing and Installing...17 Removing and Installing the Processor Air Duct and Processor Air Dam 18 Removing the Processor Air Duct 18 Installing the Processor Air Duct 19 Removing the Processor Air Dam 20 Installing the Processor Air Dam 21 Removing ... SATA or SCSI Hot-swap Hard Disk Drive 31 Intel® Server Chassis SR2400/SR2400DC User Guide xix

User Guide
Page 21
...the Large Hot-swap Air Baffle 22 Figure 17. Chassis Back ...8 Figure 8. Removing the Processor Air Duct 18 Figure 14. Removing the Small Hot-swap Air Baffle 24 Intel® Server Chassis SR2400/SR2400DC User Guide xxi Optional Peripherals ...9 Figure 9. Class A Compliance 101 Certifications...VCCI (Japan)...105 BSMI (Taiwan)...105 Korean RRL Compliance 105 Regulated Specified Components 106 Intel® Server Issue Report Form 109 Warranty...113 Limited Warranty for Intel® Chassis Subassembly Products 113 Extent of Limited Warranty 113 Warranty Limitations and Exclusions ...
...the Large Hot-swap Air Baffle 22 Figure 17. Chassis Back ...8 Figure 8. Removing the Processor Air Duct 18 Figure 14. Removing the Small Hot-swap Air Baffle 24 Intel® Server Chassis SR2400/SR2400DC User Guide xxi Optional Peripherals ...9 Figure 9. Class A Compliance 101 Certifications...VCCI (Japan)...105 BSMI (Taiwan)...105 Korean RRL Compliance 105 Regulated Specified Components 106 Intel® Server Issue Report Form 109 Warranty...113 Limited Warranty for Intel® Chassis Subassembly Products 113 Extent of Limited Warranty 113 Warranty Limitations and Exclusions ...

User Guide
Page 28
Fan module (shown with optional redundant fans) B. SATA or SCSI backplane (optional component) C. Processor air duct. (Memory DIMMs and processor(s) underneath) I TP01087 A. Internal Component Locations 4 Power distribution module G. Component Identification Internal Components C A B E G D F H I . Drive bay area (drives not included) D. Control panel board E. Air baffle (AC model; Power supply module housing F. PCI Riser assembly H. air baffle for DC model differs) Figure 2.
Fan module (shown with optional redundant fans) B. SATA or SCSI backplane (optional component) C. Processor air duct. (Memory DIMMs and processor(s) underneath) I TP01087 A. Internal Component Locations 4 Power distribution module G. Component Identification Internal Components C A B E G D F H I . Drive bay area (drives not included) D. Control panel board E. Air baffle (AC model; Power supply module housing F. PCI Riser assembly H. air baffle for DC model differs) Figure 2.

User Guide
Page 37
... Installations and Upgrades 2 Hardware Installations and Upgrades Before You Begin Before working with the server board. This document provides instructions for normal operation. Intel® Server Chassis SR2400/SR2400DC User Guide 13 For instructions on replacing components on the reader facing ...bit) Antistatic wrist strap and conductive foam pad (recommended) System References All references to the safety instructions at the beginning of the chassis as the processor and memory DIMMs, see the instructions provided with your server product, pay close attention to left, right, front, ...
... Installations and Upgrades 2 Hardware Installations and Upgrades Before You Begin Before working with the server board. This document provides instructions for normal operation. Intel® Server Chassis SR2400/SR2400DC User Guide 13 For instructions on replacing components on the reader facing ...bit) Antistatic wrist strap and conductive foam pad (recommended) System References All references to the safety instructions at the beginning of the chassis as the processor and memory DIMMs, see the instructions provided with your server product, pay close attention to left, right, front, ...

User Guide
Page 42
... DC external source. 3. Return to these instructions to maintain proper cooling of this book. See "Safety Information." 2. For instructions on processor installations and removals. Removing and Installing the Processor Air Duct and Processor Air Dam Always operate your server chassis with the processor air duct in place. The air duct is required to reinstall the...
... DC external source. 3. Return to these instructions to maintain proper cooling of this book. See "Safety Information." 2. For instructions on processor installations and removals. Removing and Installing the Processor Air Duct and Processor Air Dam Always operate your server chassis with the processor air duct in place. The air duct is required to reinstall the...

User Guide
Page 43
...the chassis cover. Place the processor air duct over the processor socket(s). The front edge of the air duct should contact the fan module and the top of the installed air duct should be near or under the air duct. Installing the Processor Air Duct 7. Intel® Server Chassis SR2400/SR2400DC User Guide... 19 Power down the server and unplug all peripheral devices and connect the AC power cable or DC external source to pinch or...
...the chassis cover. Place the processor air duct over the processor socket(s). The front edge of the air duct should contact the fan module and the top of the installed air duct should be near or under the air duct. Installing the Processor Air Duct 7. Intel® Server Chassis SR2400/SR2400DC User Guide... 19 Power down the server and unplug all peripheral devices and connect the AC power cable or DC external source to pinch or...

User Guide
Page 44
... and removals. Return to these instructions to the server. 20 TP01117 Figure 15. If you install only a single processor, the processor air dam must be installed on the underside of the processor air duct. For instructions on adding or replacing a processor, first remove the processor air duct and the processor air dam, and then see "Removing the...
... and removals. Return to these instructions to the server. 20 TP01117 Figure 15. If you install only a single processor, the processor air dam must be installed on the underside of the processor air duct. For instructions on adding or replacing a processor, first remove the processor air duct and the processor air dam, and then see "Removing the...
User Guide
Page 45
...that supports two processors but only one processor is to be installing a second processor. Observe the safety and ESD precautions at the beginning of the backplane. Install the chassis cover. A large air baffle is attached to the server. Always operate your system uses a hot... remove and then install the air baffle(s). For instructions, see "Installing the Processor Air Duct." 9. For instructions, see "Removing the Processor Air Duct." 5. See "Safety Information." 2. Intel® Server Chassis SR2400/SR2400DC User Guide 21 The steps below describe how to reveal the...
...that supports two processors but only one processor is to be installing a second processor. Observe the safety and ESD precautions at the beginning of the backplane. Install the chassis cover. A large air baffle is attached to the server. Always operate your system uses a hot... remove and then install the air baffle(s). For instructions, see "Installing the Processor Air Duct." 9. For instructions, see "Removing the Processor Air Duct." 5. See "Safety Information." 2. Intel® Server Chassis SR2400/SR2400DC User Guide 21 The steps below describe how to reveal the...

User Guide
Page 87
... PCI add-in the carrier, store the data cable, the interposer board, and the screws for proper airflow within the chassis. Intel® Server Chassis SR2400/SR2400DC User Guide 63 Install the slimline filler panel in all peripheral devices and the AC power cable or DC external source..., see "Installing the Chassis Cover." 14. (Optional) Install the front bezel. The riser assembly is required for future use. 12. Remove the processor air duct. Plug in the chassis opening. 13. See "Safety Information." 2. You will not be installed in card. Install the chassis cover. ...
... PCI add-in the carrier, store the data cable, the interposer board, and the screws for proper airflow within the chassis. Intel® Server Chassis SR2400/SR2400DC User Guide 63 Install the slimline filler panel in all peripheral devices and the AC power cable or DC external source..., see "Installing the Chassis Cover." 14. (Optional) Install the front bezel. The riser assembly is required for future use. 12. Remove the processor air duct. Plug in the chassis opening. 13. See "Safety Information." 2. You will not be installed in card. Install the chassis cover. ...

User Guide
Page 88
6. Remove the processor air duct. If you need to install the PCI riser assembly into the PCI riser assembly. 6. Lift up on the two levers on the PCI ... in cards into the chassis. 1. If you need to add or replace a PCI add-in card requirements. 64 See the figure below. 7. Power down the server and unplug all peripheral devices and the AC power cable or DC external source. 3. If you removed the PCI riser assembly as a step for information...
6. Remove the processor air duct. If you need to install the PCI riser assembly into the PCI riser assembly. 6. Lift up on the two levers on the PCI ... in cards into the chassis. 1. If you need to add or replace a PCI add-in card requirements. 64 See the figure below. 7. Power down the server and unplug all peripheral devices and the AC power cable or DC external source. 3. If you removed the PCI riser assembly as a step for information...

User Guide
Page 89
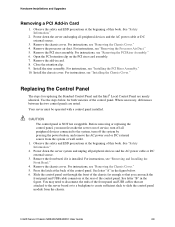
NOTE To eliminate the possibility of installing the replacement connectors on the server board. 9. Install the chassis cover. Installing the PCI Riser Assembly into the slots on the wrong side of the chassis. Set the...a different option is required. See the figure below. 8. For instructions, see "Installing the Chassis Cover." For instructions, see "Installing the Processor Air Duct" 10. TP01112 Figure 57. Intel® Server Chassis SR2400/SR2400DC User Guide 65 To replace a PCI riser connector, use the instructions under "Removing a PCI Riser Connector" to remove ...
NOTE To eliminate the possibility of installing the replacement connectors on the server board. 9. Install the chassis cover. Installing the PCI Riser Assembly into the slots on the wrong side of the chassis. Set the...a different option is required. See the figure below. 8. For instructions, see "Installing the Chassis Cover." For instructions, see "Installing the Processor Air Duct" 10. TP01112 Figure 57. Intel® Server Chassis SR2400/SR2400DC User Guide 65 To replace a PCI riser connector, use the instructions under "Removing a PCI Riser Connector" to remove ...

User Guide
Page 90
...8. Remove any installed PCI add-in the figure. Removing a PCI Riser Connector from the riser pin. See "Safety Information." 2. Remove processor air duct. For instructions, see "Removing the PCI Riser Assembly." 6. For instructions, see "Installing the PCI Riser Assembly." 11. Install ..., see "Removing the Chassis Cover." 4. For instructions, see "Installing a PCI Riser Connector." 10. Install the chassis cover. Power down the server and unplug all peripheral devices and the AC power cable or DC external source. 3. See letter "A" in Card." 7. Removing a PCI Riser ...
...8. Remove any installed PCI add-in the figure. Removing a PCI Riser Connector from the riser pin. See "Safety Information." 2. Remove processor air duct. For instructions, see "Removing the PCI Riser Assembly." 6. For instructions, see "Installing the PCI Riser Assembly." 11. Install ..., see "Removing the Chassis Cover." 4. For instructions, see "Installing a PCI Riser Connector." 10. Install the chassis cover. Power down the server and unplug all peripheral devices and the AC power cable or DC external source. 3. See letter "A" in Card." 7. Removing a PCI Riser ...

User Guide
Page 91
... duct. For instructions, see "Removing the PCI Riser Assembly." 6. Remove the PCI riser assembly. See letter "A" in the figure. 10. Intel® Server Chassis SR2400/SR2400DC User Guide 67 Remove processor air duct. Install the PCI add-in Card." 12. Install the chassis cover. Remove the chassis cover. For instructions, see "Installing the...
... duct. For instructions, see "Removing the PCI Riser Assembly." 6. Remove the PCI riser assembly. See letter "A" in the figure. 10. Intel® Server Chassis SR2400/SR2400DC User Guide 67 Remove processor air duct. Install the PCI add-in Card." 12. Install the chassis cover. Remove the chassis cover. For instructions, see "Installing the...

User Guide
Page 92
See "Safety Information." 2. Power down the server and unplug all peripheral devices and the AC power cable or DC external...PCI retention clip(s). Installing a PCI Add-in Card 1. Installing a PCI Add-in Card TP01114 10. Remove the processor air duct. See letter "B" in the riser card connector. Remove the filler panel at both the front and rear ... Make sure the bracket inserts into the chassis. For instructions, see "Removing the Processor Air Duct." 5. If you are not included in your system and must be purchased separately. A low-profile add-in card that is to ...
See "Safety Information." 2. Power down the server and unplug all peripheral devices and the AC power cable or DC external...PCI retention clip(s). Installing a PCI Add-in Card 1. Installing a PCI Add-in Card TP01114 10. Remove the processor air duct. See letter "B" in the riser card connector. Remove the filler panel at both the front and rear ... Make sure the bracket inserts into the chassis. For instructions, see "Removing the Processor Air Duct." 5. If you are not included in your system and must be purchased separately. A low-profile add-in card that is to ...
User Guide
Page 93
...card. 8. For instructions, see "Removing the Chassis Cover." 5. Intel® Server Chassis SR2400/SR2400DC User Guide 69 Remove the add-in Card 1. Where necessary, differences between the two control panels are nearly identical. Remove the processor air duct. Close the retention clip. 9. Before removing or ...the back of the control panel. For instructions, see "Removing and Installing the Front Bezel." 4. Power down the server system and unplug all peripheral devices and the AC power cable or DC external source. 3. For instructions, see "Removing the Chassis Cover." ...
...card. 8. For instructions, see "Removing the Chassis Cover." 5. Intel® Server Chassis SR2400/SR2400DC User Guide 69 Remove the add-in Card 1. Where necessary, differences between the two control panels are nearly identical. Remove the processor air duct. Close the retention clip. 9. Before removing or ...the back of the control panel. For instructions, see "Removing and Installing the Front Bezel." 4. Power down the server system and unplug all peripheral devices and the AC power cable or DC external source. 3. For instructions, see "Removing the Chassis Cover." ...
User Guide
Page 101
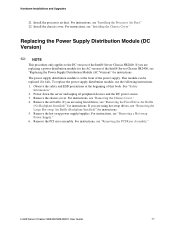
...see "Removing the Fixed Drive Air Baffle (No Backplane Installed)" for the AC version of the Intel® Server Chassis SR2400. Remove the hot swap power supply/supplies. Intel® Server Chassis SR2400/SR2400DC User Guide 77 Replacing the Power Supply Distribution Module (DC Version) ✏...This procedure only applies to the DC version of the Intel® Server Chassis SR2400, see "Removing the Chassis Cover." 4. If you are replacing a power distribution module for instructions. Remove the PCI riser assembly. Install the processor air duct. This module can be replaced if it ...
...see "Removing the Fixed Drive Air Baffle (No Backplane Installed)" for the AC version of the Intel® Server Chassis SR2400. Remove the hot swap power supply/supplies. Intel® Server Chassis SR2400/SR2400DC User Guide 77 Replacing the Power Supply Distribution Module (DC Version) ✏...This procedure only applies to the DC version of the Intel® Server Chassis SR2400, see "Removing the Chassis Cover." 4. If you are replacing a power distribution module for instructions. Remove the PCI riser assembly. Install the processor air duct. This module can be replaced if it ...

User Guide
Page 106
... to locate the connection points for a diagram of this cable. 20. Install the processor air duct. A B B AF00443 Figure 74. Refer back to Figure 63 and see your server board documentation to the server board. For instructions, see "Installing the Chassis Cover." 82 Refer back to Figure ... connection points for screw locations. Install the chassis cover. See letter "B" in the figure below for these cables connect. 19. (Hot-swap system only): Connect the flex cable to the chassis with two screws. For instructions, see "Installing a Hot-swap Power Supply." 21. For instructions...
... to locate the connection points for a diagram of this cable. 20. Install the processor air duct. A B B AF00443 Figure 74. Refer back to Figure 63 and see your server board documentation to the server board. For instructions, see "Installing the Chassis Cover." 82 Refer back to Figure ... connection points for screw locations. Install the chassis cover. See letter "B" in the figure below for these cables connect. 19. (Hot-swap system only): Connect the flex cable to the chassis with two screws. For instructions, see "Installing a Hot-swap Power Supply." 21. For instructions...