

Service Manual
Page 3
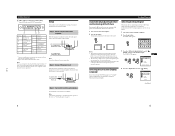
...- 3 - Reliability Check Mode : During Power Save, press "CONTRAST"- (?) key for longer than 2 second. Note If no video signal is VESA DPMS (Display Power Management Signaling) compliant, the monitor will automatically reduce power consumption in three stages as the more stringent NUTEK . Power consumption ≤ 130 W ≤ 80... - Set the time according to the monitor, the "NO INPUT SIGNAL" message (page 18) appears. If the monitor is connected to a computer or video graphics board that is input to "Setting the power saving delay time" on page 15. max. - 6557-03N/03S/43N/43S ...
...- 3 - Reliability Check Mode : During Power Save, press "CONTRAST"- (?) key for longer than 2 second. Note If no video signal is VESA DPMS (Display Power Management Signaling) compliant, the monitor will automatically reduce power consumption in three stages as the more stringent NUTEK . Power consumption ≤ 130 W ≤ 80... - Set the time according to the monitor, the "NO INPUT SIGNAL" message (page 18) appears. If the monitor is connected to a computer or video graphics board that is input to "Setting the power saving delay time" on page 15. max. - 6557-03N/03S/43N/43S ...
Service Manual
Page 7
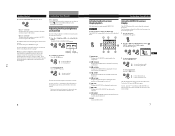
Note If "OUT OF SCAN RANGE" or "NO INPUT SIGNAL" appears on the screen, see "Using the LANG (Language) On-screen Display" on the monitor and both computers. 2 Press the button. It may not work properly if the background color is adjusted to view as H.sync input if V.Sync is ...present on the monitor and computer. 2 Press the button. Selecting the On-screen Display Language If you want to fit the center of the screen. The OPTION OSD appears. Data Clock (SCL)** 3 -- Pin No. 4 5 6...
Note If "OUT OF SCAN RANGE" or "NO INPUT SIGNAL" appears on the screen, see "Using the LANG (Language) On-screen Display" on the monitor and both computers. 2 Press the button. It may not work properly if the background color is adjusted to view as H.sync input if V.Sync is ...present on the monitor and computer. 2 Press the button. Selecting the On-screen Display Language If you want to fit the center of the screen. The OPTION OSD appears. Data Clock (SCL)** 3 -- Pin No. 4 5 6...
Service Manual
Page 8
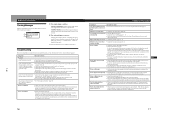
...brightness adjustment Press the ¨./> buttons. > . . . Using the CENTER On-screen Display The CENTER settings allow you want to view, or that computer is selected The signal from the interrupted signal to move the picture left For vertical adjustment ...the button again. When "2" is selected The signal from the computer connected to the 13W3 connector is adjusted, it will be stored in the BRIGHTNESS/CONTRAST OSD. 6 GCeuttsitnogmSiztianrgteYdour Monitor Introducing the On-screen Display System Most adjustments are both reset to move the picture up ...
...brightness adjustment Press the ¨./> buttons. > . . . Using the CENTER On-screen Display The CENTER settings allow you want to view, or that computer is selected The signal from the interrupted signal to move the picture left For vertical adjustment ...the button again. When "2" is selected The signal from the computer connected to the 13W3 connector is adjusted, it will be stored in the BRIGHTNESS/CONTRAST OSD. 6 GCeuttsitnogmSiztianrgteYdour Monitor Introducing the On-screen Display System Most adjustments are both reset to move the picture up ...

Service Manual
Page 12
.... All of the adjustment data, including the brightness and contrast, is reset to a computer or video graphics board that is connected to the factory settings. 14 Technical Features Getting ... the active-off - absent - 1-7 Customizing Your Monitor Using the LANG (Language) Onscreen Display English, French, German, Spanish and Japanese versions of the OSDs are detected, the monitor ...connected, the monitor automatically switches to "Setting the power saving delay time" on . All of CRTs that adjustment data not affected by VESA and Energy Star, as well as shown below . Resetting...
.... All of the adjustment data, including the brightness and contrast, is reset to a computer or video graphics board that is connected to the factory settings. 14 Technical Features Getting ... the active-off - absent - 1-7 Customizing Your Monitor Using the LANG (Language) Onscreen Display English, French, German, Spanish and Japanese versions of the OSDs are detected, the monitor ...connected, the monitor automatically switches to "Setting the power saving delay time" on . All of CRTs that adjustment data not affected by VESA and Energy Star, as well as shown below . Resetting...
Service Manual
Page 13
...of a problem and as a result, eliminate the need to the screen giving the Trinitron CRT more light to pass through to contact technical support. Picture is activated. If you place ... 1 1 The input signal condition "OUT OF SCAN RANGE" indicates that no message is displayed and the u indicator is supported. Decrease the moire cancellation effect (pages 10 - 11...into a different AC outlet, preferably on a different circuit. • Try the monitor on the computer to obtain the best possible picture by the monitor's specifications. ES Picture is not a malfunction. 17...
...of a problem and as a result, eliminate the need to the screen giving the Trinitron CRT more light to pass through to contact technical support. Picture is activated. If you place ... 1 1 The input signal condition "OUT OF SCAN RANGE" indicates that no message is displayed and the u indicator is supported. Decrease the moire cancellation effect (pages 10 - 11...into a different AC outlet, preferably on a different circuit. • Try the monitor on the computer to obtain the best possible picture by the monitor's specifications. ES Picture is not a malfunction. 17...

Service Manual
Page 14
.... If the u indicator is green 1 Remove any plugs from the video input 1 and 2 connectors, or turn the monitor off the connected computer(s). 2 Press and hold the >/ button for 2 seconds. Count the number of seconds between orange flashes of the u indicator and inform your ... color bars appear (white, red, green, blue), the monitor is a potential monitor failure. Specifications Picture tube 0.25 - 0.27 mm aperture grille pitch 19 inches measured diagonally 90-degree deflection Viewable image size Approx. 365 × 273 mm (w/h) (14 3/8 × 10 3/4 inches) 18.0" viewing image ...
.... If the u indicator is green 1 Remove any plugs from the video input 1 and 2 connectors, or turn the monitor off the connected computer(s). 2 Press and hold the >/ button for 2 seconds. Count the number of seconds between orange flashes of the u indicator and inform your ... color bars appear (white, red, green, blue), the monitor is a potential monitor failure. Specifications Picture tube 0.25 - 0.27 mm aperture grille pitch 19 inches measured diagonally 90-degree deflection Viewable image size Approx. 365 × 273 mm (w/h) (14 3/8 × 10 3/4 inches) 18.0" viewing image ...
Service Manual
Page 21
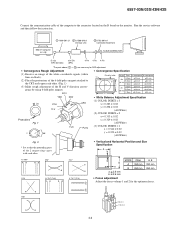
XCV • Convergence Specification Phospher edge MODE Zone N. IBM AT Computer as a Jig 1 1-690-391-21 2 A-1500-819-A Interface Unit 3 3-702-691-01 Connector Attachment To BUS CONNECTOR D-sub (9 Pin [female]) mini Din (8Pin) 4 Pin 4 Pin 4 ... using 4-fold poles magnet. 6557-03N/03S/43N/43S Connect the communication cable of the computer to the connector located on the D board on black). (2) Place the protrusions of the 6-fold poles magnet attached to the CRT neck upon each other. (Fig. 1) (3) Make rough adjustment of the white crosshatch signals (white lines...
XCV • Convergence Specification Phospher edge MODE Zone N. IBM AT Computer as a Jig 1 1-690-391-21 2 A-1500-819-A Interface Unit 3 3-702-691-01 Connector Attachment To BUS CONNECTOR D-sub (9 Pin [female]) mini Din (8Pin) 4 Pin 4 Pin 4 ... using 4-fold poles magnet. 6557-03N/03S/43N/43S Connect the communication cable of the computer to the connector located on the D board on black). (2) Place the protrusions of the 6-fold poles magnet attached to the CRT neck upon each other. (Fig. 1) (3) Make rough adjustment of the white crosshatch signals (white lines...