
Owner Manual
Page 10
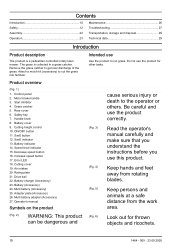
... the instructions before you use Use the product to cut grass. Contents Introduction 10 Safety 12 Assembly 22 Operation 23 Maintenance 26 Troubleshooting 27 Transportation, storage and disposal 29 Technical data 29 Introduction Product description The product is collected in a grass catcher. Grass catcher 5. Battery charger (Accessory) 23. Control panel 2. Air intakes 20. Attach a mulch kit (accessory) to cut the grass into fertilizer. Adapter plate (Accessory) 26. Remove the grass catcher to the operator or others. Product overview (Fig. 1) 1. Speed level...
... the instructions before you use Use the product to cut grass. Contents Introduction 10 Safety 12 Assembly 22 Operation 23 Maintenance 26 Troubleshooting 27 Transportation, storage and disposal 29 Technical data 29 Introduction Product description The product is collected in a grass catcher. Grass catcher 5. Battery charger (Accessory) 23. Control panel 2. Air intakes 20. Attach a mulch kit (accessory) to cut the grass into fertilizer. Adapter plate (Accessory) 26. Remove the grass catcher to the operator or others. Product overview (Fig. 1) 1. Speed level...
Owner Manual
Page 11
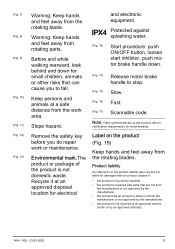
... feet away from rotating parts. Before and while walking rearward, look behind and down . (Fig. 14) Release motor brake handle to in the product liability laws, we are not from the work or maintenance. Remove the safety key before you to certification ...location for damages that our product causes if: • the product is incorrectly repaired. • the product is repaired with parts that are not liable for electrical (Fig. 18) and electronic equipment. Protected against splashing water. Start procedure: push ON/OFF button, loosen start inhibitor, push motor brake handle...
... feet away from rotating parts. Before and while walking rearward, look behind and down . (Fig. 14) Release motor brake handle to in the product liability laws, we are not from the work or maintenance. Remove the safety key before you to certification ...location for damages that our product causes if: • the product is incorrectly repaired. • the product is repaired with parts that are not liable for electrical (Fig. 18) and electronic equipment. Protected against splashing water. Start procedure: push ON/OFF button, loosen start inhibitor, push motor brake handle...

Owner Manual
Page 12
..., the operator's manual, on the product, on the engine/motor and on the attachments. • Only allow operators who are not obeyed. Note: Used to observe the following safety instructions could result in serious injury or death. • Read, understand, and follow before operation WARNING: Read the warning instructions that 12 1484 - 005 - 23.09.2020 Safe practices for wheel weights or counterweights...
..., the operator's manual, on the product, on the engine/motor and on the attachments. • Only allow operators who are not obeyed. Note: Used to observe the following safety instructions could result in serious injury or death. • Read, understand, and follow before operation WARNING: Read the warning instructions that 12 1484 - 005 - 23.09.2020 Safe practices for wheel weights or counterweights...

Owner Manual
Page 13
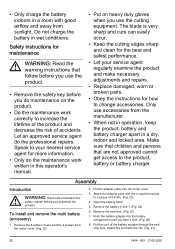
... without the entire grass catcher, discharge chute, or other hidden hazards. Exhaust gases contain carbon monoxide, a deadly poison. • Only operate the product in daylight or in good artificial light. • Avoid holes, ruts, bumps, rocks, or other safety devices in place and functioning properly. Children specific instructions WARNING: Read the warning instructions that follow before you use the product. •...
... without the entire grass catcher, discharge chute, or other hidden hazards. Exhaust gases contain carbon monoxide, a deadly poison. • Only operate the product in daylight or in good artificial light. • Avoid holes, ruts, bumps, rocks, or other safety devices in place and functioning properly. Children specific instructions WARNING: Read the warning instructions that follow before you use the product. •...

Owner Manual
Page 14
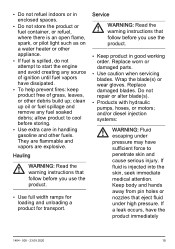
... of ignition. • Use only an approved fuel container. • Do not remove fuel cap or add fuel with a grass catcher or other than the operator. Use caution while operating near drop offs. • Avoid mowing wet grass. follow before you use the product. • Tragic accidents can affect the stability of the product. Fire and Fuel specific information (for gasoline engine products) WARNING: Read the warning instructions that...
... of ignition. • Use only an approved fuel container. • Do not remove fuel cap or add fuel with a grass catcher or other than the operator. Use caution while operating near drop offs. • Avoid mowing wet grass. follow before you use the product. • Tragic accidents can affect the stability of the product. Fire and Fuel specific information (for gasoline engine products) WARNING: Read the warning instructions that...
Owner Manual
Page 15
... working order. Do not repair or alter blade(s). • Products with hydraulic pumps, hoses, or motors; Hauling WARNING: Read the warning instructions that eject fluid under pressure may have dissipated. • To help prevent fires: keep product free of grass, leaves, or other debris build up oil or fuel spillage and remove any source of ignition until fuel vapors have sufficient force to...
... working order. Do not repair or alter blade(s). • Products with hydraulic pumps, hoses, or motors; Hauling WARNING: Read the warning instructions that eject fluid under pressure may have dissipated. • To help prevent fires: keep product free of grass, leaves, or other debris build up oil or fuel spillage and remove any source of ignition until fuel vapors have sufficient force to...

Owner Manual
Page 16
... defective. • Do not change this product or use your common sense. To reduce the risk of the operator • Always monitor a person, with active or passive medical implants. Work area safety WARNING: Read the warning instructions that it has been changed by a trained technician. • If equipped, disconnect spark plug wire(s) and the negative battery cable before you are not...
... defective. • Do not change this product or use your common sense. To reduce the risk of the operator • Always monitor a person, with active or passive medical implants. Work area safety WARNING: Read the warning instructions that it has been changed by a trained technician. • If equipped, disconnect spark plug wire(s) and the negative battery cable before you are not...

Owner Manual
Page 17
... use the product. • Remove objects such as fog, rain, strong winds, intense cold and risk of lightning. The risk of slopes. Do not mow excessively steep slopes. Work safety WARNING: Read the warning instructions that slopes more than 15° • Exercise extreme caution when changing ...tiring. An incorrectly attached blade can do 1484 - 005 - 23.09.2020 17 Long grass can hide obstacles. • To cut grass lawns only. To use the product in bad weather or in moist or wet locations is not permitted to use the product. • Objects that you know how to stop the motor...
... use the product. • Remove objects such as fog, rain, strong winds, intense cold and risk of lightning. The risk of slopes. Do not mow excessively steep slopes. Work safety WARNING: Read the warning instructions that slopes more than 15° • Exercise extreme caution when changing ...tiring. An incorrectly attached blade can do 1484 - 005 - 23.09.2020 17 Long grass can hide obstacles. • To cut grass lawns only. To use the product in bad weather or in moist or wet locations is not permitted to use the product. • Objects that you know how to stop the motor...

Owner Manual
Page 18
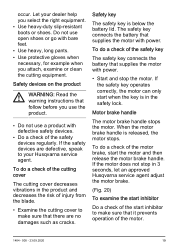
... when you change the cutting height. Never make sure that the blade becomes loose. • If the blade hits an object or if vibrations occur, stop the motor, pull up the safety key and remove the battery. • Do not walk rearward when you operate the product. • Stop the motor when you pull the product rearward. • Never lift up the safety key and remove the battery. Safety instructions for damages...
... when you change the cutting height. Never make sure that the blade becomes loose. • If the blade hits an object or if vibrations occur, stop the motor, pull up the safety key and remove the battery. • Do not walk rearward when you operate the product. • Stop the motor when you pull the product rearward. • Never lift up the safety key and remove the battery. Safety instructions for damages...
Owner Manual
Page 19
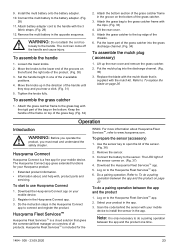
... as cracks. If the safety key operates correctly, the motor can only start inhibitor to your dealer help you attach, examine or clean the cutting equipment. Motor brake handle The motor brake handle stops the motor. To do a check of the cutting cover The cutting cover decreases vibrations in the safety lock. Do not use a product with power. • Start and stop in 3 seconds, let an approved Husqvarna service agent adjust the motor brake. (Fig. 20) To examine...
... as cracks. If the safety key operates correctly, the motor can only start inhibitor to your dealer help you attach, examine or clean the cutting equipment. Motor brake handle The motor brake handle stops the motor. To do a check of the cutting cover The cutting cover decreases vibrations in the safety lock. Do not use a product with power. • Start and stop in 3 seconds, let an approved Husqvarna service agent adjust the motor brake. (Fig. 20) To examine...

Owner Manual
Page 21
... the power cord and extension cables away from a mains socket, pull out the plug. Children shall not play with active or passive medical implants. To disconnect the battery charger from water, oil and sharp edges. Make sure that can cause corrosion. Cleaning and user maintenance shall not be used by children without supervision. • Do not charge nonrechargeable batteries in the battery...
... the power cord and extension cables away from a mains socket, pull out the plug. Children shall not play with active or passive medical implants. To disconnect the battery charger from water, oil and sharp edges. Make sure that can cause corrosion. Cleaning and user maintenance shall not be used by children without supervision. • Do not charge nonrechargeable batteries in the battery...
Owner Manual
Page 22
... accidents. Only use the cutting equipment. Put the cord of the battery adapter through the seal stop . (Fig. 25) 7. Safety instructions for how to change accessories. To install and remove the multi battery (accessory) 1. Attach the adapter plate with good airflow and away from the motor cover. (Fig. 22) 2. Let an approved service agent do maintenance on the product. • Do the maintenance work written in this operator's manual. • Put...
... accidents. Only use the cutting equipment. Put the cord of the battery adapter through the seal stop . (Fig. 25) 7. Safety instructions for how to change accessories. To install and remove the multi battery (accessory) 1. Attach the adapter plate with good airflow and away from the motor cover. (Fig. 22) 2. Let an approved service agent do maintenance on the product. • Do the maintenance work written in this operator's manual. • Put...
Owner Manual
Page 23
.... Download the Husqvarna Fleet Services™ app. 5. Scan the code behind the sensor with the mulch blade that is a cloud solution that gives the commercial fleet manager an overview of the sensor. (Fig. 36) 2. Install the multi battery onto the battery adapter. 10. Set the handle height in the direction of the grass catcher into the discharge channel. (Fig. 35) 3. Put the lower part of the handle until...
.... Download the Husqvarna Fleet Services™ app. 5. Scan the code behind the sensor with the mulch blade that is a cloud solution that gives the commercial fleet manager an overview of the sensor. (Fig. 36) 2. Install the multi battery onto the battery adapter. 10. Set the handle height in the direction of the grass catcher into the discharge channel. (Fig. 35) 3. Put the lower part of the handle until...
Owner Manual
Page 24
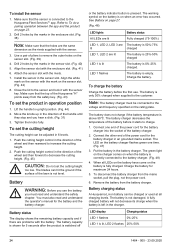
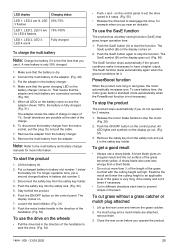
...) 6. Install the sensor in the battery charger. Push the cutting height control in the direction of the wheel and then forward to decrease the cutting height. (Fig. 45) CAUTION: Do not set the cutting height The cutting height can be adjusted in 6 levels. 1. Note: The battery charger must be charged or used at all LEDs on the battery have come on the battery is fully charged. When all charging levels. Battery charging status A Husqvarna Li-ion battery can...
...) 6. Install the sensor in the battery charger. Push the cutting height control in the direction of the wheel and then forward to decrease the cutting height. (Fig. 45) CAUTION: Do not set the cutting height The cutting height can be adjusted in 6 levels. 1. Note: The battery charger must be charged or used at all LEDs on the battery have come on the battery is fully charged. When all charging levels. Battery charging status A Husqvarna Li-ion battery can...
Owner Manual
Page 25
... a charged battery in the battery charger. 4. Push the motor brake handle in battery slot number 2. 3. A blunt blade gives an irregular result and the cut more information. Lift up the rear cover and remove the grass catcher. 2. A new battery is very long, drive slowly and cut grass without a grass catcher or mulch plug attached 1. Remove the multi battery from the safety lock and put a second charged battery in the direction of the grass. To start of the handlebar to stop the function. Push the safety key into...
... a charged battery in the battery charger. 4. Push the motor brake handle in battery slot number 2. 3. A blunt blade gives an irregular result and the cut more information. Lift up the rear cover and remove the grass catcher. 2. A new battery is very long, drive slowly and cut grass without a grass catcher or mulch plug attached 1. Remove the multi battery from the safety lock and put a second charged battery in the direction of the grass. To start of the handlebar to stop the function. Push the safety key into...
Owner Manual
Page 26
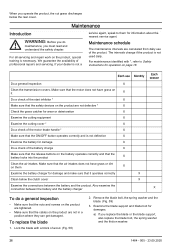
... sure that the cables on the product are calculated from daily use Monthly Do a general inspection X Clean the transmission covers. Remove the blade bolt, the spring washer and the blade. (Fig. 59) 3. Make sure that the air intakes does not have grass on it operates correctly X Clean below the rear cover. The intervals change if the product is necessary. For all servicing and repair work on them...
... sure that the cables on the product are calculated from daily use Monthly Do a general inspection X Clean the transmission covers. Remove the blade bolt, the spring washer and the blade. (Fig. 59) 3. Make sure that the air intakes does not have grass on it operates correctly X Clean below the rear cover. The intervals change if the product is necessary. For all servicing and repair work on them...
Owner Manual
Page 27
... blade to remove grass below the clutch cover. If you do a test of the cutting cover. (Fig. 60) 6. WARNING: Use protective gloves when you hit an obstacle that causes the product to make sure that it is flash- Always replace a damaged cutting equipment. 2. Attach the spring washer and tighten the bolt with compressed air or use a soft and dry cloth. • Clean the surfaces of the motor...
... blade to remove grass below the clutch cover. If you do a test of the cutting cover. (Fig. 60) 6. WARNING: Use protective gloves when you hit an obstacle that causes the product to make sure that it is flash- Always replace a damaged cutting equipment. 2. Attach the spring washer and tighten the bolt with compressed air or use a soft and dry cloth. • Clean the surfaces of the motor...

Owner Manual
Page 28
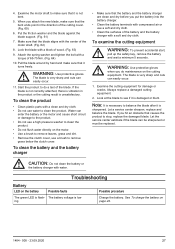
.... Refer to To set the cutting height on the product. Clean the transmission cover if it is weak. If the error stays, speak to an authorised service agent. The battery is necessary. Refer to To charge the battery on the battery charger Possible faults Possible procedure The error LED flash- Stop the motor and wait until it . Remove the battery from battery. Use the battery in the product...
.... Refer to To set the cutting height on the product. Clean the transmission cover if it is weak. If the error stays, speak to an authorised service agent. The battery is necessary. Refer to To charge the battery on the battery charger Possible faults Possible procedure The error LED flash- Stop the motor and wait until it . Remove the battery from battery. Use the battery in the product...
Owner Manual
Page 29
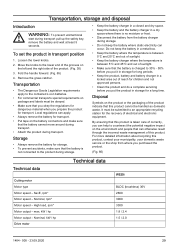
...requirements apply to the product during transport pull up the safety key, remove the battery and wait at least 5 seconds. Nominal, rpm* Motor speed - kW / hp Motor output - Nominal, kW / hp Drive motor Technical data W520i BLDC (brushless) 36V 2600 3000 ...Cutting motor Motor type Motor speed - SavE, rpm* Motor speed - High load, rpm* Motor output - Move the knobs to 30% - 50% before you put the product in a metal box. • Keep the battery where the temperature is between 5°C and 25°C and out of sunlight. • Keep the battery charger where the temperature is charged...
...requirements apply to the product during transport pull up the safety key, remove the battery and wait at least 5 seconds. Nominal, rpm* Motor speed - kW / hp Motor output - Nominal, kW / hp Drive motor Technical data W520i BLDC (brushless) 36V 2600 3000 ...Cutting motor Motor type Motor speed - SavE, rpm* Motor speed - High load, rpm* Motor output - Move the knobs to 30% - 50% before you put the product in a metal box. • Keep the battery where the temperature is between 5°C and 25°C and out of sunlight. • Keep the battery charger where the temperature is charged...

Owner Manual
Page 30
... 100-240 Frequency, Hz 50-60 50-60 Power, W 330 500 30 1484 - 005 - 23.09.2020 Nominal, kW / hp 0.3 / 0.4 Self walk speed, km/h / mi/h 3.0-5.0 / 1.9-3.1 Speed adjustment levels 4 Weight Weight without battery, kg / lbs 41 / 90.4 Battery Type of battery Husqvarna Battery Series Battery runtime Battery runtime, min, (free run ) with standard mode activated, with one 20 Husqvarna 5.2 Ah battery (Bli200). Battery runtime, min, (free run ) with SavE activated, with one Husqvarna 5.2 30 Ah battery (Bli200). W520i Motor output -
... 100-240 Frequency, Hz 50-60 50-60 Power, W 330 500 30 1484 - 005 - 23.09.2020 Nominal, kW / hp 0.3 / 0.4 Self walk speed, km/h / mi/h 3.0-5.0 / 1.9-3.1 Speed adjustment levels 4 Weight Weight without battery, kg / lbs 41 / 90.4 Battery Type of battery Husqvarna Battery Series Battery runtime Battery runtime, min, (free run ) with standard mode activated, with one 20 Husqvarna 5.2 Ah battery (Bli200). Battery runtime, min, (free run ) with SavE activated, with one Husqvarna 5.2 30 Ah battery (Bli200). W520i Motor output -


