
Parts Manual
Page 3
ELECTRICAL Ref Part No Description 1 583 81 97-01 WIRING ASSY 2 582 05 07-01 TRIGGER SWITCH 3 579 73 82-01 KEYPAD 4 503 21 28-13 SCREW CCRPANT 5 581 53 13-01 WIRING ASSY 6 581 94 66-01 CONTROL UNIT 7 588 17 64-01 GREASE 8 579 70 93-01 WIRING ASSY 9 593 89 65-01 SWITCH KIT 10 593 81 30-01 CONNECTOR Remark SB-B1500023 520iHD60 QTY KIT 19 19 1 2 1 1 1 1 1 1 8, 6
ELECTRICAL Ref Part No Description 1 583 81 97-01 WIRING ASSY 2 582 05 07-01 TRIGGER SWITCH 3 579 73 82-01 KEYPAD 4 503 21 28-13 SCREW CCRPANT 5 581 53 13-01 WIRING ASSY 6 581 94 66-01 CONTROL UNIT 7 588 17 64-01 GREASE 8 579 70 93-01 WIRING ASSY 9 593 89 65-01 SWITCH KIT 10 593 81 30-01 CONNECTOR Remark SB-B1500023 520iHD60 QTY KIT 19 19 1 2 1 1 1 1 1 1 8, 6

Parts Manual
Page 5
... 83-04 CUTTING DECK 2 578 37 22-01 GASKET 3 581 10 09-01 PROTECTION ASSY 4 503 22 00-09 HEXAGON NUT 5 579 63 31-01 HEXAGON NUT 6 584 15 22-02 SCREW IHSCFM 7 503 23 00-24 WASHER 8 581 25 93-02 TRANSPORT GUARD 9 584 15 22-01 SCREW IHSCFM 10 580 93 15-01 SUPPORT 11 581... 76 16-01 SCREW IHSCT 12 581 48 35-01 PROTECTION 13 580 71 62-01 SPACER 14 580 71 57-01 BAR 15 580 71 56-03 BLADE 16 580 71 60-01 WEAR PLATE 17 578 37 20-01 BRACKET 18 580 71 58-02 BAR Remark 520iHD60 QTY KIT 1 1 1 6 71...
... 83-04 CUTTING DECK 2 578 37 22-01 GASKET 3 581 10 09-01 PROTECTION ASSY 4 503 22 00-09 HEXAGON NUT 5 579 63 31-01 HEXAGON NUT 6 584 15 22-02 SCREW IHSCFM 7 503 23 00-24 WASHER 8 581 25 93-02 TRANSPORT GUARD 9 584 15 22-01 SCREW IHSCFM 10 580 93 15-01 SUPPORT 11 581... 76 16-01 SCREW IHSCT 12 581 48 35-01 PROTECTION 13 580 71 62-01 SPACER 14 580 71 57-01 BAR 15 580 71 56-03 BLADE 16 580 71 60-01 WEAR PLATE 17 578 37 20-01 BRACKET 18 580 71 58-02 BAR Remark 520iHD60 QTY KIT 1 1 1 6 71...

Parts Manual
Page 7
GEARS Ref 1 2 3 4 5 6 7 8 9 10 11 12 13 Part No 503 98 96-03 582 38 66-01 503 21 68-72 584 41 10-01 582 36 30-01 578 05 49-01 522 71 46-01 582 38 67-01 582 36 31-01 578 00 27-01 581 83 85-01 582 83 70-01 582 38 64-01 Description GREASE PLATE SCREW IHSCT GASKET HELICAL GEAR LOCKWASHER DISC MOTOR ASSY CONNECTING ROD ASSY HEAVY DUTY DOWEL PIN ECCENTRIC DISC GEAR GEAR CASE Remark 520iHD60 QTY KIT 1 1 6 1 1 12 1 12 1 12 1 2 12 2 12 1 12 1 18
GEARS Ref 1 2 3 4 5 6 7 8 9 10 11 12 13 Part No 503 98 96-03 582 38 66-01 503 21 68-72 584 41 10-01 582 36 30-01 578 05 49-01 522 71 46-01 582 38 67-01 582 36 31-01 578 00 27-01 581 83 85-01 582 83 70-01 582 38 64-01 Description GREASE PLATE SCREW IHSCT GASKET HELICAL GEAR LOCKWASHER DISC MOTOR ASSY CONNECTING ROD ASSY HEAVY DUTY DOWEL PIN ECCENTRIC DISC GEAR GEAR CASE Remark 520iHD60 QTY KIT 1 1 6 1 1 12 1 12 1 12 1 2 12 2 12 1 12 1 18

Parts Manual
Page 9
HANDLE Ref Part No Description 1 579 56 35-03 FRONT HANDLE 2 579 56 34-02 FRONT HANDLE 3 503 21 88-76 SCREW IHSCT 4 579 21 19-01 SCREW IHSCT 5 579 56 36-02 FRONT HANDLE 6 580 79 01-01 BUSHING 7 583 89 03-01 RECOIL SPRING 8 584 27 40-01 SPRING 9 581 22 32-01 LEVER Remark 520iHD60 QTY KIT 1 1 4 10 1 3 3 1 1
HANDLE Ref Part No Description 1 579 56 35-03 FRONT HANDLE 2 579 56 34-02 FRONT HANDLE 3 503 21 88-76 SCREW IHSCT 4 579 21 19-01 SCREW IHSCT 5 579 56 36-02 FRONT HANDLE 6 580 79 01-01 BUSHING 7 583 89 03-01 RECOIL SPRING 8 584 27 40-01 SPRING 9 581 22 32-01 LEVER Remark 520iHD60 QTY KIT 1 1 4 10 1 3 3 1 1

Parts Manual
Page 11
HOUSING Ref Part No Description 1 579 55 96-01 CHASSIS 2 579 55 97-01 CHASSIS 3 579 56 03-01 COVER 4 577 99 66-01 PUSH BUTTON 5 577 99 65-01 SPRING 6 503 21 74-16 SCREW IHSCT 7 580 71 50-01 COVER 8 579 56 53-01 LOCKING BUTTON 9 503 21 68-72 SCREW IHSCT 10 584 27 00-01... 38-01 REAR HANDLE 16 579 21 19-01 SCREW IHSCT 17 579 56 54-01 FRAME 18 580 71 95-01 BRACKET 19 579 56 41-01 THROTTLE CONTROL 20 581 66 29-05 DECAL 21 581 66 28-05 DECAL 23 577 84 43-01 DECAL Remark Chassis left Chassis right 520iHD60 QTY KIT...
HOUSING Ref Part No Description 1 579 55 96-01 CHASSIS 2 579 55 97-01 CHASSIS 3 579 56 03-01 COVER 4 577 99 66-01 PUSH BUTTON 5 577 99 65-01 SPRING 6 503 21 74-16 SCREW IHSCT 7 580 71 50-01 COVER 8 579 56 53-01 LOCKING BUTTON 9 503 21 68-72 SCREW IHSCT 10 584 27 00-01... 38-01 REAR HANDLE 16 579 21 19-01 SCREW IHSCT 17 579 56 54-01 FRAME 18 580 71 95-01 BRACKET 19 579 56 41-01 THROTTLE CONTROL 20 581 66 29-05 DECAL 21 581 66 28-05 DECAL 23 577 84 43-01 DECAL Remark Chassis left Chassis right 520iHD60 QTY KIT...
Owner Manual
Page 2
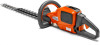
... a battery hedge trimmer with an electrical motor. Speak to your safety and efficiency during operation. Cord 11 19 12 773 - 004 - 19.08.2020 Contents Introduction 2 Safety 4 Assembly 10 Maintenance 12 Troubleshooting 14 Transportation, storage and disposal 15 Operation 10 Technical data 15 Introduction Product description Husqvarna 520iHD60, 520iHD70 is constantly in progress to increase your servicing dealer for other tasks. Intended use the...
... a battery hedge trimmer with an electrical motor. Speak to your safety and efficiency during operation. Cord 11 19 12 773 - 004 - 19.08.2020 Contents Introduction 2 Safety 4 Assembly 10 Maintenance 12 Troubleshooting 14 Transportation, storage and disposal 15 Operation 10 Technical data 15 Introduction Product description Husqvarna 520iHD60, 520iHD70 is constantly in progress to increase your servicing dealer for other tasks. Intended use the...
Owner Manual
Page 3
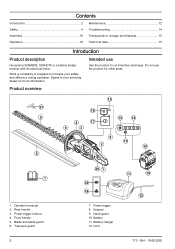
.... Start and stop button 18. Injury or death can occur to in the operator's manual. The product or package cannot be sent to Europe only) Fail-safe transformer. 13. Warning indicator 16. Power on the battery charger Recycle this product at an approved service center or by the manufacturer. • the product is the sequential number. Lock for...
.... Start and stop button 18. Injury or death can occur to in the operator's manual. The product or package cannot be sent to Europe only) Fail-safe transformer. 13. Warning indicator 16. Power on the battery charger Recycle this product at an approved service center or by the manufacturer. • the product is the sequential number. Lock for...
Owner Manual
Page 4
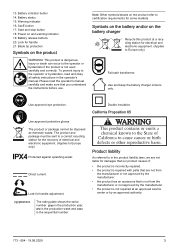
... the manual are connected and properly used . Protective equipment such as pipes, radiators, ranges and refrigerators. Ensure the switch is earthed or grounded. • Do not expose power tools to a power source and/or battery pack, picking up or carrying the tool. This enables better control of electric shock. Use of dust collection can differ from heat, oil, sharp edges or moving parts. Operators...
... the manual are connected and properly used . Protective equipment such as pipes, radiators, ranges and refrigerators. Ensure the switch is earthed or grounded. • Do not expose power tools to a power source and/or battery pack, picking up or carrying the tool. This enables better control of electric shock. Use of dust collection can differ from heat, oil, sharp edges or moving parts. Operators...
Owner Manual
Page 5
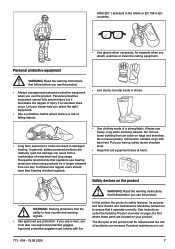
... from being started by a qualified repair person using only identical replacement parts. Personal safety • Use both hands when operating the hedge trimmer. Cutter blades contacting a "live " and could result in this manual. 773 - 004 - 19.08.2020 5 General safety instructions WARNING: Read the warning instructions that can make exposed metal parts of parts and any adjustments, changing accessories, or storing power tools. Do the safety checks, maintenance and service instructions described...
... from being started by a qualified repair person using only identical replacement parts. Personal safety • Use both hands when operating the hedge trimmer. Cutter blades contacting a "live " and could result in this manual. 773 - 004 - 19.08.2020 5 General safety instructions WARNING: Read the warning instructions that can make exposed metal parts of parts and any adjustments, changing accessories, or storing power tools. Do the safety checks, maintenance and service instructions described...
Owner Manual
Page 6
...cutting attachment until it and removed the battery. Make sure that the cutting attachment stops completely. Always use the product. • If you encounter a situation where you are thrown out by the use of non-authorized accessories or replacement parts. • Under no circumstances may the design of the product be modified without first checking behind you cut... use the machine in very bad weather, for operation WARNING: Read the warning instructions that follow before you should ask an expert. Local laws may regulate the age of the user. • Keep the product in a locked ...
...cutting attachment until it and removed the battery. Make sure that the cutting attachment stops completely. Always use the product. • If you encounter a situation where you are thrown out by the use of non-authorized accessories or replacement parts. • Under no circumstances may the design of the product be modified without first checking behind you cut... use the machine in very bad weather, for operation WARNING: Read the warning instructions that follow before you should ask an expert. Local laws may regulate the age of the user. • Keep the product in a locked ...
Owner Manual
Page 7
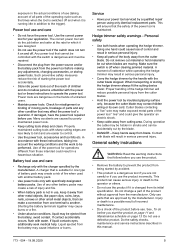
... and regular users should be reduced and the risk of accidents can increase if product maintenance is a risk of a strong fabric. Always use the product. Do not wear jewelry, short pants, sandals or go with the WARNING: Read the warning instructions that follow before you attach, examine or clean the cutting equipment. See instructions under the heading Product overview...
... and regular users should be reduced and the risk of accidents can increase if product maintenance is a risk of a strong fabric. Always use the product. Do not wear jewelry, short pants, sandals or go with the WARNING: Read the warning instructions that follow before you attach, examine or clean the cutting equipment. See instructions under the heading Product overview...
Owner Manual
Page 8
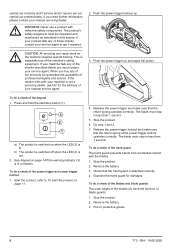
... the power trigger lockout and make sure that the return spring of the machine′s safety equipment. Remove the battery. 3. This is attached correctly. 4. Stop the product. 6. Check that the hand guard is especially true of the power trigger lockout operates correctly. Remove the battery. 3. The product's safety equipment must contact your service agent. Push the power trigger up . Start the product, refer to get it repaired. 2. carried...
... the power trigger lockout and make sure that the return spring of the machine′s safety equipment. Remove the battery. 3. This is attached correctly. 4. Stop the product. 6. Check that the hand guard is especially true of the power trigger lockout operates correctly. Remove the battery. 3. The product's safety equipment must contact your service agent. Push the power trigger up . Start the product, refer to get it repaired. 2. carried...
Owner Manual
Page 9
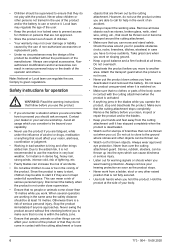
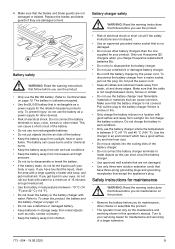
... objects as a power supply for a minimum of electrical shock. To prevent injury, do maintenance on page 15. To disconnect the battery charger from water, oil and sharp edges. Only use the battery as this operator's manual. Do not connect the battery terminals to the battery charger if there is not covered. A Battery safety WARNING: Read the warning instructions that the blades and blade guards are damaged or...
... objects as a power supply for a minimum of electrical shock. To prevent injury, do maintenance on page 15. To disconnect the battery charger from water, oil and sharp edges. Only use the battery as this operator's manual. Do not connect the battery terminals to the battery charger if there is not covered. A Battery safety WARNING: Read the warning instructions that the blades and blade guards are damaged or...
Owner Manual
Page 10
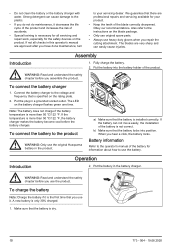
... for all checks in a grounded socket outlet. Also refer to the product WARNING: Only use the original Husqvarna battery in the battery charger. Put the battery into position. To connect the battery to the instructions on the product. Introduction Operation 2. If not all servicing and repair work, especially for the safety devices on the blade package. • Only use original spare parts. • Always use it...
... for all checks in a grounded socket outlet. Also refer to the product WARNING: Only use the original Husqvarna battery in the battery charger. Put the battery into position. To connect the battery to the instructions on the product. Introduction Operation 2. If not all servicing and repair work, especially for the safety devices on the blade package. • Only use original spare parts. • Always use it...
Owner Manual
Page 11
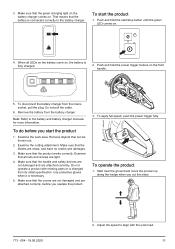
... damages. 3. Make sure that can be thrown out. 2. To operate the product 1. 3. When all nuts and screws are attached correctly. Examine the work load. 11 Use protective gloves when it is changed from the battery charger. Make sure that the blades are attached correctly, before you cut the sides. 773 - 004 - 19.08.2020 2. To apply full speed, push the power trigger fully.
... damages. 3. Make sure that can be thrown out. 2. To operate the product 1. 3. When all nuts and screws are attached correctly. Examine the work load. 11 Use protective gloves when it is changed from the battery charger. Make sure that the blades are attached correctly, before you cut the sides. 773 - 004 - 19.08.2020 2. To apply full speed, push the power trigger fully.
Owner Manual
Page 12
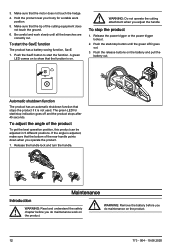
... stops the product if it is on to start the SavE function The product has a battery saving function, SavE. 1. A green LED comes on . Be careful and work position. 5. WARNING: Do not operate the cutting attachment when you do maintenance on the battery and pull the battery out. To adjust the angle of the cutting equipment does not touch the ground. 6. Hold the...
... stops the product if it is on to start the SavE function The product has a battery saving function, SavE. 1. A green LED comes on . Be careful and work position. 5. WARNING: Do not operate the cutting attachment when you do maintenance on the battery and pull the battery out. To adjust the angle of the cutting equipment does not touch the ground. 6. Hold the...

Owner Manual
Page 13
.... Do a check of the battery charger is bent or damaged. Before use . 2. Make sure that the connection cord of the connections between the battery and the battery charger. Keep the battery guide tracks clean. 3. Make sure that there are tight. Maintenance Clean the external parts of storage. 773 - 004 - 19.08.2020 13 Make sure that you must do maintenance. Replace the guard if it...
.... Do a check of the battery charger is bent or damaged. Before use . 2. Make sure that the connection cord of the connections between the battery and the battery charger. Keep the battery guide tracks clean. 3. Make sure that there are tight. Maintenance Clean the external parts of storage. 773 - 004 - 19.08.2020 13 Make sure that you must do maintenance. Replace the guard if it...
Owner Manual
Page 14
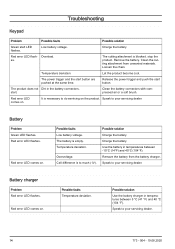
Remove the battery. Charge the battery. Battery charger Problem Red error LED flashes. Possible faults Temperature deviation. Speak to your servicing dealer. Charge the battery. Clean the cutting attachment from the battery charger. Release the power trigger and push the start LED flashes. Clean the battery connectors with compressed air or a soft brush. Possible solution Charge the battery. Use the battery in the battery connectors. Red error LED comes on . Overload. The product does not...
Remove the battery. Charge the battery. Battery charger Problem Red error LED flashes. Possible faults Temperature deviation. Speak to your servicing dealer. Charge the battery. Clean the cutting attachment from the battery charger. Release the power trigger and push the start LED flashes. Clean the battery connectors with compressed air or a soft brush. Possible solution Charge the battery. Use the battery in the battery connectors. Red error LED comes on . Overload. The product does not...
Owner Manual
Page 15
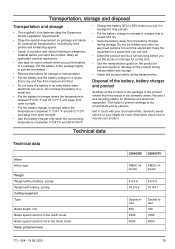
... level 520iHD60 520iHD70 PMDC (4brush) PMDC (4brush) 8.4/3.8 10.2/4.6 8.6/3.9 10.4/4.7 Double sided 600 3500 4000 Double sided 700 3500 4000 773 - 004 - 19.08.2020 15 Do not let children and other not approved persons to touch the equipment. Technical data Technical data Motor Motor type Weight Weight without battery, Lbs/kg Weight with battery, Lbs/kg Cutting equipment Type Blade...
... level 520iHD60 520iHD70 PMDC (4brush) PMDC (4brush) 8.4/3.8 10.2/4.6 8.6/3.9 10.4/4.7 Double sided 600 3500 4000 Double sided 700 3500 4000 773 - 004 - 19.08.2020 15 Do not let children and other not approved persons to touch the equipment. Technical data Technical data Motor Motor type Weight Weight without battery, Lbs/kg Weight with battery, Lbs/kg Cutting equipment Type Blade...
Owner Manual
Page 16
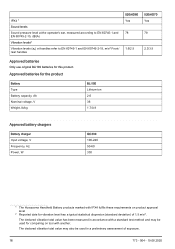
... Power, W QC330 100-240 50-60 330 1 The Husqvarna Handheld Battery products marked with IPX4 fulfils these requirements on tool with a standard test method and may also be used in accordance with another. The declared vibration total value may be used for comparing on product approval level 2 Reported date for this product. IPX4 1 Sound levels Sound pressure level at the operator...
... Power, W QC330 100-240 50-60 330 1 The Husqvarna Handheld Battery products marked with IPX4 fulfils these requirements on tool with a standard test method and may also be used in accordance with another. The declared vibration total value may be used for comparing on product approval level 2 Reported date for this product. IPX4 1 Sound levels Sound pressure level at the operator...


