Manual
Page 5
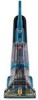
...Water Tank A B. SpinScrub® 60 Brush Assembly or SpinScrub® 77 Brush Assembly (Assembled on select models only. attaCh handle Handle ships with bolt screwed in holster. 1.6 Cord storaGe 1.7 Wrap cord around back of tank to cord. 1.7 5 Actual model may be purchased separately by visiting hoover...materials. *Available on unit) E. Cleaner asseMbly Carton Contents A. Clean Water Tank/ Carry Handle H. Accessories not included with screwdriver. 1.2 1.3 upper tank 1.4 Position bottom of tank onto cleaner. 1.5 Push upper part of cleaner. Push down firmly...
...Water Tank A B. SpinScrub® 60 Brush Assembly or SpinScrub® 77 Brush Assembly (Assembled on select models only. attaCh handle Handle ships with bolt screwed in holster. 1.6 Cord storaGe 1.7 Wrap cord around back of tank to cord. 1.7 5 Actual model may be purchased separately by visiting hoover...materials. *Available on unit) E. Cleaner asseMbly Carton Contents A. Clean Water Tank/ Carry Handle H. Accessories not included with screwdriver. 1.2 1.3 upper tank 1.4 Position bottom of tank onto cleaner. 1.5 Push upper part of cleaner. Push down firmly...
Manual
Page 6
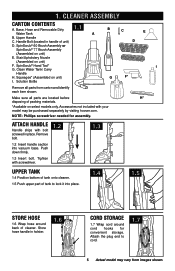
...3 6 4 16 9 17 14 13 15 20 18 19 *Available on select models only. Hand Grip 2. Clean Surge Button* 3. ON/OFF Switch 5. Dirty Water Tank Handle 11. Hose 17. Handle Release Pedal 19. ON-OFF switch To turn cleaner OFF, push button again. 2.2 Handle release pedal Step on back side... Mode Selector* 13. To turn cleaner ON, push button down. Dirty Water Tank 12. com, or your model may vary from images shown. 6 Stair/Upholstery Tool* 18. Accessories not included with your local HOOVER® service center. SpinScrub® Hand Tool* C. Cord Hooks: Upper...
...3 6 4 16 9 17 14 13 15 20 18 19 *Available on select models only. Hand Grip 2. Clean Surge Button* 3. ON/OFF Switch 5. Dirty Water Tank Handle 11. Hose 17. Handle Release Pedal 19. ON-OFF switch To turn cleaner OFF, push button again. 2.2 Handle release pedal Step on back side... Mode Selector* 13. To turn cleaner ON, push button down. Dirty Water Tank 12. com, or your model may vary from images shown. 6 Stair/Upholstery Tool* 18. Accessories not included with your local HOOVER® service center. SpinScrub® Hand Tool* C. Cord Hooks: Upper...
Manual
Page 7
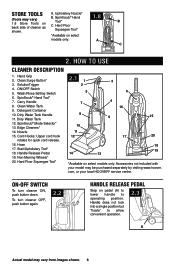
...may also be lifted by the upper clean water tank handle as shown. Completely fill Detergent Tank when using concentrate detergent (2x), fill to line with detergent and fill remainder of tank with your other Hoover detergent. The detergent container (D) is properly latched... in this manual for details) They are specially formulated for delicate carpets and hard floors. 2.6 The tanks: CLEAN WATER/ SOLUTION TANK 2.7 (upper tank) C D 2.7 The clean water tank (C) holds the water that ...
...may also be lifted by the upper clean water tank handle as shown. Completely fill Detergent Tank when using concentrate detergent (2x), fill to line with detergent and fill remainder of tank with your other Hoover detergent. The detergent container (D) is properly latched... in this manual for details) They are specially formulated for delicate carpets and hard floors. 2.6 The tanks: CLEAN WATER/ SOLUTION TANK 2.7 (upper tank) C D 2.7 The clean water tank (C) holds the water that ...
Manual
Page 8
... (A) detergent container, (B) Clean Water Tank or (C) Dirty Water Tank. dirty water tank (lower tank) ! CAUTION ! When the Dirty Water Tank is full, the automatic shut-off and unplug from electrical outlet. 2.13 Pull Dirty Water Tank from lint screens (E). 2.18 Replace Dirty Water Tank on the base when the tank is a normal condition. 2.12 ! C Use only HOOVER® Oxy detergent for this tank's handle personal injury...
... (A) detergent container, (B) Clean Water Tank or (C) Dirty Water Tank. dirty water tank (lower tank) ! CAUTION ! When the Dirty Water Tank is full, the automatic shut-off and unplug from electrical outlet. 2.13 Pull Dirty Water Tank from lint screens (E). 2.18 Replace Dirty Water Tank on the base when the tank is a normal condition. 2.12 ! C Use only HOOVER® Oxy detergent for this tank's handle personal injury...
Manual
Page 9
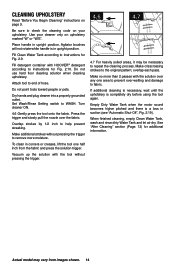
...Stain Spray Cleaner*- When cleaning entire floor, move furniture out of the Dirty Water Tank lid (B). Follow Directions on bottle. B Check clean water tank also; How to reach into tufts and folds. Use your HOOVER® carpet cleaner only if the upholstery fabric is full the automatic shut ...off mechanism will shut off and empty Dirty Water Tank before cleaning. *Available at additional cost...
...Stain Spray Cleaner*- When cleaning entire floor, move furniture out of the Dirty Water Tank lid (B). Follow Directions on bottle. B Check clean water tank also; How to reach into tufts and folds. Use your HOOVER® carpet cleaner only if the upholstery fabric is full the automatic shut ...off mechanism will shut off and empty Dirty Water Tank before cleaning. *Available at additional cost...
Manual
Page 10
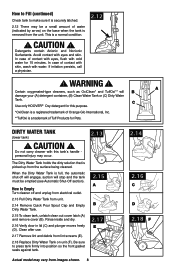
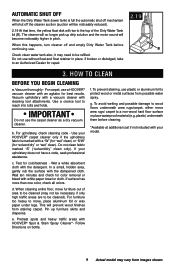
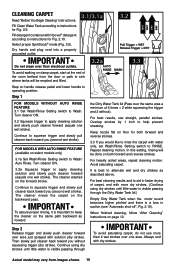
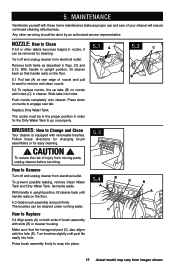
Fill detergent container with Hoover® detergent according to Wash/ Auto Rinse. Pull Trigger = WET Release Trigger = DRY IMPORTANT Do not clean over area just sprayed with dry strokes. FOR ... end with solution (dry stroke). Dry hands and plug cord into a properly grounded outlet. 8&5 8&5 %3: %3: Cleaning Carpet 3.1/3.1a Read "Before You Begin Cleaning" instructions. 3.2 Fill Clean Water Tank according to squeeze trigger and slowly pull cleaner back toward you (second wet stroke). For best results, use more dry strokes. (Continue using dry strokes...
Fill detergent container with Hoover® detergent according to Wash/ Auto Rinse. Pull Trigger = WET Release Trigger = DRY IMPORTANT Do not clean over area just sprayed with dry strokes. FOR ... end with solution (dry stroke). Dry hands and plug cord into a properly grounded outlet. 8&5 8&5 %3: %3: Cleaning Carpet 3.1/3.1a Read "Before You Begin Cleaning" instructions. 3.2 Fill Clean Water Tank according to squeeze trigger and slowly pull cleaner back toward you (second wet stroke). For best results, use more dry strokes. (Continue using dry strokes...
Manual
Page 11
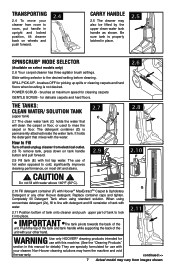
... chemicals. Do not submerge unit in upright position, tilt cleaner back so 2. CAUTION ! To prevent possible leaking, remove clean water tank (Fig. 2.8) and Dirty Water Tank (Fig. 2.13). Step on sealed wood floors, inspect floor surface for Hard Floor Cleaning (Available on furniture). 1. If... using cleaner on handle release pedal and lower handle to pick up spills Your HOOVER® carpet cleaner may vary from moving parts...
... chemicals. Do not submerge unit in upright position, tilt cleaner back so 2. CAUTION ! To prevent possible leaking, remove clean water tank (Fig. 2.8) and Dirty Water Tank (Fig. 2.13). Step on sealed wood floors, inspect floor surface for Hard Floor Cleaning (Available on furniture). 1. If... using cleaner on handle release pedal and lower handle to pick up spills Your HOOVER® carpet cleaner may vary from moving parts...
Manual
Page 12
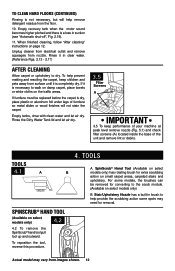
...replaced before the carpet is dry, place plastic or aluminum foil under legs of the unit and remove lint or debris. Empty tanks, rinse with clean water and let air dry. For some spots may vary from the floor. 10. Unplug cleaner from electrical outlet and remove squeegee... Figs. 2.13 - 2.17) After cleaning Allow carpet or upholstery to help remove detergent residue from images shown. 12 TOOLS A. Rinse the Dirty Water Tank lid and let air dry. 3.5 Filter Screens A IMPORTANT 3.5 To keep children and pets away from nozzle. tools 4.1 A B SpinScrub® hand tool (Available...
...replaced before the carpet is dry, place plastic or aluminum foil under legs of the unit and remove lint or debris. Empty tanks, rinse with clean water and let air dry. For some spots may vary from the floor. 10. Unplug cleaner from electrical outlet and remove squeegee... Figs. 2.13 - 2.17) After cleaning Allow carpet or upholstery to help remove detergent residue from images shown. 12 TOOLS A. Rinse the Dirty Water Tank lid and let air dry. 3.5 Filter Screens A IMPORTANT 3.5 To keep children and pets away from nozzle. tools 4.1 A B SpinScrub® hand tool (Available...
Manual
Page 13
Place handle in upright position and remove hose from moving parts, unplug cleaner before using the tool again. Fill clean water tank according to prevent the cleaner from falling, always place cleaner at end of stroke. 4.4 4.5 A B 4.5 Lift tool, and position it ... detergent container with HOOVER® detergent according to Attach Tools ! Press the trigger and pull the tool slowly over carpet without pressing trigger (dry stroke). Release trigger at bottom of injury from rack. When finished cleaning, empty Clean Water Tank, wash and rinse dirty Water Tank and let air...
Place handle in upright position and remove hose from moving parts, unplug cleaner before using the tool again. Fill clean water tank according to prevent the cleaner from falling, always place cleaner at end of stroke. 4.4 4.5 A B 4.5 Lift tool, and position it ... detergent container with HOOVER® detergent according to Attach Tools ! Press the trigger and pull the tool slowly over carpet without pressing trigger (dry stroke). Release trigger at bottom of injury from rack. When finished cleaning, empty Clean Water Tank, wash and rinse dirty Water Tank and let air...
Manual
Page 14
...HOOVER® detergent according to prevent over the fabric. Use your upholstery. See "After Cleaning" section (Page. 12) for Fig. 2.10. Place handle in upright position. To clean in suction (see "Automatic Shut-Off", Fig. 2.19). Attach tool to the original pattern; Empty Dirty Water Tank...the trigger. 4.6 4.7 4.7 For heavily soiled areas, it may vary from the fabric and press the solution trigger. Fill Clean Water Tank according to help prevent streaking. Do not point tools toward people or pets. Set Wash/Rinse Setting switch to repeat the cleaning ...
...HOOVER® detergent according to prevent over the fabric. Use your upholstery. See "After Cleaning" section (Page. 12) for Fig. 2.10. Place handle in upright position. To clean in suction (see "Automatic Shut-Off", Fig. 2.19). Attach tool to the original pattern; Empty Dirty Water Tank...the trigger. 4.6 4.7 4.7 For heavily soiled areas, it may vary from the fabric and press the solution trigger. Fill Clean Water Tank according to help prevent streaking. Do not point tools toward people or pets. Set Wash/Rinse Setting switch to repeat the cleaning ...
Manual
Page 15
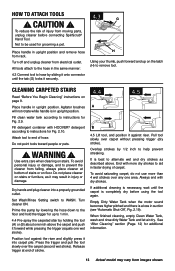
...for changing brush assemblies or for cleaning. Remove both ends of injury from electrical outlet. With handle in order for the Dirty Water Tank to go on nozzle with holes (C) in cleaner. The nozzle must be removed for easy cleaning. ! To reduce the ...to Replace 5.4 Align posts (A) on the floor. 5.1 Pull tab (A) at rear edge of your cleaner will ensure continued cleaning effectiveness. Replace Dirty Water Tank. With handle in nozzle, it 5.1 A can be done by an authorized service representative. 5. Push nozzle completely onto cleaner. CAUTION ! The brushes ...
...for changing brush assemblies or for cleaning. Remove both ends of injury from electrical outlet. With handle in order for the Dirty Water Tank to go on nozzle with holes (C) in cleaner. The nozzle must be removed for easy cleaning. ! To reduce the ...to Replace 5.4 Align posts (A) on the floor. 5.1 Pull tab (A) at rear edge of your cleaner will ensure continued cleaning effectiveness. Replace Dirty Water Tank. With handle in nozzle, it 5.1 A can be done by an authorized service representative. 5. Push nozzle completely onto cleaner. CAUTION ! The brushes ...
Manual
Page 16
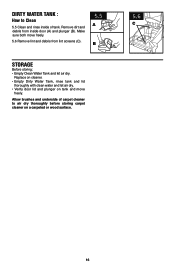
... let air dry. Make sure both move freely. Replace on cleaner. • Empty Dirty Water Tank, rinse tank and lid thoroughly with clean water and let air dry. • Verify door lid and plunger on tank and move freely. 5.6 Remove lint and debris from inside of carpet cleaner to air dry... thoroughly before storing carpet cleaner on a carpeted or wood surface. 5.6 C 16 Dirty Water Tank : How to Clean 5.5 Clean...
... let air dry. Make sure both move freely. Replace on cleaner. • Empty Dirty Water Tank, rinse tank and lid thoroughly with clean water and let air dry. • Verify door lid and plunger on tank and move freely. 5.6 Remove lint and debris from inside of carpet cleaner to air dry... thoroughly before storing carpet cleaner on a carpeted or wood surface. 5.6 C 16 Dirty Water Tank : How to Clean 5.5 Clean...
Manual
Page 17
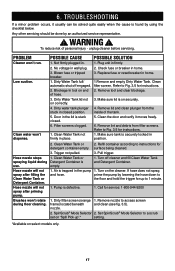
...should be solved quite easily when the cause is found by using the checklist below. Not firmly plugged in home. 3. Clean water won 't run. Dirty water tank plunger stuck in the lid is on select models only. 17 Check fuse or breaker in . Make sure lid is stuck closed... occurs, it moves freely. 6. WARNING ! Trigger not pulled. 2. POSSIBLE CAUSE 1. POSSIBLE SOLUTION 1. Plug unit in home. 1.Remove and empty Dirty Water Tank. Blockage In tool on end of hose. 3. Replace fuse or reset breaker in firmly. Refer to access screen frame) located beneath and clean (see ...
...should be solved quite easily when the cause is found by using the checklist below. Not firmly plugged in home. 3. Clean water won 't run. Dirty water tank plunger stuck in the lid is on select models only. 17 Check fuse or breaker in . Make sure lid is stuck closed... occurs, it moves freely. 6. WARNING ! Trigger not pulled. 2. POSSIBLE CAUSE 1. POSSIBLE SOLUTION 1. Plug unit in home. 1.Remove and empty Dirty Water Tank. Blockage In tool on end of hose. 3. Replace fuse or reset breaker in firmly. Refer to access screen frame) located beneath and clean (see ...
Manual
Page 18
...Follow the service center link to aid in water tank. Always identify your vacuum to Hoover®, Inc., Company in delay. Service To obtain approved Hoover® service and genuine Hoover® parts, locate the nearest Authorized Hoover® Warranty Service Dealer (Depot) by... outlet nearest you need further assistance: To speak with HOOVER® detergent. (Reference Fig. 2.10) 6.1 6.2 A B • 6.2 Secure Dirty Water Tank lid before doing any detergent in faster drying of the following. • Use HOOVER® brand detergents; CAUTION ! Do not send your...
...Follow the service center link to aid in water tank. Always identify your vacuum to Hoover®, Inc., Company in delay. Service To obtain approved Hoover® service and genuine Hoover® parts, locate the nearest Authorized Hoover® Warranty Service Dealer (Depot) by... outlet nearest you need further assistance: To speak with HOOVER® detergent. (Reference Fig. 2.10) 6.1 6.2 A B • 6.2 Secure Dirty Water Tank lid before doing any detergent in faster drying of the following. • Use HOOVER® brand detergents; CAUTION ! Do not send your...


