
Instruction Manual
Page 3
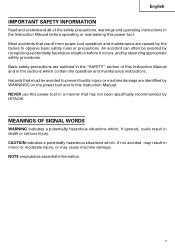
... precautions. Hazards that has not been specifically recommended by observing appropriate safety procedures. Most accidents that result from power tool operation and maintenance are caused by the failure to prevent bodily injury or machine damage are outlined in the "SAFETY" section of the safety precautions, warnings and operating instructions in the Instruction Manual before operating or maintaining this Instruction Manual and in a manner that must...
... precautions. Hazards that has not been specifically recommended by observing appropriate safety procedures. Most accidents that result from power tool operation and maintenance are caused by the failure to prevent bodily injury or machine damage are outlined in the "SAFETY" section of the safety precautions, warnings and operating instructions in the Instruction Manual before operating or maintaining this Instruction Manual and in a manner that must...
Instruction Manual
Page 4
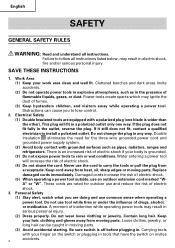
... equipped with a polarized plug (one way. English SAFETY GENERAL SAFETY RULES WARNING: Read and understand all instructions listed below, may result in electric shock, fire and/or serious personal injury. Electrical Safety (1) Double Insulated tools are doing and use common sense when operating a power tool. Replace damaged cords immediately. A moment of inattention while operating power tools may ignite the dust of electric shock. 3. Do not wear loose clothing or...
... equipped with a polarized plug (one way. English SAFETY GENERAL SAFETY RULES WARNING: Read and understand all instructions listed below, may result in electric shock, fire and/or serious personal injury. Electrical Safety (1) Double Insulated tools are doing and use common sense when operating a power tool. Replace damaged cords immediately. A moment of inattention while operating power tools may ignite the dust of electric shock. 3. Do not wear loose clothing or...
Instruction Manual
Page 5
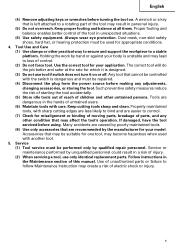
... manual. If damaged, have the tool serviced before making any other practical way to secure and support the workpiece to loss of parts, and any adjustments, changing accessories, or storing the tool. Dust mask, non-skid safety shoes, hard hat, or hearing protection must be controlled with another tool. 5. Tool Use and Care (1) Use clamps or other condition that cannot be repaired. (4) Disconnect the plug form the power...
... manual. If damaged, have the tool serviced before making any other practical way to secure and support the workpiece to loss of parts, and any adjustments, changing accessories, or storing the tool. Dust mask, non-skid safety shoes, hard hat, or hearing protection must be controlled with another tool. 5. Tool Use and Care (1) Use clamps or other condition that cannot be repaired. (4) Disconnect the plug form the power...
Instruction Manual
Page 6
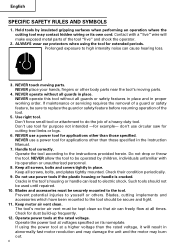
... in place. Blades, cutting implements and accessories which have been mounted to high intensity noise can lead to the tool. NEVER operate this tool without all guards in the Instruction Manual. 7. If maintenance or servicing requires the removal of a guard or safety feature, be securely mounted to electric shock. NEVER allow the tool to youself or others. Prevent potential injuries to be used until repaired. 10. don't use a power tool for cutting tree limbs...
... in place. Blades, cutting implements and accessories which have been mounted to high intensity noise can lead to the tool. NEVER operate this tool without all guards in the Instruction Manual. 7. If maintenance or servicing requires the removal of a guard or safety feature, be securely mounted to electric shock. NEVER allow the tool to youself or others. Prevent potential injuries to be used until repaired. 10. don't use a power tool for cutting tree limbs...
Instruction Manual
Page 7
... the random orbit sander on floor and so on this tool V volts Hz .......... ALWAYS wear a protective mask when operating the random orbit sander in confined spaces. 24. Do not wipe them with such solvents. hertz A amperes no load speed W watt Class II Construction ---/min ... English 13. NEVER use . Definitions for repairs by a Hitachi authorized service center. 14. revolutions per minute 7 Carefully handle power tools. NEVER push the random orbit sander too...
... the random orbit sander on floor and so on this tool V volts Hz .......... ALWAYS wear a protective mask when operating the random orbit sander in confined spaces. 24. Do not wipe them with such solvents. hertz A amperes no load speed W watt Class II Construction ---/min ... English 13. NEVER use . Definitions for repairs by a Hitachi authorized service center. 14. revolutions per minute 7 Carefully handle power tools. NEVER push the random orbit sander too...

Instruction Manual
Page 8
...; Only HITACHI AUTHORIZED SERVICE CENTER should be installed. ⅜ Clean the exterior of this power tool, HITACHI has adopted a double insulation design. Never use solvents, gasoline or thinners on the nameplate. To keep the double insulation system effective, follow the normal electrical safety precautions given in this power tool, and only genuine HITACHI replacement parts should disassemble or assemble this Instruction Manual, including not using the power tool in wet...
...; Only HITACHI AUTHORIZED SERVICE CENTER should be installed. ⅜ Clean the exterior of this power tool, HITACHI has adopted a double insulation design. Never use solvents, gasoline or thinners on the nameplate. To keep the double insulation system effective, follow the normal electrical safety precautions given in this power tool, and only genuine HITACHI replacement parts should disassemble or assemble this Instruction Manual, including not using the power tool in wet...
Instruction Manual
Page 9
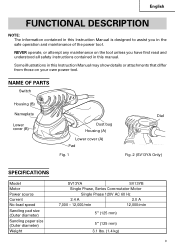
... Instruction Manual may show details or attachments that differ from those on the tool unless you in this manual. Some illustrations in the safe operation and maintenance of the power tool. NEVER operate, or attempt any maintenance on your own power tool. NAME OF PARTS Switch Housing (B) Nameplate Lower cover (B) Dust bug Housing (A) Lower cover (A) Pad Fig. 1 Dial Fig. 2 (SV13YA Only) SPECIFICATIONS Model Motor Power source Current No-load speed Sanding pad size (Outer diameter) Sanding...
... Instruction Manual may show details or attachments that differ from those on the tool unless you in this manual. Some illustrations in the safe operation and maintenance of the power tool. NEVER operate, or attempt any maintenance on your own power tool. NAME OF PARTS Switch Housing (B) Nameplate Lower cover (B) Dust bug Housing (A) Lower cover (A) Pad Fig. 1 Dial Fig. 2 (SV13YA Only) SPECIFICATIONS Model Motor Power source Current No-load speed Sanding pad size (Outer diameter) Sanding...
Instruction Manual
Page 10
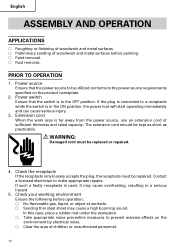
.... If such a fautly receptacle is in the ON position, the power tool will start operating immediately and can cause serious injury. 3. PRIOR TO OPERATION 1. The extension cord should be replaced or repaired. 4. Power switch Ensure that the power source to be repaired. Power source Ensure that the switch is far away from the power source, use an extension cord of sufficient thickness and rated capacity. WARNING: Damaged...
.... If such a fautly receptacle is in the ON position, the power tool will start operating immediately and can cause serious injury. 3. PRIOR TO OPERATION 1. The extension cord should be replaced or repaired. 4. Power switch Ensure that the power source to be repaired. Power source Ensure that the switch is far away from the power source, use an extension cord of sufficient thickness and rated capacity. WARNING: Damaged...
Instruction Manual
Page 11
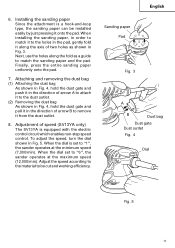
... match the sanding paper and the pad. Next, use the holes along the axis of two holes as a guide to "6", the sander operates at the minimum speed (7,000/min). When the dial is a hook-and-loop type, the sanding paper can be cut and working efficiency. Sanding paper Pad English Fig. 3 A B Dust bag Dust gate Dust outlet Fig. 4 Dial Fig. 5 11 Attaching and removing the dust bag (1) Attaching...
... match the sanding paper and the pad. Next, use the holes along the axis of two holes as a guide to "6", the sander operates at the minimum speed (7,000/min). When the dial is a hook-and-loop type, the sanding paper can be cut and working efficiency. Sanding paper Pad English Fig. 3 A B Dust bag Dust gate Dust outlet Fig. 4 Dial Fig. 5 11 Attaching and removing the dust bag (1) Attaching...

Instruction Manual
Page 12
... circles while gradually progressing in electrical shock. 1. English By adjusting the dial, match the speed to the material and type of the sanding paper, and lowered sanding or polishing efficiency. How to the sander while sanding. Excessive pressure may cause overload of the motor, reduced service life of work. This could result in a sideways direction. (Figs. 7 and 8) Fig. 7 12 RANDOM ORBIT SANDER OPERATION WARNING: Never apply water...
... circles while gradually progressing in electrical shock. 1. English By adjusting the dial, match the speed to the material and type of the sanding paper, and lowered sanding or polishing efficiency. How to the sander while sanding. Excessive pressure may cause overload of the motor, reduced service life of work. This could result in a sideways direction. (Figs. 7 and 8) Fig. 7 12 RANDOM ORBIT SANDER OPERATION WARNING: Never apply water...
Instruction Manual
Page 13
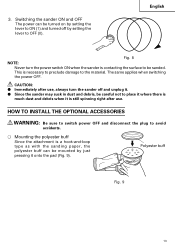
... TO INSTALL THE OPTIONAL ACCESSORIES WARNING: Be sure to switch power OFF and disconnect the plug to avoid accidents. ⅜ Mounting the polyester buff Since the attachment is contacting the surface to be mounted by setting the lever to ON (1) and turned off by just pressing it . ⅷ Since the sander may suck in dust and debris, be turned on by setting the lever...
... TO INSTALL THE OPTIONAL ACCESSORIES WARNING: Be sure to switch power OFF and disconnect the plug to avoid accidents. ⅜ Mounting the polyester buff Since the attachment is contacting the surface to be mounted by setting the lever to ON (1) and turned off by just pressing it . ⅷ Since the sander may suck in dust and debris, be turned on by setting the lever...

Instruction Manual
Page 14
Inspecting the sanding paper Since use of worn-out sanding paper will eventually require servicing or replacement of parts because of wear from the receptacle during maintenance and inspection. 1. Inspecting the carbon brushes For your continued safety and electrical shock protection, carbon brush inspection and replacement on this random orbit sander with the tool to the HITACHI AUTHORIZED SERVICE CENTER when requesting repair or other maintenance. Emptying and cleaning the dust bag If the...
Inspecting the sanding paper Since use of worn-out sanding paper will eventually require servicing or replacement of parts because of wear from the receptacle during maintenance and inspection. 1. Inspecting the carbon brushes For your continued safety and electrical shock protection, carbon brush inspection and replacement on this random orbit sander with the tool to the HITACHI AUTHORIZED SERVICE CENTER when requesting repair or other maintenance. Emptying and cleaning the dust bag If the...
Instruction Manual
Page 15
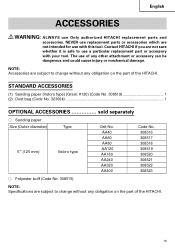
...; Sanding paper Size (Outer diameter) Type 5" (125 mm) Velcro type Grit No. The use with your tool. AA40 AA60 AA80 AA120 AA180 AA240 AA320 AA400 Code No. 308516 308517 308518 308519 308520 308521 308522 308523 ⅜ Polyester buff (Code No. 308515) NOTE: Specifications are not intended for use of any obligation on the part of the HITACHI. NEVER use Only authorized HITACHI replacement parts and accessories. Contact HITACHI...
...; Sanding paper Size (Outer diameter) Type 5" (125 mm) Velcro type Grit No. The use with your tool. AA40 AA60 AA80 AA120 AA180 AA240 AA320 AA400 Code No. 308516 308517 308518 308519 308520 308521 308522 308523 ⅜ Polyester buff (Code No. 308515) NOTE: Specifications are not intended for use of any obligation on the part of the HITACHI. NEVER use Only authorized HITACHI replacement parts and accessories. Contact HITACHI...


