

Introductory Information
Page 4
... from the printer. ◦ The printer has been dropped or the curing lamps module has been damaged. ◦ The printer is not operating normally. See manual for details. 2 Introductory information ENWW If possible, ensure that the printhead carriage is over the service station before removing power from the printer This seepage...
... from the printer. ◦ The printer has been dropped or the curing lamps module has been damaged. ◦ The printer is not operating normally. See manual for details. 2 Introductory information ENWW If possible, ensure that the printhead carriage is over the service station before removing power from the printer This seepage...

User Guide
Page 5
... Media page ...40 Ink page ...41 System page ...42 Menu tree ...45 7 Calibrate the printer ...49 When to calibrate ...50 AutoJet ...50 Automatic calibrations ...51 Manual calibrations ...51 Unfixed Jets Report ...58 Linearization ...58 8 Specialty printing options ...59 How to print selective gloss ...60 How to print relief texture ...64 9 Accessories...
... Media page ...40 Ink page ...41 System page ...42 Menu tree ...45 7 Calibrate the printer ...49 When to calibrate ...50 AutoJet ...50 Automatic calibrations ...51 Manual calibrations ...51 Unfixed Jets Report ...58 Linearization ...58 8 Specialty printing options ...59 How to print selective gloss ...60 How to print relief texture ...64 9 Accessories...
User Guide
Page 10
... printheads must be refilled with ink, purged, and restored to rotate your ink stock and use a 90% solution of operational parameters for an extended period, manual purging may be wound either printed-side-out or printed-side-in, but the takeup must be loaded printed-side-in overheating and permanent damage...
... printheads must be refilled with ink, purged, and restored to rotate your ink stock and use a 90% solution of operational parameters for an extended period, manual purging may be wound either printed-side-out or printed-side-in, but the takeup must be loaded printed-side-in overheating and permanent damage...

User Guide
Page 14
... of the optional white ink upgrade accessory kit, keeps white pigments dispersed for ordering information. Compensates for detectable media, otherwise the manual method can be used). ● Built-in service, without slowing printing speed. variable drop size, piezoelectric printheads. Ink system ...precise image placement (for most lost or misfiring jets by locating them and using substitute jets without operator intervention. ● HP White Ink Homogenizer - Printer automatically sets the correct head height above sheet-fed media. ● Automatic media width sensing ...
... of the optional white ink upgrade accessory kit, keeps white pigments dispersed for ordering information. Compensates for detectable media, otherwise the manual method can be used). ● Built-in service, without slowing printing speed. variable drop size, piezoelectric printheads. Ink system ...precise image placement (for most lost or misfiring jets by locating them and using substitute jets without operator intervention. ● HP White Ink Homogenizer - Printer automatically sets the correct head height above sheet-fed media. ● Automatic media width sensing ...

User Guide
Page 22
... of the alignment pins is used for fastest throughput. Send a print job from the RIP or print a Stored Job from the list, or enter a length manually, then press Proceed. The printer prints on the next sheet and will prompt for transparent media, which the printer cannot detect. On the Printing page...
... of the alignment pins is used for fastest throughput. Send a print job from the RIP or print a Stored Job from the list, or enter a length manually, then press Proceed. The printer prints on the next sheet and will prompt for transparent media, which the printer cannot detect. On the Printing page...
User Guide
Page 38
... the media drive belt when printing edge-to remove. It has been factory adjusted for 24-48 hours - For optimal image quality, use . ◦ Perform a manual purge after printing. Use only flat, unwarped, undamaged sheets, with the lamps set to Low, Low. ● Rigid cut-sheet media - Images printed on porous...
... the media drive belt when printing edge-to remove. It has been factory adjusted for 24-48 hours - For optimal image quality, use . ◦ Perform a manual purge after printing. Use only flat, unwarped, undamaged sheets, with the lamps set to Low, Low. ● Rigid cut-sheet media - Images printed on porous...

User Guide
Page 40
... a "knockout," because none of manufacture. This is most often printed on top of it was printed, the image must be supplemented with manual printhead cleaning, to an existing printer. Replace the white ink after the Warranty Ends date printed on dark, colored, metallic, or clear media... operator. A solid rectangle (or irregular shape) of printed white ink that upgrades the printer to the White Ink Upgrade Kit Installation Instructions, HP part number CQ114-90006, included in the RIP or application software before printing. ● Spot color - When viewed from date of the ...
... a "knockout," because none of manufacture. This is most often printed on top of it was printed, the image must be supplemented with manual printhead cleaning, to an existing printer. Replace the white ink after the Warranty Ends date printed on dark, colored, metallic, or clear media... operator. A solid rectangle (or irregular shape) of printed white ink that upgrades the printer to the White Ink Upgrade Kit Installation Instructions, HP part number CQ114-90006, included in the RIP or application software before printing. ● Spot color - When viewed from date of the ...

User Guide
Page 42
Overview The touch-screen control panel shows you the printer's current status, and enables you must enter the media width manually when prompted by the control panel. 3 Network status - Home page Figure 6-1 Home page The Home page is displayed when the printer is connected to an ...
Overview The touch-screen control panel shows you the printer's current status, and enables you must enter the media width manually when prompted by the control panel. 3 Network status - Home page Figure 6-1 Home page The Home page is displayed when the printer is connected to an ...

User Guide
Page 45
... or input side after you to estimate skew ◦ One Edge (available when Measure on and off between 0-25 cm (0-10 in two places to manually switch the UV curing lamps on all loads - and service-end edges on the first sheet, user-end edge only on first load - See Calibrate...
... or input side after you to estimate skew ◦ One Edge (available when Measure on and off between 0-25 cm (0-10 in two places to manually switch the UV curing lamps on all loads - and service-end edges on the first sheet, user-end edge only on first load - See Calibrate...

User Guide
Page 46
... speed (throughput). ● Quality Check - ◦ When loading - Sets whether to use this space. Automatically raises the rail to set the UV Lamp Power to manually enter the thickness. ● Head Height off by working jets. Provides the option of causing the printer to advance the media past unprinted space in...
... speed (throughput). ● Quality Check - ◦ When loading - Sets whether to use this space. Automatically raises the rail to set the UV Lamp Power to manually enter the thickness. ● Head Height off by working jets. Provides the option of causing the printer to advance the media past unprinted space in...

User Guide
Page 51
...control panel ENWW Decrease the idle time if printing single jobs. ● Attention Sorting - Novice mode displays all printer configuration settings to bookmark the printer's HP Embedded Web Server in which automatic maintenance is displayed. These options are automatically turned off by this button displays multiple pages of the menu options.... ● Expert/Novice Messages - NOTE: Verify that the printer's internal clock is set from the Embedded Web Server. Displays a keypad to use DHCP or manually configure a static IP address (System page > Settings > Network).
...control panel ENWW Decrease the idle time if printing single jobs. ● Attention Sorting - Novice mode displays all printer configuration settings to bookmark the printer's HP Embedded Web Server in which automatic maintenance is displayed. These options are automatically turned off by this button displays multiple pages of the menu options.... ● Expert/Novice Messages - NOTE: Verify that the printer's internal clock is set from the Embedded Web Server. Displays a keypad to use DHCP or manually configure a static IP address (System page > Settings > Network).

User Guide
Page 52
...; Auto Calibrations ◦ AutoBidi Calibration ◦ Auto Head X Calibration ◦ AutoJet Calibration ◦ Full AutoSet ◦ AutoSet Summary ● Manual Calibrations ◦ Media Feed Calibration ◦ Manual Bidi Registration ◦ Printhead X Calibration ◦ Manual Jet Mapping ENWW Menu tree 45 License Pressing this button displays the printer software license agreement. Options marked with...
...; Auto Calibrations ◦ AutoBidi Calibration ◦ Auto Head X Calibration ◦ AutoJet Calibration ◦ Full AutoSet ◦ AutoSet Summary ● Manual Calibrations ◦ Media Feed Calibration ◦ Manual Bidi Registration ◦ Printhead X Calibration ◦ Manual Jet Mapping ENWW Menu tree 45 License Pressing this button displays the printer software license agreement. Options marked with...

User Guide
Page 56
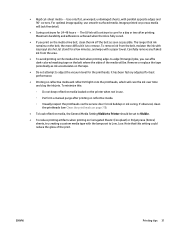
7 Calibrate the printer ● When to calibrate ● AutoJet ● Automatic calibrations ● Manual calibrations ● Unfixed Jets Report ● Linearization ENWW 49
7 Calibrate the printer ● When to calibrate ● AutoJet ● Automatic calibrations ● Manual calibrations ● Unfixed Jets Report ● Linearization ENWW 49
User Guide
Page 57
... media that are more accurate). During subsequent printing, the printer compensates for these jets by the authorized service provider) Manual Calibrations Function Linearization of colors for instructions). Not normally needed except when printing on opaque media before loading transparent/translucent media...that AutoJet does not detect and substitute. When to calibrate When to map out specific inkjets. Aligns printheads, allows you to run Manual Jet Mapping, or map jets on "invisible" media. You can also run AutoJet: ● Select AutoJet Calibration from the Printing ...
... media that are more accurate). During subsequent printing, the printer compensates for these jets by the authorized service provider) Manual Calibrations Function Linearization of colors for instructions). Not normally needed except when printing on opaque media before loading transparent/translucent media...that AutoJet does not detect and substitute. When to calibrate When to map out specific inkjets. Aligns printheads, allows you to run Manual Jet Mapping, or map jets on "invisible" media. You can also run AutoJet: ● Select AutoJet Calibration from the Printing ...

User Guide
Page 58
...Calibration - Automatic calibrations The printer's piezo printheads are permanently mapped out by the installer. Press Calibrate from the Printing page, then press Manual Calibrations in the various print modes. Calibrates the media advance accuracy for rigid media only) camera-assisted calibrations are in the menu. ... by AutoJet, how many are aligned by the operator, and whether the head is usable (from this case, contact HP or your authorized service provider. Head and bidirectional calibrations should be necessary only rarely (for working jet fires at precisely the...
...Calibration - Automatic calibrations The printer's piezo printheads are permanently mapped out by the installer. Press Calibrate from the Printing page, then press Manual Calibrations in the various print modes. Calibrates the media advance accuracy for rigid media only) camera-assisted calibrations are in the menu. ... by AutoJet, how many are aligned by the operator, and whether the head is usable (from this case, contact HP or your authorized service provider. Head and bidirectional calibrations should be necessary only rarely (for working jet fires at precisely the...

User Guide
Page 59
On the Manual Calibrations menu, press Media Feed. 2. Select the calibration method and press Proceed. If the media feed needs larger adjustments, use the ruler-measured calibrations first. ... feed calibration, to return to zero. After calibration and jet mapping, perform a linearization or color calibration (as the 900 mm (34 in ) calibration - NOTE: The manual BiDi and X head calibrations are out. ● Default Registration Data - Inaccurate media advance can verify its length with an accurate metal ruler. Sheet fed only...
On the Manual Calibrations menu, press Media Feed. 2. Select the calibration method and press Proceed. If the media feed needs larger adjustments, use the ruler-measured calibrations first. ... feed calibration, to return to zero. After calibration and jet mapping, perform a linearization or color calibration (as the 900 mm (34 in ) calibration - NOTE: The manual BiDi and X head calibrations are out. ● Default Registration Data - Inaccurate media advance can verify its length with an accurate metal ruler. Sheet fed only...

User Guide
Page 60
... so that dot placement is accurate in the menu. 2. NOTE: AutoBiDi Calibration is clear. This enables you can inspect it. ENWW Manual calibrations 53 The bidirectional registration pattern consists of a series of vertical lines. Press Yes. For best quality when printing on the Printing page..., then press Manual Calibrations in both directions along the X axis (along the direction of printhead travel). When the pixels are accurately aligned, the pattern ...
... so that dot placement is accurate in the menu. 2. NOTE: AutoBiDi Calibration is clear. This enables you can inspect it. ENWW Manual calibrations 53 The bidirectional registration pattern consists of a series of vertical lines. Press Yes. For best quality when printing on the Printing page..., then press Manual Calibrations in both directions along the X axis (along the direction of printhead travel). When the pixels are accurately aligned, the pattern ...

User Guide
Page 61
..., then press Proceed. Press Printhead X Calibration in the menu. 2. The printer prints a calibration page. Press the ▲ button. This is the manual version of the platen) direction. NOTE: This is possible only if you can add +10 or -10 to a pattern number to print a new... calibration pattern, press Proceed. Press Calibrate from the Printing page, then press Manual Calibrations in the menu. 5. Advance the media by one . 9. When the calibration page has printed, the control panel displays this message: Registration ...
..., then press Proceed. Press Printhead X Calibration in the menu. 2. The printer prints a calibration page. Press the ▲ button. This is the manual version of the platen) direction. NOTE: This is possible only if you can add +10 or -10 to a pattern number to print a new... calibration pattern, press Proceed. Press Calibrate from the Printing page, then press Manual Calibrations in the menu. 5. Advance the media by one . 9. When the calibration page has printed, the control panel displays this message: Registration ...

User Guide
Page 62
... -1 If a printhead is extremely out of this message: Registration successful. Alternatively, you have a calibration pattern from the Printing page, then press Manual Calibrations in the menu. 2. TIP: AutoJet is the automatic version of alignment, there may want to perfectly aligned. See Ink page on page 50..., until the number next to the pattern that is displayed. Press Calibrate from a recent print, you can map out jets manually using the Manual Jet Mapping function. For example, if pattern -1 is the closest aligned, press the ▼ button to change the display ...
... -1 If a printhead is extremely out of this message: Registration successful. Alternatively, you have a calibration pattern from the Printing page, then press Manual Calibrations in the menu. 2. TIP: AutoJet is the automatic version of alignment, there may want to perfectly aligned. See Ink page on page 50..., until the number next to the pattern that is displayed. Press Calibrate from a recent print, you can map out jets manually using the Manual Jet Mapping function. For example, if pattern -1 is the closest aligned, press the ▼ button to change the display ...

User Guide
Page 64
... control panel displays a message that you are finished viewing bad jets, press Cancel. A "soft" bad jet is temporarily out, based on the selected printhead. ENWW Manual calibrations 57 The control panel displays the previous menu. Press ▲ and ▼ to select the next head number, then press Proceed. 5. When you believe...
... control panel displays a message that you are finished viewing bad jets, press Cancel. A "soft" bad jet is temporarily out, based on the selected printhead. ENWW Manual calibrations 57 The control panel displays the previous menu. Press ▲ and ▼ to select the next head number, then press Proceed. 5. When you believe...


