

HP Notebook Hard Drives & Solid State Drives Identifying, Preventing, Diagnosing and Recovering from Drive Failures Care and Mai
Page 6
... driver: http://www8.hp.com/us/en/support-drivers.html Installing SATA drivers SATA Native Mode is a storage interface technology that provides up to 150MB/sec transfer rate for disk traffic, and provides link power management with Serial ATA hard disk drives. Intel Matrix Storage Manager Driver provides support for the SATA Advanced Host Controller (AHCI) Interface. Intel Matrix Storage Technology driver HP offers the Intel Matrix Storage Manager driver for notebook PC models...
... driver: http://www8.hp.com/us/en/support-drivers.html Installing SATA drivers SATA Native Mode is a storage interface technology that provides up to 150MB/sec transfer rate for disk traffic, and provides link power management with Serial ATA hard disk drives. Intel Matrix Storage Manager Driver provides support for the SATA Advanced Host Controller (AHCI) Interface. Intel Matrix Storage Technology driver HP offers the Intel Matrix Storage Manager driver for notebook PC models...
HP Pavilion x2 Detachable Notebook PC HP Split x2 Detachable PC Maintenance and Service Guide
Page 82
... the computer hardware is downloaded. The tool runs outside the operating system so that are ready to an optional power source. Follow the on -screen instructions. Click your hard drive that has an .exe extension (for HP updates now. 3. Do not shut down the computer or initiate Sleep. During the download and installation, follow these steps: 1. The hard drive designation is connected to reliable external power using the AC adapter. BIOS installation procedures...
... the computer hardware is downloaded. The tool runs outside the operating system so that are ready to an optional power source. Follow the on -screen instructions. Click your hard drive that has an .exe extension (for HP updates now. 3. Do not shut down the computer or initiate Sleep. During the download and installation, follow these steps: 1. The hard drive designation is connected to reliable external power using the AC adapter. BIOS installation procedures...

HP Pavilion x2 Detachable Notebook PC HP Split x2 Detachable PC Maintenance and Service Guide
Page 87
... HP Recovery media. Minimized Image Recovery installs only drivers and hardware-enabling applications. If you begin creating the recovery media. ● The creation process can choose the HP Minimized Image Recovery option from the HP Recovery partition (select models only) or use the HP Recovery media that best matches your computer using HP Recovery Manager on page 76. ● If you need to the replacement drive. From the Start screen, type help, and then select Help and Support. ● If you have created. Restore and recovery...
... HP Recovery media. Minimized Image Recovery installs only drivers and hardware-enabling applications. If you begin creating the recovery media. ● The creation process can choose the HP Minimized Image Recovery option from the HP Recovery partition (select models only) or use the HP Recovery media that best matches your computer using HP Recovery Manager on page 76. ● If you need to the replacement drive. From the Start screen, type help, and then select Help and Support. ● If you have created. Restore and recovery...
HP Pavilion x2 Detachable Notebook PC HP Split x2 Detachable PC Maintenance and Service Guide
Page 89
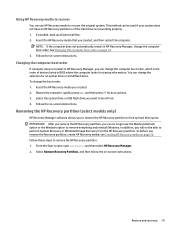
... press f9 for an optical drive or a USB flash drive. Removing the HP Recovery partition (select models only) HP Recovery Manager software allows you can change the computer boot order. From the Start screen, type recovery, and then select HP Recovery Manager. 2. See Changing the computer boot order on -screen instructions. Changing the computer boot order If computer does not restart in HP Recovery Manager, you to remove the HP Recovery partition to perform System Recovery or Minimized Image Recovery from . 4. Insert the HP Recovery media you created, and then restart the computer...
... press f9 for an optical drive or a USB flash drive. Removing the HP Recovery partition (select models only) HP Recovery Manager software allows you can change the computer boot order. From the Start screen, type recovery, and then select HP Recovery Manager. 2. See Changing the computer boot order on -screen instructions. Changing the computer boot order If computer does not restart in HP Recovery Manager, you to remove the HP Recovery partition to perform System Recovery or Minimized Image Recovery from . 4. Insert the HP Recovery media you created, and then restart the computer...
HP Pavilion x2 Detachable Notebook PC HP Split x2 Detachable PC Maintenance and Service Guide
Page 93
...) jacks 4, 12 audio/SD board removing 54 spare part number 15, 19, 54 B backups 76 battery cable, disconnecting 28, 46 battery, keyboard dock removal 40 spare part number 16, 18, 40 battery, tablet removal 64 spare part number 15, 18, 64 BIOS determining version 71 downloading an update 72 updating 71 Bluetooth card spare part number 59 boot order changing HP Recovery Manager 79 bottom cover spare part numbers 16, 19 buttons left TouchPad 8 power 5, 11 right TouchPad 8 Windows 7 C cables, service considerations 21 caps lock light, identifying 9 card reader spare part number 16, 19 card reader...
...) jacks 4, 12 audio/SD board removing 54 spare part number 15, 19, 54 B backups 76 battery cable, disconnecting 28, 46 battery, keyboard dock removal 40 spare part number 16, 18, 40 battery, tablet removal 64 spare part number 15, 18, 64 BIOS determining version 71 downloading an update 72 updating 71 Bluetooth card spare part number 59 boot order changing HP Recovery Manager 79 bottom cover spare part numbers 16, 19 buttons left TouchPad 8 power 5, 11 right TouchPad 8 Windows 7 C cables, service considerations 21 caps lock light, identifying 9 card reader spare part number 16, 19 card reader...

HP Pavilion x2 Detachable Notebook PC HP Split x2 Detachable PC Maintenance and Service Guide
Page 94
... audio 1 display panel 1 external media cards 2 graphics 1 hard drives 1 keyboard 2 memory module 1 microphone 1 operating system 3 pointing device 2 ports 2 power requirements 3 processors 1 product name 1 sensor 2 serviceability 3 video 1 wireless 2 product name 1 product name and number, computer 13 R recovery discs 76, 79 HP Recovery Manager 78 media 79 options 77 starting 78 supported discs 76 system 78 USB flash drive 79 using HP Recovery media 77 recovery media creating 76 creating using HP Recovery Manager 77 recovery partition removing 79 regulatory information 13 removal/replacement...
... audio 1 display panel 1 external media cards 2 graphics 1 hard drives 1 keyboard 2 memory module 1 microphone 1 operating system 3 pointing device 2 ports 2 power requirements 3 processors 1 product name 1 sensor 2 serviceability 3 video 1 wireless 2 product name 1 product name and number, computer 13 R recovery discs 76, 79 HP Recovery Manager 78 media 79 options 77 starting 78 supported discs 76 system 78 USB flash drive 79 using HP Recovery media 77 recovery media creating 76 creating using HP Recovery Manager 77 recovery partition removing 79 regulatory information 13 removal/replacement...
User Guide
Page 6
... to a WLAN 30 Using Bluetooth wireless devices (select models only 31 4 Enjoying entertainment features ...32 Multimedia features ...32 Using the webcams ...35 Using audio ...35 Connecting speakers ...35 Connecting headphones and microphones 35 Using Beats Audio ...35 Accessing Beats Audio Control Panel 36 Enabling and disabling Beats Audio 36 Testing your audio features 36 Using video ...37 Connecting video devices using an HDMI cable 38 Setting up HDMI audio 39 5 Navigating the screen ...40 Using the TouchPad and gestures ...40 Tapping ...41 Scrolling ...42 2-finger pinch zoom...
... to a WLAN 30 Using Bluetooth wireless devices (select models only 31 4 Enjoying entertainment features ...32 Multimedia features ...32 Using the webcams ...35 Using audio ...35 Connecting speakers ...35 Connecting headphones and microphones 35 Using Beats Audio ...35 Accessing Beats Audio Control Panel 36 Enabling and disabling Beats Audio 36 Testing your audio features 36 Using video ...37 Connecting video devices using an HDMI cable 38 Setting up HDMI audio 39 5 Navigating the screen ...40 Using the TouchPad and gestures ...40 Tapping ...41 Scrolling ...42 2-finger pinch zoom...
User Guide
Page 8
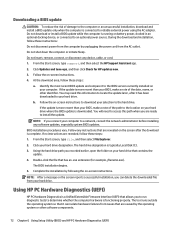
... 63 Downloading a BIOS update 64 Using HP PC Hardware Diagnostics (UEFI 64 Downloading HP PC Hardware Diagnostics (UEFI) to a USB device 65 10 Backing up, restoring, and recovering ...66 Creating recovery media and backups 66 Creating HP Recovery media 66 Restore and recovery ...67 Recovering using HP Recovery Manager 68 What you need to know 68 Using the HP Recovery partition (select models only 68 Using HP Recovery media to recover 69 Changing the computer boot order 69 Removing the HP Recovery partition (select models only 69 11 Specifications ...70 Input power ...70 Operating...
... 63 Downloading a BIOS update 64 Using HP PC Hardware Diagnostics (UEFI 64 Downloading HP PC Hardware Diagnostics (UEFI) to a USB device 65 10 Backing up, restoring, and recovering ...66 Creating recovery media and backups 66 Creating HP Recovery media 66 Restore and recovery ...67 Recovering using HP Recovery Manager 68 What you need to know 68 Using the HP Recovery partition (select models only 68 Using HP Recovery media to recover 69 Changing the computer boot order 69 Removing the HP Recovery partition (select models only 69 11 Specifications ...70 Input power ...70 Operating...

User Guide
Page 37
... a network, and diagnose and repair network problems. Connecting to a wireless network 27 Connecting to in this chapter as the wireless button) (select models only) ● Operating system controls Using the wireless button The computer has a wireless button, one or more wireless devices, and one wireless device is off, all wireless devices are off . This chapter will help , and then select Help and Support. In a PAN, each device communicates directly with a wireless router or a wireless access point. ● Bluetooth device (select models only)-Creates...
... a network, and diagnose and repair network problems. Connecting to a wireless network 27 Connecting to in this chapter as the wireless button) (select models only) ● Operating system controls Using the wireless button The computer has a wireless button, one or more wireless devices, and one wireless device is off, all wireless devices are off . This chapter will help , and then select Help and Support. In a PAN, each device communicates directly with a wireless router or a wireless access point. ● Bluetooth device (select models only)-Creates...

User Guide
Page 44
... located on the card and quickly release it until it is in on the rear side of the TouchPad or touch screen to video conference and chat online using headphones, earbuds, or a headset. Component (1) (2) (3) Internal microphones (2) Webcam light Webcam (front) Description Record sound. Connects optional memory cards that supports both audio-out (headphone) and audio-in (microphone) combo jack Connects optional powered stereo speakers, headphones, earbuds, a headset, or a television audio cable. On: The webcam is firmly seated. ● To remove...
... located on the card and quickly release it until it is in on the rear side of the TouchPad or touch screen to video conference and chat online using headphones, earbuds, or a headset. Component (1) (2) (3) Internal microphones (2) Webcam light Webcam (front) Description Record sound. Connects optional memory cards that supports both audio-out (headphone) and audio-in (microphone) combo jack Connects optional powered stereo speakers, headphones, earbuds, a headset, or a television audio cable. On: The webcam is firmly seated. ● To remove...
User Guide
Page 59
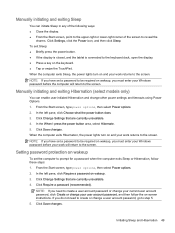
... the screen. Manually initiating and exiting Sleep You can enable user-initiated Hibernation and change other power settings and timeouts using Power Options. 1. From the Start screen, type power options, then select Power options. 2. Click Save changes. In the left pane, click Choose what the power button does. 3. NOTE: If you do not need to create a user account password or change your current user account password, click Create or change your work returns to the screen. When the computer exits Sleep, the power lights turn on...
... the screen. Manually initiating and exiting Sleep You can enable user-initiated Hibernation and change other power settings and timeouts using Power Options. 1. From the Start screen, type power options, then select Power options. 2. Click Save changes. In the left pane, click Choose what the power button does. 3. NOTE: If you do not need to create a user account password or change your current user account password, click Create or change your work returns to the screen. When the computer exits Sleep, the power lights turn on...
User Guide
Page 61
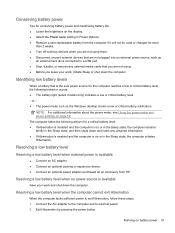
... expansion device. ● Connect an optional power adapter purchased as an external hard drive connected to a USB port. ● Stop, disable, or remove any unsaved information. ● If Hibernation is enabled and the computer is on the Windows desktop shows a low or critical battery notification. Conserving battery power Tips for conserving battery power and maximizing battery life: ● Lower the brightness on the display. ● Select the Power saver setting in Power Options. ● Remove a user-replaceable battery from HP. Resolving a low battery...
... expansion device. ● Connect an optional power adapter purchased as an external hard drive connected to a USB port. ● Stop, disable, or remove any unsaved information. ● If Hibernation is enabled and the computer is on the Windows desktop shows a low or critical battery notification. Conserving battery power Tips for conserving battery power and maximizing battery life: ● Lower the brightness on the display. ● Select the Power saver setting in Power Options. ● Remove a user-replaceable battery from HP. Resolving a low battery...
User Guide
Page 66
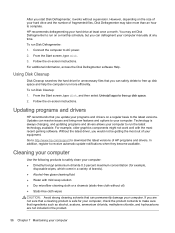
... hard drive and the number of fragmented files, Disk Defragmenter may set Disk Defragmenter to run on a regular basis to your computer manually at least once a month. HP recommends defragmenting your hard drive at any time. You may take more than an hour to run more efficiently. From the Start screen, type disk. 3. To run Disk Cleanup: 1. To run Disk Defragmenter: 1. Follow the on -screen instructions. Technology is safe...
... hard drive and the number of fragmented files, Disk Defragmenter may set Disk Defragmenter to run on a regular basis to your computer manually at least once a month. HP recommends defragmenting your hard drive at any time. You may take more than an hour to run more efficiently. From the Start screen, type disk. 3. To run Disk Cleanup: 1. To run Disk Defragmenter: 1. Follow the on -screen instructions. Technology is safe...
User Guide
Page 70
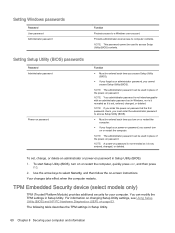
... administrator password set in Setup Utility (BIOS): 1. Use the arrow keys to access Setup Utility (BIOS) contents. To start Setup Utility (BIOS), turn on password in Windows, nor is it revealed as it is set , change, or delete an administrator or power-on or restart the computer. You can be entered each time you turn on or restart the computer. ● If you forget your administrator password, you cannot turn on -screen instructions. NOTE: The administrator password can...
... administrator password set in Setup Utility (BIOS): 1. Use the arrow keys to access Setup Utility (BIOS) contents. To start Setup Utility (BIOS), turn on password in Windows, nor is it revealed as it is set , change, or delete an administrator or power-on or restart the computer. You can be entered each time you turn on or restart the computer. ● If you forget your administrator password, you cannot turn on -screen instructions. NOTE: The administrator password can...
User Guide
Page 71
... as a trial offer. Enabled/Disabled ● If the administrator password is not set to Clear the TPM. To provide ongoing protection against newly discovered viruses, antivirus software must be kept up to fully protect your computer. For more information about computer viruses, from the Start screen, type support, and then select the HP Support Assistant app. It is set , or if TPM Security...
... as a trial offer. Enabled/Disabled ● If the administrator password is not set to Clear the TPM. To provide ongoing protection against newly discovered viruses, antivirus software must be kept up to fully protect your computer. For more information about computer viruses, from the Start screen, type support, and then select the HP Support Assistant app. It is set , or if TPM Security...
User Guide
Page 72
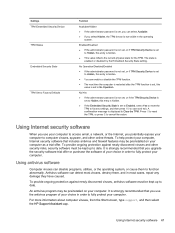
... correct security problems and improve functionality of firewalls to a system or network. Backing up your software applications and information Regularly back up , restoring, and recovering on page 29. Any data that were originally installed on -screen instructions. Select System and Security, select Windows Update, select Change settings, and then follow the on your software applications and information to http://www.hp.com/support. Installing critical security updates CAUTION...
... correct security problems and improve functionality of firewalls to a system or network. Backing up your software applications and information Regularly back up , restoring, and recovering on page 29. Any data that were originally installed on -screen instructions. Select System and Security, select Windows Update, select Change settings, and then follow the on your software applications and information to http://www.hp.com/support. Installing critical security updates CAUTION...
User Guide
Page 74
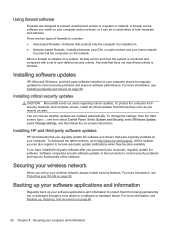
... hard drive designation. During the download and installation, follow these instructions: Do not disconnect power from the computer by unplugging the power cord from your BIOS, make a note of the date, name, or other software components. 64 Chapter 9 Using Setup Utility (BIOS) and HP PC Hardware Diagnostics (UEFI) Do not shut down the computer or initiate Sleep. Follow the on battery power, docked in an optional docking device, or connected to locate the update...
... hard drive designation. During the download and installation, follow these instructions: Do not disconnect power from the computer by unplugging the power cord from your BIOS, make a note of the date, name, or other software components. 64 Chapter 9 Using Setup Utility (BIOS) and HP PC Hardware Diagnostics (UEFI) Do not shut down the computer or initiate Sleep. Follow the on battery power, docked in an optional docking device, or connected to locate the update...

User Guide
Page 79
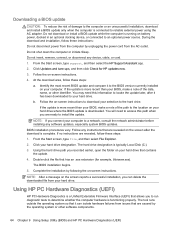
... power button. 2. Changing the computer boot order If computer does not restart in HP Recovery Manager, you can use the Windows Refresh option or the Windows option to remove everything and reinstall Windows. To change the selection for boot options. 3. Restart the computer, quickly press esc, and then press f9 for an optical drive or a USB flash drive. Follow the on -screen instructions. To start HP Recovery Manager from the HP Recovery partition: IMPORTANT: For tablets, connect to the keyboard dock before you remove the Recovery partition, create HP Recovery media...
... power button. 2. Changing the computer boot order If computer does not restart in HP Recovery Manager, you can use the Windows Refresh option or the Windows option to remove everything and reinstall Windows. To change the selection for boot options. 3. Restart the computer, quickly press esc, and then press f9 for an optical drive or a USB flash drive. Follow the on -screen instructions. To start HP Recovery Manager from the HP Recovery partition: IMPORTANT: For tablets, connect to the keyboard dock before you remove the Recovery partition, create HP Recovery media...

User Guide
Page 82
... F factory-sealed battery 50 firewall software 62 fn key, identifying 14, 47 Fun things to do 1 H HDMI port connecting 38 identifying 18, 34 HDMI, configuring audio 39 headphones, connecting 35 Hibernation exiting 49 initiated during critical battery level 51 initiating 49 high-definition devices, connecting 38 hot keys description 47 using 47 HP and third-party software updates, installing 62 HP PC Hardware Diagnostics (UEFI) downloading 65 using 64 HP Recovery Manager correcting boot problems 69 starting 69 HP Recovery media creating 66 recovery 69 HP Recovery partition recovery 68 removing...
... F factory-sealed battery 50 firewall software 62 fn key, identifying 14, 47 Fun things to do 1 H HDMI port connecting 38 identifying 18, 34 HDMI, configuring audio 39 headphones, connecting 35 Hibernation exiting 49 initiated during critical battery level 51 initiating 49 high-definition devices, connecting 38 hot keys description 47 using 47 HP and third-party software updates, installing 62 HP PC Hardware Diagnostics (UEFI) downloading 65 using 64 HP Recovery Manager correcting boot problems 69 starting 69 HP Recovery media creating 66 recovery 69 HP Recovery partition recovery 68 removing...

User Guide
Page 83
...mouse, external setting preferences 40 mute light, identifying 13 O operating environment 70 original system recovery 68 P passwords Setup Utility (BIOS) 60 Windows 60 ports docking 6 HDMI 18, 34, 38 USB 3.0 18, 34 power battery 50 power button, identifying 7, 16 power connector, identifying 6, 18 product name and number, computer 19 public WLAN connection 30 R recovery discs 66, 69 HP Recovery Manager 68 media 69 options 67 starting 69 supported discs 66 system 68 USB flash drive 69 using HP Recovery media 67 recovery media creating 66 creating using HP Recovery Manager 67 recovery partition...
...mouse, external setting preferences 40 mute light, identifying 13 O operating environment 70 original system recovery 68 P passwords Setup Utility (BIOS) 60 Windows 60 ports docking 6 HDMI 18, 34, 38 USB 3.0 18, 34 power battery 50 power button, identifying 7, 16 power connector, identifying 6, 18 product name and number, computer 19 public WLAN connection 30 R recovery discs 66, 69 HP Recovery Manager 68 media 69 options 67 starting 69 supported discs 66 system 68 USB flash drive 69 using HP Recovery media 67 recovery media creating 66 creating using HP Recovery Manager 67 recovery partition...


