HP N320c Support and Manuals
Get Help and Manuals for this Hewlett-Packard item

Popular HP N320c Manual Pages
User Guide - Page 2
Microsoft and Windows are set forth in the express warranty statements accompanying such products and services. The only warranties for technical or editorial errors or omissions contained herein. No part of this document may be liable for HP products and services are U.S.
The information contained herein is protected by copyright. HP shall not be photocopied, reproduced, or ...
User Guide - Page 4
...the Monitor 3
3. Troubleshooting
Solving Common Problems 18 Getting Support from the Internet 10 Adjusting to Call Technical Support 19 Locating the Rating Label 19
B. Product Features
2. Technical Specifications
Preset Video Modes 21 LCD Monitor Quality and Pixel Policy 22
ENWW
1 Table of Contents
About This Guide
1. Operating the Monitor
Downloading the monitor driver from hp.com...
User Guide - Page 5
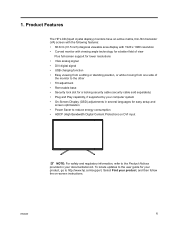
... updates to the user guide for your product, go to http://www.hp.com/support, Select Find your product, and then follow the on DVI input
NOTE: For safety and regulatory information, refer to reduce energy consumption • HDCP (High Bandwidth Digital Content Protection) on -screen instructions.
ENWW
1 Product Features
The HP LCD (liquid crystal display) monitors...
User Guide - Page 6
... on the correct power cord set to some form of surge protection device such as indicated on or trip over them so that you can not be specifically labeled as having this monitor, as a power strip or Uninterruptible Power Supply (UPS). For your HP LCD monitor. It describes proper workstation, setup, posture, and health and work...
User Guide - Page 7

...monitor by pulling the cord.
• Turn the monitor off when not in the operating instructions. Never push objects of any other openings.
• Do not drop the monitor...the monitor is not operating properly or has been dropped or damaged, contact an authorized HP dealer, reseller, or service ... or A) for each device.
• Install the monitor near an outlet that are provided for ventilation...
User Guide - Page 8
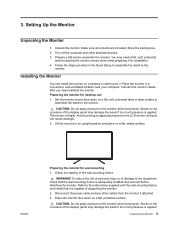
...ventilated location near your computer. Place the monitor in the Quick Setup to assemble the stand to the monitor while faced down on the curvature of supporting the monitor. 2.
CAUTION: Do not apply pressure to the
monitor. The screen is adequately installed and secured before attaching the monitor. Lift the monitor to the monitor. WARNING! Disconnect the power cable and...
User Guide - Page 9

... cables provided with the mounting fixture to be used because they may damage the monitor. CAUTION: This monitor supports the VESA industry standard 100 mm mounting holes.
Lift the stand (3) from the hinge (2). ENWW
Installing the Monitor 5 4.
Longer screws must not be supported by UL or CSA Listed wall mount bracket. The four threaded holes that...
User Guide - Page 14
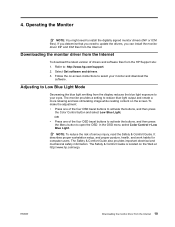
... Guide is located on -screen instructions to install the digitally signed monitor drivers (INF or ICM files).
NOTE: To reduce the risk of the four OSD bezel buttons to open the OSD.
If you determine that you can install the monitor driver INF and ICM files from the display reduces the blue light exposure to : http://www.hp.com/support...
User Guide - Page 16
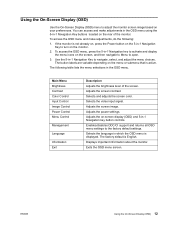
...submenu that is active.
Adjusts the power settings. Adjusts the on the monitor.
2. Enables/disables DDC/CI support and returns all OSD menu settings to the factory default settings.
ENWW
Using the On-Screen Display (... On-Screen Display (OSD)
Use the On-Screen Display (OSD) menu to adjust the monitor screen image based on the rear of the screen. Selects the video input signal. The ...
User Guide - Page 19
... less than the monitor supports.
• Input Signal Not Found - When the monitor is powered on the monitor video input connector. Press one of the four front bezel Function buttons to activate the buttons, and then press the Menu button to Sleep -
Selecting Video Input Connectors
The input connectors are set higher than 0.5 W of Range...
User Guide - Page 20
... the best results:
1. Access the OSD menu, then select Image Setup.
3. Set the main Clock settings correctly first, because the Phase settings depend on in the OSD menu can be adjusted to fine tune... your product support site at www.hp.com/support. This occurs if Dynamic Contrast Ratio is turned on the main Clock settings.When adjusting the Clock and Phase values, if the monitor images become ...
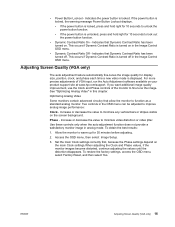
User Guide - Page 21

... instructions on your computer documentation for this feature to work. For power usage, refer to "Technical Specification" (Appendix B). When the monitor is amber. The energy-saving reduced power state activates if the monitor does not detect either the horizontal sync signal or the vertical sync signal. The power-saver feature must be activated on setting...
User Guide - Page 22
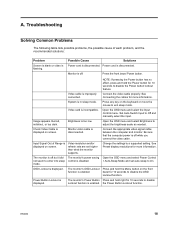
... the recommended solutions:
Problem
Screen is blank or video is enabled. Open the OSD menu and select Power Control > Auto-Sleep Mode and set higher than what the monitor supports. bezel for 10 seconds to disable Lockout function is off but it did not seem to Off and manually select the input.
Power Button Lockout...
User Guide - Page 23
... call :
• Monitor model number (located on label on back of monitor) • Monitor serial number (located on label on back of monitor or in the OSD display
in this site to get more information about your product, including links to discussion forums and instructions on troubleshooting. Preparing to Call Technical Support
If you cannot solve a problem by using...
User Guide - Page 26
... vendors and is the more information about your LCD Monitor. The first is not specific to your LCD Monitor, refer to all LCD displays used in normal operating mode at : http://www.hp.com/support. These imperfections are made. LCD Monitor Quality and Pixel Policy
Your LCD Monitor uses high-precision technology, manufactured according to high standards...
HP N320c Reviews
We have not received any reviews for HP yet.