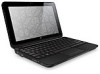
HP Mini 2102, HP Mini 210, and Compaq Mini 210 - Maintenance and Service Guide
Page 9
...inch standard-definition (SD), WSVGA, AntiGlare √ √ (1024 × 600) LED One customer-accessible/upgradable memory module slot √ √ PC2-4200, 667-MHz, DDR2 √ √ Supports the following configurations: √ √... network (WLAN) antenna transceivers/cables; 1 Product description Category Product Name Processor Chipset Graphics Panels Memory Description HP Mini 2102 and Compaq Mini HP Mini 210 210 HP Mini 2102 √ HP Mini 210 √ Compaq Mini 210 √ Intel® Atom™ N450 1.66-GHz processor, 512-KB level √...
...inch standard-definition (SD), WSVGA, AntiGlare √ √ (1024 × 600) LED One customer-accessible/upgradable memory module slot √ √ PC2-4200, 667-MHz, DDR2 √ √ Supports the following configurations: √ √... network (WLAN) antenna transceivers/cables; 1 Product description Category Product Name Processor Chipset Graphics Panels Memory Description HP Mini 2102 and Compaq Mini HP Mini 210 210 HP Mini 2102 √ HP Mini 210 √ Compaq Mini 210 √ Intel® Atom™ N450 1.66-GHz processor, 512-KB level √...

Mini User Guide - Windows 7
Page 78
...discharge (ESD) can be upgraded by sliding the power switch. To add or replace a memory module: 1. Remove the bottom panel: a. Remove the battery from the AC outlet. 5. Press the inner release latches (2) on a flat surface. 6. b. Save your work. 2. Disconnect all batteries before installing a memory module. Turn the computer ...beneath the removable bottom panel. If you are not sure whether the computer is located on by replacing the existing memory module in this guide. 7. Unplug the power cord from the computer (1). Shut down the computer and close the display. The...
...discharge (ESD) can be upgraded by sliding the power switch. To add or replace a memory module: 1. Remove the bottom panel: a. Remove the battery from the AC outlet. 5. Press the inner release latches (2) on a flat surface. 6. b. Save your work. 2. Disconnect all batteries before installing a memory module. Turn the computer ...beneath the removable bottom panel. If you are not sure whether the computer is located on by replacing the existing memory module in this guide. 7. Unplug the power cord from the computer (1). Shut down the computer and close the display. The...
Mini User Guide - Windows XP
Page 79
... inner release latches (2) on a flat surface. 6. WARNING! Disconnect all batteries before installing a memory module. CAUTION: Electrostatic discharge (ESD) can be upgraded by replacing the existing memory module in the memory module slot. Then shut down on the left and right sides to the computer. 4. b. ...loosen the bottom panel. Shut down the computer and close the display. 11 Memory modules The computer has one memory module compartment, which is off or in this guide. 7. The memory capacity of static electricity by touching a grounded metal object. Before beginning any...
... inner release latches (2) on a flat surface. 6. WARNING! Disconnect all batteries before installing a memory module. CAUTION: Electrostatic discharge (ESD) can be upgraded by replacing the existing memory module in the memory module slot. Then shut down on the left and right sides to the computer. 4. b. ...loosen the bottom panel. Shut down the computer and close the display. 11 Memory modules The computer has one memory module compartment, which is off or in this guide. 7. The memory capacity of static electricity by touching a grounded metal object. Before beginning any...

