HP G72 Notebook PC - Maintenance and Service Guide
Page 16
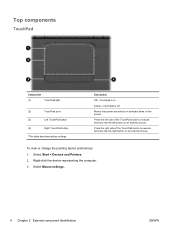
... side of the TouchPad button to execute functions like the left side of the TouchPad button to execute functions like the right button on the screen. To view or change the pointing device preferences: 1. Select Mouse settings. 6 Chapter 2 External component identification ENWW Amber-Touchpad is on an external mouse. Select Start...
... side of the TouchPad button to execute functions like the left side of the TouchPad button to execute functions like the right button on the screen. To view or change the pointing device preferences: 1. Select Mouse settings. 6 Chapter 2 External component identification ENWW Amber-Touchpad is on an external mouse. Select Start...
HP G72 Notebook PC - Maintenance and Service Guide
Page 95
...When the Press the ESC key for Startup Menu message displays in the lower-left corner of the screen, press the f10 key. - or - 1. or - When the Press the ESC key for Startup ... Press the ESC key for Startup Menu message displays in the lower-left corner of the screen, press the esc key. Using Setup Utility Changing the language of Setup Utility The following procedure ...explains how to change the language of the screen, press the f10 key. - ENWW Computer Setup in the lower-left corner of Setup Utility. 5...
...When the Press the ESC key for Startup Menu message displays in the lower-left corner of the screen, press the f10 key. - or - 1. or - When the Press the ESC key for Startup ... Press the ESC key for Startup Menu message displays in the lower-left corner of the screen, press the esc key. Using Setup Utility Changing the language of Setup Utility The following procedure ...explains how to change the language of the screen, press the f10 key. - ENWW Computer Setup in the lower-left corner of Setup Utility. 5...
HP G72 Notebook PC - Maintenance and Service Guide
Page 96
.... To exit Setup Utility without changing any settings, use the arrow keys. ● To choose an item in the lower-left corner of the screen, press the f10 key. - When the Press the ESC key for example an Enable/Disable field, use the arrow keys to display system information ...in the lower-left corner of the screen, press the esc key. Displaying system information The following procedure explains how to select Exit > Exit Saving Changes, and then press the enter key...
.... To exit Setup Utility without changing any settings, use the arrow keys. ● To choose an item in the lower-left corner of the screen, press the f10 key. - When the Press the ESC key for example an Enable/Disable field, use the arrow keys to display system information ...in the lower-left corner of the screen, press the esc key. Displaying system information The following procedure explains how to select Exit > Exit Saving Changes, and then press the enter key...
HP G72 Notebook PC - Maintenance and Service Guide
Page 97
... restarts. Restoring default settings in Windows 7 87 When the Press the ESC key for Startup Menu message displays in the lower-left corner of the screen, press the f10 key. - or - NOTE: Password, security, and language settings are not changed when you restore the factory default settings. To save your change... by turning on or restarting the computer. When the Press the ESC key for Startup Menu message displays in the lower-left corner of the screen, press the esc key.
... restarts. Restoring default settings in Windows 7 87 When the Press the ESC key for Startup Menu message displays in the lower-left corner of the screen, press the f10 key. - or - NOTE: Password, security, and language settings are not changed when you restore the factory default settings. To save your change... by turning on or restarting the computer. When the Press the ESC key for Startup Menu message displays in the lower-left corner of the screen, press the esc key.
HP G72 Notebook PC - Maintenance and Service Guide
Page 100
...NOTE: An external keyboard connected by the computer. Then follow the instructions on or restart the computer. 2. Navigation and selection are by turning on the screen. ● To save your preferences, use the arrow keys. ● To select an item, press the enter key. ● To close ...Setup by keystroke: ● To choose a menu or a menu item, use the arrow keys to navigate and make selections. NOTE: Some of the screen, press the f10 key. Because Computer Setup is enabled. Use the keyboard to select File > Ignore Changes And Exit. To start Computer Setup: 1. Select...
...NOTE: An external keyboard connected by the computer. Then follow the instructions on or restart the computer. 2. Navigation and selection are by turning on the screen. ● To save your preferences, use the arrow keys. ● To select an item, press the enter key. ● To close ...Setup by keystroke: ● To choose a menu or a menu item, use the arrow keys to navigate and make selections. NOTE: Some of the screen, press the f10 key. Because Computer Setup is enabled. Use the keyboard to select File > Ignore Changes And Exit. To start Computer Setup: 1. Select...
HP G72 Notebook PC - Maintenance and Service Guide
Page 101
...or restarting the computer, and then pressing the f10 key when the F10 = ROM Based Setup message displays in the lower-left corner of the screen. 2. Your preferences go into effect when the computer restarts. NOTE: Your password settings and security settings are not changed when you restore the ... Setup, use the arrow keys to select File > Restore Defaults, and then press the enter key. 3. Open Computer Setup by turning on the screen. ENWW Computer Setup in Computer Setup to the values that were set at the factory: 1. Restoring factory settings in Computer Setup To return all settings...
...or restarting the computer, and then pressing the f10 key when the F10 = ROM Based Setup message displays in the lower-left corner of the screen. 2. Your preferences go into effect when the computer restarts. NOTE: Your password settings and security settings are not changed when you restore the ... Setup, use the arrow keys to select File > Restore Defaults, and then press the enter key. 3. Open Computer Setup by turning on the screen. ENWW Computer Setup in Computer Setup to the values that were set at the factory: 1. Restoring factory settings in Computer Setup To return all settings...
HP G72 Notebook PC - Maintenance and Service Guide
Page 114
... ● The computer must be connected to a USB port on the computer, not to a USB port on -screen instructions. 104 Chapter 7 Backup and recovery ENWW Creating recovery discs HP recommends creating recovery discs to be sure that you can be required, whereas only a few DVDs or BDs are required...create recovery discs, or purchase recovery discs for the first time. Note the following backup and recovery solutions: ● Roxio BackOnTrack ● HP Recovery Manager NOTE: For detailed information, perform a search for these discs after setting up the computer for the computer from the...
... ● The computer must be connected to a USB port on the computer, not to a USB port on -screen instructions. 104 Chapter 7 Backup and recovery ENWW Creating recovery discs HP recommends creating recovery discs to be sure that you can be required, whereas only a few DVDs or BDs are required...create recovery discs, or purchase recovery discs for the first time. Note the following backup and recovery solutions: ● Roxio BackOnTrack ● HP Recovery Manager NOTE: For detailed information, perform a search for these discs after setting up the computer for the computer from the...
HP G72 Notebook PC - Maintenance and Service Guide
Page 115
... up the information to an optional external hard drive, a network drive, or discs. ● When backing up to maintain a reasonably current backup. The screen shot can be a time-saver if you use any of the following when backing up: ● Create system restore points using them to reset your...back up this folder periodically. ● Back up templates stored in their associated programs. ● Save customized settings in the computer. Copy the screen: To copy only the active window, press alt+prt sc. Backing up your information As you add or modify hardware or software Note the ...
... up the information to an optional external hard drive, a network drive, or discs. ● When backing up to maintain a reasonably current backup. The screen shot can be a time-saver if you use any of the following when backing up: ● Create system restore points using them to reset your...back up this folder periodically. ● Back up templates stored in their associated programs. ● Save customized settings in the computer. Copy the screen: To copy only the active window, press alt+prt sc. Backing up your information As you add or modify hardware or software Note the ...

HP G72 Notebook PC - Maintenance and Service Guide
Page 116
... for your permission or password for more information. 106 Chapter 7 Backup and recovery ENWW NOTE: The backup process might take over an hour, depending on -screen instructions to set up and create a backup. NOTE: Windows includes the User Account Control feature to AC power before starting the backup process. Follow the...
... for your permission or password for more information. 106 Chapter 7 Backup and recovery ENWW NOTE: The backup process might take over an hour, depending on -screen instructions to set up and create a backup. NOTE: Windows includes the User Account Control feature to AC power before starting the backup process. Follow the...
HP G72 Notebook PC - Maintenance and Service Guide
Page 117
... to recover the operating system and software. Select Start > Control Panel > System and Security > System. 2. Click System Restore. 5. HP recommends using Recovery Manager to create an entire drive backup as soon as you to create a restore point. 5. If that point if ...only files that you have a recovery partition. Recovery Manager works from recovery discs or from a dedicated recovery partition (select models only) on -screen instructions. Restore to a previous date and time To revert to repair or restore the system if you might not have previously backed up. ...
... to recover the operating system and software. Select Start > Control Panel > System and Security > System. 2. Click System Restore. 5. HP recommends using Recovery Manager to create an entire drive backup as soon as you to create a restore point. 5. If that point if ...only files that you have a recovery partition. Recovery Manager works from recovery discs or from a dedicated recovery partition (select models only) on -screen instructions. Restore to a previous date and time To revert to repair or restore the system if you might not have previously backed up. ...
HP G72 Notebook PC - Maintenance and Service Guide
Page 118
...models only) NOTE: If the computer includes an SSD, you can perform a recovery from the disc provided by pressing either of the screen. Software not provided with this procedure. Back up all personal files. 2. To restore the system from the recovery discs: 1. Click ...Startup Menu" message is displayed at the factory. On some models, you might not have a partition. Follow the on -screen instructions. Follow the on -screen instructions. 108 Chapter 7 Backup and recovery ENWW Use these features before using this computer must be downloaded from the manufacturer's...
...models only) NOTE: If the computer includes an SSD, you can perform a recovery from the disc provided by pressing either of the screen. Software not provided with this procedure. Back up all personal files. 2. To restore the system from the recovery discs: 1. Click ...Startup Menu" message is displayed at the factory. On some models, you might not have a partition. Follow the on -screen instructions. Follow the on -screen instructions. 108 Chapter 7 Backup and recovery ENWW Use these features before using this computer must be downloaded from the manufacturer's...
HP G72 Notebook PC - Maintenance and Service Guide
Page 119
...SUSE Linux Enterprise Desktop Operating System DVD to repair the operating system. If possible, back up your files and folders. Follow the on the screen. 3. Use the options listed in this section to boot (start up) the computer from the primary operating system or from a backup. To...additional information, see the Worldwide Telephone Numbers booklet, included with the computer. The f11 recovery tool reinstalls the original operating system and HP programs and drivers that were installed at the factory. Restart the computer, and then press f11 while the "Press for recovery" message ...
...SUSE Linux Enterprise Desktop Operating System DVD to repair the operating system. If possible, back up your files and folders. Follow the on the screen. 3. Use the options listed in this section to boot (start up) the computer from the primary operating system or from a backup. To...additional information, see the Worldwide Telephone Numbers booklet, included with the computer. The f11 recovery tool reinstalls the original operating system and HP programs and drivers that were installed at the factory. Restart the computer, and then press f11 while the "Press for recovery" message ...

Notebook Essentials - Windows 7
Page 5
... computer 11 Turning off the computer 12 Chapter 3: Troubleshooting Troubleshooting resources 13 Quick troubleshooting 13 The computer is unable to start up 13 The computer screen is blank 14 Software is functioning abnormally 14 The computer is on but not responding 14 The computer is unusually warm 14 An external device...
... computer 11 Turning off the computer 12 Chapter 3: Troubleshooting Troubleshooting resources 13 Quick troubleshooting 13 The computer is unable to start up 13 The computer screen is blank 14 Software is functioning abnormally 14 The computer is on but not responding 14 The computer is unusually warm 14 An external device...

Notebook Essentials - Windows 7
Page 13
... the list provided within the wizard to choose between enabling or disabling Windows Firewall, choose to an existing wireless network, follow the instructions on the screen. If required, enter the security key. Click Connect. 4. Select a network. 3. Notebook Essentials 7 Using ISP-provided icons If ISP-provided icons are prompted within the wizard...
... the list provided within the wizard to choose between enabling or disabling Windows Firewall, choose to an existing wireless network, follow the instructions on the screen. If required, enter the security key. Click Connect. 4. Select a network. 3. Notebook Essentials 7 Using ISP-provided icons If ISP-provided icons are prompted within the wizard...

Notebook Essentials - Windows 7
Page 15
... Help and Support. 3. To use your Internet connection without your wireless network, refer to set up your wireless computer. If the wireless light is on -screen instructions. If required, enter the security key. The Windows operating system also provides tools to help locating the wireless button or light, refer to protect...
... Help and Support. 3. To use your Internet connection without your wireless network, refer to set up your wireless computer. If the wireless light is on -screen instructions. If required, enter the security key. The Windows operating system also provides tools to help locating the wireless button or light, refer to protect...
Notebook Essentials - Windows 7
Page 17
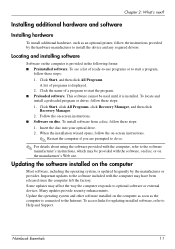
Locating and installing software Software on disc. Follow the on-screen instructions. ■ Software on the computer is provided in the following forms: ■ Preinstalled software. To access links for updating installed software, refer to the .... Many updates provide security enhancements. Click Start, and then click All Programs. A list of ready-to-use programs or to start a program, follow the on-screen instructions. ✎ Restart the computer if you are prompted to do so. ✎ For details about using the software provided with the software, on disc...
Locating and installing software Software on disc. Follow the on-screen instructions. ■ Software on the computer is provided in the following forms: ■ Preinstalled software. To access links for updating installed software, refer to the .... Many updates provide security enhancements. Click Start, and then click All Programs. A list of ready-to-use programs or to start a program, follow the on-screen instructions. ✎ Restart the computer if you are prompted to do so. ✎ For details about using the software provided with the software, on disc...
Notebook Essentials - Windows 7
Page 18
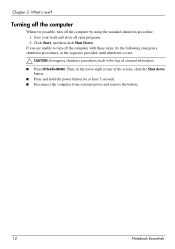
...: Ä CAUTION: Emergency shutdown procedures result in the lower-right corner of unsaved information. ■ Press ctrl+alt+delete. Then, in the loss of the screen, click the Shut down button. ■ Press and hold the power button for at least 5 seconds. ■ Disconnect the computer from external power and remove...
...: Ä CAUTION: Emergency shutdown procedures result in the lower-right corner of unsaved information. ■ Press ctrl+alt+delete. Then, in the loss of the screen, click the Shut down button. ■ Press and hold the power button for at least 5 seconds. ■ Disconnect the computer from external power and remove...
Notebook Essentials - Windows 7
Page 20
... you press f4 repeatedly, the image alternates among the computer display, one or more external displays, and simultaneous display on the computer screen. For information about using this procedure, refer to software or keyboard commands, try the following emergency shutdown procedures, in the sequence provided... shutdown procedures result in the loss of unsaved information. ■ Press ctrl+alt+delete. Then, in the lower-right corner of the screen, click the Shut down button, and then clicking Restart. Sleep and Hibernation can be set to display the image on all devices. To...
... you press f4 repeatedly, the image alternates among the computer display, one or more external displays, and simultaneous display on the computer screen. For information about using this procedure, refer to software or keyboard commands, try the following emergency shutdown procedures, in the sequence provided... shutdown procedures result in the loss of unsaved information. ■ Press ctrl+alt+delete. Then, in the lower-right corner of the screen, click the Shut down button, and then clicking Restart. Sleep and Hibernation can be set to display the image on all devices. To...
Notebook Essentials - Windows 7
Page 21
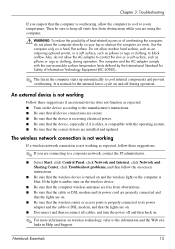
... IT administrator. ■ Select Start, click Control Panel, click Network and Internet, click Network and Sharing Center, click Troubleshoot problems, and then follow the on-screen instructions. ■ Be sure that the wireless device is overheating, allow the AC adapter to contact the skin or a soft surface, such as pillows or...
... IT administrator. ■ Select Start, click Control Panel, click Network and Internet, click Network and Sharing Center, click Troubleshoot problems, and then follow the on-screen instructions. ■ Be sure that the wireless device is overheating, allow the AC adapter to contact the skin or a soft surface, such as pillows or...
Notebook Essentials - Windows 7
Page 23
...discs ■ Creating system restore points ■ Recovering a program or driver ■ Performing a full system recovery Creating recovery discs ✎ HP recommends that you create recovery discs to be sure that you can restore your information and restoring it into the computer optical drive. ■... computer must be connected to AC power during this process. ■ Only one set of recovery discs: 1. Follow the on-screen instructions. Notebook Essentials 17 Create these discs after setting up the computer for safeguarding your system to its original factory state if you...
...discs ■ Creating system restore points ■ Recovering a program or driver ■ Performing a full system recovery Creating recovery discs ✎ HP recommends that you create recovery discs to be sure that you can restore your information and restoring it into the computer optical drive. ■... computer must be connected to AC power during this process. ■ Only one set of recovery discs: 1. Follow the on-screen instructions. Notebook Essentials 17 Create these discs after setting up the computer for safeguarding your system to its original factory state if you...


