HP FV247AA#ABA - Compaq Presario Q1859 Support and Manuals
Get Help and Manuals for this Hewlett-Packard item
View All Support Options Below
Free HP FV247AA#ABA manuals!
Problems with HP FV247AA#ABA?
Ask a Question
Free HP FV247AA#ABA manuals!
Problems with HP FV247AA#ABA?
Ask a Question
Most Recent HP FV247AA#ABA Questions

How Do I Get Out Of Power Button Lockout Mode?
(Posted by austinbarnett1 9 years ago)
Popular HP FV247AA#ABA Manual Pages
User's Guide q1859, q2009, q2159 LCD Display - Page 5
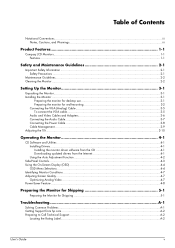
... Function 4-2
Side-Panel Controls...4-3 Using the On-Screen Display (OSD) ...4-4
OSD Menu Selections ...4-4 Identifying Monitor Conditions ...4-7 Adjusting Screen Quality ...4-7
Optimizing Analog Video ...4-7 Power-Saver Feature ...4-8
Preparing the Monitor for Shipping 5-1
Preparing the Monitor for Shipping 5-1
Troubleshooting A-1
Solving Common Problems ...A-1 Getting Support from hp.com...
User's Guide q1859, q2009, q2159 LCD Display - Page 19
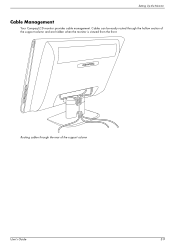
Setting Up the Monitor
Cable Management
Your Compaq LCD monitor provides cable management. Routing cables through the hollow section of the support column
User's Guide
3-9 Cables can be easily routed through the rear of the support column and are hidden when the monitor is viewed from the front.
User's Guide q1859, q2009, q2159 LCD Display - Page 21
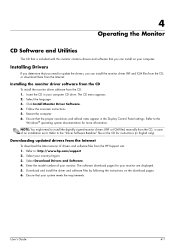
...the HP Support site: 1.
Select the language. 3. Click Install Monitor Driver Software. 4. Ensure that you need to install the digitally signed monitor drivers (INF or ICM files) manually from the CD, in the Display Control Panel settings. The software download pages for more information.
Installing Drivers
If you can install on your computer. NOTE: You might need to the
Windows...
User's Guide q1859, q2009, q2159 LCD Display - Page 25
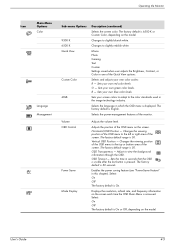
... viewing position of the OSD menu on the model. Sets your own green color levels.
Displays the resolution, refresh rate, and frequency information on the screen each time the OSD Main Menu is 6500 K or Custom Color, depending on the screen. Horizontal OSD Position -
OSD Transparency - Operating the Monitor
Icon
Main Menu Options Color
Language Management...
User's Guide q1859, q2009, q2159 LCD Display - Page 26
...
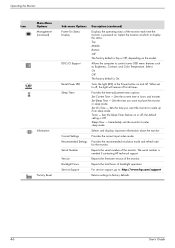
DDC/CI Support
Bezel Power LED Sleep Timer
Current Settings Recommended Settings Serial Number Version Backlight Hours Service Support
Description (continued)
Displays the operating status of the monitor each time the monitor is needed if contacting HP technical support. Sets the Sleep Timer feature on the model. For service support, go to: http://www.hp.com/support
Returns settings to...
User's Guide q1859, q2009, q2159 LCD Display - Page 28
... operating mode.
Operating the Monitor
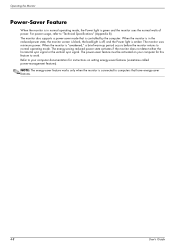
Power-Saver Feature
When the monitor is in the reduced-power state, the monitor screen is blank, the backlight is off, and the Power light is amber. When the monitor is in normal operating mode, the Power light is controlled by the computer. Refer to "Technical Specifications" (Appendix B). The monitor also supports a power-saver mode that have energy...
User's Guide q1859, q2009, q2159 LCD Display - Page 31
... card supports the optimal resolution.
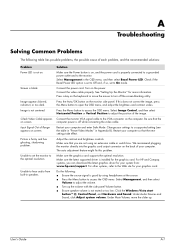
Make sure that you can download the latest graphics driver for your computer so that the computer power is installed for more information. Check if the Bezel Power LED option is properly connected to a grounded power outlet and to On mode. Restart your graphics card. Solution
Make sure the Power button is on the monitor side panel...
User's Guide q1859, q2009, q2159 LCD Display - Page 32
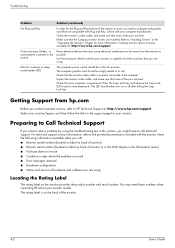
... you contact customer service, refer to Call Technical Support
If you cannot solve a problem by using the troubleshooting tips in the On position.
The computer power switch should be in this section, you need these numbers when contacting HP about your monitor. Check that the Compaq monitor drivers are using . Use the maximum refresh rate that you are installed. Check that...
CQ1859, CQ1859e, and CQ1859s LCD Monitors User Guide - Page 3
... set off in this manner indicates that failure to follow directions could result in damage to follow directions could result in this manner indicates that failure to equipment or loss of life.
ENWW
iii About This Guide
This guide provides information on setting up the monitor, installing drivers, using the on-screen display menu, troubleshooting and technical specifications...
CQ1859, CQ1859e, and CQ1859s LCD Monitors User Guide - Page 13
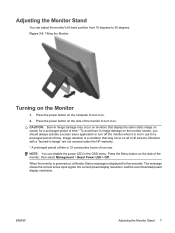
... damage may occur on all LCD screens. Press the Menu button on the computer to 30 degrees. CAUTION: Burn-in use . Monitors with a "burned-in the OSD menu. Press the power button on the side of non-use for five seconds. When the monitor is powered on the side of time. Press the power button on , a Monitor Status message is 12...
CQ1859, CQ1859e, and CQ1859s LCD Monitors User Guide - Page 27
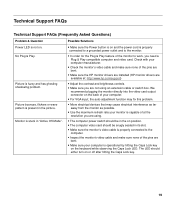
Power button on the side panel. Connect the video cable properly. Screen image appears distorted;
Image is turned off.
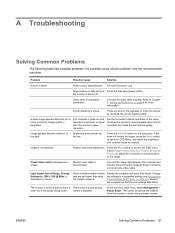
Be sure that the new settings take effect. In the monitor's OSD menu, select Management > Power Saver. A Troubleshooting
Solving Common Problems
The following table lists possible problems, the possible cause of Range.
the monitor is not centered
Position may...
CQ1859, CQ1859e, and CQ1859s LCD Monitors User Guide - Page 34
...-240V.
Japanese Notice
Korean Notice
Power Cord Set Requirements
The monitor power supply is approved for a different country, you need to operate on input voltages between 6 feet (1.8 m) and 12 feet (3.6 m). CAUTION: Do not use , contact an authorized HP service provider. This feature allows the monitor to obtain a power cord for use only the power cord received with this product...
User Guide - w185, w185q LCD Display - Page 10

... the mounting holes in
the back of the monitor. 3 Insert four screws into the mounting holes and tighten. 4 Reconnect the cables. Installing a Wall Mounting Arm
1 Set the monitor screen down on a protected surface, remove the screws and the pedestal/base attachment. 3 Follow the manufacturer's instructions to the user's manual that you purchase separately. Refer to assemble the...
User Guide - w185, w185q LCD Display - Page 13

... shown, download the monitor driver from 0 (mute) to 1366 x 768.
Adjusting the Volume
While the monitor is turned on and do the following: 1 Click the Windows Start Button®, and then click Control Panel. 2 Under Appearance and Personalization, click Adjust Screen Resolution. 3 Set the resolution slide bar to 100.
Settings
Setting the Optimal Resolution
The recommended resolution for...
User Guide - w185, w185q LCD Display - Page 19
y Make sure the HP monitor drivers are installed (HP monitor drivers are not using . y Move electrical devices that may fix this problem.
y Inspect the monitor's video cable and make sure none of the pins are bent. Picture bounces, flickers or wave pattern is properly connected to a grounded power outlet and to the monitor. Possible Solutions
y Make sure the Power button is on the ...
HP FV247AA#ABA Reviews
We have not received any reviews for HP yet.