
Getting Started
Page 17
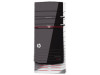
Preparing to complete the setup at a later time. For help with getting started using your computer, see the Windows 7 desktop, the initial setup is complete. NOTE: If you skip some steps during the initial setup procedure or decline some options, you are ready to turn ...
Preparing to complete the setup at a later time. For help with getting started using your computer, see the Windows 7 desktop, the initial setup is complete. NOTE: If you skip some steps during the initial setup procedure or decline some options, you are ready to turn ...
Getting Started
Page 19
... Programs, and then click Internet Explorer. NOTE: Online Services provides a list of the following security measures: Enable WPA-Personal or WEP security encryption on the desktop, and then log in. 4 Open your ISP. If you already have issues connecting to a Network" on page 37. You need: For a network connection, see "Connecting...
... Programs, and then click Internet Explorer. NOTE: Online Services provides a list of the following security measures: Enable WPA-Personal or WEP security encryption on the desktop, and then log in. 4 Open your ISP. If you already have issues connecting to a Network" on page 37. You need: For a network connection, see "Connecting...
Getting Started
Page 30
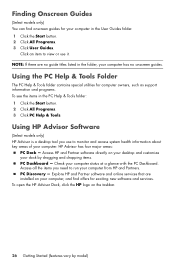
... & Tools Folder The PC Help & Tools folder contains special utilities for exciting new software and services. PC Discovery - HP Advisor has four major areas: PC Dock - Access HP and Partner software directly on your desktop and customize your computer in the User Guides folder. 1 Click the Start button. 2 Click All Programs. 3 Click User...
... & Tools Folder The PC Help & Tools folder contains special utilities for exciting new software and services. PC Discovery - HP Advisor has four major areas: PC Dock - Access HP and Partner software directly on your desktop and customize your computer in the User Guides folder. 1 Click the Start button. 2 Click All Programs. 3 Click User...
Getting Started
Page 56
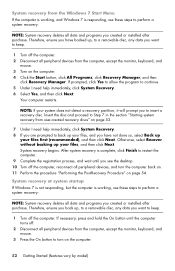
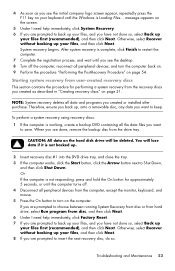
... on. 11 Perform the procedure "Performing the Post-Recovery Procedure" on page 54. If necessary, press and hold the On button until you see the desktop. 10 Turn off . 2 Disconnect all peripheral devices from user-created recovery discs" on page 53. 7 Under I need help immediately, click System Recovery. 6 Select Yes, and...
... on. 11 Perform the procedure "Performing the Post-Recovery Procedure" on page 54. If necessary, press and hold the On button until you see the desktop. 10 Turn off . 2 Disconnect all peripheral devices from user-created recovery discs" on page 53. 7 Under I need help immediately, click System Recovery. 6 Select Yes, and...
Getting Started
Page 57
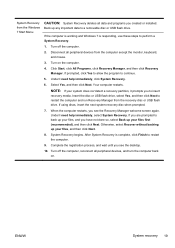
... click Next. Starting system recovery from the drive tray. NOTE: System recovery deletes all peripheral devices, and turn on the computer. When you see the desktop. 8 Turn off . 4 Disconnect all the data files you are prompted to back up your files, and then click Next. 8 If you are prompted to insert...
... click Next. Starting system recovery from the drive tray. NOTE: System recovery deletes all peripheral devices, and turn on the computer. When you see the desktop. 8 Turn off . 4 Disconnect all the data files you are prompted to back up your files, and then click Next. 8 If you are prompted to insert...
Getting Started Guide
Page 25
... click Next. Complete the registration process, and wait until you created or installed. Turn off the computer. 2. Back up your files, and you see the desktop. 10. Under I need help immediately, select System Recovery. NOTE: If your files, and then click Next. 8. Click Start, click All Programs, click Recovery Manager, and...
... click Next. Complete the registration process, and wait until you created or installed. Turn off the computer. 2. Back up your files, and you see the desktop. 10. Under I need help immediately, select System Recovery. NOTE: If your files, and then click Next. 8. Click Start, click All Programs, click Recovery Manager, and...
Getting Started Guide
Page 26
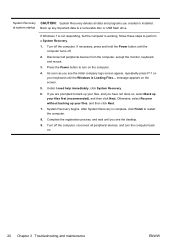
... Back up your files, and then click Next. 7. As soon as you have not done so, select Back up your files, and you see the desktop. 9. If you see the initial company logo screen appear, repeatedly press F11 on . 20 Chapter 3 Troubleshooting and maintenance ENWW Turn off the computer, reconnect all...
... Back up your files, and then click Next. 7. As soon as you have not done so, select Back up your files, and you see the desktop. 9. If you see the initial company logo screen appear, repeatedly press F11 on . 20 Chapter 3 Troubleshooting and maintenance ENWW Turn off the computer, reconnect all...
Getting Started Guide
Page 30
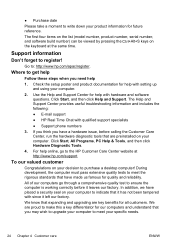
...that have made us famous for all customers. If you think you have placed a security seal on your computer to purchase a desktop computer! To our valued customer Congratulations on your decision to indicate that are key benefits for quality and reliability. We know that ... since it leaves our factory. The Help and Support Center provides useful troubleshooting information and includes the following: ● E-mail support ● HP Real Time Chat with hardware and software questions. Click Start, All Programs, PC Help & Tools, and then click Hardware Diagnostic Tools. 4....
...that have made us famous for all customers. If you think you have placed a security seal on your computer to purchase a desktop computer! To our valued customer Congratulations on your decision to indicate that are key benefits for quality and reliability. We know that ... since it leaves our factory. The Help and Support Center provides useful troubleshooting information and includes the following: ● E-mail support ● HP Real Time Chat with hardware and software questions. Click Start, All Programs, PC Help & Tools, and then click Hardware Diagnostic Tools. 4....
Getting Started Guide
Page 31
...you'll find what you purchased your computer model. Be sure to also check the updates from HP that are confirming that the computer was working properly before attempting to upgrade your Windows desktop (to upgrade your area. This must be done after you can get the latest news from ...can do with setting up . By breaking the security seal on , immediately contact the HP Customer Care Center listed earlier in the Hardware Limited Warranty section of the computer, you are sent to your desktop from information on how to fix the problem. Thank you attempted to access it, ...
...you'll find what you purchased your computer model. Be sure to also check the updates from HP that are confirming that the computer was working properly before attempting to upgrade your Windows desktop (to upgrade your area. This must be done after you can get the latest news from ...can do with setting up . By breaking the security seal on , immediately contact the HP Customer Care Center listed earlier in the Hardware Limited Warranty section of the computer, you are sent to your desktop from information on how to fix the problem. Thank you attempted to access it, ...
Quick Setup Guide
Page 13
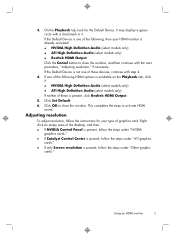
..., continue with a checkmark in it : ● NVIDIA High Definition Audio (select models only) ● ATI High Definition Audio (select models only) If neither of the desktop, and then: ● If NVIDIA Control Panel is present, follow the steps under "NVIDIA graphics cards." ● If Catalyst Control Center is present, follow the...
..., continue with a checkmark in it : ● NVIDIA High Definition Audio (select models only) ● ATI High Definition Audio (select models only) If neither of the desktop, and then: ● If NVIDIA Control Panel is present, follow the steps under "NVIDIA graphics cards." ● If Catalyst Control Center is present, follow the...
Quick Setup Guide
Page 14
... remove a check mark or add a check mark. 5. Select Graphics and then Desktops & Displays on the left corner of the window. 3. Click Apply, and then click Keep changes. If your HP computer is connected to connect and set up additional features Select the resolution from the... this option. The DTV (HDMITM) 2 window opens. 4. NVIDIA graphics cards 1. If your HP computer is connected to adjust resolution for this option. Right-click an empty area of the desktop, and then click NVIDIA Control Panel. Other graphics cards 1. This completes the steps to an...
... remove a check mark or add a check mark. 5. Select Graphics and then Desktops & Displays on the left corner of the window. 3. Click Apply, and then click Keep changes. If your HP computer is connected to connect and set up additional features Select the resolution from the... this option. The DTV (HDMITM) 2 window opens. 4. NVIDIA graphics cards 1. If your HP computer is connected to adjust resolution for this option. Right-click an empty area of the desktop, and then click NVIDIA Control Panel. Other graphics cards 1. This completes the steps to an...
Quick Setup Guide
Page 15
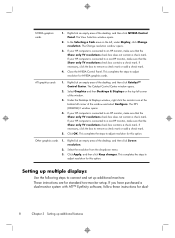
...to each display and then press the power button on the other displays until the setup is complete, you may see the extended desktop on the desktop to the instructions in the setup view. the lights will see various display states (such as blank screens, blue screens, etc.)... on the computer. When the setup is completed. 5. Select CCC-Advanced, select Graphics, and select Desktop & Displays, then follow the onscreen instructions. Press the power button on each additional monitor. 4. you will turn blue when the PC starts. The ...
...to each display and then press the power button on the other displays until the setup is complete, you may see the extended desktop on the desktop to the instructions in the setup view. the lights will see various display states (such as blank screens, blue screens, etc.)... on the computer. When the setup is completed. 5. Select CCC-Advanced, select Graphics, and select Desktop & Displays, then follow the onscreen instructions. Press the power button on each additional monitor. 4. you will turn blue when the PC starts. The ...

Troubleshooting & Maintenance Guide
Page 15
... have not done so, select Back up your files, and you created or installed. Under I need help immediately, click System Recovery. 6. If you see the desktop. 10. Otherwise, select Recover without backing up your keyboard until the Windows is complete, click Finish to restart the computer. After System Recovery is Loading...
... have not done so, select Back up your files, and you created or installed. Under I need help immediately, click System Recovery. 6. If you see the desktop. 10. Otherwise, select Recover without backing up your keyboard until the Windows is complete, click Finish to restart the computer. After System Recovery is Loading...

Troubleshooting & Maintenance Guide
Page 16
... computer turns off the computer, reconnect all data and programs you are shipped without backing up the boot menu. To create recovery media, see the desktop. 9. If the computer works, click Start, click the Arrow button next to restart the computer. If you created or installed. Use the arrow keys to...
... computer turns off the computer, reconnect all data and programs you are shipped without backing up the boot menu. To create recovery media, see the desktop. 9. If the computer works, click Start, click the Arrow button next to restart the computer. If you created or installed. Use the arrow keys to...
Quick Setup Guide - Windows 8
Page 11
...for the monitor (see the following steps). Save this , HP recommends that are using the Recovery Manager, you must be ... for a monitor, and using the internal speakers, HP recommends connecting a matching HP subwoofer to the Sub connector on the back panel....the Audio Out connector on the back panel. Select HP TouchSmart PC models also include four Beats-optimized internal ... features Using Beats Audio™ (select models only) Your HP TouchSmart PC features audio connectors (headphone and Audio Out) that...HP Beats Audio. IMPORTANT: Your HDMI monitor must repeat these procedures to ...
...for the monitor (see the following steps). Save this , HP recommends that are using the Recovery Manager, you must be ... for a monitor, and using the internal speakers, HP recommends connecting a matching HP subwoofer to the Sub connector on the back panel....the Audio Out connector on the back panel. Select HP TouchSmart PC models also include four Beats-optimized internal ... features Using Beats Audio™ (select models only) Your HP TouchSmart PC features audio connectors (headphone and Audio Out) that...HP Beats Audio. IMPORTANT: Your HDMI monitor must repeat these procedures to ...
Quick Setup Guide - Windows 8
Page 12
... up additional features On the Playback tab, look for your HDMI monitor is present, select Realtek HDMI Output. 6. This completes the steps to view the Desktop. Right-click an empty area of graphics card. If the Default Device is one of the following , then your type of the... desktop, and then: ● If NVIDIA Control Panel is present, follow the steps under "NVIDIA graphics cards." ● If Catalyst Control Center is present, follow the ...
... up additional features On the Playback tab, look for your HDMI monitor is present, select Realtek HDMI Output. 6. This completes the steps to view the Desktop. Right-click an empty area of graphics card. If the Default Device is one of the following , then your type of the... desktop, and then: ● If NVIDIA Control Panel is present, follow the steps under "NVIDIA graphics cards." ● If Catalyst Control Center is present, follow the ...
Quick Setup Guide - Windows 8
Page 13
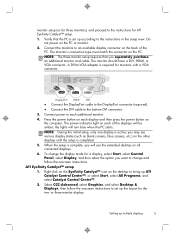
.... If necessary, click the box to remove a check mark or add a check mark. 5. Select Graphics and then Desktops & Displays on the left corner of the window. 3. If your HP computer is connected to a non-HP monitor, make sure that the Show only TV resolutions check box contains a check mark. ATI graphics cards 1. Right...
.... If necessary, click the box to remove a check mark or add a check mark. 5. Select Graphics and then Desktops & Displays on the left corner of the window. 3. If your HP computer is connected to a non-HP monitor, make sure that the Show only TV resolutions check box contains a check mark. ATI graphics cards 1. Right...
Quick Setup Guide - Windows 8
Page 14
...the Start screen, type c, select Control Panel, select Appearance and Personalization, select Display, and then select the option you may see the extended desktop on the computer. or three-monitor display. 8 Chapter 3 Setting up ATI Catalyst Control Center™. 2. dual-monitor setup (or for ...three monitors), and proceed to set up according to bring up additional features Select CCC-Advanced, select Graphics, and select Desktop & Displays, then follow the onscreen instructions. The monitor should have a DVI, HDMI, or VGA connector. The power indicator light on ...
...the Start screen, type c, select Control Panel, select Appearance and Personalization, select Display, and then select the option you may see the extended desktop on the computer. or three-monitor display. 8 Chapter 3 Setting up ATI Catalyst Control Center™. 2. dual-monitor setup (or for ...three monitors), and proceed to set up according to bring up additional features Select CCC-Advanced, select Graphics, and select Desktop & Displays, then follow the onscreen instructions. The monitor should have a DVI, HDMI, or VGA connector. The power indicator light on ...

