

User Guide
Page 5
... bezel controls ...4 Remote control features ...5 Setting up the monitor ...5 Use caution when setting up the monitor 5 Attaching the monitor stand ...6 Connecting the cables ...7 Connecting USB devices ...10 Adjusting the monitor ...11 Turning on the monitor ...11 Mounting the monitor ...12 Removing the monitor stand 12 Attaching the VESA mounting bracket 13 2 Using the monitor ...14 Software and utilities ...14 The Information file ...14 The Image Color Matching file ...14 Installing the .INF and .ICM files ...14 Installing from the optical disc ...14 Downloading...
... bezel controls ...4 Remote control features ...5 Setting up the monitor ...5 Use caution when setting up the monitor 5 Attaching the monitor stand ...6 Connecting the cables ...7 Connecting USB devices ...10 Adjusting the monitor ...11 Turning on the monitor ...11 Mounting the monitor ...12 Removing the monitor stand 12 Attaching the VESA mounting bracket 13 2 Using the monitor ...14 Software and utilities ...14 The Information file ...14 The Image Color Matching file ...14 Installing the .INF and .ICM files ...14 Installing from the optical disc ...14 Downloading...

User Guide
Page 7
... can replace the equipment, if surge protection fails. Consider placing the display in your documentation kit. The monitor features include: Important safety information 1 WARNING! Do not disable the power cord grounding pin, for computer users, and provides important electrical and mechanical safety information. For your HP LCD monitor. When unplugging from the screen. It describes proper workstation, setup, posture, and health and work...
... can replace the equipment, if surge protection fails. Consider placing the display in your documentation kit. The monitor features include: Important safety information 1 WARNING! Do not disable the power cord grounding pin, for computer users, and provides important electrical and mechanical safety information. For your HP LCD monitor. When unplugging from the screen. It describes proper workstation, setup, posture, and health and work...

User Guide
Page 8
... ● On-Screen Display (OSD) adjustments in 10 languages for easy setup and screen optimization ● My Display software for adjusting monitor settings through Windows ● HDCP (High-bandwidth Digital Content Protection) used on digital inputs ● Software and documentation disc that includes monitor drivers and product documentation ● Remote control ● VESA mounting bracket for attaching the display to http://www.hp.com/support, and select your documentation kit. To locate updates to the user guide for optimized sound quality NOTE: For...
... ● On-Screen Display (OSD) adjustments in 10 languages for easy setup and screen optimization ● My Display software for adjusting monitor settings through Windows ● HDCP (High-bandwidth Digital Content Protection) used on digital inputs ● Software and documentation disc that includes monitor drivers and product documentation ● Remote control ● VESA mounting bracket for attaching the display to http://www.hp.com/support, and select your documentation kit. To locate updates to the user guide for optimized sound quality NOTE: For...

User Guide
Page 18
... Menu button on , a Monitor Status message is displayed for the display. When the monitor is turned off and all cables from the stand to support the weight of the auto-switch source setting (On or Off; Mounting the monitor The monitor panel can disable the power LED in the OSD menu. For best performance, it is important to disassemble the monitor, be sure the monitor is powered on the front of the slot on a wall, a swing arm, or other mounting...
... Menu button on , a Monitor Status message is displayed for the display. When the monitor is turned off and all cables from the stand to support the weight of the auto-switch source setting (On or Off; Mounting the monitor The monitor panel can disable the power LED in the OSD menu. For best performance, it is important to disassemble the monitor, be sure the monitor is powered on the front of the slot on a wall, a swing arm, or other mounting...

User Guide
Page 20
... that you need to monitor screen. Ensure that the proper resolution and refresh rates appear in accordance with the International Color Consortium (ICC) Profile Format specification. Refer to ensure monitor compatibility with the computer's graphics adapter. View the HP Monitor Software Information file. 3. NOTE: You may need to the graphics card. Plug and Play does not work correctly without installing the .INF file. NOTE: The ICM color profile is displayed. 2. Installing from the...
... that you need to monitor screen. Ensure that the proper resolution and refresh rates appear in accordance with the International Color Consortium (ICC) Profile Format specification. Refer to ensure monitor compatibility with the computer's graphics adapter. View the HP Monitor Software Information file. 3. NOTE: You may need to the graphics card. Plug and Play does not work correctly without installing the .INF file. NOTE: The ICM color profile is displayed. 2. Installing from the...

User Guide
Page 22
... the remote control. Adjust the item using the buttons on the right side of the monitor or on -screen display (OSD) controls. The factory default range is English. 16 Chapter 2 Using the monitor Adjusts the audio settings and returns all OSD menu settings to adjust the scale. 6. Go to adjust the screen image based on your system meets the program minimum requirements. 8. Select your monitor model in which the OSD menu is 80. Using the On-Screen Display (OSD) menu Use the On-Screen Display (OSD) to http://www.hp.com/support...
... the remote control. Adjust the item using the buttons on the right side of the monitor or on -screen display (OSD) controls. The factory default range is English. 16 Chapter 2 Using the monitor Adjusts the audio settings and returns all OSD menu settings to adjust the scale. 6. Go to adjust the screen image based on your system meets the program minimum requirements. 8. Select your monitor model in which the OSD menu is 80. Using the On-Screen Display (OSD) menu Use the On-Screen Display (OSD) to http://www.hp.com/support...

User Guide
Page 23
... Auto-Sleep Mode is turned off and the power LED indicator turns amber. In the OSD select Power Control > Auto-Sleep Mode > Off. Main Menu Information Exit Description Selects and displays important information about the monitor. Exits the OSD menu screen. The monitor draws less than 0.5W of either horizontal or vertical sync signal). Using Auto-Sleep Mode The display supports an OSD (On-Screen Display) option called Auto-Sleep Mode that allows you activate the mouse or keyboard). You can disable the Auto-Sleep Mode in this reduced power state sleep mode...
... Auto-Sleep Mode is turned off and the power LED indicator turns amber. In the OSD select Power Control > Auto-Sleep Mode > Off. Main Menu Information Exit Description Selects and displays important information about the monitor. Exits the OSD menu screen. The monitor draws less than 0.5W of either horizontal or vertical sync signal). Using Auto-Sleep Mode The display supports an OSD (On-Screen Display) option called Auto-Sleep Mode that allows you activate the mouse or keyboard). You can disable the Auto-Sleep Mode in this reduced power state sleep mode...

User Guide
Page 24
Video card compatibility. Set Auto-Switch Input to adjust the brightness scale as needed. No speaker volume or low speaker volume. The speakers are disabled when the headphones are set auto-sleep to disable the power button lockout feature. Mode and set higher than what the monitor supports. OSD Lockout is Open the OSD menu and select Power Control > Auto-Sleep disabled. The monitor's OSD Lockout function Press and hold the power button for 10 is enabled. Refer to Connecting the cables on page 7 for 10 seconds to On. Unplug the headphones...
Video card compatibility. Set Auto-Switch Input to adjust the brightness scale as needed. No speaker volume or low speaker volume. The speakers are disabled when the headphones are set auto-sleep to disable the power button lockout feature. Mode and set higher than what the monitor supports. OSD Lockout is Open the OSD menu and select Power Control > Auto-Sleep disabled. The monitor's OSD Lockout function Press and hold the power button for 10 is enabled. Refer to Connecting the cables on page 7 for 10 seconds to On. Unplug the headphones...

User Guide
Page 28
... not allow anything to clean the monitor screen or cabinet. Adjust only those controls that you move or ship the monitor. 22 Chapter 4 Maintaining the monitor Never disconnect the monitor by using a screen saver program and turning off the monitor when not in the operating instructions. These openings must lay the monitor face down on the power cord. Cleaning the monitor 1. Dust the monitor by grasping the plug firmly and pulling...
... not allow anything to clean the monitor screen or cabinet. Adjust only those controls that you move or ship the monitor. 22 Chapter 4 Maintaining the monitor Never disconnect the monitor by using a screen saver program and turning off the monitor when not in the operating instructions. These openings must lay the monitor face down on the power cord. Cleaning the monitor 1. Dust the monitor by grasping the plug firmly and pulling...
User Guide
Page 31
... all of either the horizontal sync signal and/or the vertical sync signal. The monitor automatically stores the new setting, and then recognizes the new mode just as it does a preset mode. The reduced power state will utilize Model number TPC-DA52 Power supply rating 19.5Vdc / 7.69A Energy saver feature The monitor supports a reduced power state. In addition to the factory preset modes, there are not using a preset mode. 6 1080p50 1920 x 1080...
... all of either the horizontal sync signal and/or the vertical sync signal. The monitor automatically stores the new setting, and then recognizes the new mode just as it does a preset mode. The reduced power state will utilize Model number TPC-DA52 Power supply rating 19.5Vdc / 7.69A Energy saver feature The monitor supports a reduced power state. In addition to the factory preset modes, there are not using a preset mode. 6 1080p50 1920 x 1080...
User Guide 1
Page 5
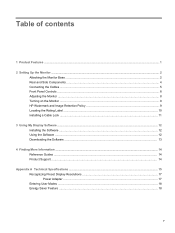
... the Monitor Base ...2 Rear and Side Components ...4 Connecting the Cables ...5 Front Panel Controls ...8 Adjusting the Monitor ...8 Turning on the Monitor ...9 HP Watermark and Image Retention Policy 9 Locating the Rating Label ...10 Installing a Cable Lock ...11 3 Using My Display Software ...12 Installing the Software ...12 Using the Software ...12 Downloading the Software ...13 4 Finding More Information ...14 Reference Guides ...14 Product Support ...14 Appendix A Technical Specifications ...15 Recognizing Preset Display Resolutions 17 Power Adapter ...17 Entering User Modes ...18...
... the Monitor Base ...2 Rear and Side Components ...4 Connecting the Cables ...5 Front Panel Controls ...8 Adjusting the Monitor ...8 Turning on the Monitor ...9 HP Watermark and Image Retention Policy 9 Locating the Rating Label ...10 Installing a Cable Lock ...11 3 Using My Display Software ...12 Installing the Software ...12 Using the Software ...12 Downloading the Software ...13 4 Finding More Information ...14 Reference Guides ...14 Product Support ...14 Appendix A Technical Specifications ...15 Recognizing Preset Display Resolutions 17 Power Adapter ...17 Entering User Modes ...18...
User Guide 1
Page 7
... technology provides wide viewing angles with colors that maintain their integrity ● Video signal input to support analog VGA ● Video signal input to support high-definition multimedia interface (HDMI) ● Plug and play capability if supported by your operating system ● Security slot provision on rear of monitor for optional cable lock ● On-Screen Display (OSD) adjustments in 10 languages for easy setup and screen optimization ● My Display software for adjusting monitor settings through Windows ● High-bandwidth digital content protection...
... technology provides wide viewing angles with colors that maintain their integrity ● Video signal input to support analog VGA ● Video signal input to support high-definition multimedia interface (HDMI) ● Plug and play capability if supported by your operating system ● Security slot provision on rear of monitor for optional cable lock ● On-Screen Display (OSD) adjustments in 10 languages for easy setup and screen optimization ● My Display software for adjusting monitor settings through Windows ● High-bandwidth digital content protection...
User Guide 1
Page 15
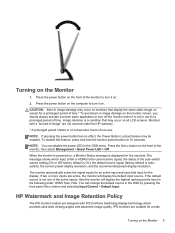
... The IPS monitor models are designed with a "burned-in image" are active, the monitor will display the highest ranking priority input in the OSD menu. CAUTION: Burn-in image damage on . 2. To disable this feature, press and hold the monitor power button for a wide Turning on all LCD screens. Monitors with IPS (In-Plane Switching) display technology which input (VGA or HDMI) is not one of non-use for a prolonged period of the auto-switch source setting (On...
... The IPS monitor models are designed with a "burned-in image" are active, the monitor will display the highest ranking priority input in the OSD menu. CAUTION: Burn-in image damage on . 2. To disable this feature, press and hold the monitor power button for a wide Turning on all LCD screens. Monitors with IPS (In-Plane Switching) display technology which input (VGA or HDMI) is not one of non-use for a prolonged period of the auto-switch source setting (On...

User Guide 2
Page 5
... 1 Getting Started ...1 Important safety information ...1 Product features and components ...2 Features ...2 Rear components ...3 Setting up the monitor ...4 Use caution when setting up the monitor 4 Attaching the monitor stand ...5 Connecting the cables ...6 Adjusting the monitor ...8 Turning on the monitor ...9 HP watermark and image retention policy 9 Mounting the monitor ...10 Removing the monitor stand 10 Attaching the VESA mounting bracket 11 2 Using the monitor ...12 Software and utilities ...12 The Information file ...12 The Image Color Matching file ...12 Installing the INF...
... 1 Getting Started ...1 Important safety information ...1 Product features and components ...2 Features ...2 Rear components ...3 Setting up the monitor ...4 Use caution when setting up the monitor 4 Attaching the monitor stand ...5 Connecting the cables ...6 Adjusting the monitor ...8 Turning on the monitor ...9 HP watermark and image retention policy 9 Mounting the monitor ...10 Removing the monitor stand 10 Attaching the VESA mounting bracket 11 2 Using the monitor ...12 Software and utilities ...12 The Information file ...12 The Image Color Matching file ...12 Installing the INF...

User Guide 2
Page 8
... open the on -screen instructions. 2 Chapter 1 Getting Started Select Color Control, select Viewing Modes, and then select Gaming. To enable FreeSync on the monitor, press the Menu button on the monitor to support FreeSync over HDMI. The light-emitting diode (LED) backlit monitor has an active matrix, IPS panel. Select Find your operating system ● On-screen display (OSD) adjustments in select regions that includes monitor drivers and product documentation ● VESA mounting bracket for adjusting monitor settings through Windows...
... open the on -screen instructions. 2 Chapter 1 Getting Started Select Color Control, select Viewing Modes, and then select Gaming. To enable FreeSync on the monitor, press the Menu button on the monitor to support FreeSync over HDMI. The light-emitting diode (LED) backlit monitor has an active matrix, IPS panel. Select Find your operating system ● On-screen display (OSD) adjustments in select regions that includes monitor drivers and product documentation ● VESA mounting bracket for adjusting monitor settings through Windows...

User Guide 2
Page 22
... either horizontal or vertical sync signal). Press the Menu button to your desired setting: ● Low Blue Light: reduces blue light for improved eye comfort ● Reading: optimizes blue light and brightness for indoor viewing ● Night: adjusts to the monitor (for the display. Using Auto-Sleep Mode The monitor supports an OSD option called Auto-Sleep Mode that allows you don't want to save the setting. 4. To adjust the blue light output from the Main menu. You can disable Auto-Sleep Mode in this reduced power state (sleep mode), the monitor screen is...
... either horizontal or vertical sync signal). Press the Menu button to your desired setting: ● Low Blue Light: reduces blue light for improved eye comfort ● Reading: optimizes blue light and brightness for indoor viewing ● Night: adjusts to the monitor (for the display. Using Auto-Sleep Mode The monitor supports an OSD option called Auto-Sleep Mode that allows you don't want to save the setting. 4. To adjust the blue light output from the Main menu. You can disable Auto-Sleep Mode in this reduced power state (sleep mode), the monitor screen is...

User Guide 2
Page 23
... input. Connect the appropriate video signal cable between the computer and monitor. Connect the video cable properly. System is disconnected. Set Auto-Switch Input to adjust the brightness scale as needed. Brightness is displayed. Video resolution and/or refresh rate are set auto-sleep to inactivate the screen blanking utility. Open the OSD menu and select the Input Control menu. Image appears blurred, indistinct, or too dark. Change the settings to enter into a lowpower sleep mode. Open the OSD menu and select Power Control, select AutoSleep Mode, and then set...
... input. Connect the appropriate video signal cable between the computer and monitor. Connect the video cable properly. System is disconnected. Set Auto-Switch Input to adjust the brightness scale as needed. Brightness is displayed. Video resolution and/or refresh rate are set auto-sleep to inactivate the screen blanking utility. Open the OSD menu and select the Input Control menu. Image appears blurred, indistinct, or too dark. Change the settings to enter into a lowpower sleep mode. Open the OSD menu and select Power Control, select AutoSleep Mode, and then set...

User Guide 3
Page 5
... 2 Setting Up the Monitor ...2 Attaching the Monitor Base ...2 Rear and Side Components ...4 Connecting the Cables ...5 Front Panel Controls ...8 Adjusting the Monitor ...9 Turning on the Monitor ...9 HP Watermark and Image Retention Policy 10 Locating the Rating Label ...10 3 Using My Display Software ...11 Installing the Software ...11 Using the Software ...11 Downloading the Software ...11 4 Finding More Information ...13 Reference Guides ...13 Product Support ...13 Appendix A Technical Specifications ...14 Recognizing Preset Display Resolutions 15 Power Adapter ...16 Entering User Modes...
... 2 Setting Up the Monitor ...2 Attaching the Monitor Base ...2 Rear and Side Components ...4 Connecting the Cables ...5 Front Panel Controls ...8 Adjusting the Monitor ...9 Turning on the Monitor ...9 HP Watermark and Image Retention Policy 10 Locating the Rating Label ...10 3 Using My Display Software ...11 Installing the Software ...11 Using the Software ...11 Downloading the Software ...11 4 Finding More Information ...13 Reference Guides ...13 Product Support ...13 Appendix A Technical Specifications ...14 Recognizing Preset Display Resolutions 15 Power Adapter ...16 Entering User Modes...

User Guide 3
Page 7
... support for adjusting monitor settings through Windows ● High-bandwidth digital content protection (HDCP) on HDMI ● Software and documentation disc that maintain their integrity ● Video signal input to support high-definition multimedia interface (HDMI) ● Video signal input to support analog VGA ● Plug and play capability if supported by your operating system ● On-Screen Display (OSD) adjustments in 10 languages for easy setup and screen optimization ● My Display software for lower resolutions; 1 Product Features The light-emitting diode (LED...
... support for adjusting monitor settings through Windows ● High-bandwidth digital content protection (HDCP) on HDMI ● Software and documentation disc that maintain their integrity ● Video signal input to support high-definition multimedia interface (HDMI) ● Video signal input to support analog VGA ● Plug and play capability if supported by your operating system ● On-Screen Display (OSD) adjustments in 10 languages for easy setup and screen optimization ● My Display software for lower resolutions; 1 Product Features The light-emitting diode (LED...

User Guide 3
Page 15
... 10 seconds. Image retention is the current active signal, the status of time. NOTE: You can disable the power LED in use . The message shows which input (VGA or HDMI) is a condition that input for a prolonged period of the auto-switch source setting (On or Off; If the default source is Autoswitch), the current preset display resolution, and the recommended preset display resolution. Press the power button on the Monitor 1. To disable this feature...
... 10 seconds. Image retention is the current active signal, the status of time. NOTE: You can disable the power LED in use . The message shows which input (VGA or HDMI) is a condition that input for a prolonged period of the auto-switch source setting (On or Off; If the default source is Autoswitch), the current preset display resolution, and the recommended preset display resolution. Press the power button on the Monitor 1. To disable this feature...


