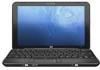
HP Mini 1000 and Compaq Mini 700 - Maintenance and Service Guide
Page 6
Workstation guidelines 32 Equipment guidelines 33 Unknown user password 34 Component replacement procedures 35 Service tag ...35 Device feet ...36 Battery ...37 Memory module ...38 Keyboard ...40 Mass storage devices ...42 Top cover ...45 WLAN module ...48 ... 6 Specifications Device specifications ...74 8.9-inch, WSVGA, BrightView display specifications 75 10.1-inch, standard-definition, AntiGlare display specifications 76 10.2-inch, WSVGA, AntiGlare display specifications 77 Hard drive specifications ...78 Solid-state drive specifications ...79 System DMA specifications ...80 vi
HP Mini 1000 and Compaq Mini 700 - Maintenance and Service Guide
Page 22
... Kit on page 24. Hard drive (select models only): 60-GB, 4200-rpm 504601-001 Hard Drive Hardware Kit (not illustrated) 504607-001 Solid-state drive 16-GB 507314-001 8-GB 507313-001 Fan 504615-001 Heat sink assembly (includes replacement thermal material) 515099-001...cable Wireless modules Broadcom 4312 802.11/b/g WLAN module For use with red-colored HP Mini 1000 models only 509650-xx1 Top cover (includes TouchPad) 504612-001 Mass storage devices NOTE: Each hard drive spare part kit and solid-state drive spare part kit includes a cable and bracket. Item (2) (3) (4a) ...
HP Mini 1000 and Compaq Mini 700 - Maintenance and Service Guide
Page 38
... any height onto any surface. Avoid exposing a drive to a drive, or loss of protective packaging and label the package "FRAGILE." 30 Chapter 4 Removal and replacement procedures After removing a hard drive, an optical drive, or a diskette drive, place it down the device. If a drive must be mailed, place the drive in a static-proof bag. To prevent damage to the device...
HP Mini 1000 and Compaq Mini 700 - Maintenance and Service Guide
Page 50
... AC adapter from the top of the hard drive. 2. Description 8-GB solid-state drive 16-GB solid-state drive 60-GB, 4200-rpm hard drive Spare part number 507313-001 507314-001 504601-001 Before removing the hard drive or solid-state drive, follow these steps: 1. Disconnect all external devices connected to the device. 42 Chapter 4 Removal and replacement procedures
HP Mini 1000 and Compaq Mini 700 - Maintenance and Service Guide
Page 51
To remove the solid-state drive: 1. Component replacement procedures 43 Reverse this procedure to the device. Disconnect the solid-state drive cable (2). 5. Lift the hard drive (4) up and slide it out of the solid-state drive. 3. Remove the two Phillips PM2.0×4.5 screws (3) that secure the drive bracket to install the hard drive. Release the ZIF connector (1) to which the...
HP Mini 1000 and Compaq Mini 700 - Maintenance and Service Guide
Page 53
... the top cover to the device. 3. Component replacement procedures 45 Turn the device upside down, with the front toward you are unsure whether the device is not notched. 3. Turn the device right-side up, with the front toward you. Remove the hard drive or solid-state drive (see Battery on page 42). 1. If you...
HP Mini 1000 and Compaq Mini 700 - Maintenance and Service Guide
Page 56
... (see Top cover on page 37). 5. Remove the following components: a. Top cover (see Battery on page 45) 48 Chapter 4 Removal and replacement procedures Vincent and the Grenadines, Suriname, Swaziland, Sweden, Switzerland, Taiwan, Tajikistan, Tanzania, Togo, Tonga, Trinidad and Tobago, Tunisia, Turkey, Turkmenistan,...use in Canada, the Cayman Islands, Guam, Puerto Rico, the U.S. If you replace the module and then receive a warning message, remove the module to the device. 3. Hard drive or solid-state drive (see Keyboard on page 42) c. Virgin Islands, and the United States 504593...
HP Mini 1000 and Compaq Mini 700 - Maintenance and Service Guide
Page 58
...on page 45) 50 Chapter 4 Removal and replacement procedures If you are not interchangeable. If you replace the module and then receive a warning message, remove the module to the device. 3. WWAN module Description HP un2400 Mobile Broadband Module Spare part number 483377...unresponsive system, replace the wireless module only with a wireless module authorized for use in your country or region. Disconnect all external devices connected to restore device functionality, and then contact technical support through the operating system. 2. Hard drive or solid-state drive (see ...
HP Mini 1000 and Compaq Mini 700 - Maintenance and Service Guide
Page 60
...(1) from the system board. NOTE: The RTC battery is off or in Hibernation, turn the device on page 37). 5. Hard drive or solid-state drive (see Battery on , and then shut it uninstalled for 5 or more minutes causes all external devices connected to the system ...board with double-sided tape. Detach the RTC battery (2) from the system board. 2. Disconnect all passwords and CMOS settings to install the RTC battery. 52 Chapter 4 Removal and replacement...
HP Mini 1000 and Compaq Mini 700 - Maintenance and Service Guide
Page 61
...module Spare part number 507706-001 Before removing the Bluetooth module, follow these steps: 1. Shut down through the operating system. 2. Hard drive or solid-state drive (see Keyboard on page 42) c. Keyboard (see Mass storage devices on page 40) b. Top cover (see Battery on ...attached to the device. 3. Remove the following components: a. Remove the battery (see Top cover on page 37). 5. Component replacement procedures 53 Disconnect all external devices connected to the system board with double-sided tape. Reverse this procedure to install the Bluetooth module...
HP Mini 1000 and Compaq Mini 700 - Maintenance and Service Guide
Page 62
...53) ● Heat sink assembly (see Keyboard on page 42) c. Shut down through the operating system. 2. Hard drive or solid-state drive (see WWAN module on page 45) When replacing the system board, be sure that the following components: a. Top cover (see Top cover on page 50). 54... (see Mass storage devices on page 40) b. Disconnect all external devices connected to the device. 3. Description System board equipped with 1.6-GHz processor Spare part number 504592-001 Before removing the system board, follow these steps: 1. Remove the following components are unsure whether the...
HP Mini 1000 and Compaq Mini 700 - Maintenance and Service Guide
Page 65
... cord from the AC outlet and then unplugging the AC adapter from the base enclosure. Component replacement procedures 57 Heat sink assembly NOTE: The heat sink assembly spare part kit includes replacement thermal material. Hard drive or solid-state drive (see Battery on page 42) c. Remove the following components: a. Grasp the system board at its...
HP Mini 1000 and Compaq Mini 700 - Maintenance and Service Guide
Page 67
..., and software requirements. Remove the battery (see Mass storage devices on automatically when high temperature conditions exist. Component replacement procedures 59 Disconnect the power from the device. 4. Remove the following components: a. Hard drive or solid-state drive (see Battery on , and then shut it down the device. Remove the Phillips PM2.0×3.0 screw (1) and...
HP Mini 1000 and Compaq Mini 700 - Maintenance and Service Guide
Page 69
.... 3. d. Fan (see Keyboard on , and then shut it down the computer. Component replacement procedures 61 If you are unsure whether the computer is included in Hibernation, turn the computer on page 40). Keyboard (see Fan on page 37). 5. Hard drive (see Battery on page 59). Remove the DC jack bracket (1) and USB board...
HP Mini 1000 and Compaq Mini 700 - Maintenance and Service Guide
Page 71
...001 for more spare part information. Shut down through the operating system. 2. Hard drive or solid-state drive (see Battery on page 17 for all other models of the HP Mini 1000, or 512143-001 for the HP Mini 1000. Remove the battery (see Mass storage devices on page 45) CAUTION... result in Hibernation, turn the device on page 40) b. Top cover (see Keyboard on , and then shut it down the device. Component replacement procedures 63 Display assembly NOTE: Each display assembly spare part kit includes 1 webcam, 1 microphone, 1 speaker box, and 2 WLAN antenna transceivers/cables...
HP Mini 1000 and Compaq Mini 700 - Maintenance and Service Guide
Page 119
...drive 2 Ethernet 2 expansion port 3 external media cards 2 flash storage drive 2 graphics 1 hard drive 2 internal media cards 2 keyboard 3 mass storage device 2 memory module 1 modem 2 operating system 3 optical drive 2 panels 1 pointing device 3 ports 2 power requirements 3 processors 1 product name 1 security 3 serviceability 3 solid-state drive 2 webcam 2 wireless 2 product name 1 R removal/replacement... 4 specifications device 74 display 75, 76, 77 hard drive 78 I/O addresses 81 interrupts 80 memory map 83 solid-state drive 79 system DMA 80 static-shielding materials 33 switches internal...
HP Mini 1000 NetBook - Maintenance and Service Guide
Page 6
Component replacement procedures 28 Service tag ...28 Device feet ...29 Battery ...30 Memory module ...31 Keyboard ...33 Mass storage devices ...35 Top cover ...37 WLAN ...58 System Configuration menu 59 Diagnostics menu ...59 6 Specifications Device specifications ...60 8.9-inch, WSVGA display specifications 61 10.2-inch, WSVGA display specifications 62 Hard drive specifications ...63 Solid-state drive specifications ...64 System DMA specifications ...65 System interrupt specifications ...65 System I/O address specifications ...66 System memory map specifications 68 7 Screw listing Phillips...
HP Mini 1000 NetBook - Maintenance and Service Guide
Page 31
... surfaces covered with care. Avoid exposing a drive to temperature extremes or liquids. While handling a drive, avoid touching the connector. Before removing a diskette drive or optical drive, be sure that you are discharged of protective packaging and label the package "FRAGILE." After removing a hard drive, an optical drive, or a diskette drive, place it down the device. Preliminary replacement requirements 23
HP Mini 1000 NetBook - Maintenance and Service Guide
Page 43
... 33). Disconnect the USB board pass-through cable is attached. Component replacement procedures 35 Description 60-GB, 4200-rpm hard drive 8-GB solid-state drive 16-GB solid-state drive Spare part number 504601-001 507313-001 507314-001 Before removing the hard drive or solid-state drive, follow these steps: 1. Disconnect the power from the device by...
HP Mini 1000 NetBook - Maintenance and Service Guide
Page 44
... 36 Chapter 4 Removal and replacement procedures Disconnect the USB board pass-through cable (that secure the drive bracket to which the solid-state drive cable is attached. 2. Grasp the Mylar tab on the drive, lift the drive up (4), and then slide it out of the drive) is attached, and then ...disconnect the cable (2). 4. Reverse this procedure to which the USB board pass-through cable (2), and then detach the tape from the top of the drive. 3. Release the LIF connector (1) to install the hard drive. Remove the two black Phillips...