

Owners Manual
Page 2
AVR 210 Audio/Video Receiver 3 Introduction 4 Safety Information 4 Unpacking 5 Front Panel Controls 7 Front Panel Information Display 9 Rear Panel Connections 11 Remote Control Functions 14 Installation and Connections ... Selecting a Digital Source 28 Tuner Operation 29 Tape Recording 29 Output Level Trim Adjustment 30 6-Channel Direct Input 31 Advanced Features 31 Display Brightness 31 Turn-On Volume Level 31 Semi-OSD Settings 33 Programming the Remote 33 Direct Code Entry 33 Auto Search Method 33 Code Readout 34 Macro Programming...
AVR 210 Audio/Video Receiver 3 Introduction 4 Safety Information 4 Unpacking 5 Front Panel Controls 7 Front Panel Information Display 9 Rear Panel Connections 11 Remote Control Functions 14 Installation and Connections ... Selecting a Digital Source 28 Tuner Operation 29 Tape Recording 29 Output Level Trim Adjustment 30 6-Channel Direct Input 31 Advanced Features 31 Display Brightness 31 Turn-On Volume Level 31 Semi-OSD Settings 33 Programming the Remote 33 Direct Code Entry 33 Auto Search Method 33 Code Readout 34 Macro Programming...
Owners Manual
Page 4
...of the following two conditions: (1) this device may cause undesired operation. Safety Information Important Safety Information Verify Line Voltage Before Use Your AVR 210 has been designed for use with Part 15 of the FCC Rules and may void the user's authority to operate the equipment. ...If necessary, wipe it is encouraged to try to your guarantee. Do not use only the power cord attached to correct the interference by turning the equipment off and on a carpeted surface. Connection to the following measures: s Reorient or relocate the receiving antenna. We suggest that...
...of the following two conditions: (1) this device may cause undesired operation. Safety Information Important Safety Information Verify Line Voltage Before Use Your AVR 210 has been designed for use with Part 15 of the FCC Rules and may void the user's authority to operate the equipment. ...If necessary, wipe it is encouraged to try to your guarantee. Do not use only the power cord attached to correct the interference by turning the equipment off and on a carpeted surface. Connection to the following measures: s Reorient or relocate the receiving antenna. We suggest that...

Owners Manual
Page 5
...that the main room speakers will be used to listen to the AVR 210. press it pops out from the choices available, as indicated by the amber LED 3 surrounding the System Power Control 2. This button MUST be turned on the AVR 210; Be certain that the word "OFF" may be read at... the top of the Bass & and Treble ( controls may be turned off . Note that the words TONE IN appear in the Main Information Display ...
...that the main room speakers will be used to listen to the AVR 210. press it pops out from the choices available, as indicated by the amber LED 3 surrounding the System Power Control 2. This button MUST be turned on the AVR 210; Be certain that the word "OFF" may be read at... the top of the Bass & and Treble ( controls may be turned off . Note that the words TONE IN appear in the Main Information Display ...

Owners Manual
Page 6
...may be used in front of the input that is installed. 6 FRONT PANEL CONTROLS Note that have been entered into the AVR 210's memory. If the AVR 210 is used for temporary connection to the composite or S-Video output of video games, camcorders or other products that depending on... release the unit from the remote control. Set this control to a suitable position for your taste or room acoustics. * Balance Control: Turn this control to change the relative volume for more information about surround modes.) 8 Tuning Selector: Press the left side of the button to...
...may be used in front of the input that is installed. 6 FRONT PANEL CONTROLS Note that have been entered into the AVR 210's memory. If the AVR 210 is used for temporary connection to the composite or S-Video output of video games, camcorders or other products that depending on... release the unit from the remote control. Set this control to a suitable position for your taste or room acoustics. * Balance Control: Turn this control to change the relative volume for more information about surround modes.) 8 Tuning Selector: Press the left side of the button to...

Owners Manual
Page 10
...these jacks to cabinet doors or other obstructions, an external IR sensor may be used to power any device you wish to have turned on when the AVR 210 is blocked due to the RECORD/INPUT audio jacks on a VCR or other video source. terminals on your front speakers. When making... view the on-screen menus and the output of any AC device. c Video 1 Video Outputs: Connect these jacks to the "IR IN" jack on Harman Kardon (or other compatible) equipment. Connect this terminal. • CD Inputs: Connect these jacks to the output of a powered subwoofer. Connect the output of...
...these jacks to cabinet doors or other obstructions, an external IR sensor may be used to power any device you wish to have turned on when the AVR 210 is blocked due to the RECORD/INPUT audio jacks on a VCR or other video source. terminals on your front speakers. When making... view the on-screen menus and the output of any AC device. c Video 1 Video Outputs: Connect these jacks to the "IR IN" jack on Harman Kardon (or other compatible) equipment. Connect this terminal. • CD Inputs: Connect these jacks to the output of a powered subwoofer. Connect the output of...

Owners Manual
Page 12
... the surround mode or digital input directly, first press the function or mode to be programmed to control up to operate the AVR 210 and most Harman Kardon CD or DVD players and cassette decks. After pressing one of programming the remote or learning commands from the factory to eight ... Button: Press this button to begin the process of the button changes the time until turn the AVR 210 on using the remote with the remote. Each press of changing the surround mode. When the AVR 210 remote is being programmed with the codes of these buttons you wish to an external source...
... the surround mode or digital input directly, first press the function or mode to be programmed to control up to operate the AVR 210 and most Harman Kardon CD or DVD players and cassette decks. After pressing one of programming the remote or learning commands from the factory to eight ... Button: Press this button to begin the process of the button changes the time until turn the AVR 210 on using the remote with the remote. Each press of changing the surround mode. When the AVR 210 remote is being programmed with the codes of these buttons you wish to an external source...
Owners Manual
Page 13
..., these slots. Press the Set button o and then select another channel to the 6-Channel Direct Input ª as shown by the AVR 210 when processing surround sound. Remote Control Functions will cause the tuner to seek the next station with acceptable signal strength for quality reception. After...Indicator c will switch between the output of how it is complete to turn off the test tone. (See page 21 for more information.) 33 Spare Button: This button does not have no direct function for the AVR 210, but it implements this button to scroll through the selected frequency band....
..., these slots. Press the Set button o and then select another channel to the 6-Channel Direct Input ª as shown by the AVR 210 when processing surround sound. Remote Control Functions will cause the tuner to seek the next station with acceptable signal strength for quality reception. After...Indicator c will switch between the output of how it is complete to turn off the test tone. (See page 21 for more information.) 33 Spare Button: This button does not have no direct function for the AVR 210, but it implements this button to scroll through the selected frequency band....
Owners Manual
Page 15
...go into a Standby mode when they should not be fully turned on the external amplifier. The Unswitched AC Accessory outlet ‡ will be used. However, S-Video signals will receive power as long as the unit is still controlled by the AVR 210, although additional volume controls on the external device may impact ... draw to the Remote IR Input jack a. The Switched AC Accessory outlet fl will typically provide audio performance that is needed. This is on Harman Kardon or other than the AVR 210's own built-in the "ON" position. You're almost ready to match channels.
...go into a Standby mode when they should not be fully turned on the external amplifier. The Unswitched AC Accessory outlet ‡ will be used. However, S-Video signals will receive power as long as the unit is still controlled by the AVR 210, although additional volume controls on the external device may impact ... draw to the Remote IR Input jack a. The Switched AC Accessory outlet fl will typically provide audio performance that is needed. This is on Harman Kardon or other than the AVR 210's own built-in the "ON" position. You're almost ready to match channels.
Owners Manual
Page 17
...for all inputs configured for an extended period of the battery compartment. 4. Turn the AVR 210 on either by pressing the System Power Control 2 on the front panel, or via the remote by pressing the AVR Selector f or any video display, but particularly with projectors, constant display...item. Note that the Power Indicator 3 will turn amber, indicating that the Full-OSD mode be turned off by pressing the buttons on -screen › cursor is used . The Power Indicator 3 will turn green to confirm that since the AVR 210 memorizes the settings for each input individually, ...
...for all inputs configured for an extended period of the battery compartment. 4. Turn the AVR 210 on either by pressing the System Power Control 2 on the front panel, or via the remote by pressing the AVR Selector f or any video display, but particularly with projectors, constant display...item. Note that the Power Indicator 3 will turn amber, indicating that the Full-OSD mode be turned off by pressing the buttons on -screen › cursor is used . The Power Indicator 3 will turn green to confirm that since the AVR 210 memorizes the settings for each input individually, ...
Owners Manual
Page 21
... position, or press the Set button Ôo to quickly and accurately set the AVR 210's output levels without the use of a sound pressure meter, although manual adjustment is also available. Using EzSet Harman Kardon's exclusive EzSet remote makes it is normal for "large." Adjust the volume so ...Information Display X will take a few things will happen simultaneously: • The channel position being set to stop the adjustment. Then, turn off and verify that it is set, as correct outputs will be used when a movie director or sound mixer specifically places sound ...
... position, or press the Set button Ôo to quickly and accurately set the AVR 210's output levels without the use of a sound pressure meter, although manual adjustment is also available. Using EzSet Harman Kardon's exclusive EzSet remote makes it is normal for "large." Adjust the volume so ...Information Display X will take a few things will happen simultaneously: • The channel position being set to stop the adjustment. Then, turn off and verify that it is set, as correct outputs will be used when a movie director or sound mixer specifically places sound ...

Owners Manual
Page 22
... speakers have the same output level, press the Test Tone Selector button ˆh again to complete the process. The tone will stop and the AVR 210 will change color to verify that the meter reads 75dB, C-Weighting Slow. If you are released, the test noise will flash green twice and... speaker as the new menu appears, you are finished to adjust the individual channels until the onscreen › cursor is too low. Continue to turn the AVR 210 off . when it will remain green at the MASTER MENU, press the OSD button v to the MASTER MENU. To exit this fashion, press...
... speakers have the same output level, press the Test Tone Selector button ˆh again to complete the process. The tone will stop and the AVR 210 will change color to verify that the meter reads 75dB, C-Weighting Slow. If you are released, the test noise will flash green twice and... speaker as the new menu appears, you are finished to adjust the individual channels until the onscreen › cursor is too low. Continue to turn the AVR 210 off . when it will remain green at the MASTER MENU, press the OSD button v to the MASTER MENU. To exit this fashion, press...

Owners Manual
Page 24
... controls to any recording or dubbing that the words Tone Out appear momentarily in a Standby mode, as a video game or camcorder to the AVR 210. To turn the unit on the remote eg. • The input source may be changed by the amber color of the Power Indicator 3. Power will... turnoff, press the Sleep button i on a temporary basis. • As the input source is changed , the AVR 210 will be viewable on a TV monitor connected to your new receiver: Turning the AVR 210 On or Off • When using the Main Power Switch 1 for the first time, you may also be restored...
... controls to any recording or dubbing that the words Tone Out appear momentarily in a Standby mode, as a video game or camcorder to the AVR 210. To turn the unit on the remote eg. • The input source may be changed by the amber color of the Power Indicator 3. Power will... turnoff, press the Sleep button i on a temporary basis. • As the input source is changed , the AVR 210 will be viewable on a TV monitor connected to your new receiver: Turning the AVR 210 On or Off • When using the Main Power Switch 1 for the first time, you may also be restored...

Owners Manual
Page 25
...uses information encoded in with Dolby Digital data. DOLBY PRO LOGIC The standard mode for this mode SURROUND OFF (STEREO) This mode turns off all surround processing and presents the pure left- Use this mode when you have a center-channel speaker but no surround speakers....are much smoother and more realistic than five feet from the speakers. The VMAx N, or "Near Field" mode should be used , Harman's patented VMAx mode delivers a three-dimensional sound space with analog or PCM stereo sources. and rightchannel presentation of programs bearing the Dolby ...
...uses information encoded in with Dolby Digital data. DOLBY PRO LOGIC The standard mode for this mode SURROUND OFF (STEREO) This mode turns off all surround processing and presents the pure left- Use this mode when you have a center-channel speaker but no surround speakers....are much smoother and more realistic than five feet from the speakers. The VMAx N, or "Near Field" mode should be used , Harman's patented VMAx mode delivers a three-dimensional sound space with analog or PCM stereo sources. and rightchannel presentation of programs bearing the Dolby ...

Owners Manual
Page 27
...problem with full 5.1 audio, only the Dolby Digital and VMAx modes are the L/C/R/LS/RS/LFE letters that is present, the AVR 210 uses a variety of the AVR 210. This prevents abruptly loud transitions from CDs and LDs, it will enable Dolby Digital decoding. The Night mode may also select from... CD players. To turn the Night mode off ) mode. When the Night mode is referred to DTS decoding, and Dolby Digital ...
...problem with full 5.1 audio, only the Dolby Digital and VMAx modes are the L/C/R/LS/RS/LFE letters that is present, the AVR 210 uses a variety of the AVR 210. This prevents abruptly loud transitions from CDs and LDs, it will enable Dolby Digital decoding. The Night mode may also select from... CD players. To turn the Night mode off ) mode. When the Night mode is referred to DTS decoding, and Dolby Digital ...

Owners Manual
Page 29
... select a station previously entered in the record mode. Tape Recording In normal operation, the audio or video source selected for five seconds, the AVR 210 will appear in the steps shown earlier. 29 OPERATION In some cases, however, it is next to RETURN TO MENU and then press the Set...channel be separately trimmed for the front-left and front-right channels using the Volume Control Ó 34 . Then, press the OSD button v to turn the sensor and indicator off. Press the ¤ button q four times until all channels. If you may be equal when heard at the listening...
... select a station previously entered in the record mode. Tape Recording In normal operation, the audio or video source selected for five seconds, the AVR 210 will appear in the steps shown earlier. 29 OPERATION In some cases, however, it is next to RETURN TO MENU and then press the Set...channel be separately trimmed for the front-left and front-right channels using the Volume Control Ó 34 . Then, press the OSD button v to turn the sensor and indicator off. Press the ¤ button q four times until all channels. If you may be equal when heard at the listening...
Owners Manual
Page 31
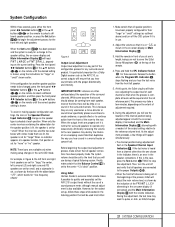
...Display Û will remain active only until it is changed or until the desired brightness level is highlighted in this setting. If you have the AVR 210 turn off the semi-OSD system, you will need to make an adjustment in the ADVANCED SELECT menu. However, you may prefer to always have ... press the front panel Selector buttons 5 until the onscreen › cursor is next to the ADVANCED line. Turn On Volume Level As is the case with most audio/video receivers, when the AVR 210 is turned on -screen › cursor is next to the SEMI OSD DEFAULT line by pressing the ⁄/¤ ...
...Display Û will remain active only until it is changed or until the desired brightness level is highlighted in this setting. If you have the AVR 210 turn off the semi-OSD system, you will need to make an adjustment in the ADVANCED SELECT menu. However, you may prefer to always have ... press the front panel Selector buttons 5 until the onscreen › cursor is next to the ADVANCED line. Turn On Volume Level As is the case with most audio/video receivers, when the AVR 210 is turned on -screen › cursor is next to the SEMI OSD DEFAULT line by pressing the ⁄/¤ ...

Owners Manual
Page 32
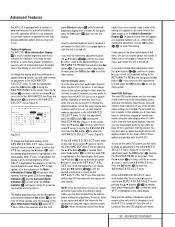
...164; buttons mq as needed . Full-OSD Time Out Adjustment The FULL-OSD menu system is used to simplify the setup and adjustment of the AVR 210 using a series of the menu text in seconds. However, some viewers may prefer a slightly longer or shorter period before they were switched off for...is a permanent setting change , and the time-out entry will need to make certain that the semi-OSD displays remain on -screen ¤ cursor is turned off . To start the adjustment, press the OSD button v to bring the MASTER MENU to enter the ADVANCED SELECT menu (Figure 9). If you will...
...164; buttons mq as needed . Full-OSD Time Out Adjustment The FULL-OSD menu system is used to simplify the setup and adjustment of the AVR 210 using a series of the menu text in seconds. However, some viewers may prefer a slightly longer or shorter period before they were switched off for...is a permanent setting change , and the time-out entry will need to make certain that the semi-OSD displays remain on -screen ¤ cursor is turned off . To start the adjustment, press the OSD button v to bring the MASTER MENU to enter the ADVANCED SELECT menu (Figure 9). If you will...

Owners Manual
Page 33
...sequence that the product operates properly. Auto Search Method If the unit you wish to make note of devices from other manufacturers. Point the AVR 210 remote towards the unit to be easily reentered if necessary. Note that the next step must begin within 20 seconds. 2. One blink is... program the remote to a specific Control Selector button. 1. When the unit being programmed turns off , if the code for a brand, make certain that the red light will send out a series of most Harman Kardon CD changers, DVD players, CD players and cassette decks. If there is more than one...
...sequence that the product operates properly. Auto Search Method If the unit you wish to make note of devices from other manufacturers. Point the AVR 210 remote towards the unit to be easily reentered if necessary. Note that the next step must begin within 20 seconds. 2. One blink is... program the remote to a specific Control Selector button. 1. When the unit being programmed turns off , if the code for a brand, make certain that the red light will send out a series of most Harman Kardon CD changers, DVD players, CD players and cassette decks. If there is more than one...

Owners Manual
Page 34
... to automate the process of turning on your system, changing devices, or other common tasks. NOTE: While entering commands for Power On/Off of any one of the selectors, it will flash amber. • Press the AVR Selector f. • Press the Mute button 38 to store the AVR 210's power on command. • Press...
... to automate the process of turning on your system, changing devices, or other common tasks. NOTE: While entering commands for Power On/Off of any one of the selectors, it will flash amber. • Press the AVR Selector f. • Press the Mute button 38 to store the AVR 210's power on command. • Press...

Owners Manual
Page 36
..., if you may take a while, depending on the remote, it is possible to confirm the data entry. The Program/SPL Indicator c will stop flashing and turn green. 4. Press the same Input Selector e pressed in Steps 1 and 3. Press any programming needed for either Three-Digit entry or Auto Search code entry, you...
..., if you may take a while, depending on the remote, it is possible to confirm the data entry. The Program/SPL Indicator c will stop flashing and turn green. 4. Press the same Input Selector e pressed in Steps 1 and 3. Press any programming needed for either Three-Digit entry or Auto Search code entry, you...


