
Operation Manual
Page 2
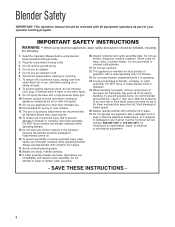
.... 10. To reduce risk of your operator training program. Always operate blender with all equipment operators as part of personal injury and to prevent damage to repair or tighten cutter assembly. 20. Blades are loose, discontinue use by Hamilton Beach may push lid off parts. 8. If cutter assembly blades are sharp. With the protection of...
.... 10. To reduce risk of your operator training program. Always operate blender with all equipment operators as part of personal injury and to prevent damage to repair or tighten cutter assembly. 20. Blades are loose, discontinue use by Hamilton Beach may push lid off parts. 8. If cutter assembly blades are sharp. With the protection of...
Operation Manual
Page 3
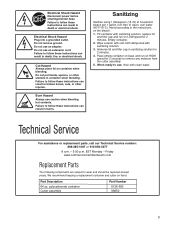
...Shock Hazard Disconnect power before cleaning blender base. Do not use caution when blending hot contents. Failure to the instructions on the bleach. 1. Failure to remove any moisture from the cutter assembly. 5. Technical Service For assistance or replacement parts, call our Technical Service number:...these instructions can result in broken bones, cuts, or other utensils in burns. Friday www.commercial.hamiltonbeach.com Replacement Parts The following components are subject to follow these instructions can result in container when blending. Wipe exterior with soft ...
...Shock Hazard Disconnect power before cleaning blender base. Do not use caution when blending hot contents. Failure to the instructions on the bleach. 1. Failure to remove any moisture from the cutter assembly. 5. Technical Service For assistance or replacement parts, call our Technical Service number:...these instructions can result in broken bones, cuts, or other utensils in burns. Friday www.commercial.hamiltonbeach.com Replacement Parts The following components are subject to follow these instructions can result in container when blending. Wipe exterior with soft ...
Operation Manual
Page 4
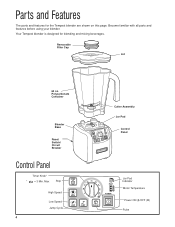
Become familiar with all parts and features before using your blender. Polycarbonate Container Blender Base Reset Switch/ Circuit Breaker Control Panel Timer Knob* * = 3 Min. Removable Filler Cap Lid 64 oz. Max Stop High Speed Low Speed Jump Cycle 4 Cutter Assembly Jar Pad 5 10 15 20 STOP 25 30 35 40 POWER HIGH LOW JUMP PULSE Control Panel Jar Pad Indicator Motor Temperature Power ON (I)/OFF (O) Pulse Your Tempest blender is designed for the Tempest blender are shown on this page. Parts and Features The parts and features for blending and mixing beverages.
Become familiar with all parts and features before using your blender. Polycarbonate Container Blender Base Reset Switch/ Circuit Breaker Control Panel Timer Knob* * = 3 Min. Removable Filler Cap Lid 64 oz. Max Stop High Speed Low Speed Jump Cycle 4 Cutter Assembly Jar Pad 5 10 15 20 STOP 25 30 35 40 POWER HIGH LOW JUMP PULSE Control Panel Jar Pad Indicator Motor Temperature Power ON (I)/OFF (O) Pulse Your Tempest blender is designed for the Tempest blender are shown on this page. Parts and Features The parts and features for blending and mixing beverages.
Operation Manual
Page 12
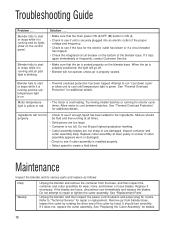
... or stops while it is properly seated. Maintenance Inspect the blender and its various parts and replace as follows: Daily Weekly Unplug the blender and remove the container from blender base. See "Replacement Parts". Unplug the blender, and then inspect the power cord insulation and power plug... for wear, nicks, and broken or loose blades. Blender fails to start or stops while it...
... or stops while it is properly seated. Maintenance Inspect the blender and its various parts and replace as follows: Daily Weekly Unplug the blender and remove the container from blender base. See "Replacement Parts". Unplug the blender, and then inspect the power cord insulation and power plug... for wear, nicks, and broken or loose blades. Blender fails to start or stops while it...


