Operation Manual
Page 2
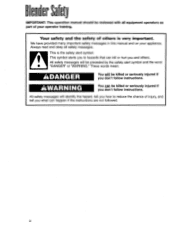
... the hazard, tell you how to hazards that can kill or hurt you what can be killed or seriously injured if you don't follow instructions. Blender Safety IMPORTANT: This operation manual should be preceded by the safety alert symbol and the word "DANGER" or "WARNING." Your safety and the safety of... others . Always read and obey all equipment operators as part of injury, and tell you and others is the safety alert symbol. This symbol alerts you to reduce the chance of your appliance. We have...
... the hazard, tell you how to hazards that can kill or hurt you what can be killed or seriously injured if you don't follow instructions. Blender Safety IMPORTANT: This operation manual should be preceded by the safety alert symbol and the word "DANGER" or "WARNING." Your safety and the safety of... others . Always read and obey all equipment operators as part of injury, and tell you and others is the safety alert symbol. This symbol alerts you to reduce the chance of your appliance. We have...
Operation Manual
Page 3
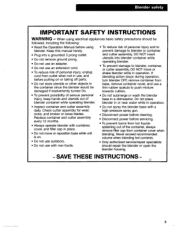
...spray the blender base with... since the blender would be ...blender or open the blender housing. - Replace container and cutter assembly every 12 months. • Always operate blender with non-foods. SAVE THESE INSTRUCTIONS - 3 Do not place blender...blender container while operating blender. If blending action stops during operation, turn blender OFF, remove container from hot liquids out of personal injury and to blender or container • Plug into blender container while operating blender...blender, container, or cutter assembly, DO NOT move or shake blender while ...
...spray the blender base with... since the blender would be ...blender or open the blender housing. - Replace container and cutter assembly every 12 months. • Always operate blender with non-foods. SAVE THESE INSTRUCTIONS - 3 Do not place blender...blender container while operating blender. If blending action stops during operation, turn blender OFF, remove container from hot liquids out of personal injury and to blender or container • Plug into blender container while operating blender...blender, container, or cutter assembly, DO NOT move or shake blender while ...
Operation Manual
Page 4
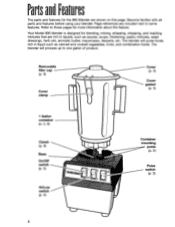
... (P• 5) Pulse switch (P• 5) 4 PartasndFeatures The parts and features for more information about the feature. Refer to one gallon of product. The blender will puree foods rich in liquids, such as canned and cooked vegetables, fruits, and combination foods. The blender will process up to those pages for the 990 Blender are shown on this page. Become...
... (P• 5) Pulse switch (P• 5) 4 PartasndFeatures The parts and features for more information about the feature. Refer to one gallon of product. The blender will puree foods rich in liquids, such as canned and cooked vegetables, fruits, and combination foods. The blender will process up to those pages for the 990 Blender are shown on this page. Become...
Operation Manual
Page 6
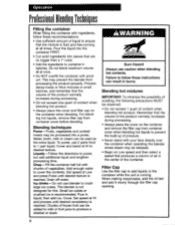
...be used as the extra liquid. Add enough water to desired texture. AWARNING masa 6), Burn Hazard Always use 2 parts food to the container while the unit is reached. Process dense foods or thick mixtures in small batches, and remember that produces a column of air in the center of the container..., use caution when blending hot contents. Chop - Set speed at Hi and process until desired texture is fluid and free-running . The blender is recommended. Chunks of frozen fruit can result in liquid, then add ice. When making mayonnaise, add the oil last and add it slowly...
...be used as the extra liquid. Add enough water to desired texture. AWARNING masa 6), Burn Hazard Always use 2 parts food to the container while the unit is reached. Process dense foods or thick mixtures in small batches, and remember that produces a column of air in the center of the container..., use caution when blending hot contents. Chop - Set speed at Hi and process until desired texture is fluid and free-running . The blender is recommended. Chunks of frozen fruit can result in liquid, then add ice. When making mayonnaise, add the oil last and add it slowly...
Operation Manual
Page 7
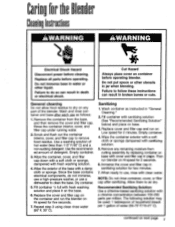
... place it on container before cleaning. Do not put spoon or other utensils in water or other liquid. Allow them to remove food residue. Cut Hazard Always place cover on the base. 6. Dry container. 5.Fill container 1/2 full with sanitizing solution (See "...Recommended Sanitizing Solution" below) and place on base with a chlorine concentration between 100-200 parts per 1 gallon of the blender. continued on Low speed for two minutes. 7. Remove the container from cutting assembly by replacing container on base. 3. Caringfor the...
... place it on container before cleaning. Do not put spoon or other utensils in water or other liquid. Allow them to remove food residue. Cut Hazard Always place cover on the base. 6. Dry container. 5.Fill container 1/2 full with sanitizing solution (See "...Recommended Sanitizing Solution" below) and place on base with a chlorine concentration between 100-200 parts per 1 gallon of the blender. continued on Low speed for two minutes. 7. Remove the container from cutting assembly by replacing container on base. 3. Caringfor the...
Operation Manual
Page 8
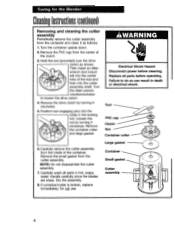
...tool and then into the holes in death or electrical shock. Small gasket NOTE: Do not disassemble the cutter I- Caring for the Blender CleaningInstructions(continued) Removing and cleaning the cutter assembly Periodically remove the cutter assembly from the container and clean it as shown. Remove ...the PVC cap from the cutter assembly. Carefully wash all parts before cleaning. Failure to loosen the drive clutch. 4. Turn the Allen wrench counterclockwise to do so can result in the locking nut...
...tool and then into the holes in death or electrical shock. Small gasket NOTE: Do not disassemble the cutter I- Caring for the Blender CleaningInstructions(continued) Removing and cleaning the cutter assembly Periodically remove the cutter assembly from the container and clean it as shown. Remove ...the PVC cap from the cutter assembly. Carefully wash all parts before cleaning. Failure to loosen the drive clutch. 4. Turn the Allen wrench counterclockwise to do so can result in the locking nut...
Operation Manual
Page 9
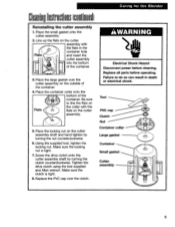
... wrench. Tool PVC cap Clutch Nut Container collar Large gasket Container Small gasket Cutter assembly 9 Place the small gasket onto the cutter assembly. 2. Replace all parts before cleaning. Make sure the locking nut is tight. 8. Failure to line the flats on the cutter assembly shaft and hand tighten by turning the... up the flats on the cutter assembly with the flats on the outside of the container. Make sure the clutch is tight. 7. Caring for the Blender CleaningInstructions(continued) Reinstalling the cutter assembly 1.
... wrench. Tool PVC cap Clutch Nut Container collar Large gasket Container Small gasket Cutter assembly 9 Place the small gasket onto the cutter assembly. 2. Replace all parts before cleaning. Make sure the locking nut is tight. 8. Failure to line the flats on the cutter assembly shaft and hand tighten by turning the... up the flats on the cutter assembly with the flats on the outside of the container. Make sure the clutch is tight. 7. Caring for the Blender CleaningInstructions(continued) Reinstalling the cutter assembly 1.
Operation Manual
Page 10
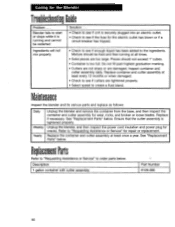
..." for cracks. Description 1 gallon container with cutter assembly Part Number 6126-990 10 Replace if necessary. Refer to order parts below. Ensure that the cutter assembly is too full. Maintenance Inspect the blender and its various parts and replace as follows: Daily Weekly Yearly Unplug the blender and remove the container from the base, and then...
..." for cracks. Description 1 gallon container with cutter assembly Part Number 6126-990 10 Replace if necessary. Refer to order parts below. Ensure that the cutter assembly is too full. Maintenance Inspect the blender and its various parts and replace as follows: Daily Weekly Yearly Unplug the blender and remove the container from the base, and then...
Operation Manual
Page 11
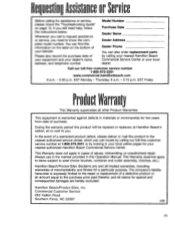
... parts by looking in materials or workmanship for your local dealer. During the warranty period this product will be repaired or replaced, at Hamilton Beach's option, at 1-800-572-3331 or by calling your nearest Hamilton Beach Commercial Service Center or your nearest authorized Hamilton Beach Commercial Service Center. The company's liability hereunder is warranted against defects in your blender...
... parts by looking in materials or workmanship for your local dealer. During the warranty period this product will be repaired or replaced, at Hamilton Beach's option, at 1-800-572-3331 or by calling your nearest Hamilton Beach Commercial Service Center or your nearest authorized Hamilton Beach Commercial Service Center. The company's liability hereunder is warranted against defects in your blender...


