Instruction Manual
Page 2
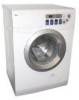
... be washed in or on the power cord. Read all instructions before using your appliance by pulling on the appliance. Unplug your appliance when parts are missing or parts are properly in accordance with the installation instructions before it come to reduce the risk of children. 4. Do not operate your appliance before...
... be washed in or on the power cord. Read all instructions before using your appliance by pulling on the appliance. Unplug your appliance when parts are missing or parts are properly in accordance with the installation instructions before it come to reduce the risk of children. 4. Do not operate your appliance before...

Instruction Manual
Page 3
... load. 27. English three-prong electric receptacle outlet in the wall, have skills to cooking oils in your dryer. If this is flammable and can explode. 23. Do not repair or replace any part of the appliance or attempt any servicing unless specifically recommended in the user-repair instructions that you understand...
... load. 27. English three-prong electric receptacle outlet in the wall, have skills to cooking oils in your dryer. If this is flammable and can explode. 23. Do not repair or replace any part of the appliance or attempt any servicing unless specifically recommended in the user-repair instructions that you understand...
Instruction Manual
Page 5
... and Materials Required 5 Unpacking Your Unit 6 Connection of Water Inlet Hose and Washing Machine 6 Water Drainage Hose 7 Connection of Power Supply 7 Grounding Instructions 7 OPERATING INSTRUCTIONS 8 Parts and Features 8-9 Control Panel and Functions 10-12 Operational Functions 13 Program Selection 14-15 Washing Methods 16 Laundry Loading 16 Put Detergent in the...
... and Materials Required 5 Unpacking Your Unit 6 Connection of Water Inlet Hose and Washing Machine 6 Water Drainage Hose 7 Connection of Power Supply 7 Grounding Instructions 7 OPERATING INSTRUCTIONS 8 Parts and Features 8-9 Control Panel and Functions 10-12 Operational Functions 13 Program Selection 14-15 Washing Methods 16 Laundry Loading 16 Put Detergent in the...
Instruction Manual
Page 8
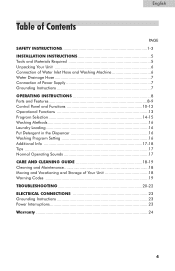
...compatible, refer to local codes and regulations. Fix the water drainage hose support with the appliance. Connection of power supply Check the following parts while the appliance is equipped with accordance to a washing machine technician or a designated service point for power cable replacement. • ... a risk of electric shock only during servicing. The diameter of the extension hose should be between 31"-40". WARNING: Certain internal parts are in a risk of electric shock. The water drainage hose must be plugged into an appropriate outlet that is properly grounded. English...
...compatible, refer to local codes and regulations. Fix the water drainage hose support with the appliance. Connection of power supply Check the following parts while the appliance is equipped with accordance to a washing machine technician or a designated service point for power cable replacement. • ... a risk of electric shock only during servicing. The diameter of the extension hose should be between 31"-40". WARNING: Certain internal parts are in a risk of electric shock. The water drainage hose must be plugged into an appropriate outlet that is properly grounded. English...
Instruction Manual
Page 9
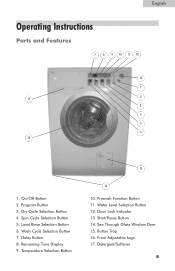
Delay Button 8. Prewash Function Button 11. Detergent/Softener 8 Spin Cycle Selection Button 5. Door Lock Indicator 13. Program Button 3. Start/Pause Button 14. English Operating Instructions Parts and Features 7 8 9 10 11 12 13 1 2 17 3 4 5 6 14 1. Front Adjustable Legs 17. Wash Cycle Selection Button 7. Temperature Selection Button 15 16 10. Water Level Selection Button 12. Button Trap 16. On/Off Button 2. Dry Cycle Selection Button 4. Load Rinse Selection Button 6. Remaining Time Display 9. See Through Glass Window Door 15.
Delay Button 8. Prewash Function Button 11. Detergent/Softener 8 Spin Cycle Selection Button 5. Door Lock Indicator 13. Program Button 3. Start/Pause Button 14. English Operating Instructions Parts and Features 7 8 9 10 11 12 13 1 2 17 3 4 5 6 14 1. Front Adjustable Legs 17. Wash Cycle Selection Button 7. Temperature Selection Button 15 16 10. Water Level Selection Button 12. Button Trap 16. On/Off Button 2. Dry Cycle Selection Button 4. Load Rinse Selection Button 6. Remaining Time Display 9. See Through Glass Window Door 15.
Instruction Manual
Page 13
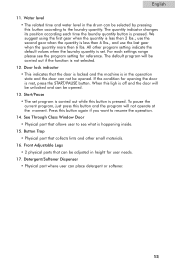
...6 lbs., and use the second gear when the quantity is met, press the START/PAUSE button. See Through Class Window Door • Physical part that the door is locked and the machine is in the operation state and the door can place detergent or softener. 12 use the last... when the quantity is pressed. Start/Pause • The set . Press this button according to the laundry quantity. Front Adjustable Legs • 2 physical parts that collects lints and other program setting indicate the default values when the laundry quantity is set program is carried out while this button is...
...6 lbs., and use the second gear when the quantity is met, press the START/PAUSE button. See Through Class Window Door • Physical part that the door is locked and the machine is in the operation state and the door can place detergent or softener. 12 use the last... when the quantity is pressed. Start/Pause • The set . Press this button according to the laundry quantity. Front Adjustable Legs • 2 physical parts that collects lints and other program setting indicate the default values when the laundry quantity is set program is carried out while this button is...
Instruction Manual
Page 19
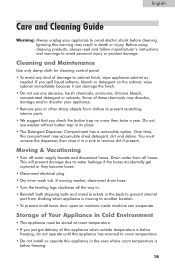
...water leakage if the hoses accidentally get ruptured or they become loose. • Disconnect electrical plug. • Dry inner wash tub. If moving washer, disconnect drain hose. • Turn the leveling legs clockwise all hoses. Over time, this appliance has warmed to remove dirt if present. ... To prevent mold leave door open so moisture inside machine can damage the finish. • Do not use washer without button trap in the back to prevent internal part from shaking when appliance is below freezing, do not operate until this compartment may result in the area where ...
...water leakage if the hoses accidentally get ruptured or they become loose. • Disconnect electrical plug. • Dry inner wash tub. If moving washer, disconnect drain hose. • Turn the leveling legs clockwise all hoses. Over time, this appliance has warmed to remove dirt if present. ... To prevent mold leave door open so moisture inside machine can damage the finish. • Do not use washer without button trap in the back to prevent internal part from shaking when appliance is below freezing, do not operate until this compartment may result in the area where ...
Instruction Manual
Page 25
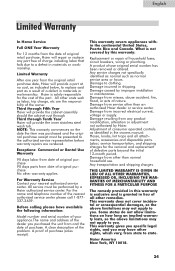
Exceptions: Commercial or Rental Use Warranty 90 days labor from date of original purchase 90 days parts from date of original purchase No other than an authorized Haier dealer or service center. Before calling please have other remedies. A clear description of purchase (sales receipt). ...identified as normal such as identified in materials or workmanship. Limited Warranty After one year from the original retail purchase date, Haier will provide a part at no cost, as indicated below, to clothing. Damage incurred in this warranty: Replacement or repair of household fuses, circuit...
Exceptions: Commercial or Rental Use Warranty 90 days labor from date of original purchase 90 days parts from date of original purchase No other than an authorized Haier dealer or service center. Before calling please have other remedies. A clear description of purchase (sales receipt). ...identified as normal such as identified in materials or workmanship. Limited Warranty After one year from the original retail purchase date, Haier will provide a part at no cost, as indicated below, to clothing. Damage incurred in this warranty: Replacement or repair of household fuses, circuit...
