
User Manual
Page 1
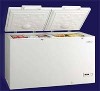
TThhaannkkyyoouuffoorr cchhoooossiinngg HTF-219/319/379/429/519H CHEST FREEZER USER M ANUAL IIMMPPORTANT PPleleaassee rreeaadd tthhiiss OOwwnneerr''ss MManual carefully before usingg yyoouurrffrreeeezzeerr.. KKeeeepp iinn aa ssaaffee place for future reference.
TThhaannkkyyoouuffoorr cchhoooossiinngg HTF-219/319/379/429/519H CHEST FREEZER USER M ANUAL IIMMPPORTANT PPleleaassee rreeaadd tthhiiss OOwwnneerr''ss MManual carefully before usingg yyoouurrffrreeeezzeerr.. KKeeeepp iinn aa ssaaffee place for future reference.
User Manual
Page 2
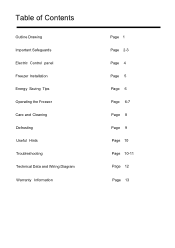
Table of Contents Outline Drawing Important Safeguards Electric Control panel Freezer Installation Energy Saving Tips Operating the Freezer Care and Cleaning Defrosting Useful Hints Troubleshooting Technical Data and Wiring Diagram Warranty Information Page 1 Page 2-3 Page 4 Page 5 Page 6 Page 6-7 Page 8 Page 9 Page 10 Page 10-11 Page 12 Page 13
Table of Contents Outline Drawing Important Safeguards Electric Control panel Freezer Installation Energy Saving Tips Operating the Freezer Care and Cleaning Defrosting Useful Hints Troubleshooting Technical Data and Wiring Diagram Warranty Information Page 1 Page 2-3 Page 4 Page 5 Page 6 Page 6-7 Page 8 Page 9 Page 10 Page 10-11 Page 12 Page 13
User Manual
Page 3
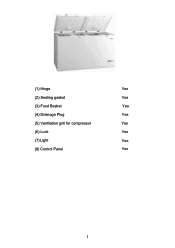
(1) Hinge Yes (2) Sealing gasket Yes (3) Food Basket Yes (4) Drainage Plug Yes (5) Ventilation grill for compressor Yes (6) Lock Yes (7) Light Yes (8) Control Panel Yes 1
(1) Hinge Yes (2) Sealing gasket Yes (3) Food Basket Yes (4) Drainage Plug Yes (5) Ventilation grill for compressor Yes (6) Lock Yes (7) Light Yes (8) Control Panel Yes 1

User Manual
Page 4
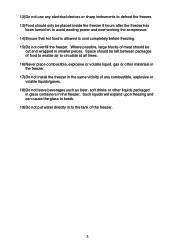
... from the outlet. 8) Replace or repair immediately all instructions before making any foods which may have been thawed. 2 BEFORE THROWING AWAY AN OLD REFRIGERATOR OR FREEZER, TAKE OFF THE DOORS/LIDS AND REMOVE THE SHELVES SO THAT CHILDREN CANNOT GET TRAPPED INSIDE. Always grip the plug firmly and pull it should be installed properly in the installation section. 4) This freezer is plugged in this manual. 7) Never unplug your...
... from the outlet. 8) Replace or repair immediately all instructions before making any foods which may have been thawed. 2 BEFORE THROWING AWAY AN OLD REFRIGERATOR OR FREEZER, TAKE OFF THE DOORS/LIDS AND REMOVE THE SHELVES SO THAT CHILDREN CANNOT GET TRAPPED INSIDE. Always grip the plug firmly and pull it should be installed properly in the installation section. 4) This freezer is plugged in this manual. 7) Never unplug your...
User Manual
Page 5
... freezing. 15)Do not overfill the freezer. Where possible, large blocks of the freezer. 3 Space should be cut and wrapped in to the tank of meat should be placed inside the freezer 8 hours after the freezer has been turned on to avoid wasting power and over working the compressor. 14)Ensure that hot food is allowed to break. 19)Do not put water...
... freezing. 15)Do not overfill the freezer. Where possible, large blocks of the freezer. 3 Space should be cut and wrapped in to the tank of meat should be placed inside the freezer 8 hours after the freezer has been turned on to avoid wasting power and over working the compressor. 14)Ensure that hot food is allowed to break. 19)Do not put water...

User Manual
Page 6
on the inside of the electric control panel are: 1) The thermostat is higer than -6.5‹C. 5 temperature control dial switch red light -alarm yellow fast freeze switch green power - This refers to the temperature on light 4 The red lamp will be illuminated when the freezer interior temperature is numbered "0"-"5". Electric Control Panel The main functions of the freezer. The temperature is lowered by turning the dial in a clockwise direction.
on the inside of the electric control panel are: 1) The thermostat is higer than -6.5‹C. 5 temperature control dial switch red light -alarm yellow fast freeze switch green power - This refers to the temperature on light 4 The red lamp will be illuminated when the freezer interior temperature is numbered "0"-"5". Electric Control Panel The main functions of the freezer. The temperature is lowered by turning the dial in a clockwise direction.

User Manual
Page 7
... damaging the compressor. 3) A 13 Amp, 3 pin plug and 5 Amp fuse only must be properly earthed. 2) The voltage range for this freezer to avoid serious damage. Electrical Connection and Precautions 1) IMPORTANT - This will allow the freezer to stand upright for at least 3inches (7.5cm) of electric shock by providing an escape wire for the electrical current. For personal safety, this appliance must be used for...
... damaging the compressor. 3) A 13 Amp, 3 pin plug and 5 Amp fuse only must be properly earthed. 2) The voltage range for this freezer to avoid serious damage. Electrical Connection and Precautions 1) IMPORTANT - This will allow the freezer to stand upright for at least 3inches (7.5cm) of electric shock by providing an escape wire for the electrical current. For personal safety, this appliance must be used for...
User Manual
Page 9
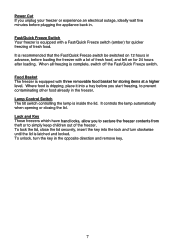
hand locks, allow you to secture the freezer contents from 7
hand locks, allow you to secture the freezer contents from 7
User Manual
Page 10
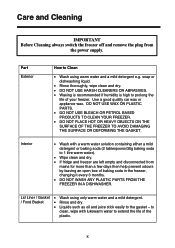
... GASKET. Interior • Wash with lukewarm water to 1 litre warm water). • Wipe clean and dry. • If fridge and freezer are left empty and disconnected from the power supply. to clean, wipe with a warm water solution containing either a mild detergent or baking soda (2 tablespoons/30g baking soda to extend the life of your freezer. Care and Cleaning IMPORTANT Before Cleaning always switch the freezer off and remove the plug...
... GASKET. Interior • Wash with lukewarm water to 1 litre warm water). • Wipe clean and dry. • If fridge and freezer are left empty and disconnected from the power supply. to clean, wipe with a warm water solution containing either a mild detergent or baking soda (2 tablespoons/30g baking soda to extend the life of your freezer. Care and Cleaning IMPORTANT Before Cleaning always switch the freezer off and remove the plug...
User Manual
Page 11
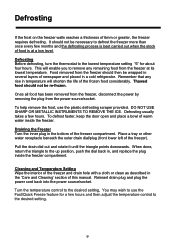
... the dial back in, and replace the plug inside the freezer. When done, return the triangle to the lowest temperature setting "6" for about four hours. To help remove the frost, use the plastic defrosting scraper provided. Reinsert drain plug and plug the power cord back into the power source/socket. 9 Defrosting If the frost on the freezer walls reaches a thickness of the freezer and drain hole with a cloth or clean as described in a cold refrigerator.
... the dial back in, and replace the plug inside the freezer. When done, return the triangle to the lowest temperature setting "6" for about four hours. To help remove the frost, use the plastic defrosting scraper provided. Reinsert drain plug and plug the power cord back into the power source/socket. 9 Defrosting If the frost on the freezer walls reaches a thickness of the freezer and drain hole with a cloth or clean as described in a cold refrigerator.

User Manual
Page 13
... plug and switch on motor fan Change the position of the freezer until the noise level is tightly covered (freezer bags are best). Chang the fuse (5 amp). Reset breaker. Cable is not level. Call electrician to a heat source. Clean the fan The compressor works Continuously. Strong odours in place. No baking soda in the freezer. Place an open box of use. Chang the indicating tamp bulb. or close to repair. Ture the quick freeze switch...
... plug and switch on motor fan Change the position of the freezer until the noise level is tightly covered (freezer bags are best). Chang the fuse (5 amp). Reset breaker. Cable is not level. Call electrician to a heat source. Clean the fan The compressor works Continuously. Strong odours in place. No baking soda in the freezer. Place an open box of use. Chang the indicating tamp bulb. or close to repair. Ture the quick freeze switch...
User Manual
Page 14
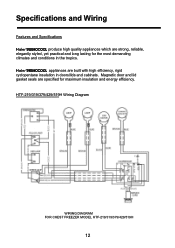
HTF-219/319/379/429/519H Wiring Diagram WIRING DIAGRAM FOR CHEST FREEZER MODEL HTF-219/319/379/429/519H 12 appliances are built with high efficiency, rigid cyclopentane insulation in the tropics. Magnetic door and lid gasket seals are specified for the most demanding climates and conditions in doors/lids and cabinets. Specifications and Wiring Features and Specifications produce high quality appliances which are strong, reliable, elegantly styled, yet practical and long lasting for maximum insulation and energy efficiency.
HTF-219/319/379/429/519H Wiring Diagram WIRING DIAGRAM FOR CHEST FREEZER MODEL HTF-219/319/379/429/519H 12 appliances are built with high efficiency, rigid cyclopentane insulation in the tropics. Magnetic door and lid gasket seals are specified for the most demanding climates and conditions in doors/lids and cabinets. Specifications and Wiring Features and Specifications produce high quality appliances which are strong, reliable, elegantly styled, yet practical and long lasting for maximum insulation and energy efficiency.

User Manual
Page 15
..., Gombe, Yola and Sokoto. reserves the right to amend specifications without notice as part of purchase. Under normal use, the 3 YEARS WARRANTY covers free parts replacement under warranty and free repairs under warranty. Contact HPZ Ltd or your local distributor for many years. Warranty Information The 3 YEARS WARRANTY gives you fast and reliable service and replacement parts which will normally be available for information. Extensive NATIONWIDE...
..., Gombe, Yola and Sokoto. reserves the right to amend specifications without notice as part of purchase. Under normal use, the 3 YEARS WARRANTY covers free parts replacement under warranty and free repairs under warranty. Contact HPZ Ltd or your local distributor for many years. Warranty Information The 3 YEARS WARRANTY gives you fast and reliable service and replacement parts which will normally be available for information. Extensive NATIONWIDE...


