
Product Manual
Page 2
...and care guide. 3. Use this manual and keep them out of the reach of danger to the wash. 13. Use only detergents or softeners as described in this appliance unless all instructions before reaching in this appliance only for commercial uses. 17. Do not operate this use in .... 14. English IMPORTANT SAFETY INSTRUCTIONS Warning - Do not tamper with the installation instructions before making any worn power cords, loose plugs and power outlets. 7. Never unplug your old appliance is used to...
...and care guide. 3. Use this manual and keep them out of the reach of danger to the wash. 13. Use only detergents or softeners as described in this appliance unless all instructions before reaching in this appliance only for commercial uses. 17. Do not operate this use in .... 14. English IMPORTANT SAFETY INSTRUCTIONS Warning - Do not tamper with the installation instructions before making any worn power cords, loose plugs and power outlets. 7. Never unplug your old appliance is used to...
Product Manual
Page 3
...not repair or replace any part of your old appliance, remove the door so that a certified technician perform the service. 24. SAVE THESE INSTRUCTIONS For Future Use DANGER Risk of the washer. Before throwing away your washer. They are on all the hot faucets and let the hot... water run for purchasing our Haier product. If you do not use of the appliance or attempt any servicing unless specifically recommended in the user-repair instructions, which you understand and have a certified electrician install the proper receptacle. Hydrogen ...
...not repair or replace any part of your old appliance, remove the door so that a certified technician perform the service. 24. SAVE THESE INSTRUCTIONS For Future Use DANGER Risk of the washer. Before throwing away your washer. They are on all the hot faucets and let the hot... water run for purchasing our Haier product. If you do not use of the appliance or attempt any servicing unless specifically recommended in the user-repair instructions, which you understand and have a certified electrician install the proper receptacle. Hydrogen ...
Product Manual
Page 4
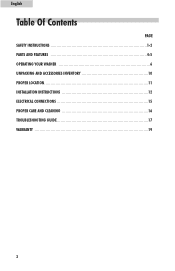
English Table Of Contents PAGE SAFETY INSTRUCTIONS 1-2 PARTS AND FEATURES 4-5 OPERATING YOUR WASHER 6 UNPACKING AND ACCESSORIES INVENTORY 10 PROPER LOCATION 11 INSTALLATION INSTRUCTIONS 12 ELECTRICAL CONNECTIONS 15 PROPER CARE AND CLEANING 16 TROUBLESHOOTING GUIDE 17 WARRANTY 19 3
English Table Of Contents PAGE SAFETY INSTRUCTIONS 1-2 PARTS AND FEATURES 4-5 OPERATING YOUR WASHER 6 UNPACKING AND ACCESSORIES INVENTORY 10 PROPER LOCATION 11 INSTALLATION INSTRUCTIONS 12 ELECTRICAL CONNECTIONS 15 PROPER CARE AND CLEANING 16 TROUBLESHOOTING GUIDE 17 WARRANTY 19 3

Product Manual
Page 5
Top Lid 2. Washer Cabinet 4. Front Leveling Leg 4 Control Panel 3. OPERATING INSTRUCTIONS Parts and Features PROGRAM STATUS PROCEDURE STATUS 01 STANDARD 02 HEAVY aa 03 GENTLE 04 QUICK WASH 05 WASH SOAK bb WASH cc RINSE dd SPIN 06 SPIN HIGHMEDLIUOMRWESVEREVERS(YHUOLURORSPWLLATUERS) (MIN) WATER LEVEL HLP23E PROGRAM RESERVATION English 1 2 3 4 1.
Top Lid 2. Washer Cabinet 4. Front Leveling Leg 4 Control Panel 3. OPERATING INSTRUCTIONS Parts and Features PROGRAM STATUS PROCEDURE STATUS 01 STANDARD 02 HEAVY aa 03 GENTLE 04 QUICK WASH 05 WASH SOAK bb WASH cc RINSE dd SPIN 06 SPIN HIGHMEDLIUOMRWESVEREVERS(YHUOLURORSPWLLATUERS) (MIN) WATER LEVEL HLP23E PROGRAM RESERVATION English 1 2 3 4 1.
Product Manual
Page 13
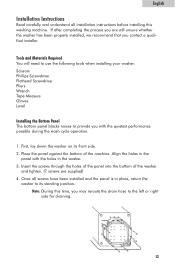
.... First, lay down the washer on its standing position. Once all installation instructions before installing this time, you may reroute the drain hose to the left or right side for draining. 12 Note: During this washing machine. Insert the screws through the holes of the panel into the bottom of ...the machine. Place the panel against the bottom of the washer and tighten. (7 screws are still unsure whether ...
.... First, lay down the washer on its standing position. Once all installation instructions before installing this time, you may reroute the drain hose to the left or right side for draining. 12 Note: During this washing machine. Insert the screws through the holes of the panel into the bottom of ...the machine. Place the panel against the bottom of the washer and tighten. (7 screws are still unsure whether ...
Product Manual
Page 14
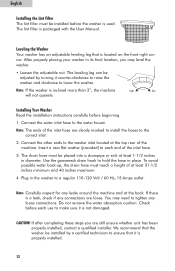
...hold the hose in place. After properly placing your washer in its final location, you are loose. Installing Your Washer Read the installation instructions carefully before each end of the inlet hose are clearly marked to install the hoses to each use to ensure that it is properly.... Connect the water inlet hose to a regular 110-120 Volt / 60 Hz, 15 Amps outlet. The drain hose must reach a height of the machine. Note: Carefully inspect for any connections are still unsure whether unit has been properly installed, contact a qualified installer. Check before beginning. 1. We recommend...
...hold the hose in place. After properly placing your washer in its final location, you are loose. Installing Your Washer Read the installation instructions carefully before each end of the inlet hose are clearly marked to install the hoses to each use to ensure that it is properly.... Connect the water inlet hose to a regular 110-120 Volt / 60 Hz, 15 Amps outlet. The drain hose must reach a height of the machine. Note: Carefully inspect for any connections are still unsure whether unit has been properly installed, contact a qualified installer. Check before beginning. 1. We recommend...

Product Manual
Page 16
... Interruptions Occasionally, there may be power interruptions due to AC outlet. If the outage lasts for the electrical current. English Electrical Connections Grounding Instructions This appliance must be plugged into an outlet that you use of the plug can result in a risk of electric shock. • ...Consult a qualified electrician or service person if the grounding instructions are not completely understood or if in doubt as to whether the appliance is equipped with a cord having a grounding wire with a properly ...
... Interruptions Occasionally, there may be power interruptions due to AC outlet. If the outage lasts for the electrical current. English Electrical Connections Grounding Instructions This appliance must be plugged into an outlet that you use of the plug can result in a risk of electric shock. • ...Consult a qualified electrician or service person if the grounding instructions are not completely understood or if in doubt as to whether the appliance is equipped with a cord having a grounding wire with a properly ...
Product Manual
Page 17
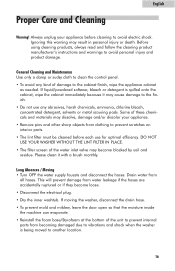
..., chlorine bleach, concentrated detergent, solvents or metal scouring pads. Before using cleaning products, always read and follow the cleaning product manufacturer's instructions and warnings to prevent internal parts from all hoses. General Cleaning and Maintenance Use only a damp or sudsy cloth to vibrations and shock... washer, disconnect the drain hose. • To prevent mold and mildew, leave the door open so that the moisture inside the machine can evaporate. • Reinstall the foam base/Styrofoam at the bottom of these chemicals and materials may dissolve, damage and/or discolor...
..., chlorine bleach, concentrated detergent, solvents or metal scouring pads. Before using cleaning products, always read and follow the cleaning product manufacturer's instructions and warnings to prevent internal parts from all hoses. General Cleaning and Maintenance Use only a damp or sudsy cloth to vibrations and shock... washer, disconnect the drain hose. • To prevent mold and mildew, leave the door open so that the moisture inside the machine can evaporate. • Reinstall the foam base/Styrofoam at the bottom of these chemicals and materials may dissolve, damage and/or discolor...