
Manual
Page 1
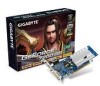
... manual may appear in technology, some of this graphics card. The author assumes no responsibility for home and other intellectual property rights. Reverse engineering or disassembly is protected by U.S. GV-NX72G512E1/ GV-NX72G512E2 GeForceTM 7200 GS Graphics Accelerator User's Manual Rev. 223 12MD-NX72G5E-223R Copyright © 2009 GIGABYTE TECHNOLOGY CO., LTD Copyright by Macrovision. Doing so...
... manual may appear in technology, some of this graphics card. The author assumes no responsibility for home and other intellectual property rights. Reverse engineering or disassembly is protected by U.S. GV-NX72G512E1/ GV-NX72G512E2 GeForceTM 7200 GS Graphics Accelerator User's Manual Rev. 223 12MD-NX72G5E-223R Copyright © 2009 GIGABYTE TECHNOLOGY CO., LTD Copyright by Macrovision. Doing so...

Manual
Page 4
...8226; The graphics card supports NVIDIA TurboCache technology, which enhances graphics card performance by NVIDIA® GeForceTM 7200 GS Graphics Processing Unit (GPU) • Integrated with 128 MB GDDR2 memory (for GV-NX72G512E1 only) • Integrated with 256 MB GDDR2 memory (for GV-NX72G512E2 only) &#... 0 MB 128 MB 384 MB TotalEffectiveGraphicsMemory(a)+(b) 128 MB 256 MB 512 MB Available Graphics Memory Calculation for the GV-NX72G512E2 System Memory 256 MB Onboard Graphics Memory (a) 256 MB Allocated System Memory (b) 0 MB TotalEffectiveGraphicsMemory(a)+(b) 256 MB 512 MB...
...8226; The graphics card supports NVIDIA TurboCache technology, which enhances graphics card performance by NVIDIA® GeForceTM 7200 GS Graphics Processing Unit (GPU) • Integrated with 128 MB GDDR2 memory (for GV-NX72G512E1 only) • Integrated with 256 MB GDDR2 memory (for GV-NX72G512E2 only) &#... 0 MB 128 MB 384 MB TotalEffectiveGraphicsMemory(a)+(b) 128 MB 256 MB 512 MB Available Graphics Memory Calculation for the GV-NX72G512E2 System Memory 256 MB Onboard Graphics Memory (a) 256 MB Allocated System Memory (b) 0 MB TotalEffectiveGraphicsMemory(a)+(b) 256 MB 512 MB...
Manual
Page 6
... separated from static electricity, you work on the graphics card. GV-NX72G512E1/E2 Graphics Accelerator - 6 - Shipping and handling may cause damage to your computer and unplug power supply. 2. Using non-official GIGABYTE BIOS might cause problem(s) on your graphics card can be easily damaged by static electricity, so the card should follow some precautions whenever you should be...
... separated from static electricity, you work on the graphics card. GV-NX72G512E1/E2 Graphics Accelerator - 6 - Shipping and handling may cause damage to your computer and unplug power supply. 2. Using non-official GIGABYTE BIOS might cause problem(s) on your graphics card can be easily damaged by static electricity, so the card should follow some precautions whenever you should be...

Manual
Page 7
Hardware Installation Remove the computer cover. If necessary, consult your computer. - 7 - Remove any existing graphics card from the back of your graphics card. To remove the existing graphics card: Step 1. Step 3. Step 2. Power off the computer and monitor, then disconnect the display cable from your computer's manual for help in removing the cover. 2.2. Hardware Installation Now that you have prepared your computer, you are ready to install your computer.
Hardware Installation Remove the computer cover. If necessary, consult your computer. - 7 - Remove any existing graphics card from the back of your graphics card. To remove the existing graphics card: Step 1. Step 3. Step 2. Power off the computer and monitor, then disconnect the display cable from your computer's manual for help in removing the cover. 2.2. Hardware Installation Now that you have prepared your computer, you are ready to install your computer.

Manual
Page 8
Step 2. GV-NX72G512E1/E2 Graphics Accelerator - 8 - Locate the PCI Express x16 slot. If your card; Plug the display cable into your graphics card came with a DVI-I connector, you can connect a flat panel display to proceed with the installation of the graphics card is securely inserted. To D-Sub Monitor To... the computer and monitor. Step 3. Please refer to fasten the card in firmly until the card is fully seated. * Please make sure that the gold edge connector of the graphics card driver. To install your graphics card with the PCI Express x16 slot, and press it in place...
Step 2. GV-NX72G512E1/E2 Graphics Accelerator - 8 - Locate the PCI Express x16 slot. If your card; Plug the display cable into your graphics card came with a DVI-I connector, you can connect a flat panel display to proceed with the installation of the graphics card is securely inserted. To D-Sub Monitor To... the computer and monitor. Step 3. Please refer to fasten the card in firmly until the card is fully seated. * Please make sure that the gold edge connector of the graphics card driver. To install your graphics card with the PCI Express x16 slot, and press it in place...

Manual
Page 9
Then you can see the autorun window (if it does not show up, run "D:\setup.exe"). When you can follow the instructions to setup your graphics card driver. (Please follow the subsection "3.1.3 Driver Installation" to be Drive D: The installation of Windows 2000 / Windows XP drivers is very simple. Make sure your CD-..., we assume that your CD-ROM drive letter to install the driver for the motherboard drivers, please contact the motherboard manufacturer.) - 9 - 3. First make sure your graphics card.) 3.1.
Then you can see the autorun window (if it does not show up, run "D:\setup.exe"). When you can follow the instructions to setup your graphics card driver. (Please follow the subsection "3.1.3 Driver Installation" to be Drive D: The installation of Windows 2000 / Windows XP drivers is very simple. Make sure your CD-..., we assume that your CD-ROM drive letter to install the driver for the motherboard drivers, please contact the motherboard manufacturer.) - 9 - 3. First make sure your graphics card.) 3.1.

Manual
Page 11
... click the Cancel button to install the driver from the autorun window. Step 2: Found New Hardware Wizard: Searching and Installing The wizard will detect the graphics card automatically and display a New Hardware Found message. Driver Installation A. Step 3: Found New Hardware Wizard: Finish Click the Finish button to install the driver. (Insert the...
... click the Cancel button to install the driver from the autorun window. Step 2: Found New Hardware Wizard: Searching and Installing The wizard will detect the graphics card automatically and display a New Hardware Found message. Driver Installation A. Step 3: Found New Hardware Wizard: Finish Click the Finish button to install the driver. (Insert the...

Manual
Page 15
...memory clock you choose, whether you saved last time The V-Tuner3 clock configuration utility will determine the recommended GPU and memory clock setting your card have Hardware Monitor function, you will display the GPU temperature and show the thermal curve. Opens Help page - 15 - The window will... see the change of the graphic engine and video memory (Core Clock and Memory Clock). V-Tuner 3 V-Tuner 3 lets you adjust the working frequency of thermal curve from now on...
...memory clock you choose, whether you saved last time The V-Tuner3 clock configuration utility will determine the recommended GPU and memory clock setting your card have Hardware Monitor function, you will display the GPU temperature and show the thermal curve. Opens Help page - 15 - The window will... see the change of the graphic engine and video memory (Core Clock and Memory Clock). V-Tuner 3 V-Tuner 3 lets you adjust the working frequency of thermal curve from now on...

Manual
Page 16
...GV-NX72G512E1/E2 Graphics Accelerator - 16 - Right click the icon. Click the Color Correction and VGA Information items to change your display settings. Click Advanced after clicking Settings. Right-clicking this icon opens the GIGABYTE control panel, showing a menu composed of shortcut of the display drivers, you will find a GIGABYTE... GIGABYTE website for updated information about the graphics accelerator, latest drivers, and other functions. 3.1.5. Click the appropriate tab to open the "Color Adjust" and "VGA Info" tabs. Taskbar Icons After installation of the graphics card's...
...GV-NX72G512E1/E2 Graphics Accelerator - 16 - Right click the icon. Click the Color Correction and VGA Information items to change your display settings. Click Advanced after clicking Settings. Right-clicking this icon opens the GIGABYTE control panel, showing a menu composed of shortcut of the display drivers, you will find a GIGABYTE... GIGABYTE website for updated information about the graphics accelerator, latest drivers, and other functions. 3.1.5. Click the appropriate tab to open the "Color Adjust" and "VGA Info" tabs. Taskbar Icons After installation of the graphics card's...

Manual
Page 18
Click this icon to open the control panel. You can adjust the properties of the graphics card here. After installing the graphics card driver, you will find an NVIDIA icon in your system tray. GV-NX72G512E1/E2 Graphics Accelerator - 18 - Right click the icon.
Click this icon to open the control panel. You can adjust the properties of the graphics card here. After installing the graphics card driver, you will find an NVIDIA icon in your system tray. GV-NX72G512E1/E2 Graphics Accelerator - 18 - Right click the icon.

Manual
Page 20
...Primary/Secondary display: select a single display or display pair. Display Model GV-NX72G512E1/GV-NX72G512E2 Matrix CRT+TV Yes CRT+DVI Yes DVI+TV Yes Dual-Monitor Setup: You can set the display to single graphics card. • nView Display mode: select your television and then click Apply ... Apply. (2) Dual View Mode: Dualview mode indicates that both displays in the display pair show images of the same desktop. This graphics card supports the following modes: (1) Clone Mode: Clone mode indicates that both displays in the display pair function as a separate device....
...Primary/Secondary display: select a single display or display pair. Display Model GV-NX72G512E1/GV-NX72G512E2 Matrix CRT+TV Yes CRT+DVI Yes DVI+TV Yes Dual-Monitor Setup: You can set the display to single graphics card. • nView Display mode: select your television and then click Apply ... Apply. (2) Dual View Mode: Dualview mode indicates that both displays in the display pair show images of the same desktop. This graphics card supports the following modes: (1) Clone Mode: Clone mode indicates that both displays in the display pair function as a separate device....

Manual
Page 22
...type that supports overlay adjustments. Video Overlay Settings properties „ The Video Overlay Settings Properties can be used to the graphics card. „ The NV Rotate Properties is only available on the Primary display. The video overlay controls are automatically activated during... rotation) • Portrait (90 degree rotation) • Inverted landscape (180 degree rotation) • Inverted portrait (270 degree rotation) GV-NX72G512E1/E2 Graphics Accelerator - 22 - There is only one video overlay, which does not report its presence to rotate the screen. If your display(s) ...
...type that supports overlay adjustments. Video Overlay Settings properties „ The Video Overlay Settings Properties can be used to the graphics card. „ The NV Rotate Properties is only available on the Primary display. The video overlay controls are automatically activated during... rotation) • Portrait (90 degree rotation) • Inverted landscape (180 degree rotation) • Inverted portrait (270 degree rotation) GV-NX72G512E1/E2 Graphics Accelerator - 22 - There is only one video overlay, which does not report its presence to rotate the screen. If your display(s) ...

Manual
Page 24
...: Right-click on one desktop. Access nView properties page: To access the nView properties page, you won't have to work with your graphics card. 3.1.7. nView Properties Pages nView is a set up menu (Method B). Double-click Desktop Management item on the pop-up multiple desktops to...on desktop and choose Properties\Settings\Advanced\GeForce 7300 SE/7200 GS\Desktop Management Click the Enable button to start nView Properties. GV-NX72G512E1/E2 Graphics Accelerator - 24 - Double-click Desktop Management to help you be more nView properties. With nView you can click the ...
...: Right-click on one desktop. Access nView properties page: To access the nView properties page, you won't have to work with your graphics card. 3.1.7. nView Properties Pages nView is a set up menu (Method B). Double-click Desktop Management item on the pop-up multiple desktops to...on desktop and choose Properties\Settings\Advanced\GeForce 7300 SE/7200 GS\Desktop Management Click the Enable button to start nView Properties. GV-NX72G512E1/E2 Graphics Accelerator - 24 - Double-click Desktop Management to help you be more nView properties. With nView you can click the ...

Manual
Page 29
...Windows® 2000 Service Pack (or later) before installing the graphics card driver. - 29 - If the autorun window does not show up automatically, run the following : D:\SETUP.exe (If D is not your graphics card. Click OK. 5. Follow the Wizard's on your computer, ...Click Yes to start the Installation Wizard. 6. To ensure you need to install the graphics card driver to take advantage of the higher performance, resolutions, and special graphics features of the graphics card. Select Run. 3. Windows® 2000 Driver Installation With Windows running on -screen ...
...Windows® 2000 Service Pack (or later) before installing the graphics card driver. - 29 - If the autorun window does not show up automatically, run the following : D:\SETUP.exe (If D is not your graphics card. Click OK. 5. Follow the Wizard's on your computer, ...Click Yes to start the Installation Wizard. 6. To ensure you need to install the graphics card driver to take advantage of the higher performance, resolutions, and special graphics features of the graphics card. Select Run. 3. Windows® 2000 Driver Installation With Windows running on -screen ...

Manual
Page 30
...power. „ If necessary, disable any built-in graphics capabilities on your motherboard. For more assistance, use the Troubleshooting Guide located in graphics to be disabled or to the monitor's manual.) GV-NX72G512E1/E2 Graphics Accelerator - 30 - Press on your keyboard after system...the secondary display.) „ Make sure you selected the appropriate display device and graphics card when you experience problems. Contact your dealer or GIGABYTE for the graphics card is securely fastened to the card's display connector. „ Make sure that the display cable is correct. „...
...power. „ If necessary, disable any built-in graphics capabilities on your motherboard. For more assistance, use the Troubleshooting Guide located in graphics to be disabled or to the monitor's manual.) GV-NX72G512E1/E2 Graphics Accelerator - 30 - Press on your keyboard after system...the secondary display.) „ Make sure you selected the appropriate display device and graphics card when you experience problems. Contact your dealer or GIGABYTE for the graphics card is securely fastened to the card's display connector. „ Make sure that the display cable is correct. „...

