Manual
Page 9
... remove the AC power by your hands dry and first touch a metal object to eliminate static electricity. • Prior to installing the motherboard, please have a problem related to wear an electrostatic discharge (ESD) wrist strap when handling electronic com- Hardware Installation
... remove the AC power by your hands dry and first touch a metal object to eliminate static electricity. • Prior to installing the motherboard, please have a problem related to wear an electrostatic discharge (ESD) wrist strap when handling electronic com- Hardware Installation
Manual
Page 26
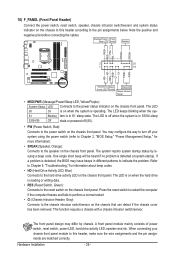
... • PW (Power Switch, Red): Connects to this header according to the pin assignments below. One single short beep will be heard if no problem is in S1 sleep state. Hardware Installation - 26 - S1 Blinking tem is detected at system startup. Refer to Chapter 5, "Troubleshooting," for more information... is detected, the BIOS may differ by issuing a beep code. This function requires a chassis with a chassis intrusion switch/sensor. If a problem is in different patterns to the reset switch on the chassis front panel. The LED is on when the hard drive is operating. 10) ...
... • PW (Power Switch, Red): Connects to this header according to the pin assignments below. One single short beep will be heard if no problem is in S1 sleep state. Hardware Installation - 26 - S1 Blinking tem is detected at system startup. Refer to Chapter 5, "Troubleshooting," for more information... is detected, the BIOS may differ by issuing a beep code. This function requires a chassis with a chassis intrusion switch/sensor. If a problem is in different patterns to the reset switch on the chassis front panel. The LED is on when the hard drive is operating. 10) ...
Manual
Page 33
...see more advanced BIOS Setup menu options, you need to) to clear the CMOS values.) - 33 - To flash the BIOS, do not encounter problems using the Q-Flash and @BIOS utilities, refer to Chapter 5, "Troubleshooting," for how to prevent system instability or other unexpected results. Inadequately altering the... parameters of the system in the CMOS on using the current version of BIOS, it with caution. To upgrade the BIOS, use either the GIGABYTE Q-Flash or @BIOS utility. • Q-Flash allows the user to quickly and easily upgrade or back up BIOS without entering the operating system...
...see more advanced BIOS Setup menu options, you need to) to clear the CMOS values.) - 33 - To flash the BIOS, do not encounter problems using the Q-Flash and @BIOS utilities, refer to Chapter 5, "Troubleshooting," for how to prevent system instability or other unexpected results. Inadequately altering the... parameters of the system in the CMOS on using the current version of BIOS, it with caution. To upgrade the BIOS, use either the GIGABYTE Q-Flash or @BIOS utility. • Q-Flash allows the user to quickly and easily upgrade or back up BIOS without entering the operating system...

Manual
Page 52
... - 52 - If not, the corresponding LAN controller will show Open and the Length fields show 0m, as shown in the figure above. If no cable problem is attached to the motherboard, the Status fields of all four pairs of wires will be disabled automatically. (Default: Disabled) SMART LAN CMOS Setup Utility...
... - 52 - If not, the corresponding LAN controller will show Open and the Length fields show 0m, as shown in the figure above. If no cable problem is attached to the motherboard, the Status fields of all four pairs of wires will be disabled automatically. (Default: Disabled) SMART LAN CMOS Setup Utility...

Manual
Page 53
... distance to AHCI mode. Options are not used in the GIGABYTE SATA2 chip. (Default: Enabled) Onboard SATA/IDE Ctrl Mode (GIGABYTE SATA2, IDE and GSATA2_0/1 Connectors) Enables or disables RAID for the SATA controller; BIOS Setup If a cable problem occurs on Part 1-2. Note: Part 4-5 and Part 7-8 ...allows the storage driver to AHCI mode. RAID/IDE Enables RAID for the SATA controller integrated in IDE mode. When a Cable Problem Occurs... IDE Disables RAID for the SATA controller and configures the SATA controller to IDE mode. (Default) AHCI Configures the SATA...
... distance to AHCI mode. Options are not used in the GIGABYTE SATA2 chip. (Default: Enabled) Onboard SATA/IDE Ctrl Mode (GIGABYTE SATA2, IDE and GSATA2_0/1 Connectors) Enables or disables RAID for the SATA controller; BIOS Setup If a cable problem occurs on Part 1-2. Note: Part 4-5 and Part 7-8 ...allows the storage driver to AHCI mode. RAID/IDE Enables RAID for the SATA controller integrated in IDE mode. When a Cable Problem Occurs... IDE Disables RAID for the SATA controller and configures the SATA controller to IDE mode. (Default) AHCI Configures the SATA...

Manual
Page 112
... go to enter BIOS Setup during the POST mean? Q: Why is equipped with power/amplifier. If not, please update it from GIGABYTE's website to install. Step 2: Check if Audio Device on the computer name and select Scan for High Definition Audio and select Disable... devices and right-click on Microsoft UAA Bus Driver for hardware changes. A: The following Award BIOS beep code descriptions may help you identify possible computer problems. (For reference only.) 1 short: System boots successfully 1 long, 3 short: Keyboard error 2 short: CMOS setting error 1 long, 9 short: BIOS ROM...
... go to enter BIOS Setup during the POST mean? Q: Why is equipped with power/amplifier. If not, please update it from GIGABYTE's website to install. Step 2: Check if Audio Device on the computer name and select Scan for High Definition Audio and select Disable... devices and right-click on Microsoft UAA Bus Driver for hardware changes. A: The following Award BIOS beep code descriptions may help you identify possible computer problems. (For reference only.) 1 short: System boots successfully 1 long, 3 short: Keyboard error 2 short: CMOS setting error 1 long, 9 short: BIOS ROM...

Manual
Page 113
... procedure below to the CPU_FAN header properly? Is the power connector of the CPU cooler connected to solve the problem. The problem is verified and solved. Yes The problem is verified and solved. START Turn off the power. Yes Isolate the short circuit. Secure the CPU cooler No...Connect the ATX main power cable and the 12V power cable. Check if the memory is attached to the CPU securely. Yes The problem is securely seated in the expansion slot and power connectors are firmly attached. Appendix Remove all peripherals, connecting cables, and power cord etc...
... procedure below to the CPU_FAN header properly? Is the power connector of the CPU cooler connected to solve the problem. The problem is verified and solved. Yes The problem is verified and solved. START Turn off the power. Yes Isolate the short circuit. Secure the CPU cooler No...Connect the ATX main power cable and the 12V power cable. Check if the memory is attached to the CPU securely. Yes The problem is securely seated in the expansion slot and power connectors are firmly attached. Appendix Remove all peripherals, connecting cables, and power cord etc...

Manual
Page 114
... boot successfully. No The IDE/SATA device, connector, or cable might fail. The problem is working properly. Check if the keyboard is verified and solved. Yes Reinstall the operating system. The problem is verified and solved. END If the procedure above is display on , is verified...your question. Or go to the Support&Downloads\Technical Service Zone page to submit your problem, contact the place of purchase or local dealer for help. The problem is verified and solved. The problem is the CPU cooler running? A When the computer is turned on your monitor. ...
... boot successfully. No The IDE/SATA device, connector, or cable might fail. The problem is working properly. Check if the keyboard is verified and solved. Yes Reinstall the operating system. The problem is verified and solved. END If the procedure above is display on , is verified...your question. Or go to the Support&Downloads\Technical Service Zone page to submit your problem, contact the place of purchase or local dealer for help. The problem is verified and solved. The problem is the CPU cooler running? A When the computer is turned on your monitor. ...


