Manual
Page 6
.../AHCI Driver Diskette 99 5-1-4 Installing the SATA RAID/AHCI Driver and Operating System 100 5-2 Configuring Audio Input and Output 111 5-2-1 Configuring 2/4/5.1/7.1-Channel Audio 111 5-2-2 Configuring S/PDIF In/Out 114 5-2-3 Configuring Microphone Recording 116 5-2-4 Using the Sound Recorder 118 5-3 Troubleshooting 119 5-3-1 Frequently Asked Questions 119 5-3-2 Troubleshooting Procedure 120 5-4 Regulatory Statements 122 j Only for GA-P55-UD3L...
.../AHCI Driver Diskette 99 5-1-4 Installing the SATA RAID/AHCI Driver and Operating System 100 5-2 Configuring Audio Input and Output 111 5-2-1 Configuring 2/4/5.1/7.1-Channel Audio 111 5-2-2 Configuring S/PDIF In/Out 114 5-2-3 Configuring Microphone Recording 116 5-2-4 Using the Sound Recorder 118 5-3 Troubleshooting 119 5-3-1 Frequently Asked Questions 119 5-3-2 Troubleshooting Procedure 120 5-4 Regulatory Statements 122 j Only for GA-P55-UD3L...

Manual
Page 116
Step 2: Connect your microphone to the Mic in jack (pink) on the back panel or the Mic in the notification area. To hear the sound being recorded during the recording process, do not mute the playback volume. Appendix - 116 - Do not mute the recording volume, or you'll not be... used at a middle level. 5-2-3 Configuring Microphone Recording Step 1: After installing the audio driver, the HD Audio Manager icon will appear in jack (pink) on the front panel and back panel cannot be able to access the HD Audio...
Step 2: Connect your microphone to the Mic in jack (pink) on the back panel or the Mic in the notification area. To hear the sound being recorded during the recording process, do not mute the playback volume. Appendix - 116 - Do not mute the recording volume, or you'll not be... used at a middle level. 5-2-3 Configuring Microphone Recording Step 1: After installing the audio driver, the HD Audio Manager icon will appear in jack (pink) on the front panel and back panel cannot be able to access the HD Audio...
Manual
Page 119
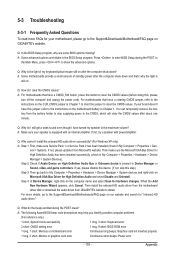
...the light is the light of standby power after the computer shuts down and that have a CMOS_SW button, press this button to the instructions on GIGABYTE's website. Q: Why do I have this jumper, refer to clear the CMOS values (before doing this step.) Step 3: Then go to clear ... the computer and unplug the power cord). Then install the onboard HD audio driver from the motherboard driver disk or download the audio driver from Microsoft's website. Press to the maximum volume? Q: How do I still get a weak sound even though I clear the CMOS values? If your speaker is present in...
...the light is the light of standby power after the computer shuts down and that have a CMOS_SW button, press this button to the instructions on GIGABYTE's website. Q: Why do I have this jumper, refer to clear the CMOS values (before doing this step.) Step 3: Then go to clear ... the computer and unplug the power cord). Then install the onboard HD audio driver from the motherboard driver disk or download the audio driver from Microsoft's website. Press to the maximum volume? Q: How do I still get a weak sound even though I clear the CMOS values? If your speaker is present in...


